Spinner in Origami: TUTORIAL!
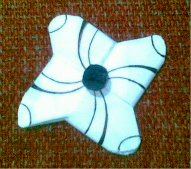
Origami Spinner!
Welcome to all the Steemit Comunity to this little tutorial of a spinner in origami. I really hope you will enjoy so let´s start!
You will need:
- 2 sheets of paper.
- A piece of paperboard.
- A chopstick.
- Glue.
Tutorial

Source
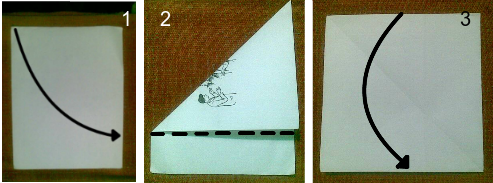
Step 1: Fold the corner trying to align the top border with the border of the right side.
Step 2: Cut along the line.
Step 3: Fold in half.

Source
Step 4: fold in half again.
Step 5: fold in half vertically.
Step 6: Fold aligning the orange line with green line.

Source
Step 7: Fold like the last step but this time in the opposite direction of the step 6.
Step 8: Flip the paper.
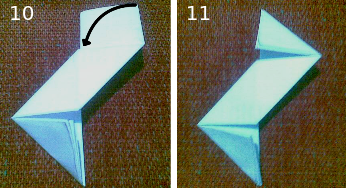
Step 9: Fold the corner to the spot marked by the point of the arrow.
Step10: Repeat the previous step on the top of the paper.
Step 11: This is one part of the Spinner, repeat the process with the other sheet of paper.
Step 12: Put the 2 modules in the position shown in the image and fold the tip to the pointed spot.
Step 13: Fold back the paper.
Step 14: Now fold the paper following the arrow but this time put it inside the little pocket in the red line.
Step15: This is step is like the number 12 but on the other side of the paper.

Source
Step 16: Flip the paper.
Step 17: this step follows the same process of the steps that go from 12 to 15.
Step 18: Unfold de paper and put it inside on the pocker in the center of the paper just like step 14.
Step 19: turn the paper to make the next step easier.

Source
Step 20: Fold the point to the indicated spot.
Step 21: Unfold the paper and put it inside the pocket in the red line.
Step 22: Draw the lines with the pencil and cut the paper along those lines.
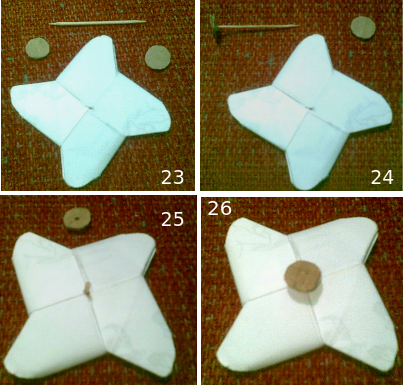
Step 23: Make a hole in the center of the spinner, and cut 2 little circles on the paperboard.
Step 24: Use the glue to fix the chopstick to the circle.
Step 25: Pass the chopstick trough the spinner and cut it.
Step 26: Fix the other circle on the chopstick.


Y esto demuestra que puedes hacer cualquier cosa con el origami jajajaja
Congratulations! This post has been upvoted from the communal account, @minnowsupport, by windzarf from the Minnow Support Project. It's a witness project run by aggroed, ausbitbank, teamsteem, theprophet0, someguy123, neoxian, followbtcnews, and netuoso. The goal is to help Steemit grow by supporting Minnows. Please find us at the Peace, Abundance, and Liberty Network (PALnet) Discord Channel. It's a completely public and open space to all members of the Steemit community who voluntarily choose to be there.
If you would like to delegate to the Minnow Support Project you can do so by clicking on the following links: 50SP, 100SP, 250SP, 500SP, 1000SP, 5000SP.
Be sure to leave at least 50SP undelegated on your account.