TUTORIAL: How To Make Gif Images In Adobe Photoshop (Part 1)
Hello guys, Today I'm going to teach you how to make gif images in Adobe Photoshop. There different ways make gif images in Photoshop depending on the complexity of the design and your level of expertise.
I will teach you the most simple and basic process in this tutorial and in subsequent tutorials, we will talk about the more advanced processes.
Here are the sequential steps to follow to make a simple Gif image in Adobe Photoshop:
Launch Adobe Photoshop App on your PC and create a new project

Enter your desired image dimension and resolution
Now, our project has been created

Let's make a very simple design, We will start by filling the layer with a solid colour, this will serve as our background
[Press Shift+F5 keys to the the layer with a desired solid colour]
Now that we've created our background layer, we can stroke the edges with deeper hue as shown, it depend on your choice though.
After creating our background, we can now start creating/designing the vectors we want in the gif and make sure that all the vectors you want animate independently are on individual layers, because in photoshop, you can only animate a layer not a vector.
For this tutorial, we will be using Five vectors: The background, The Steemit logo, And three texts; Blog, Vote and Earn.
Each vector must be on a different layer so that we can animate them independently.
All that said, we can now import the steemit logo into the design

Then add your texts

I just added shadow, strote and gradient effect to the "Blog" text, nothing big. We can copy and paste the effects to the other text layers.
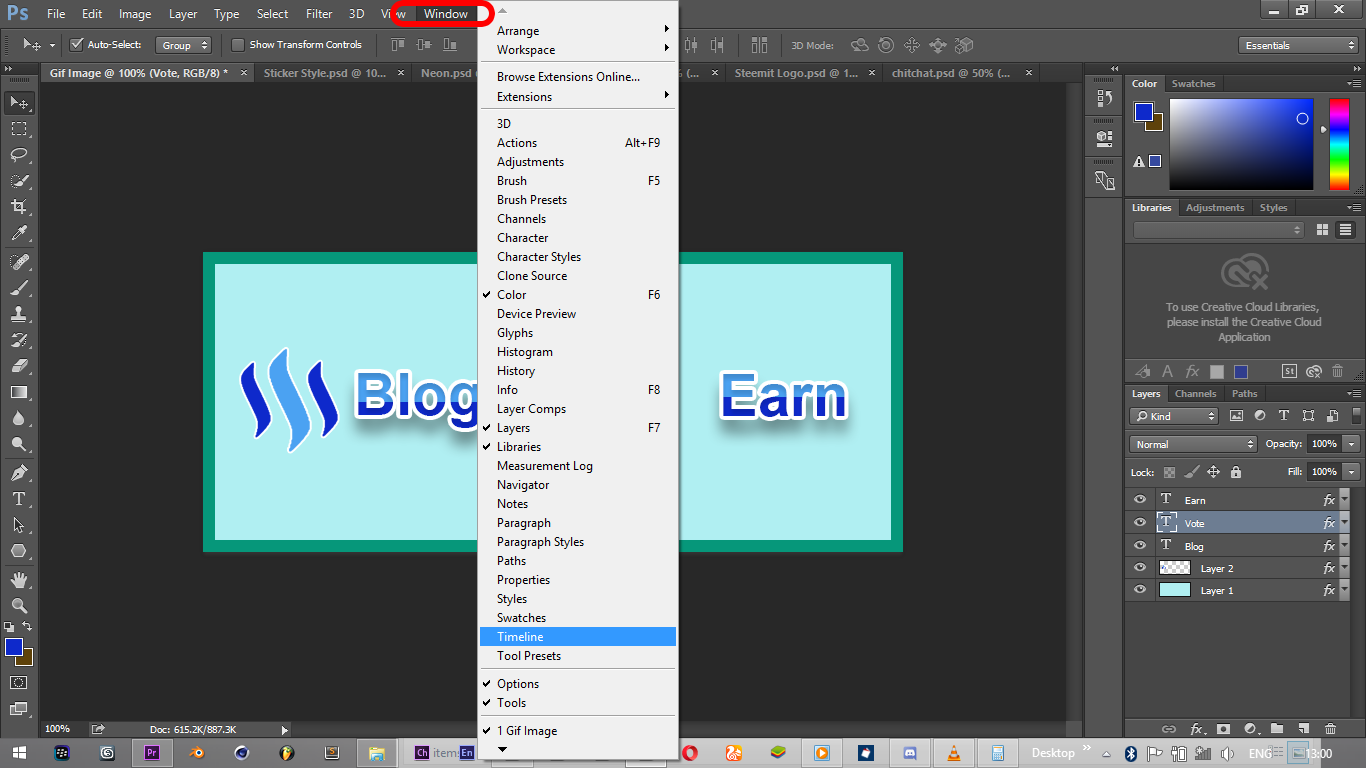
We are done with the design, the next step is to animate. So we have to enable photoshop timeline.
Go to Window>Timeline
.png)
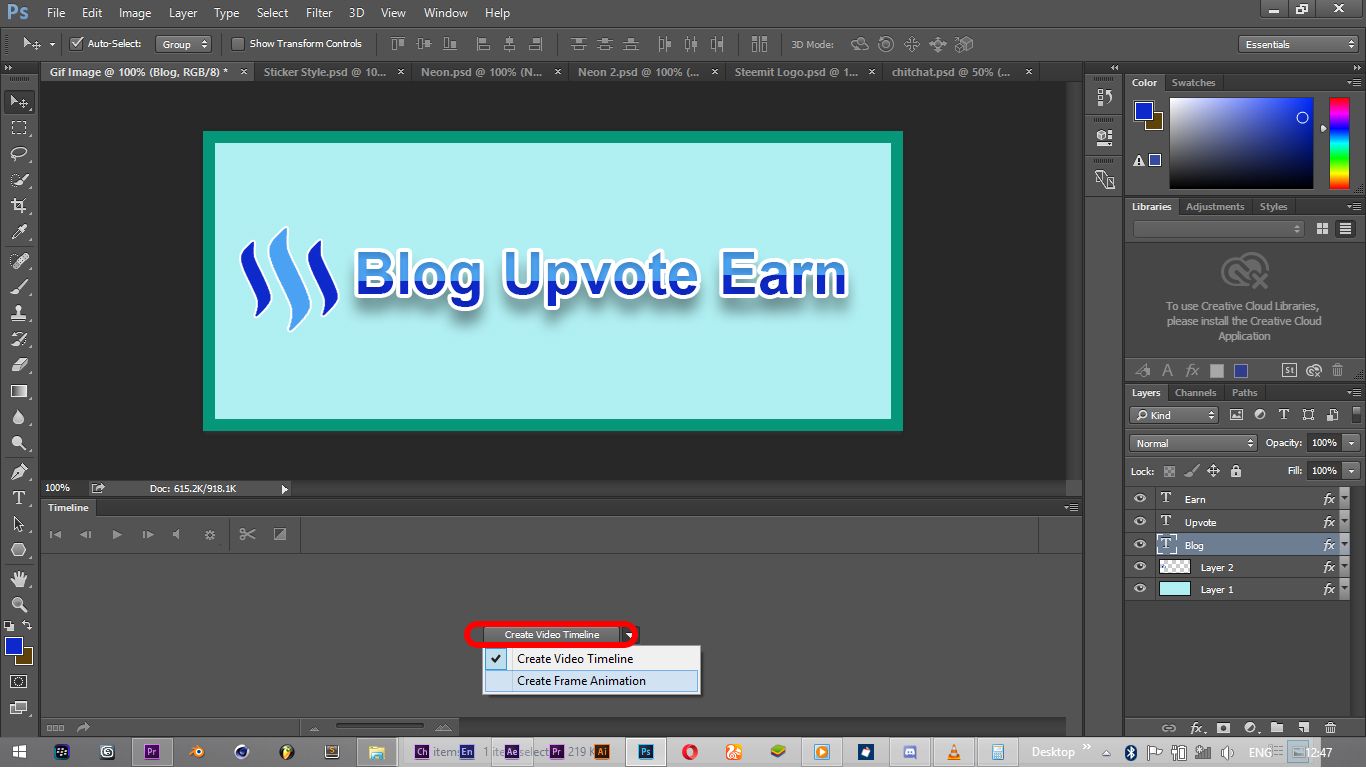
After enabling the timeline, click on the drop arrow at the middle of the timeline and select "Create Frame Animation".
I will talk about how to use Video Timeline in subsequent tutorials
.jpg)
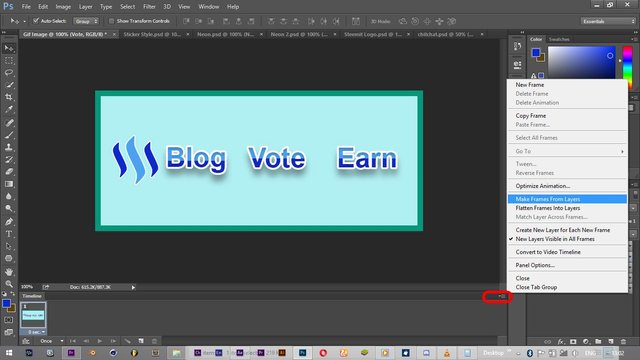
Then click on the tab at top right corner of the timeline and select "Make Frames From Layers"
This will make animatable frames from each layer.

So, we now have five frames representing each of the layers
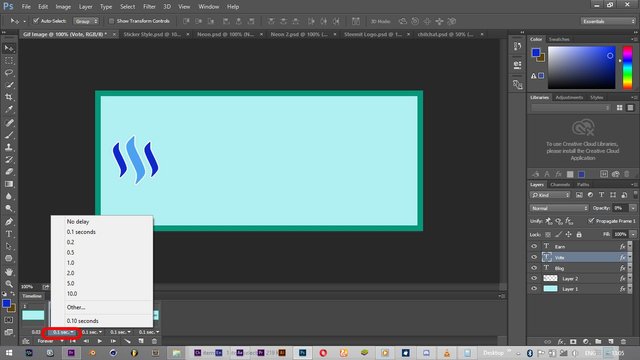
At the bottom of each layer, we can adjust the duration of the layer animation
.jpg)
Adjust the duration to desired duration
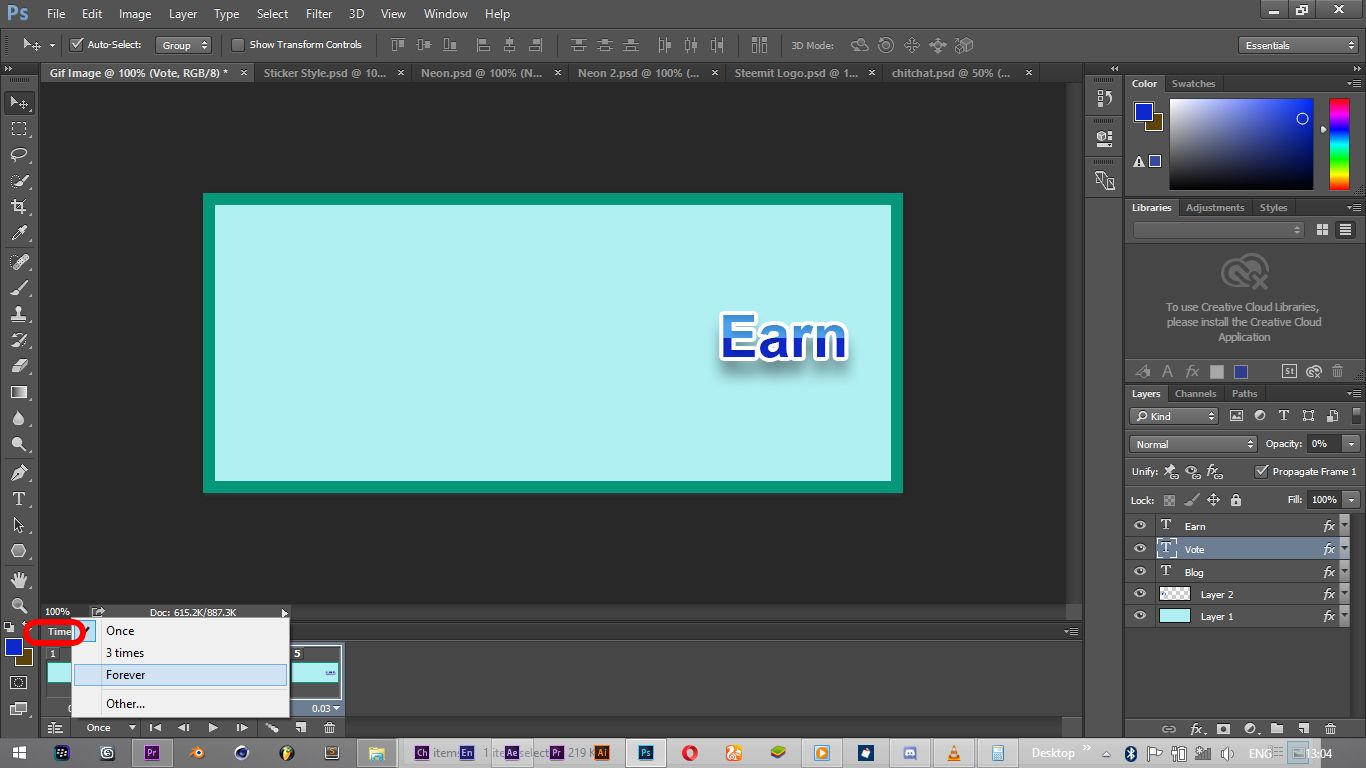
At the top left corner of the timeline, click on "Time" and select forever. To set the loop of the animation.
.jpg)
Voila! You've made your gif. Hit the space bar to preview.
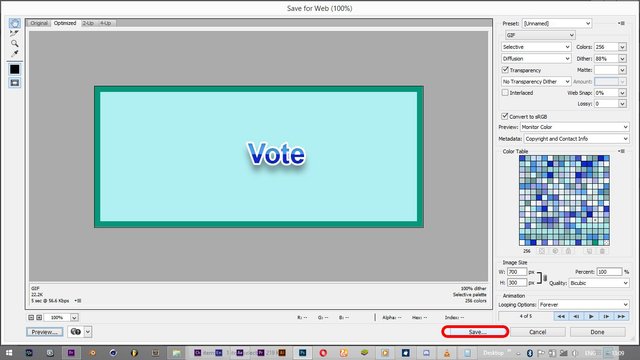
The next thing now is to export your gif. Go to File>Export>Save For Web (Legacy)
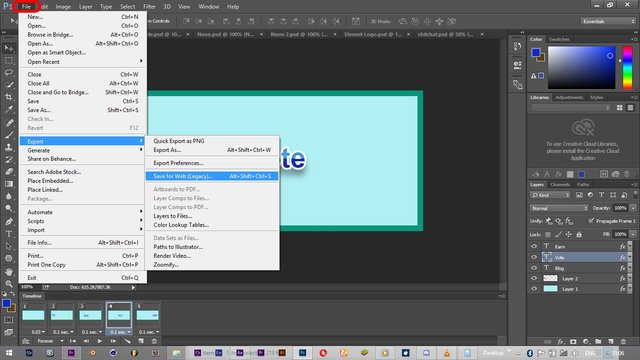.jpg)
Cross check looping option to be sure it is "Forever"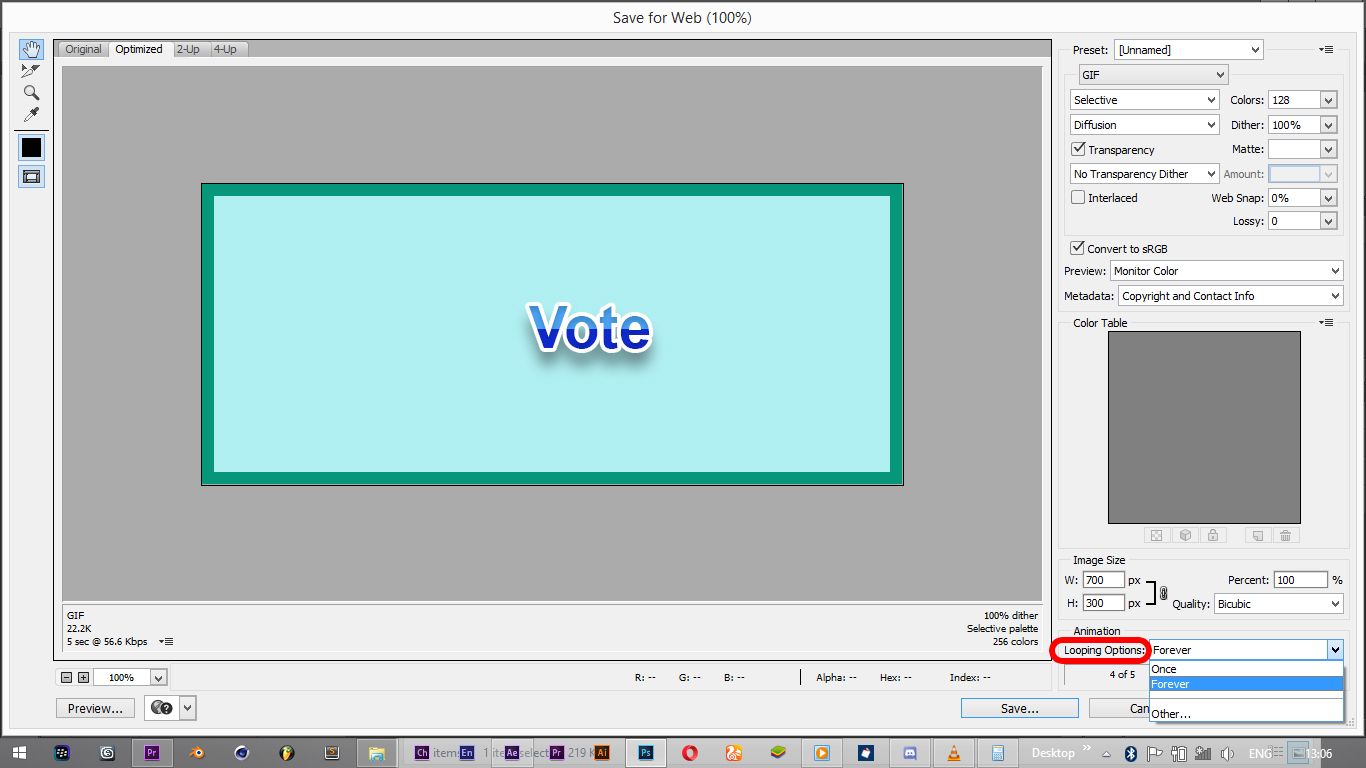.jpg)
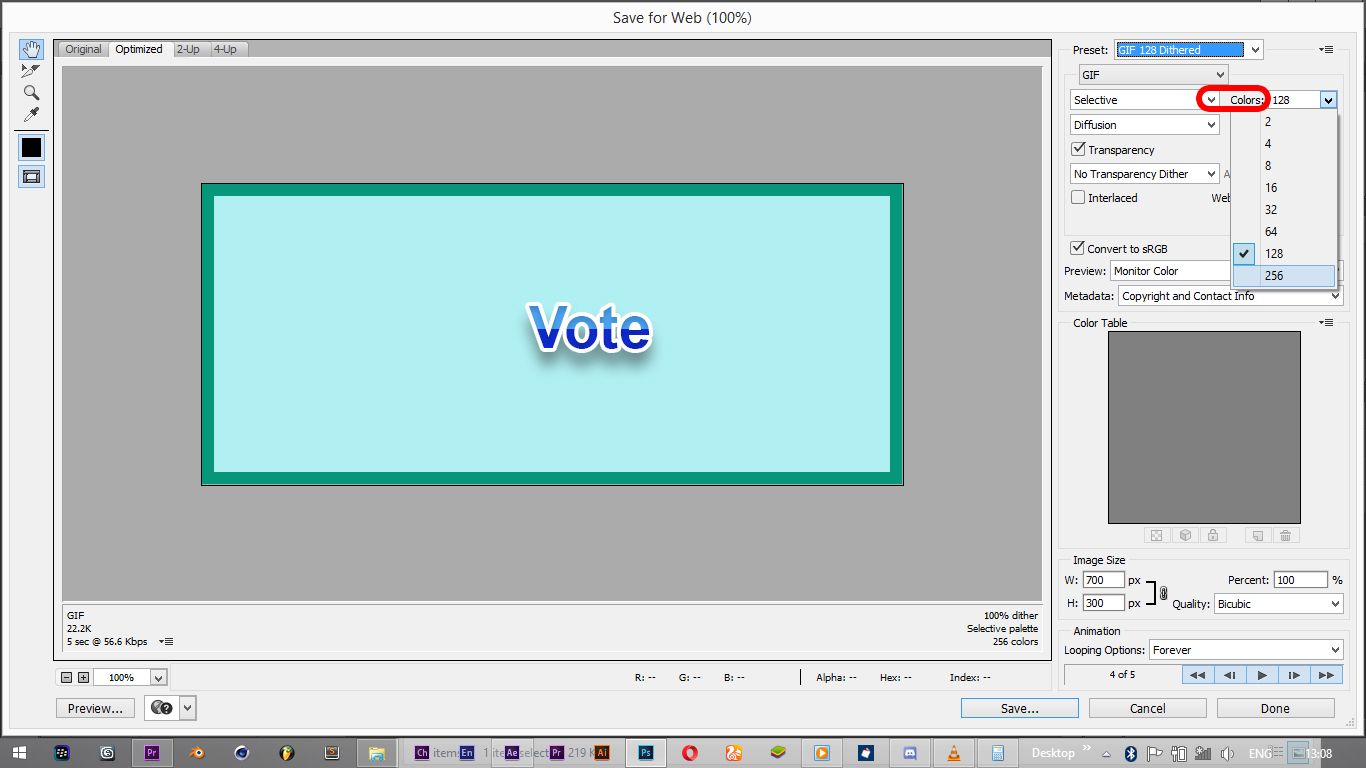
Set the Preset to GIF 128 Dithered, and colors to 256

Hit preview to view gif in a web browser.
Hit save to save Final Gif Image

Here is our final gif image:
I believe you found the tutorial helpful. Watch out for tutorials on how to make advance gif images in Photoshop.
Got any question? Feel free to ask.
Need Awesome Motion Graphics Designs, Vector Graphics Designs, Animated Videos, Marketing Videos, Ad Videos, Logos And Mascots or a Content Writer? Reach me on Steem.chat @royalfinest
Thanks For Your Time.


.jpg)
.jpg)

.jpg)


This post received a 10% vote by @msp-africa courtesy of @surpassinggoogle from the Minnow Support Project ( @minnowsupport ). Join us in Discord.
Upvoting this comment will help support @minnowsupport.
I will try this out. Thanks for sharing
You're welcome bro
I've been looking for how to this. Thanks bro
You're welcome bro. Glad you found it helpful
This will be helpful. Thank you for sharing.
You're welcome bro
This is awesome
Thanks ma