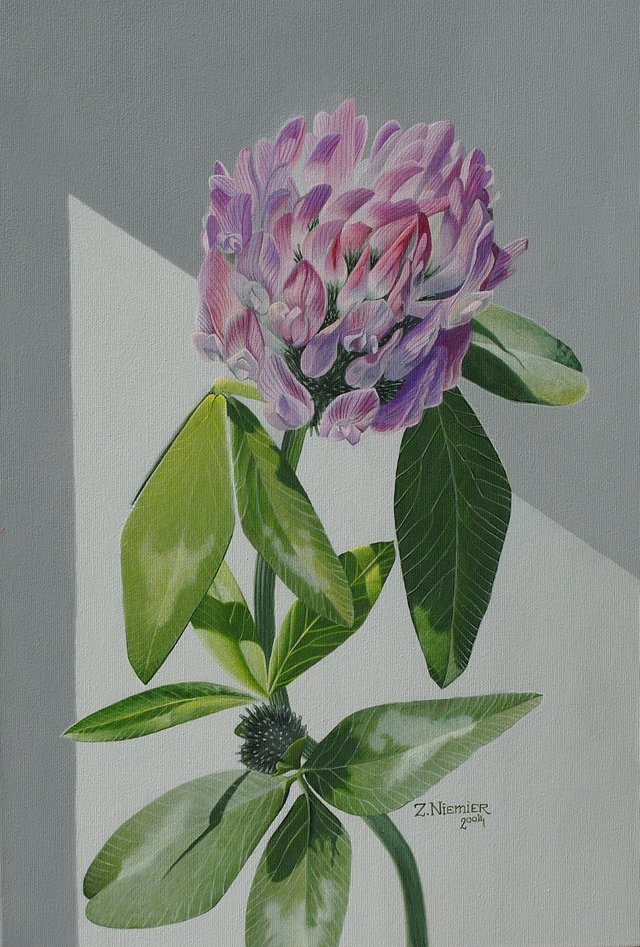
A closer look at pink clover - painting in 7 steps.
I am going to describe creative process that led to the effect you see above.
I'm sure my way isn't the only one, or the best one. It is just the one I know.
1- Find an object and take a closer look.
It is absolutely basic for this kind of painting.
I wanted to see as many details of the flower, as possible with human eyes.

So, can you see, that the familiar round flower is in reality an aggregate of orchid-shaped flowers?
Can you see vein-like pattern on each flower?
The fur-like thing between flowers and the stem?
Look at the object you decided to paint.
Did you find surprising details?
Good. We can go to the next step.
2- Take a set of photographs.
If you decided to paint a plant, I really recommend taking a bunch of pics from all the angles.
Mostly because of what we are going to do in step 4 (take your time).
Flower is going to die before you are done with work.
No camera is able to capture the details, colors and light the way I want to show it.
Otherwise I wouldn't have to paint stuff.
3- Sketch it in shades of grey.
If something goes bad, it is way easier to correct the mistake in greyscale.
As you can see, the shape was not perfect from the very beginning.
4- Take your time.
Have you finished the shapes? Sure?
Take a photo of your painting. Flip the photo horizontal on the computer.

Does it still look fine? If there is something wrong, figure out what is that.
Fix your painting. Repeat step 4 as long as you are not satisfied with mirror image of your painting.
5- Add colours.
Yeah, finally.
Decide, which colours you want to use.

For this flower, I needed few shades of pink, few shades of green, yellow and violet.
Pick your colours and try them out.
Paint with semi-transparent layers.
6- Take your time <- most important step
Does your painting look good?
Do exactly what we did in step 4. Don't rush to call your painting finished.
Checking the mirror image allows you to criticise yourself before somebody else does.
You are probably quite happy with the result, yet you have a feeling, that something is missing.
It may take days before you realise, what is it.
This is probably about the difference between a nice painting and almost-masterpiece.
Let me suggest:
-it is not about shapes, if you did step 4 correctly. Leave the shapes as they are.
-is it about colour? Tricks with colours are complicated stuff, but if you don't rush, it is worth the risk.
You can, for example, make shadows on the leaves deeper using almost invisible layer of blue.
-is it about light effects? When my paintings need some sparkles, I use very concentrated paint and the thinnest brush I have and I make dots of bright colours. Not necessarily white.
This effect never looks good on the computer screen, but in real life it creates optical illusions. Try this at home.
Grey around makes white fields more shiny.
7- Feel the satisfaction from finishing a thing.
It probably feels like finishing watching a good TV-series that has no sequels.
Get over it, there are more paintings waiting to be created!
Well, this blog entry reminds me of this famous meme:

but I still hope you have fun!
I will be very happy to discuss this content or answer questions.
Zuzanna Niemier
"Pink clover", 40x60 cm, acrylic on canvas
Private collection


Congratulations @nr35813! You have completed the following achievement on Steemit and have been rewarded with new badge(s) :
Click on the badge to view your Board of Honor.
If you no longer want to receive notifications, reply to this comment with the word
STOP