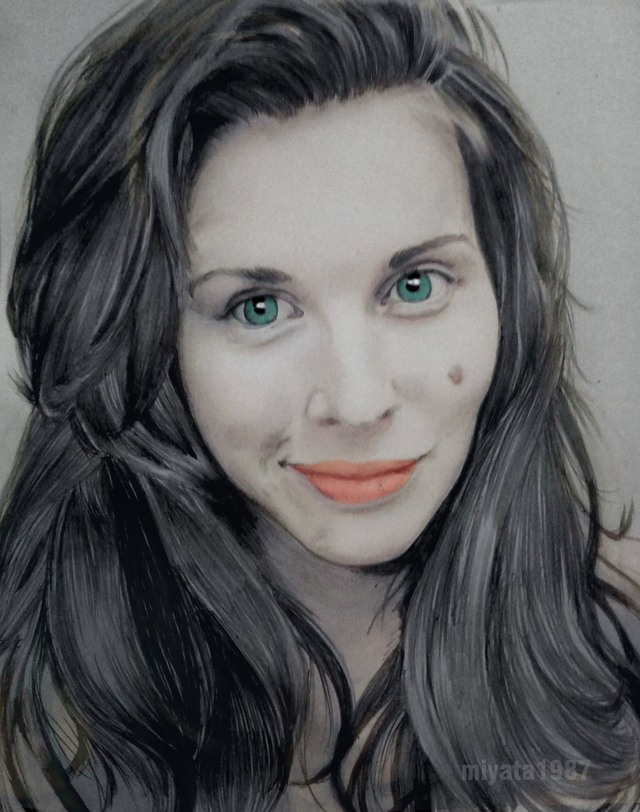
I explain to you step by step how I did this portrait
Hello friends, this time I will explain step by step how I do my drawings in general. I hope you like it and that the post is helpful.
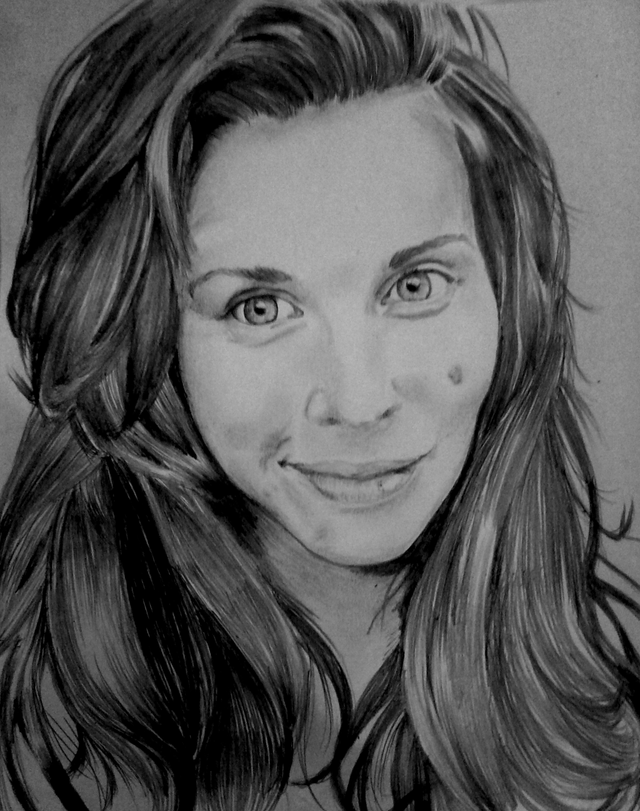
Step by Step
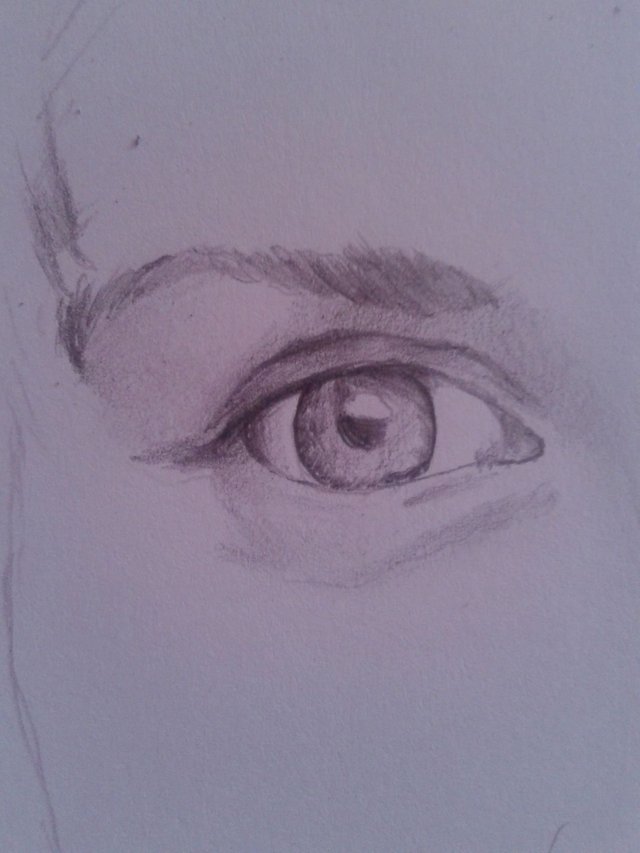
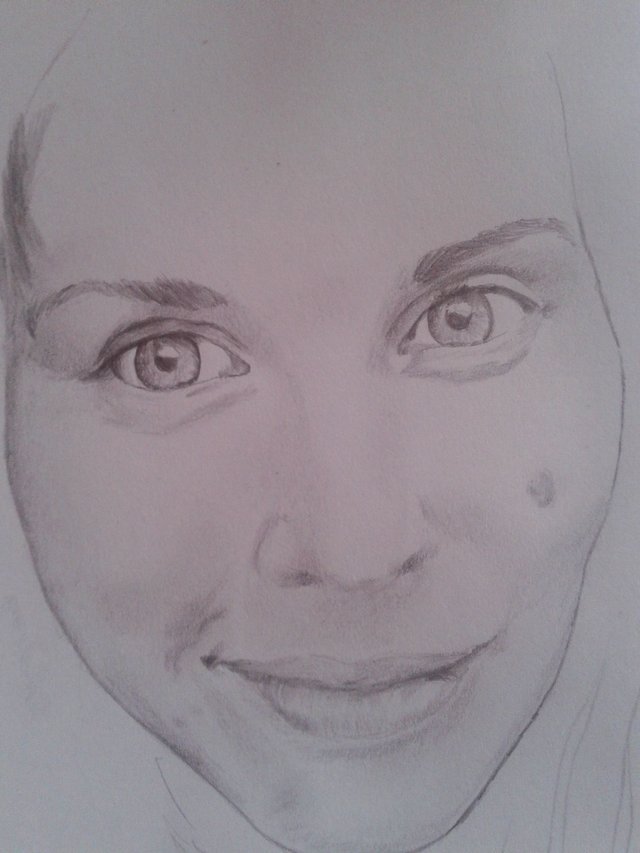
It is generally recommended to start from the left side (if you are right) to avoid running with your hand or arm, the graphite of the pencil, staining the blade.
I always start with the left eye, why the eye? because I think it's what's gonna bring my drawing to life. If I start with an eye I don't like, it's a good idea to start over. The eyes say it all.
The reality is that I don't use a previous sketch. I just try to mark the fundamentals first and start shaping it with the umbrellas and lights.
If the left eye goes well, I know I have a 90% chance the rest of it will go well.
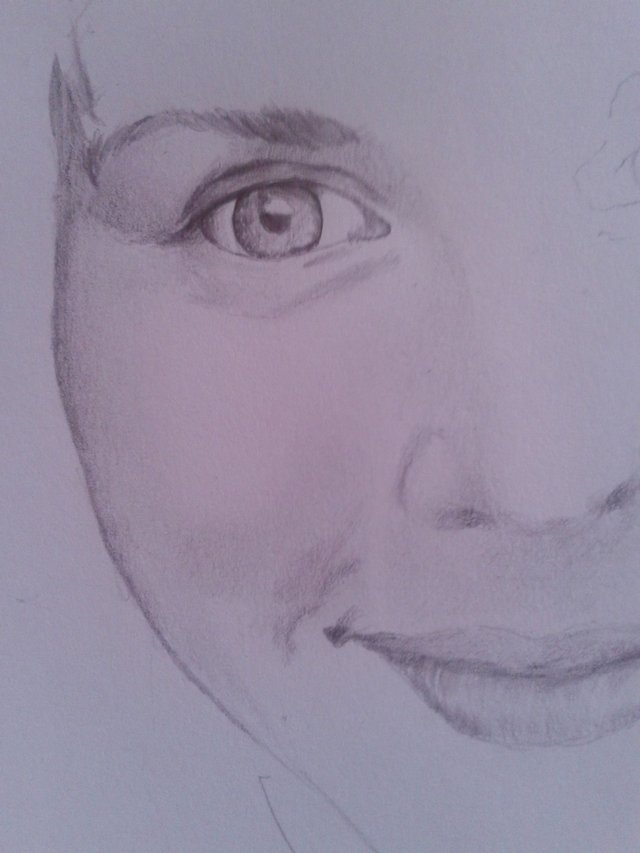
It is very important to maintain the proportions, I do not use guides, simply observe well before continuing with another part. If I am going to draw the right eye, for example, I first see the separation between each of them and the width of the nose. Or I just draw the nose and then continue with the other eye.
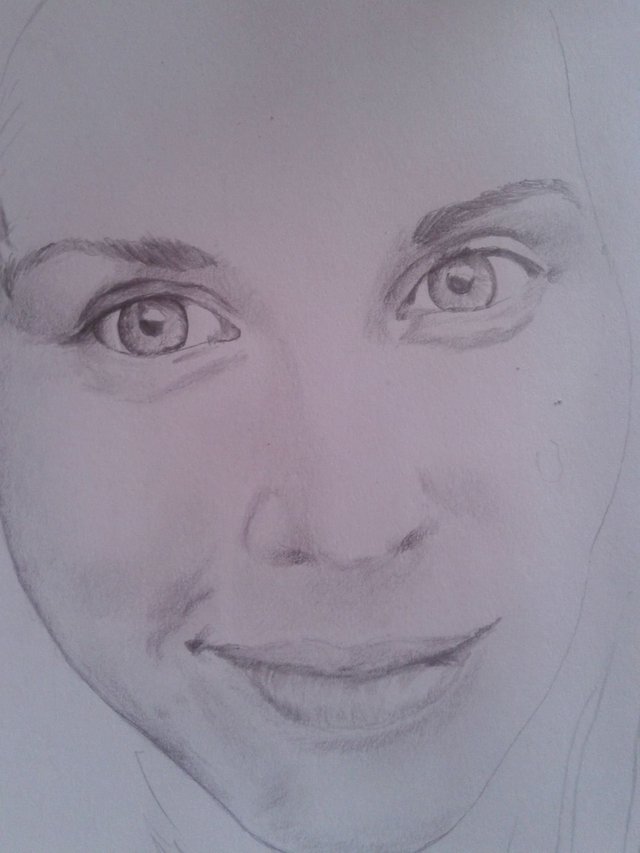
As far as the nose and mouth are concerned, I try not to press the pencil too hard, especially on the nose, I just frame the shadows and that is what gives it shape. S
If we push the pencil too hard, the nose will be forced and unrealistic. Like something that's forcibly placed and just has to look natural.
In the same way the mouth. It is only necessary to notice the change of shade between the color of the skin and that of the mouth, without forcing it. Make it as natural as possible.
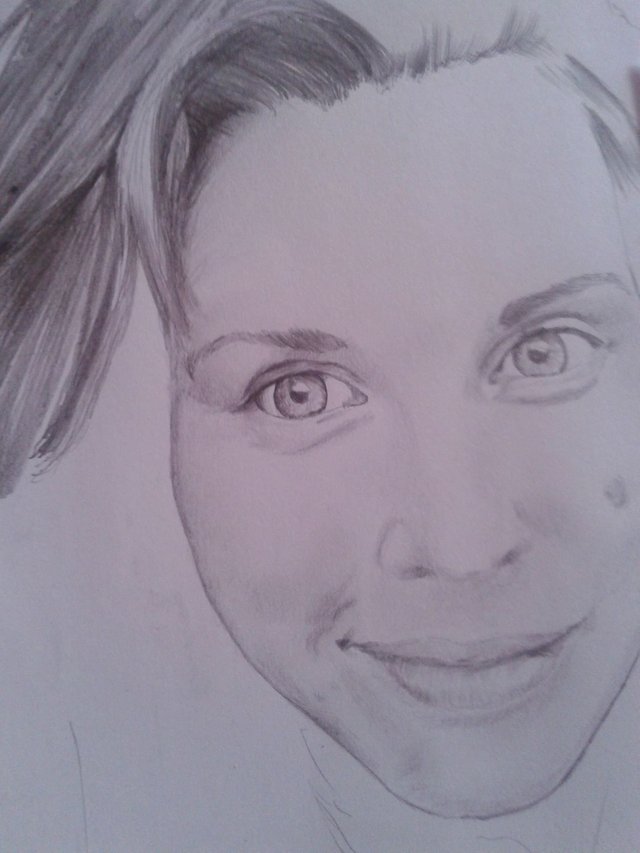
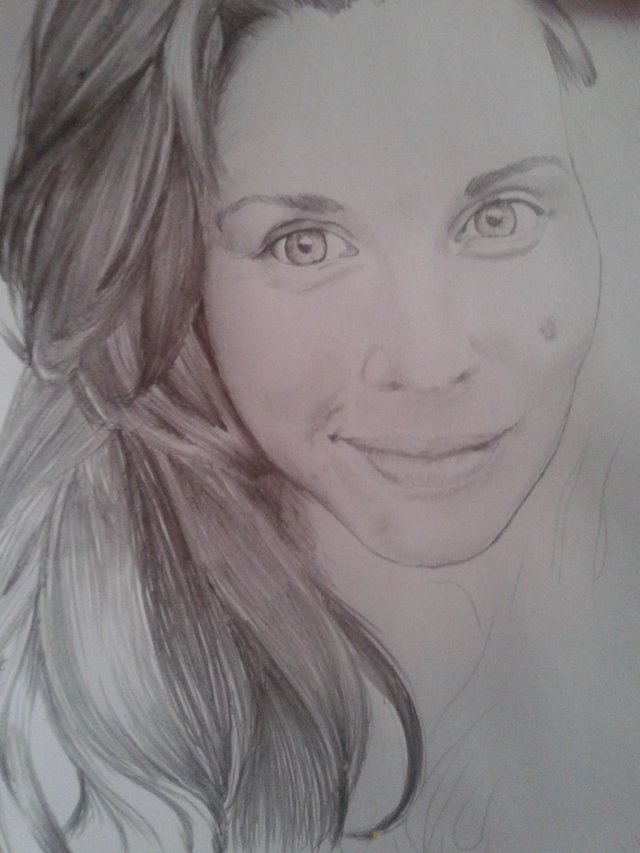
The hair will give more life to our drawing. Logically, it's impossible to do hair by hair.
In my case I try to make several repetitive strokes as far as there is a light. I don't cut the stroke there, but let each one flow, some longer, some shorter, that gives the feeling of a natural hair movement.
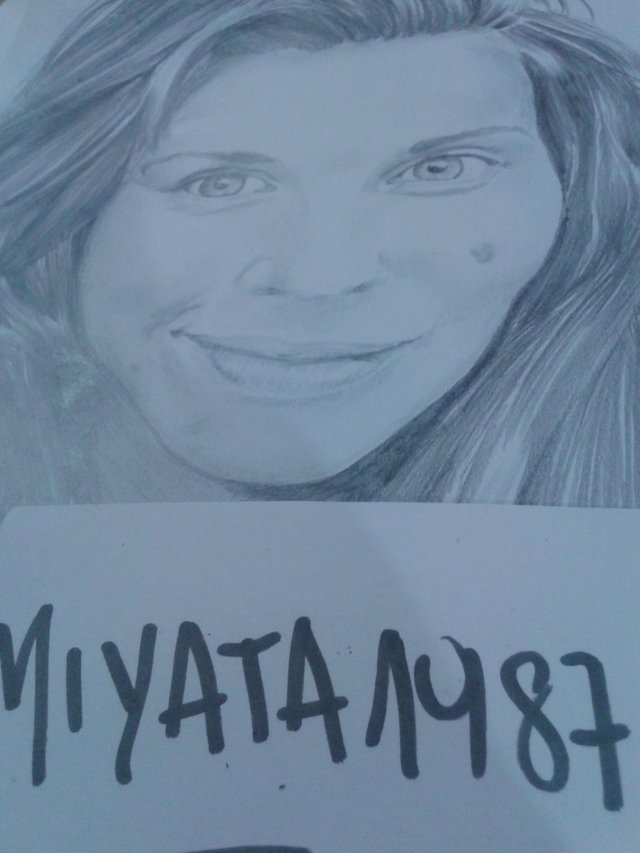
Images certified with my nickname
Enhancing shadows
In any editing program, I particularly use Photoshop, we can enhance the shadows. Increasing the image exposure, intensity, levels.
What are we doing this for? For subsequent colouring.
The idea when coloring is to do it with strong colors. Suppose our lips are pink, well, in that case we will paint that part with a very intense red. Then we will reduce the opacity of the color. Therefore, the background of the drawing, the lines, the lines, the strokes and the shadow determined by the pencil begin to be seen.
To give more life to the eyes we use the same method. Only that the light, we leave it with a 100% opacity.
°°°°°°°°°°°°°°°°°°°°°°°°°°°°°°°°°°°°°°°°°°°°°°°°°°°°°°°°°°°°°°°°°°°°°°°°°°°°°°°°°°°°°°°°°°°°°°°°°°°°°°°°°°°°°
That was it, in short. If you have any questions, leave them in the comment box. If you liked the post please share it with your followers. Thank you!!
Miyata1987
Upvoted.
Hello @miyata1987, thank you for sharing this creative work! We just stopped by to say that you've been upvoted by the @creativecrypto magazine. The Creative Crypto is all about art on the blockchain and learning from creatives like you. Looking forward to crossing paths again soon. Steem on!