Draw the Most Popular Chord Progression I V vi IV in Ableton Live with C Major!
How do we draw the most popular chord progression, which is I V vi IV into Ableton Live 9?
This will show exactly how to do it. Why would we want to do this?
If we're new to producing music like me and you just want to hear instrument sounds, it can be tempting to just bang on the keys and have complete chaos.
Draw the Most Popular Chord Progression I V vi IV in Ableton Live with C Major!
The nice thing is this chord right here is the most popular in music currently among so many different songs and this chord is one people are used to hearing. It all fits together nicely. It's a good way to listen to an instrument to see if you like the sound of it, which is what I want to do. I want to listen to thousands of different instruments in Ableton Live 9 and the nice thing is I can standardize it by playing this chord in all of them.
The question is, how do I draw this in from scratch?
What does it look like?
I didn't know this myself. I went through my friend @TomasGeorge's course, he has a university at u.tomasgeorge.com.
He shares the most valuable skills there for music production. I've learned almost everything I know about music production in the last year from watching Tomas' courses, from googling, and from deadmau5’s masterclass, which Tomas George referred me to.
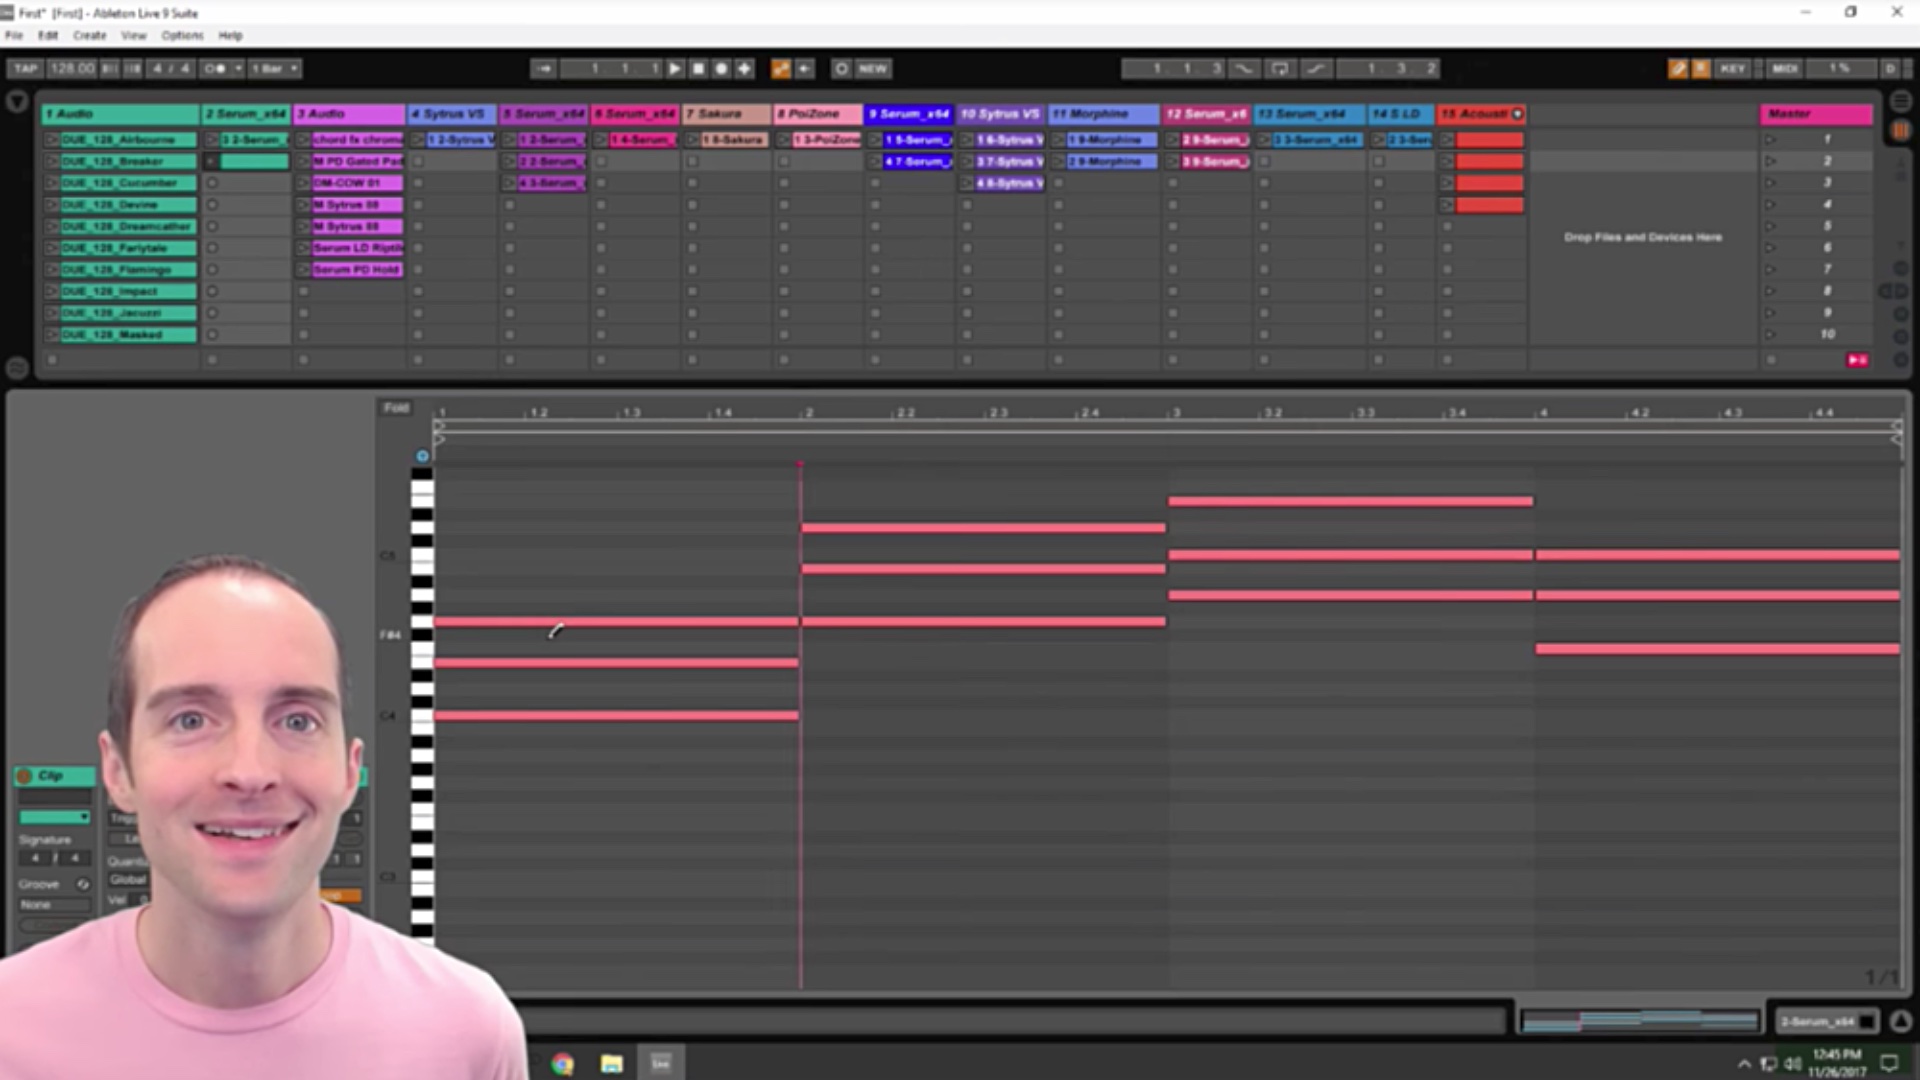
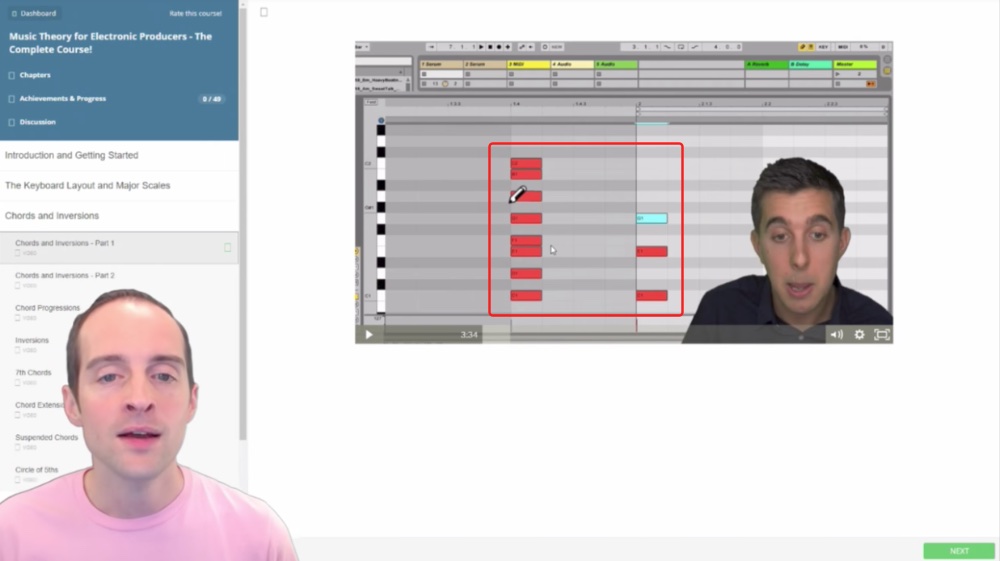
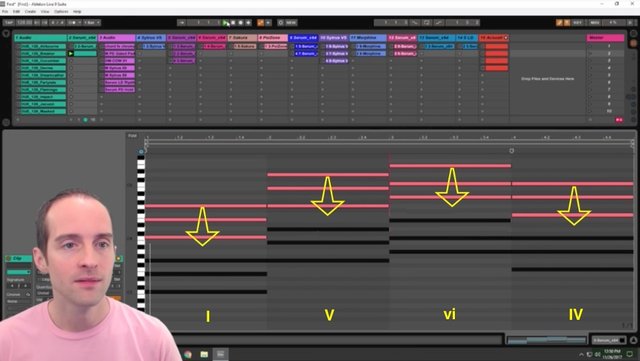
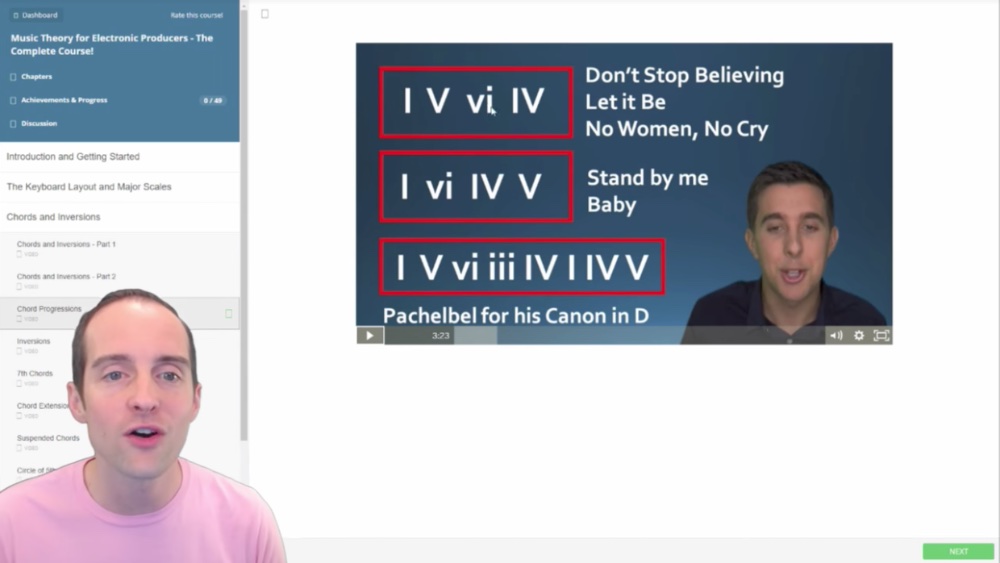
This is the basics of writing in a chord progression. You can see each of these chords are for a different key. You've got, for example, the 1 is a major, 2 minor, 3 in this particular key, which I think is C major.
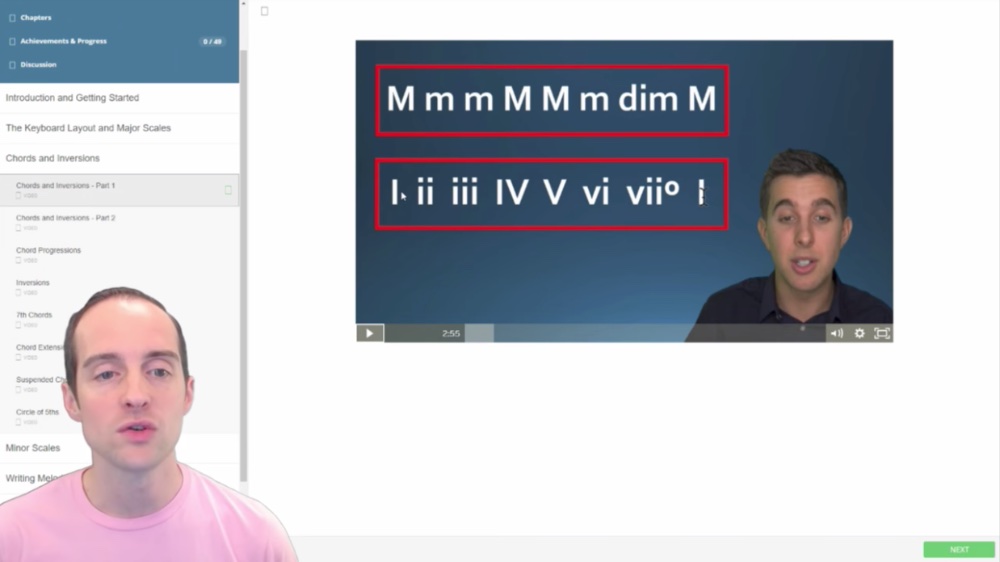
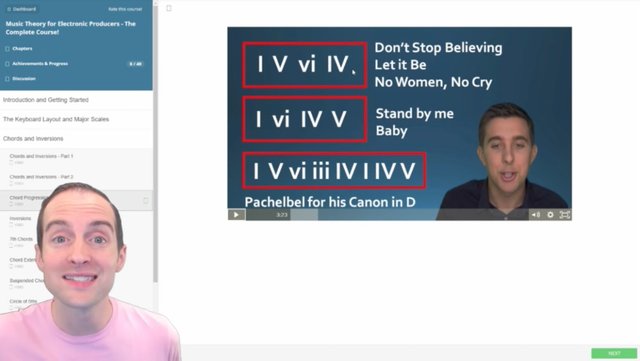
Then, in this lecture Tomas shows this is the most popular chord. I found this on hook theory. Also, this 1-5-6-4 especially switching out, for example, starting on 4 and going to 1 so it's 1-5-6-4. You can do variations on it too.
If you just want to listen to something in a way that sounds good and that we're used to, it's very helpful to draw this. I went through Tomas' lecture here showing exactly how to draw this in.
Then what I do here after watching his, I've given essentially the finished product straightaway in Ableton Live 9.
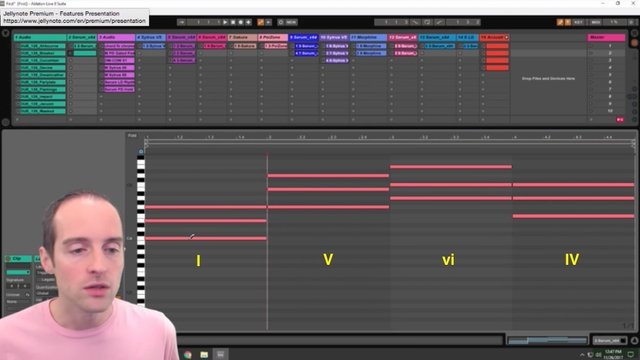
Now, you can adjust this for different scales. You can do it, however, you want to. If you're a beginner like me or you just want to learn how to do this, it's nice to just start with this exact one, and then play around it from there. I will show you first what each of these are.
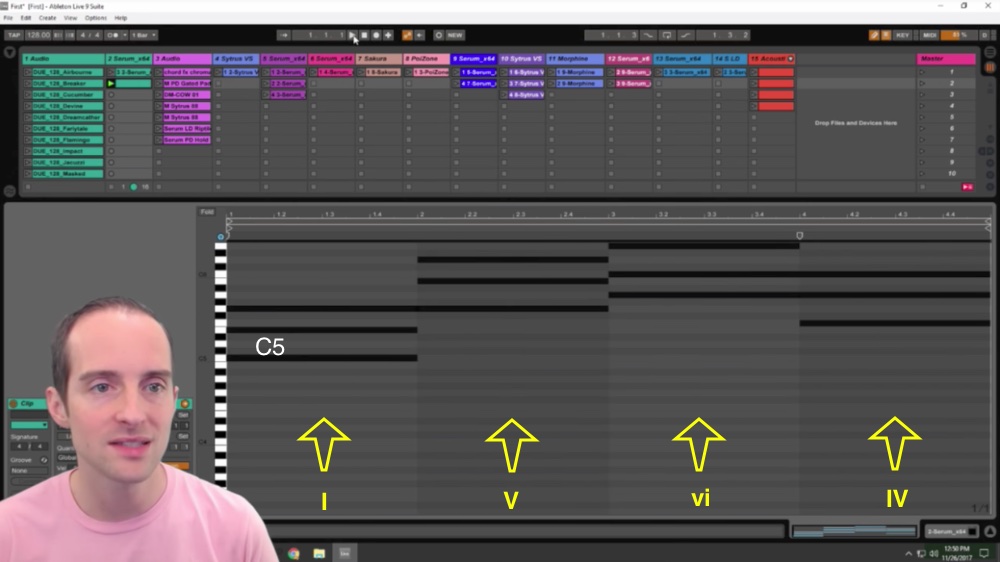
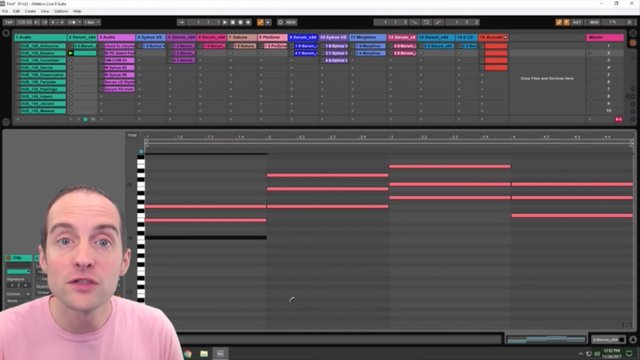
This starts with C and I started on the fourth octave here, so it's C4, and then E and G.
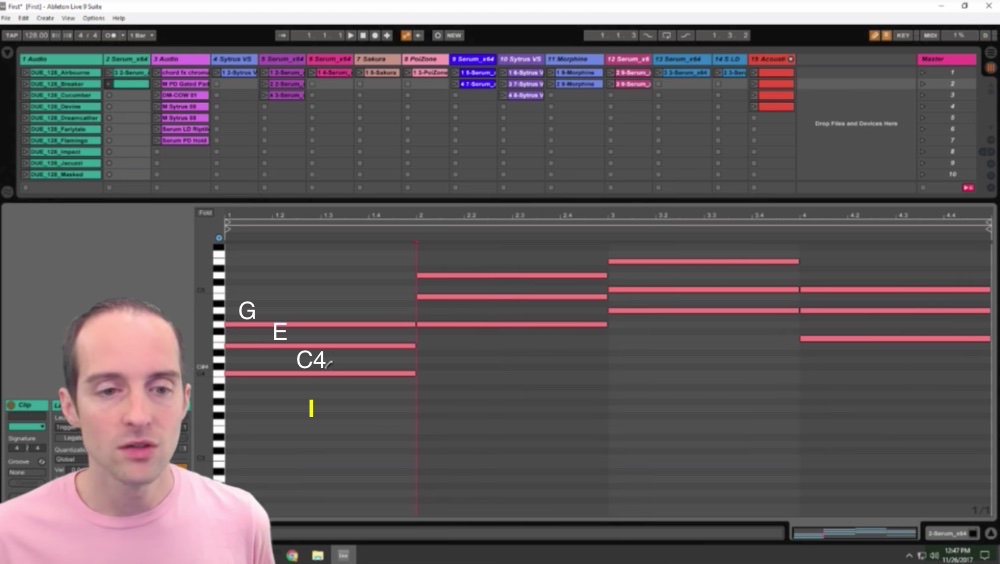
This first one is a major. It's a G. You essentially just use the white keys in the C major scale. You've got C, E and G in this one.
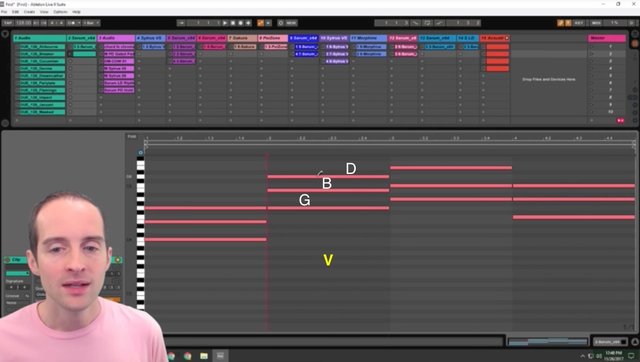
It is what's called a 1 chord I believe. Roman numeral one in the major here, and then next is a 5. Then, that starts on G and goes up to B, and then D in the next octave.
Next is the 6, it starts on A4 and goes to C, and then E.
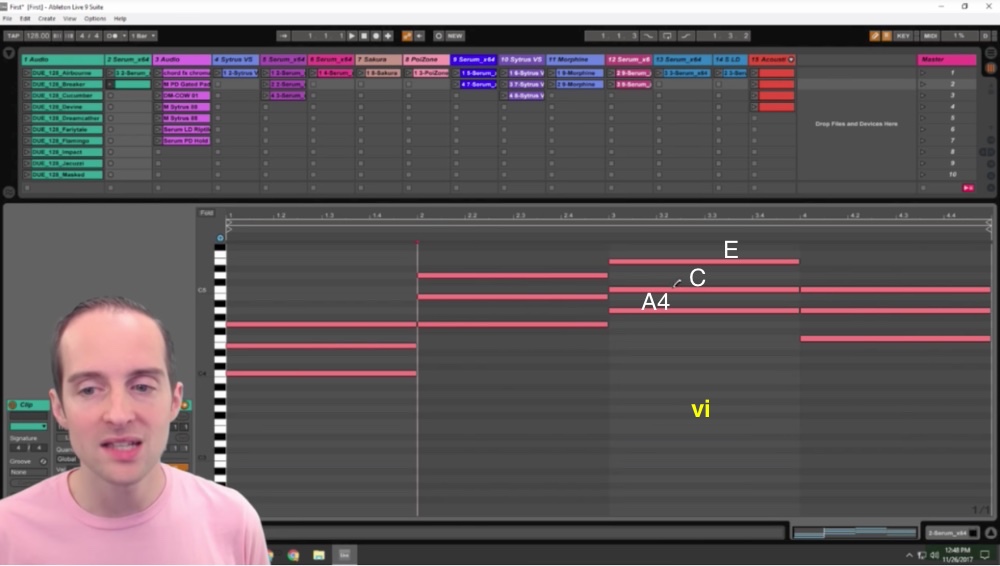
That's a 1-5-6, and then back down to 4 and that is F, A, and then C.
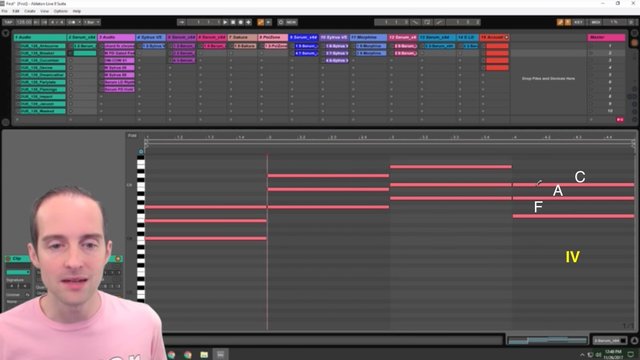
Now, if you play this, it just sounds beautiful together and it's familiar.
If I start this off and play it.

>> Listen to music clip on YouTube
It naturally resolves which makes it awesome for looping, and then I can listen to this on all kinds of different instruments just to get a basic feel of whether I like that instrument or not. I will throw this on a different serum and play it.
>> Listen to music clip on YouTube
That's what's lovely about this, once you've gotten this, it's really easy to test different instruments just using this chord. Then we can do things to have fun with it.
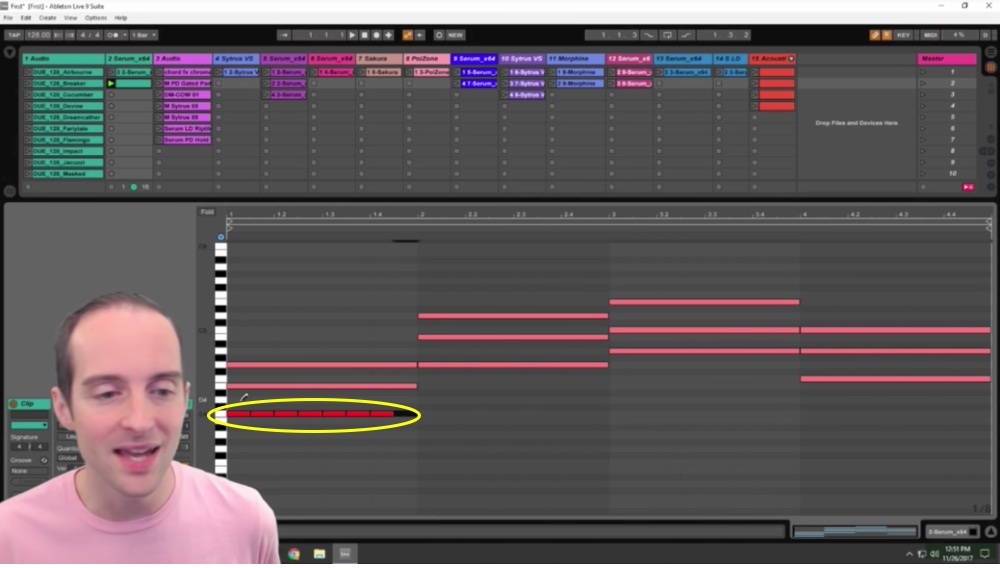
For example, if you want to move the notes, you could take this E5 out and put this on an E4 because it's on just a different octave, so it's still the same chord you've just gotten it on a different octave then.
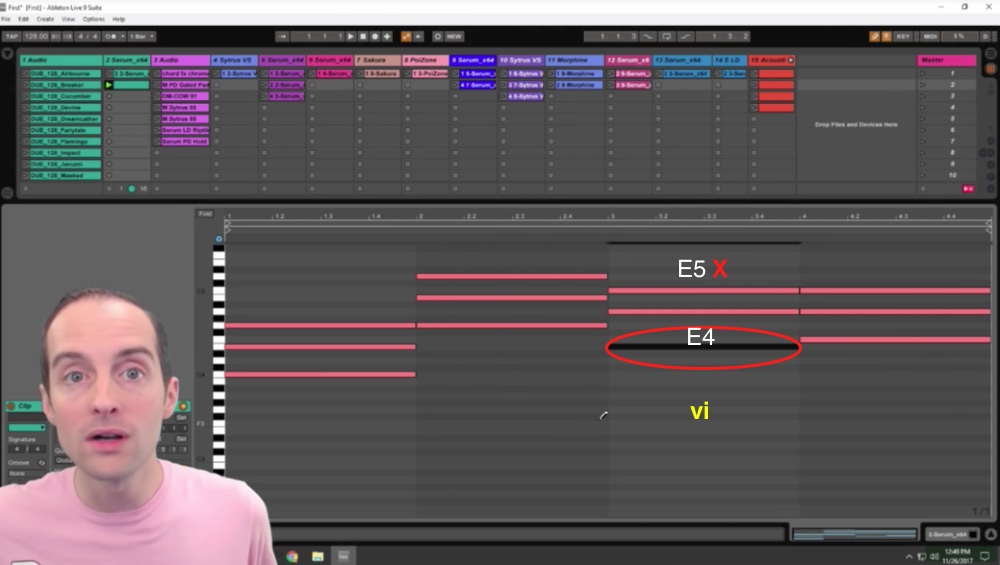
This can move on any different octave.
For example, if I just highlight all of this, I can put this down an octave, drag it down, and that's the same chord just at a lower octave.
When I play it.
>> Listen to music clip on YouTube
Then, I can move it up an octave if I want.
This is a higher octave now, C5.
>> Listen to music clip on YouTube
I've got that all set up now and the nice thing is then, I can just make basic variations.
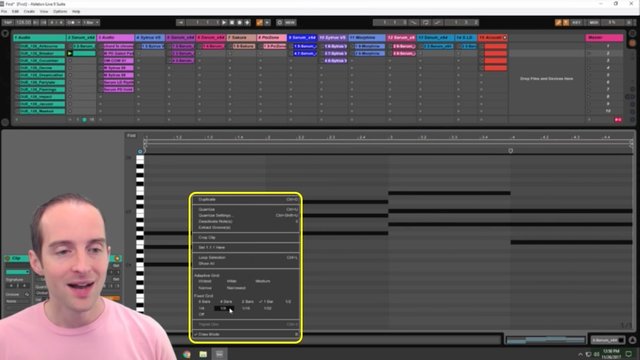
For example, instead of having a note that goes for an entire bar, I could have several short stutters of the note. If I right click over here, and put this on an eighth, I could draw out something here instead.
I could just put little short notes and have it play like that. That's still the same chord progression and that will be a completely different sound to listen to.
I put this over to a whole bar here, so it comes out that length, but if I right-click and do the fixed grid at something different, I can have some more fun with it.
I could go throw other random things in here, but just to listen to different instruments make some basic music, this exact set of notes all put together here in terms of a chord progression on the C major scale, this is the very basic.
This is what a lot of us are comfortable with and have already listened to. This is just an awesome chord to have set up here in one of these particular MIDIS, and then I can rotate through all the different instruments and listen to it.
What I'm going to do is make this into an electronic music station using some very basic chord progressions because I don't know much about making music and what I do know is as a listener I'd like to hear a lot of different instruments in a way that sounds good.
Putting a lot of different instruments, I can then essentially just put these different chords or these same chords, and I can do different variations on this, shorter or longer. I could have different octaves, I will know that harmonically it sounds good together because as soon as I stray from just the very basics, I don't know if it sounds good anymore instinctively, and then I can just try all these different instruments on it and that might be fun to listen to.
Thank you very much for joining me in this tutorial. I did this because I was googling and looking for it and I struggled to find one. I'm grateful I was already enrolled in Tomas' class and knew exactly where to look.
This is in his "Music Theory for Electronic Producers" class that I've got as a part of all his courses for life bundle. I'm also going through his "Music Production in Ableton Live 9" class and this is a very specific skill I wanted, so I hope it's useful for you.
If you'd like to join me on my musical journey, would you please follow me wherever you find, whether it's on YouTube or somewhere else because I will be doing live streams using everything I've learned that I hope will be amazing to listen to.
I love you.
You're awesome.
I hope you have a wonderful day today.
Final words
Thank you for reading this blog post, which was originally filmed as the video below.
If you found this post helpful on Steem, would you please upvote it and follow me because you will then be able to see more posts like this in your home feed?
Love,
Jerry Banfield with edits by @gmichelbkk on the transcript from @deniskj
Shared on:
- Facebook page with 2,230,398 likes.
- YouTube channel with 216,596 subscribers.
- Twitter to 103,989 followers.
Our Most Important Votes on Steem are for Witness!
Would you please make a vote for jerrybanfield as a witness or set jerrybanfield as a proxy to handle all witness votes at https://steemit.com/~witnesses because 100% of my witness earnings pay for ads that will help promote Steem for years? Thank you to the 2200+ of us on Steem voting for me as a witness, the nearly 1 million dollars worth of Steem power assigned by followers trusting me to make all witness votes through setting me as proxy, and @followbtcnews for making these .gif images!
Or

Let's stay together?
- If you want to stay updated via email, will you sign up either to get new emails daily at http://jerry.tips/steemposts or join at http://jerry.tips/emaillist1017 to get an email once a week with highlights?
- If you would like to build a relationship with me online, would you please visit https://jerrybanfield.com/contact/ because I would like a chance to get to know you?
Hey Jerry, music aside, I appreciate you got me into steem. Wish I got earlier when it was trading with cents. But anyways, better late than never.
That's all is also my thought thanks to #jerrybanfield how is promoting steem on Facebook.
Hi ,
Very interesting read, Thanks you for sharing it!
cool beans
Nice
wow another post educational post from you my bud Jerry..thanks a lot. Pls try see your steemit chat , I messaged you there. More success to you.
Also see my post for a top crypto challenge ..wish you success
i get to know about steemit through you ...i saw your video on youtube about it and in starting i think that you are founder of steemit...because you promote it in such a way...thanx for your extraordinary work for steemit...
Most of us know Jerry before steemit.
He's been an extraordinary contributor to this platform.😊
Thank you Kartik!
hi bro. I found you on youtube, I've followed you ya friend
Hello Jerry, music aside, I welcome you got me into steem. Wish I got before when it was exchanging with pennies. Be that as it may, in any case, preferable late over never.
This is really good @jerrybanfield. I got to know about Ableton Live about 6 months ago. Your videos have helped me clarify some points about it and I'm better equipped to make those chord progressions on it.
C Major my best sound for making hits ..
Cheers!
#AIR-CLINIC
Thanks @jerrybanfield for this wonderful piece.. I keep learning from your posts.