Tutorial: How to Create a Realistic T-Shirt Mockup using Photoshop
Learning how to create a shirt mock-up would greatly help designers in gaining an extra edge, may it be a shirt design competition or an advertisement for selling printed shirts. Shirt mockups can enhance a design and help show customers a more accurate image of the outcome.
------------------------------------------------------------------------------------------------------------------------------------
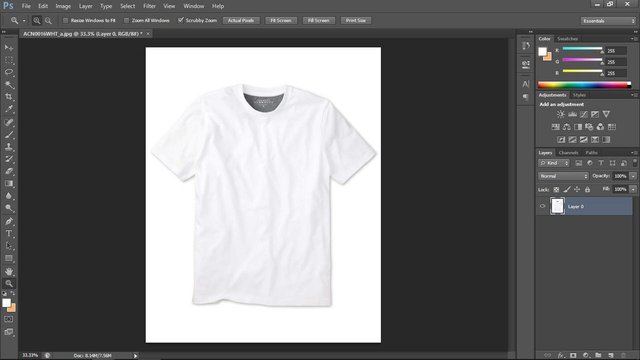
Find any shirt on the web, preferably white, that you would like to use in your shirt mockup. I got mine from this link.
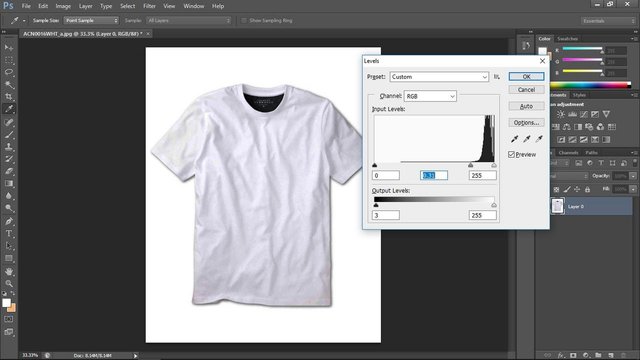
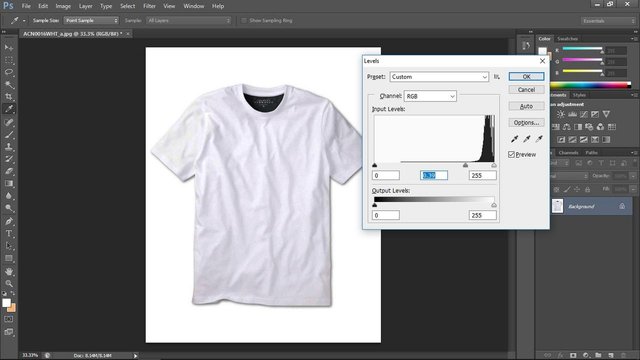
Press Ctrl+L on the keyboard and edit the input level sliders just enough to enhance the details on the shirt. The wrinkles on the shirt would play a vital part in this mockup.
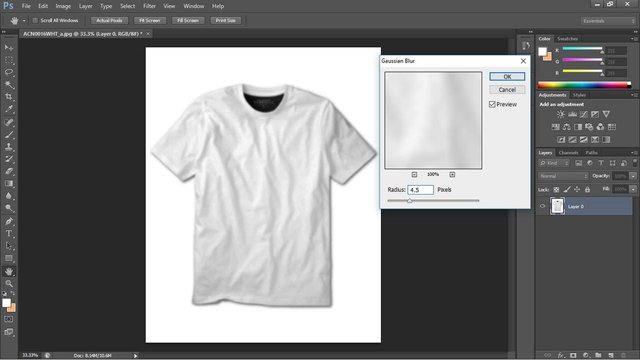
Click on Filter>Blur>Gaussian Blur and adjust the blur radius just enough to erase minor details on the shirt. Make sure most of the shadows on the wrinkled cloth are still recognizable because the Displace command to be used later will be dependent upon these shades.
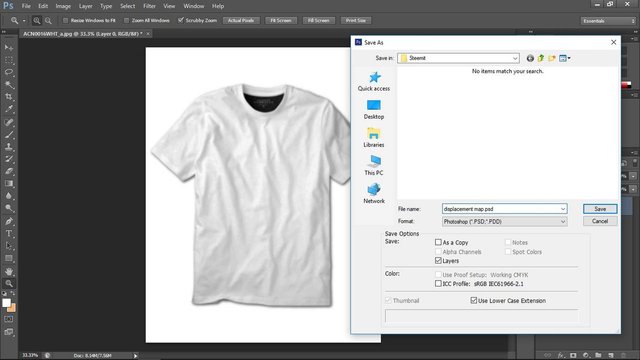
Click on File>Save As then save the file as a psd document with your desired filename. Close the file or simply create a new workspace as this file will be reserved for later use.
Reopen your downloaded shirt image and adjust the levels once again but this time, the level should reveal a bit lesser details as compared to the first file.
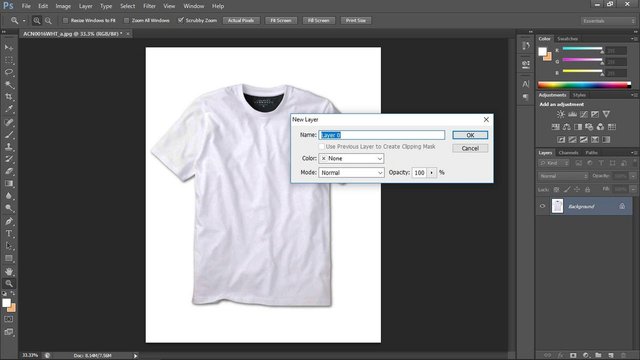
Unlock the layer by double clicking on the background layer to allow more alterations in the image.
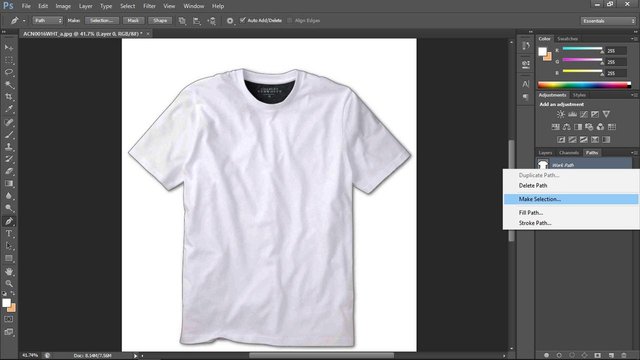
Trace the outline of the shirt by using pen tool (the pen icon located in the left toolbar or simply press P).
After creating a path around the shirt, click the Paths tab located in the same row with the Layer tab on the right toolbar. Right click on Work Path and then click Make Selection.
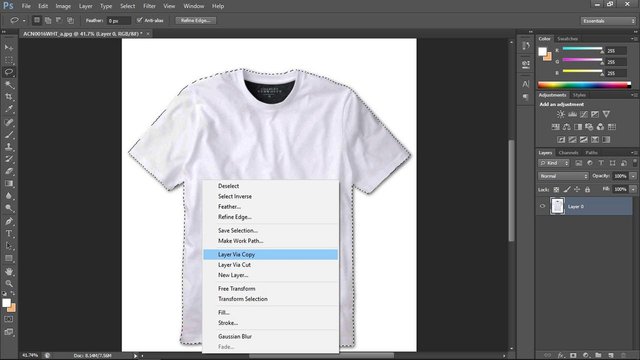
The shirt is now the current selection. Right click on the shirt and click Layer Via Copy to generate a new layer containing the current selection.
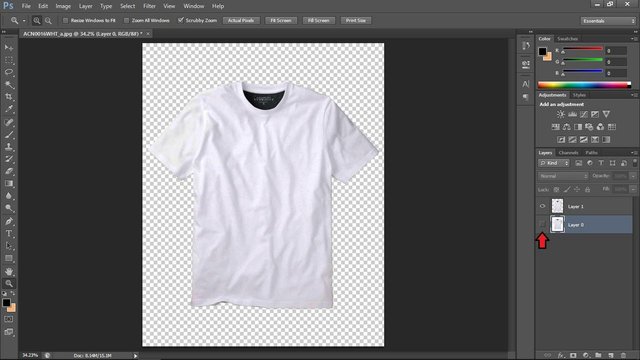
Turn the visibility of Layer 0 (the layer containing the shirt with background) off by clicking the checkbox indicated by an eye icon.
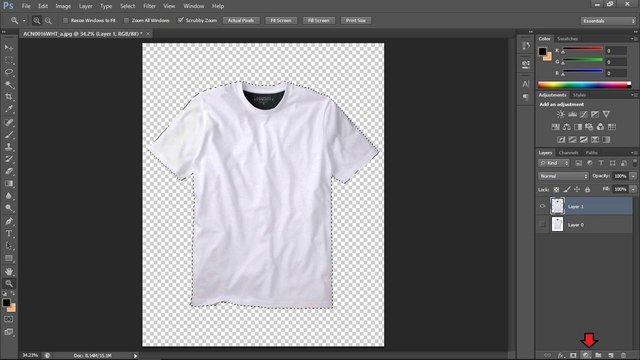
Right click on the thumbnail of Layer 1 then click Select Pixels. After making a selection, click the contrast icon below the layer toolbar to generate a color fill of the current selection. Select white as the fill color.
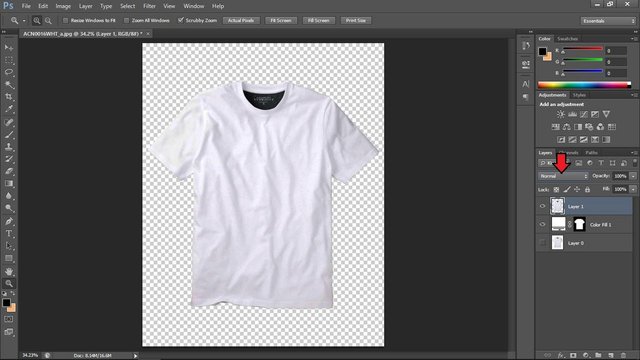
Make sure Layer 1 is over the color fill mask. To move a layer, simply drag the layer and position it over where you want to put it within the layer toolbar. Then click on Normal the change the Blending Option to Multiply.
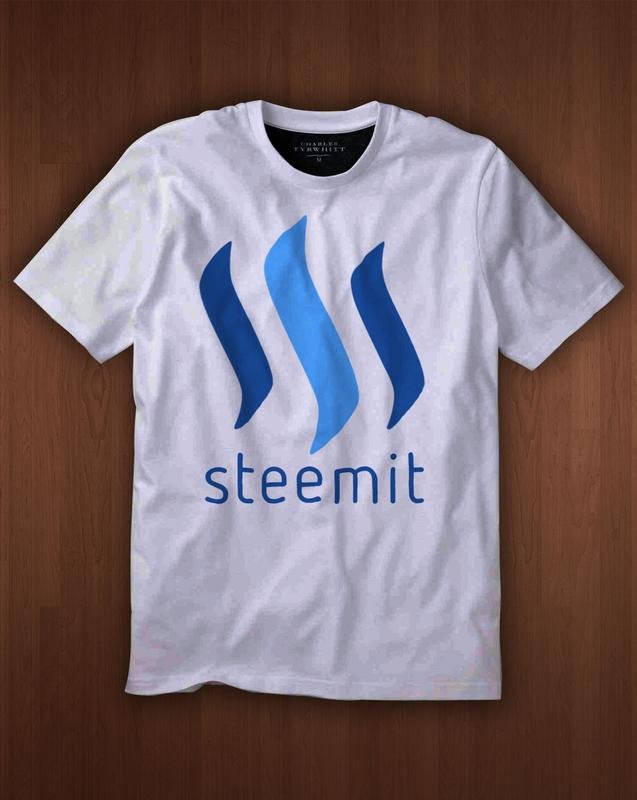
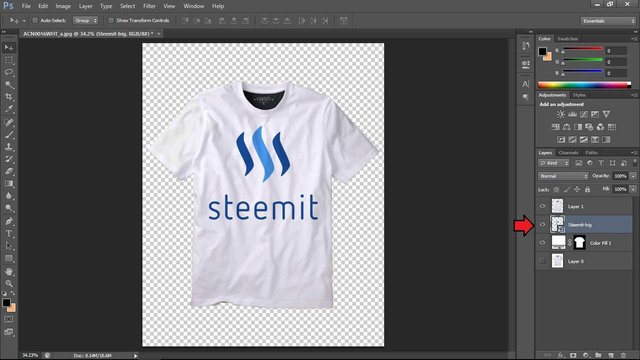
Copy an image design locally or from the web and paste in the the workspace area. Make sure the layer of the image is positioned between the Shirt Layer and the Color Fill Layer. In this case, I am using the Steemit logo.
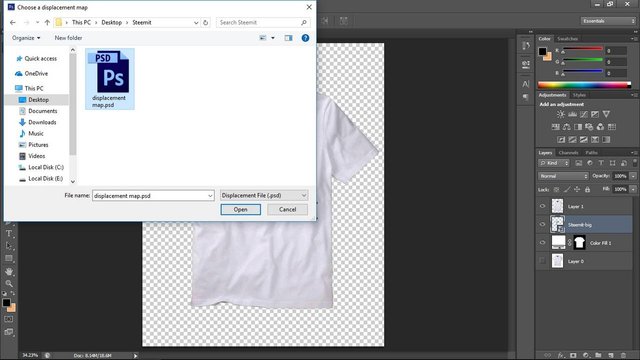
Now this is where the magic happens. Having the design image as the current layer selection , click on Filter>Distort>Displace click OK and locate the psd file we created in the beginning of this tutorial.
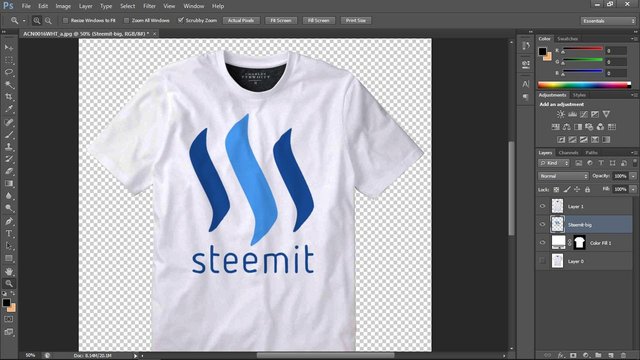
It is a bit subtle in this design but you will now see the logo distort to wrap on the folds and wrinkles of the shirt.
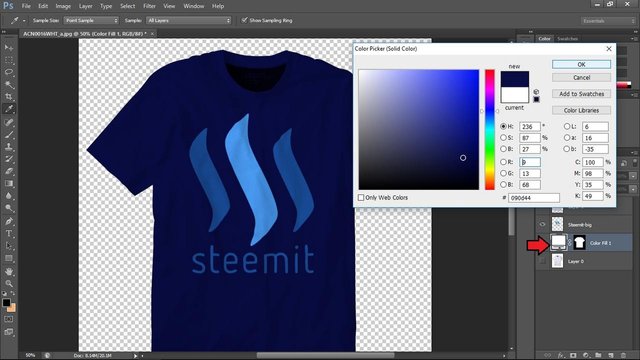
We can change the shirt's color by navigating to the color fill layer we have created earlier. Double click on the color fill layer thumbnail and a Color Picker window will pop up. Navigate to your desired shirt color, shade and hue. You can change the shirt design by simply replacing your original design and by re-executing the displace command.
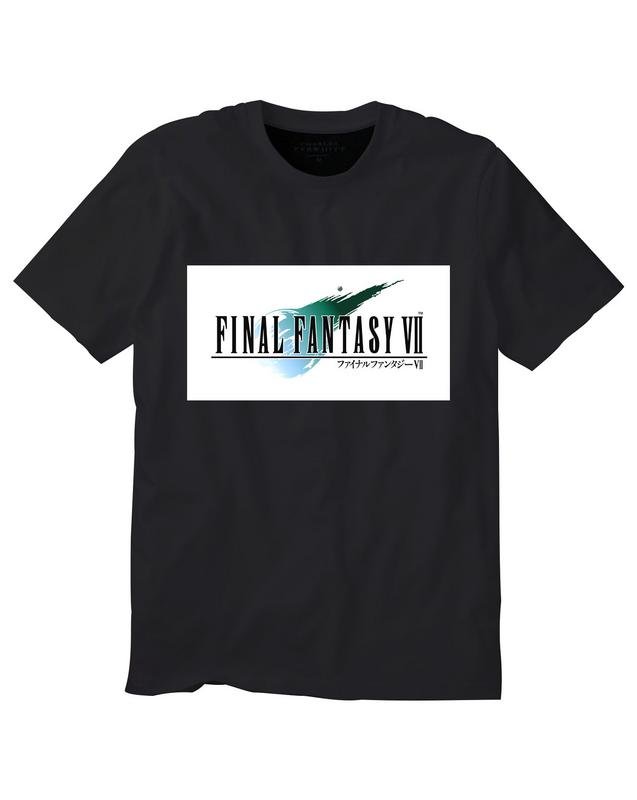
I have tried the T-Shirt Mockup on a different image (a Final Fantasy VII logo ) to further contrast the difference of a mocked-up design and a non mocked-up.
The design here looks boring and unreal as it seems to float over the shirt.
The image here has more realism in it with the inclusion of both shadow and distortion on the design.
These steps may work differently for different shirt designs and images. Try messing up with Levels and Gaussian Blur to see which settings work best for you.


Interesting! I'm looking forward for more tutorials from you
thanks @codygee237
Very helpful tutorial
thanks @agentzero
Congratulations @aodhan! You have completed some achievement on Steemit and have been rewarded with new badge(s) :
Click on any badge to view your own Board of Honor on SteemitBoard.
For more information about SteemitBoard, click here
If you no longer want to receive notifications, reply to this comment with the word
STOP