DESIGN 01 # HOW TO MAKE NEON GLOW EFFECT IN "STEEMIT" TEXT (PHOTOSHOP TUTORIAL) || {ENG - IND}

{ ENGLISH }
Hallo Steemians.
This time, I will try to share the tutorial on how to create neon glow effect on the words "STEEMIT" using Photoshop application. Of course some of the friends - friends are familiar enough with this application. Yes, photoshop itself is one application that is very useful, especially for graphic design, in the form of photo or image processing. Well, by giving the effect of Neon Glow on text, the text that we make will look luminous (something like that: D).
Ok friends, below I will explain the steps to make it. The pictures I show are the results of my own experiments: D. And I gave an example of the effect on the word "STEEMIT". You can choose your own text selection as you wish. Okay, let's start trying it out:
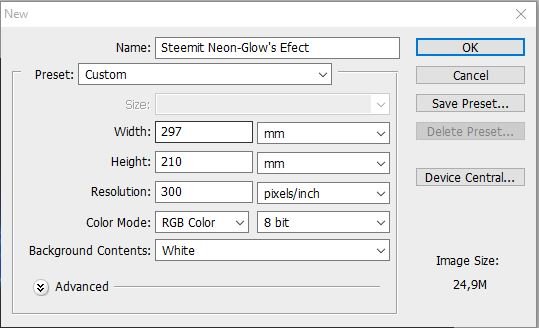
1. Open the Photoshop app (Here I am using Photoshop CS3). Then create a new document by clicking the File - New menu in the upper right corner of the Photoshop window. Next on the window that appears, give the paper size as you wish (Here I give the paper size W: 297mm & H: 210mm). Then click OK.
2. Next will appear the sheet is white. Because we want to create a neon glow effect on the text, the required background must be dark. And I'm here to choose black color. The way simply press the Shift + Backspace, then on the Use menu, select Color and select the color you want to use (Ex: Black). Or just by pressing the Ctrl + Shift + Backspace, and the original background screen turns white into black.
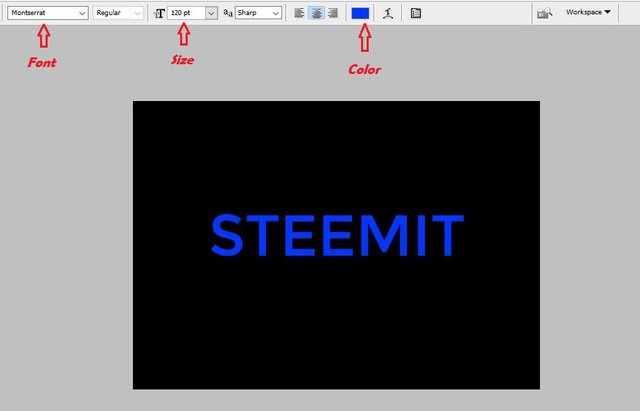
3. Now we will make a writing, and here the writing that I will make is "STEEMIT". For those who do not know yet, first click Type Tool (T) on the left of Photoshop Window, point to the screen and write the words. You can choose your own Font, size or color you want to use. (Here I choose Font Montserrat, 120 pt size and Blue color).
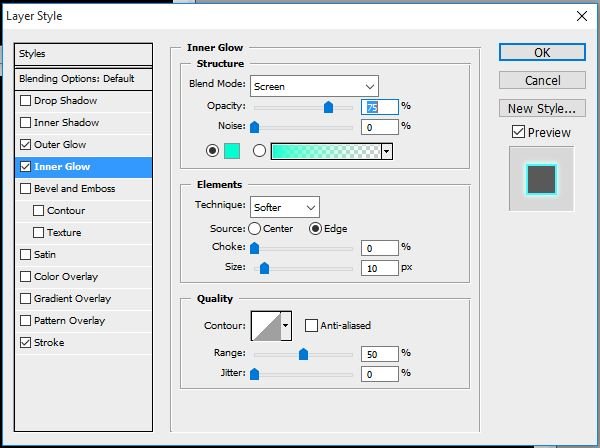
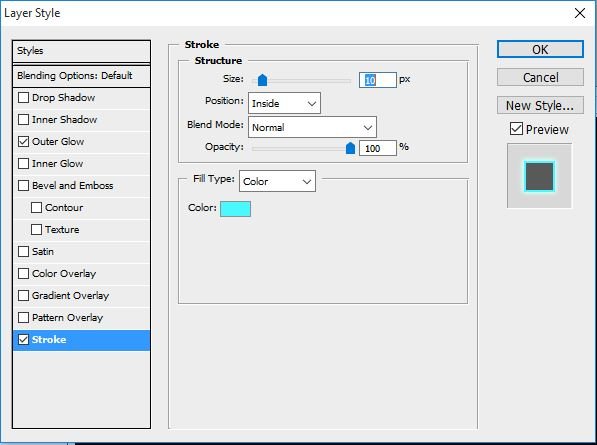
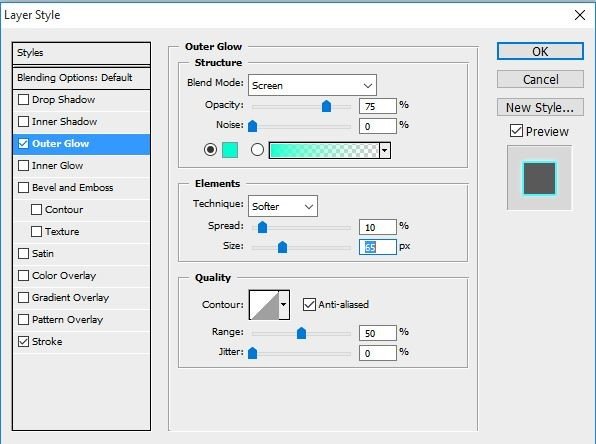
4. The next step we will give the effect of light on text. Right-click on the Text / T layer (on the bottom right of the photoshop window), then select Blending Option. Then will appear Blending Option window. Check the Outer Glow, Inner Glow and Stroke. can arrange it like the picture below (Or you can make set according to the wishes of each.)
a. Outer Glow

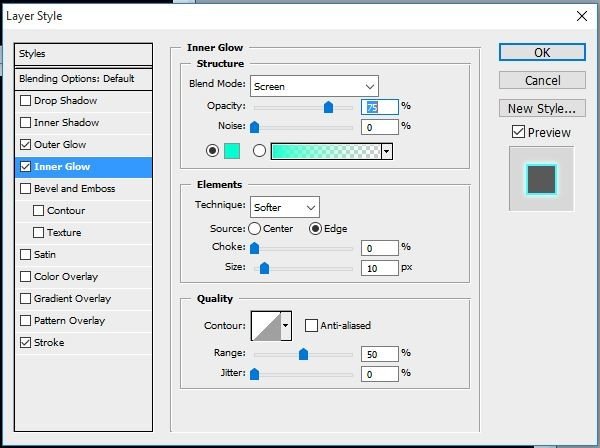
b. Inner Glow
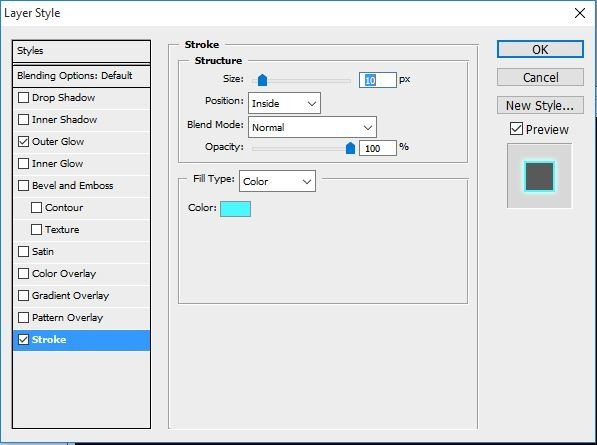
c. Stroke
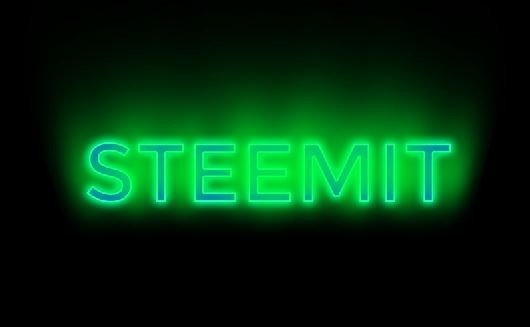
5. When done, click OK. Then the result will be as below. You can change the color of the settings in accordance with your wishes.

How? Cool, right? Up here, you've managed to give the effect of Neon-Glow on text. However, if you want, the effect is more "glowing" again, then the tutorial will we continue.
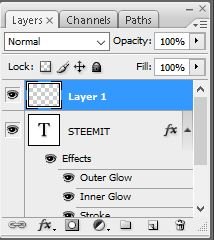
6. Create a new layer and place it at the top of the other layers. For those who do not know yet, more easily, press SHIFT + CTRL + N, then click OK. Then can be seen in the menu at the bottom right of the Photoshop window has appeared a new layer with the name Layer 1.
7. Click the Brush Tool on the left of the Photoshop window. Give color as you wish. Select the size of Brush you want to use. (Here I give Blue color and Size 135px, Hardness 0%) Scribble text, as shown below.

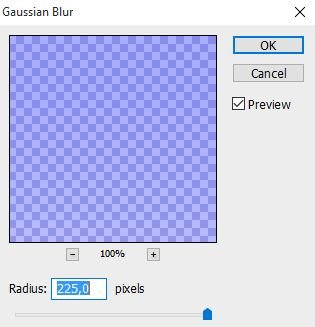
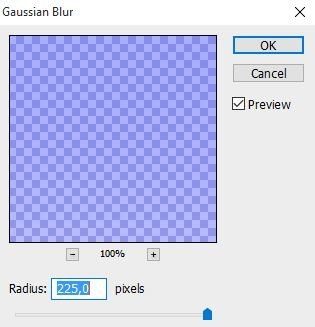
8. Next, on the top menu select Filter - Blur - Gaussian Blur. Then drag the Radius value as desired. (Here I set the Radius of 225 Pixels).
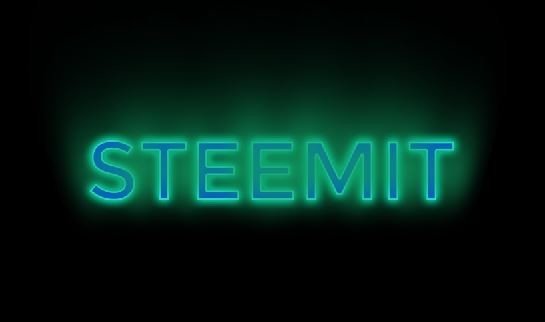
9. Then press OK. Then the result will be like this.

How? Looks cool the result? Well Done !!! It's enough until here ?? Actually has finished giving the effect of his Neon Glow. However, we can also set the finished effect to be like there is a reflection of light in his writing. And how to make it is:
10. Still on that layer. When finished with the settings earlier, then click the button Ctrl + T, reduce the size of the light to the size of the letter. Then right click on the size and then select Distort. Set the size, as in the following picture.

11. And then, just duplicate the results of the reflection of light before by pressing the CTRL + J. Arrange until the results become as shown below.

Well done! Creating "STEEMIT" text by giving the effect of Neon-Glow has been successful we do.
12. Here are the results of the Neon-Glowing Effect on the Steemit text with various colors


How Steemians? Not too difficult is not it? You can create your own Neon Glow effect on your text. Thank you for read my post.
Thank you very much.
If this post is useful, please Follow, Upvote, Comments and Resteem
By : @achmadkurniawan
##################################
{INDONESIA)
Hallo sahabat Steemian.
Kali ini saya akan mencoba berbagi tutorial bagaimana cara membuat efek Neon Glow pada kata – kata “STEEMIT” dengan menggunakan aplikasi Photoshop. Tentu sebagian dari teman – teman sudah cukup familiar dengan aplikasi ini. Ya, photoshop sendiri merupakan salah satu aplikasi yang sangat berguna sekali, terutama untuk desain grafis, berupa pengolahan foto atau gambar. Nah, dengan memberi efek Neon Glow tulisan, tulisan yang kita buat akan kelihatan bercahaya (kira – kira seperti itu :D ).
Ok teman – teman, dibawah ini akan saya jelaskan langkah – langkah pembuatannya. Gambar – gambar yang saya tampilkan adalah hasil dari percobaan saya sendiri. Dan saya memberi contoh pemberian efek pada kata “STEEMIT”. Sahabat bisa memilih pemilihan kata – kata sendiri sesuai dengan keinginan. Langsung saja:
1. Buka aplikasi Photoshop (Disini saya menggunakan Photoshop CS3). Lalu buat sebuah dokumen baru dengan mengklik menu File – New disudut kanan atas jendela Photoshop. Selanjutnya pada jendelan yang muncul, beri ukuran kertas sesuai dengan keinginan dari sahabat ( Disini saya memberi ukuran kertas W: 297mm & H:210mm). Kemudian klik OK.

2. Selanjutnya akan muncul lembaran berwarna putih. Karena kita ingin membuat efek neon glow pada tulisan, maka background yang dibutuhkan haruslah berwarna gelap. Dan saya disini memilih warna hitam. Caranya cukup menekan tombol Shift + Backspace, lalu pada menu Use, pilih Color dan pilih warna yang ingin digunakan (Ex : Black). Atau cukup dengan menekan tombol Ctrl + Shift + Backspace, dan layar background yang semula putih berubah menjadi warna hitam.
3. Sekarang kita akan membuat sebuah tulisan, dan disini tulisan yang akan saya buat adalah “STEEMIT”. Bagi yang belum mengetahui, caranya adalah dengan meng – klik Type Tool (T) di sebelah kiri Jendela Photoshop, arahkan ke layar dan tulis kata - katanya tulis kata – katanya. Sahabat bisa memilih sendiri Font tulisan, ukuran ataupun warna yang ingin digunakan. (Disini saya memilih Font Montserrat, ukuran 120 pt dan warna Biru)

4. Langkah selanjutnya kita akan memberikan efek cahaya pada tulisan. Langkahnya klik kanan pada layer Text / T (di sebelah kanan bawah jendela photoshop), lalu pilih Blending Option. Kemudian akan muncul jendela Blending Option. Berikan tanda centang pada Outer Glow, Inner Glow dan Stroke. Silahkan atur seperti gambar di bawah ini (Atau teman – teman bisa membuat mengatur sesuai dengan keinginan masing masing.)
a. Outer Glow
b. Inner Glow
c. Stroke
5. Setelah selesai klik OK. Maka hasilnya akan seperti di bawah ini. Teman – teman bisa mengganti warna nya pada pengaturan tadi sesuaai dengan keinginan kalian.

Bagaimana? Keren kan? Sampai disini, teman – teman sudah berhasil memberikan efek Neon-Glow pada tulisan. Namun, jika ingin, efeknya lebih “bersinar” lagi, maka tutorialnya akan kita lanjutkan.
6. Buat layer baru dan letakkan dibagian paling atas layer – layer lainnya. Jika ada yang belum tahu caranya,lebih mudahnya, tekan SHIFT + CTRL + N, lalu klik OK. Maka dapat dilihat di menu bagian kanan bawah jendela Photoshop sudah muncul layer baru dengan nama Layer1.

7. Klik Brush Tool di sebelah kiri jendela Photoshop. Beri warna sesuai keinginan. Pilih ukuran Brush yang ingin digunakan. (Disini saya memberi warna Biru dan Size 135px, Hardness 0%) Coret – coretlah tulisannya, seperti pada gambar di bawah ini.

8. Selanjutnya, pada menu paling atas Pilih Filter – Blur – Gaussian Blur. Lalu geser nilai Radius sesuai yang di inginkan.(Disini saya mengatur Radius – nya 225 Pixels)
9. Lalu tekan OK. Maka hasilnya akan menjadi seperti ini.

Bagaimana? Sudah semakin kerenkan tulisannya? Well Done!!! Sudah cukup sampai disini?? Sebenarnya sudah selesai pemberian efek Neon Glow – nya. Namun, kita bisa juga mengatur efek yang sudah jadi menjadi seperti ada bias cahaya di tulisannya. Dan cara membuatnya adalah:
10. Masih pada layer tadi. Setelah selesai dengan pengaturan tadi, selanjutnya Klik tombol Ctrl +T, kecilkan ukuran cahayanya sampai sebesar ukuran huruf. Kemudian klik kanan pada ukuran tadi lalu pilih Distort. Atur ukurannya, seperti pada gambar berikut.
11. Selanjutnya tinggal duplikat saja hasil bias cahaya tadi dengan menekan tombol CTRL + J. Aturlah sampai hasilnya menjadi seperti gambar dibawah ini.
Nah, Selamat sahabat!!! Membuat tulisan “STEEMIT” dengan memberikan efek Neon-Glow sudah berhasil kita lakukan.
12. Berikut berapa hasil Efek Neon-Glowing pad teks “Steemit” dengan berbagai warna .
Bagimana teman – teman. Tidak terlalu sulit bukan? Kalian bisa mengkreasikan sendiri efek Neon Glow pada tulisan kalian masing- masing. Terima kasih sudah membaca postingan saya
Terimakasih.
Jika merasa artikel ini bermanfaat, silahkan Follow, Upvote, Comments and Resteem
Sangat bermanfaat artikelnya bung @achmadkurniawan. Aku baca habis, khusus yang pakai bahasa Indonesia aja. Sudah aku vote, dan ini; aku komen pula, tapi tak usahlah kuresteem lagi. 😀Hehehe... Salam kenal.
Hahaha,, terimakasih sudah mampir, upvote dan komen di postingan saya bung @bookrak.
Salam.
Mantap