EVERYTHING You need to know to make Travel videos with your phone

Fancy yourself a potential travel vlogger? Or maybe you just want to capture your travel memories in catchy short Instagram vids? Here are our top 20 tips on what to look out for when using your mobile device to shoot videos.
Before you Leave - Before you head out take a little time to prepare the following:
TIP 1 - Which Apps to use
Filming
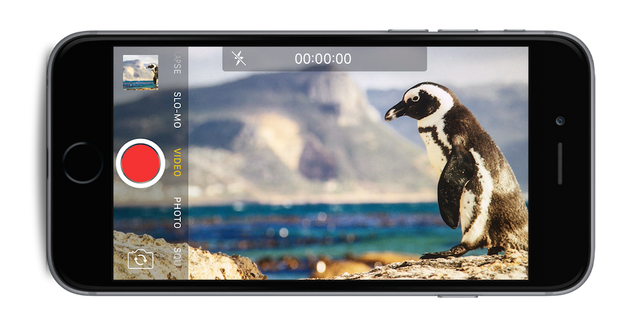
The standard camera app that comes with your Mobile Phone (iOS or Android) is easy to use and more than adequate to film great videos. There are more advanced apps out there, but filming is about technique so stick to the basic app.
Editing
Similarly, there are thousands of editing apps out there that will all do the trick. Here is a little secret, they all work on the same concept: Import, Reorder, Trim, Export. Some people just prefer certain looks & interfaces, here are our two picks:
Android
Powerdirector is a great App. The only downside is the free Version has a watermark.
iMovie for iOS
One of the easiest to use Apps out there. Free & Comes standard with iPhone.
All the mobile editing apps of 2017 - http://travelvids.tv/review-of-all-mobile-video-editing-apps-2017/
TIP 2 - Get Extra Battery Power
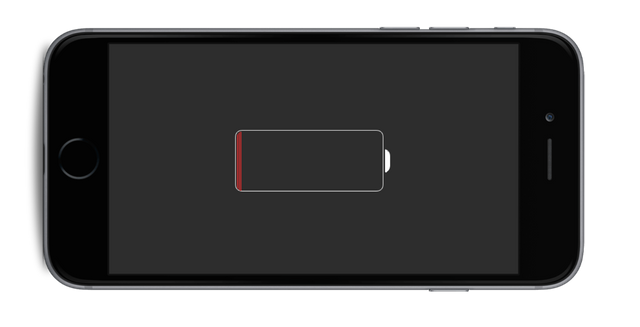
Ah dammit!
Filming is intense on your battery, especially if you are planning on being out on excursions all day. The last thing you want is to run out of battery before the end of your day. Make sure you don’t miss out on epic moments, so keep a battery-pack handy to charge on the go. It is also a good idea to always keep a spare charger with you as there are more & more charging hotspots around these days.
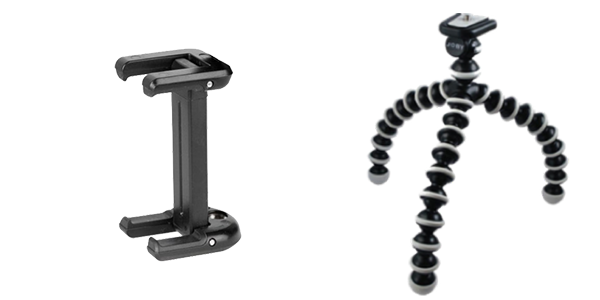
TIP 3 - Accessorize
Here are some basic accessories that really help turn your video from a home-movie into a professional mini film.
The Selfie-Stick
For a very basic hack you can use a selfie-stick to get some distance between you and the camera. This is great to give a better perspective while talking to camera as more of the background is visible. It’s great to get to places you can reach and best of all it really increases your stability while moving.
Joby Phone Clamp & Gorilla Pod
For a very basic hack you can use a selfie-stick to get some distance between you and the camera. This is great to give a better perspective while talking to camera as more of the background is visible. It’s great to get to places you can reach and best of all it really increases your stability while moving.
Small External Mic
Using an external microphone you can dramatically increase the quality of your audio.
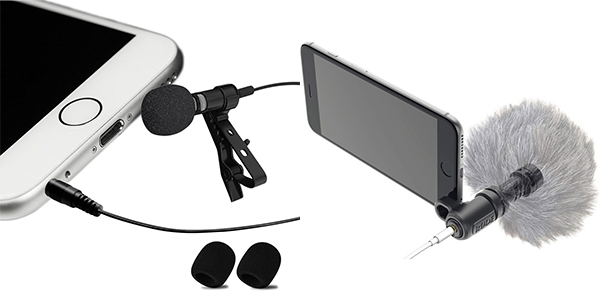
The Lapel Mic (LEFT) is great if you find yourself talking to camera most of the time.
If you prefer filming other people then rather settle for a directional zoom Mic (RIGHT).
It is naturally best to have one of each in your travel bag.
Extra Storage
Just like your battery, storage can run out quickly when you are filming. You will likely want to move your videos to a storage device. Get an external hardrive. Lexar makes products that plug straight into your phone for both iOS & Android devices.
Most Android Devices have a slot for a Micro SD Card
Remember to check the size compatibility. Some devices can only handle SD cards up to a certain capacity.
Extra Lenses
You can add clip on lenses which give you a wide angle for getting much wider shots, a tele lens for things off in the distance as well as a macro lens for really detailed closeups.
Before you Film - These next few tips are things to consider before you hit record:
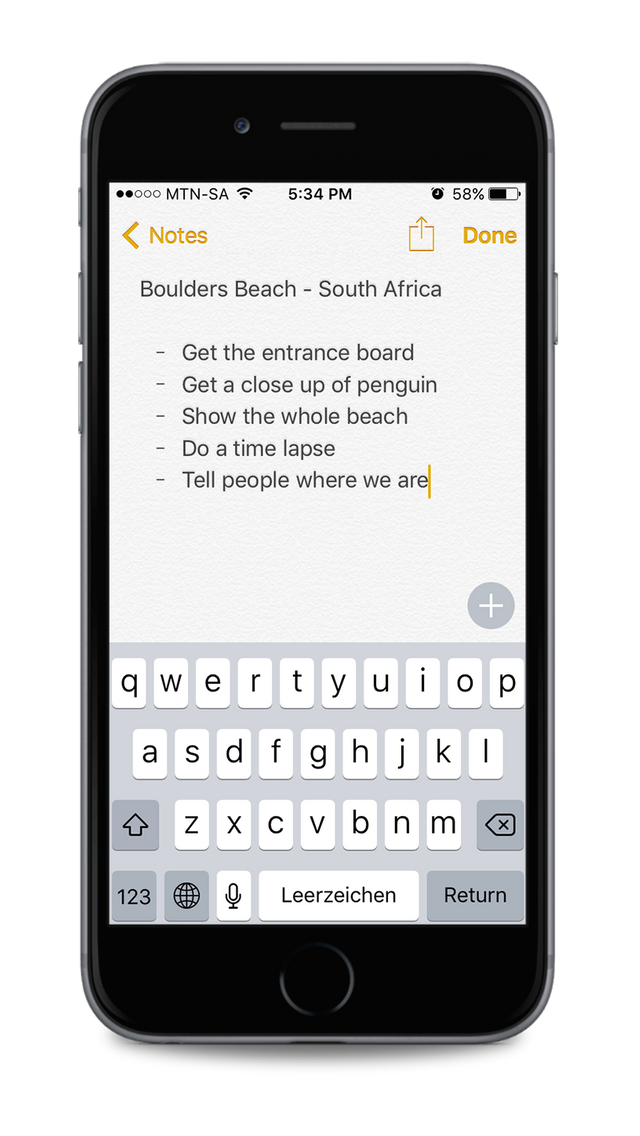
TIP 4 - Shotlist
Spend 10 minutes before you head out to think about what you are going to film. You need to tell your story, so plan those 5 - 10 “must get” shots, everything else is extra. It’s a good idea to make a short list on your Notes App or write it down on a paper. Your Shot-List is your check-List. Tick off exactly what you came to get. This process turns a collection of video clips into an engaging story.
Plan your Shoot
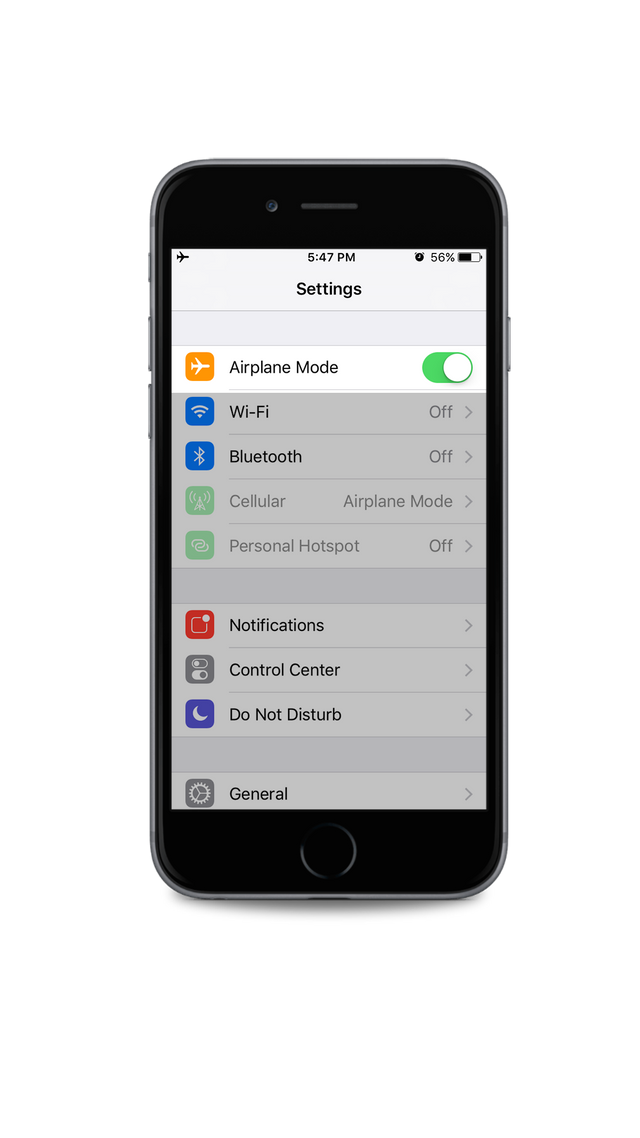
TIP 5- Airplane Mode
Whenever possible, switch your phone to Airplane mode to avoid any unwanted buzzing interruptions while you filming.
When you Film - Ok, so now you on location and you ready to start filming. Did you know the following things?
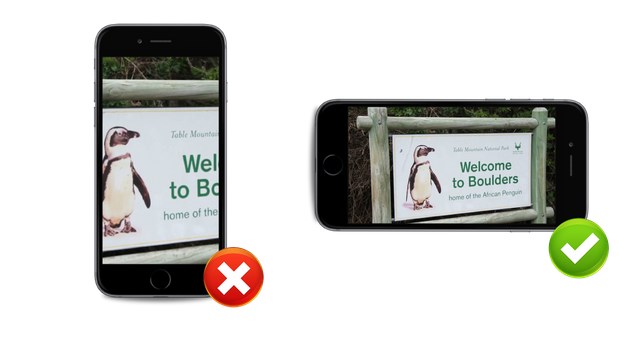
TIP 6 - Shoot Horizontal
It may be obvious to some people, but we still see people holding their camera upright. This is fine for meme’s and short Facebook clips, but if you want a cinematic video of your experience, remember to hold your phone longways to get the full 16x9 view.
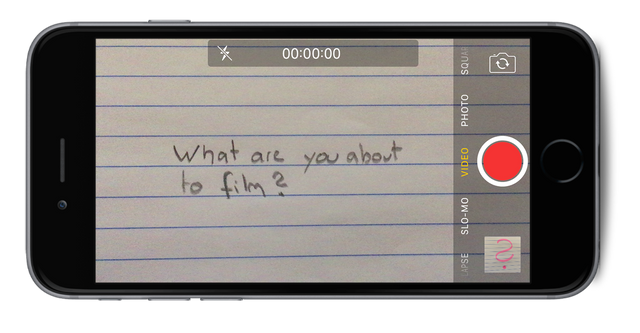
TIP 7 - Short Clips THIS IS VERY IMPORTANT
Keep your clips short and precise! This will make the editing process a whole lot easier. Don’t just film and wait for something to happen, look for the moment. That little moment is all you need to convey the story.
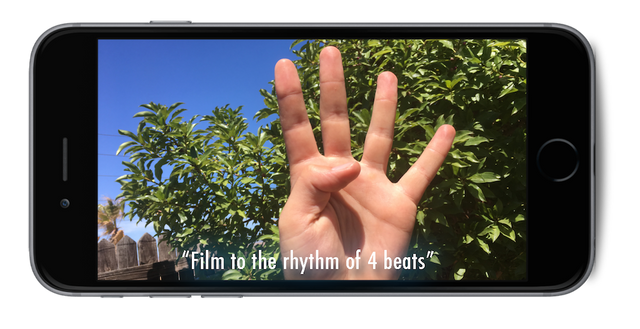
Count to Four slowly and then stop.
When you hit record silently count:
And one, and two, and three and four and Cut.
This does not necessarily represent 4 seconds, it can take longer. It is a rhythmic count to capture only short clips. Within this count you should get the part of video that you need, we call this THE MOMENT.
If “the moment” was not captured within that shot, cut, and do it again. It is better to make 5 separate short clips, where 1 is the winner and you can quickly delete the other 4, rather than looking for the moment in one long clip afterwards.
TIP 8 - Composition
When you pick up your Phone you should know what the purpose of the clip is before you even hit record. Too many people see a nice scene (like penguins on the beach) and just point their lens at everything hoping to capture what their eyes see.
Ask yourself: What is the purpose of this shot?
In a movie, every single shot has a purpose. It tells us something about what we are watching. Your experience video should do the same. Break down what you are seeing into various parts. Film a unique clip to capture each aspect. Which brings us to:
TIP 9 - Variety of Shots
Let’s stick to the example of Penguins on a beach. There are many things happening here. There are birds, waves, the beach, people and a sunset in the background. Flailing your camera around at all of them will not do your video any good. Each one deserves at least one, if not two unique shots. There are 3 types of shots to choose from:
The Wide
This sets the location. Perhaps you want to show the landscape like the beauty of the beach & how many penguins there are? Remember try keep your wides still. If you would like to pan left or right do it slowly and steadily.
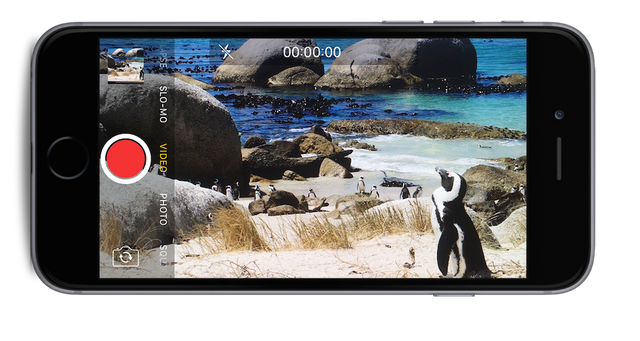
THE WIDE
The Medium
The medium shot is slightly closer in. This is great to show 2 or 3 birds interacting. This sets the activity or action. You can also use medium shots to film portrait shots of your friends/family. The Medium usually covers head to waist.
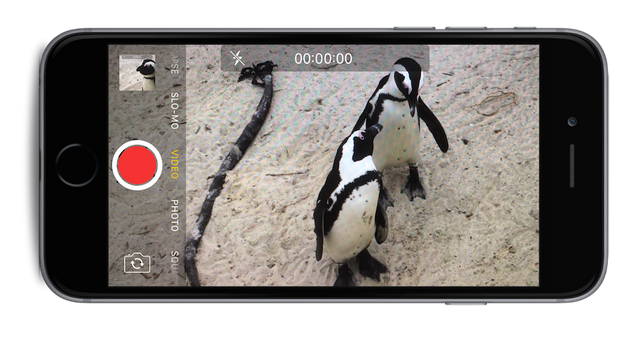
THE MEDIUM
The Close Up
(aka The CU). This shot is when you are zoomed in or as close to the subject as possible. It fills the screen and is the most obvious to show your “focal” point. (or the reason you came)
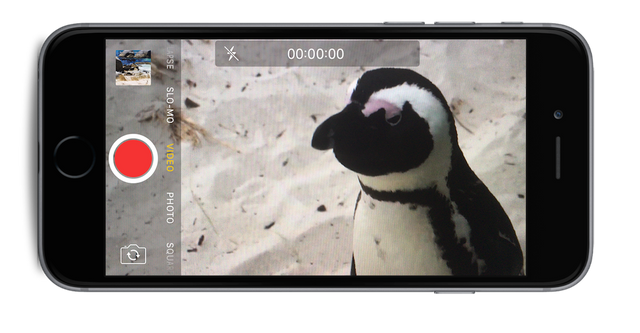
THE CLOSE UP
Please note that one should avoid zooming on phones unless you actually have a optical zoom lens. If you don’t know what I’m talking about just avoid zooming and rather try get closer to the subject.
TIP 10 - Stability
As previously mentioned, accessories like a tripod or a selfie-stick aid in the stability of your shots. You can also use your surroundings like a pole or wall to lean against to steady yourself. Now, whether you are using these or not these are some tips to help you steady yourself naturally.
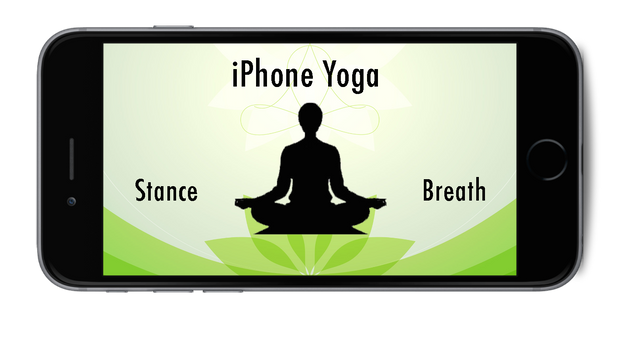
oooohm
Stance
Make sure you are not standing with your legs crossed. Get your feet nice and firmly on the ground about shoulder width apart and bend your knees slightly. Keep the camera in front of your chest with with your elbows bent. This stance will provide you the best stability possible. Don’t hold yourself stiff. If you want to walk forward as you film, remember to take the bounce off by keeping your knees bent moving forward in a semi-crouch like position.
Breath
The second key element is not to hold your breath while you film. Take a nice deep breath just as you start recording and exhale slowly as you take the shot (and count). When you need a really steady moment the exhale is your best friend.
TIP 11 - Timelapse & Slow Motion
These two elements can add an incredible amount of “cool factor” to your video. Not all phones have them build in so you might want to find an App that allows you to capture Timelapses & Slowmos.
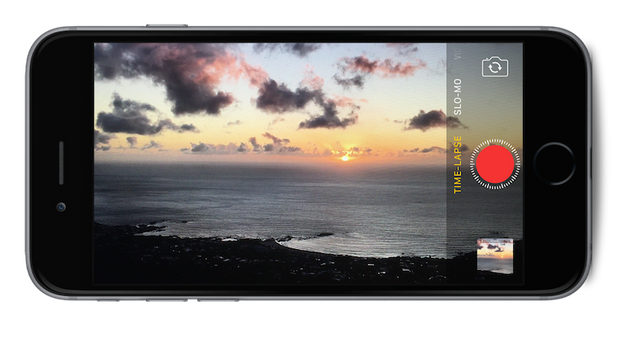
Timelapse
For this you will need to keep the camera dead still, preferably using a mini tripod. For a great time lapse you need to keep the camera rolling in place for at least 5 to 10 minutes (naturally it will depend on what you are filming). In order for a time lapse to be effective you need to frame up something that is moving in contrast to something that is not. This could be like clouds over a mountain, boats bobbing in a harbour or traffic passing-by a busy intersection.
Slow Motion
Slow motion also only really makes sense when the subject is moving, especially when it’s going fast. Anything to do with action and water is always a winner. Remember not to film for too long. The clip will always be much longer than the time it took to film. Short bursts are good.
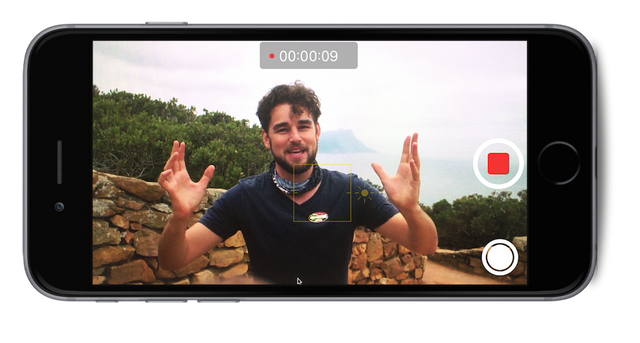
TIP 12 - Talk to your Audience
You are the best storyteller, of your own experiences. Talking to camera adds a social aspect that makes a video incredibly watchable. When talking to camera be prepared with something to say, like, where you are going, where you are, or what you just saw happening.
You may need to practice a few times before you record, or if you flop it, don't worry, it’s digital, just do it again. This is a vital part of making your video engaging. If you don’t like being on camera or don’t feel comfortable talking to camera, get a friend or family member or stranger to say something. Remember to are actually talking to people on the other side of that lens.
TIP 13 - Lighting
Lighting is one of the most important parts of making something look good on video. So why is it not higher up on our list? Well, because 95% of the time the places you are visiting are either naturally or artificially lit anyway. Lucky you, but you will need to know how to manipulate it to suit you.
You just have to ask one question: Where is the light coming from?
Then always try and keep the light source behind you, so that your subject can be well lit.
TIP 14 - Stick to the Shot List & Have Fun!
The idea of filming a travel experience is to get away and experience the place you visit with your eyes and not through your lens. Too much of our time is spent on our phones anyway, so the best thing you can do is spend as little time as possible filming but still show the world: “you were there”. But how?
Remember we said make a short shot list. Tick off the shots you came to get. Once you have them, pack your phone in your pocket and enjoy your experience while it’s happening.
LESS IS MORE
After you done Filming - Time to take what you’ve filmed and edit it into a watchable video.
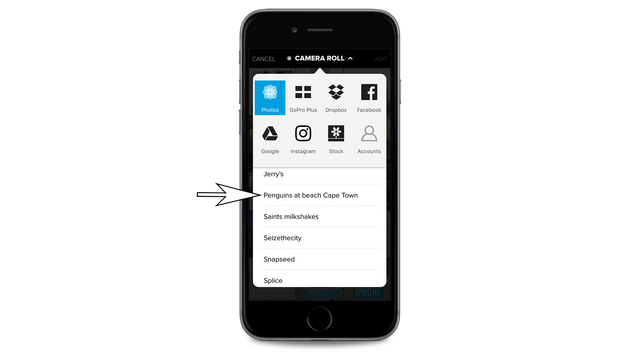
TIP 15 - Organise Clips
Our phones are a dumping ground for media. After a holiday we all have tons of footage we don’t know what to do with. One of the most important aspects of turning these into short watchable movies is to keep things organised as you go. It’s really easy to do.
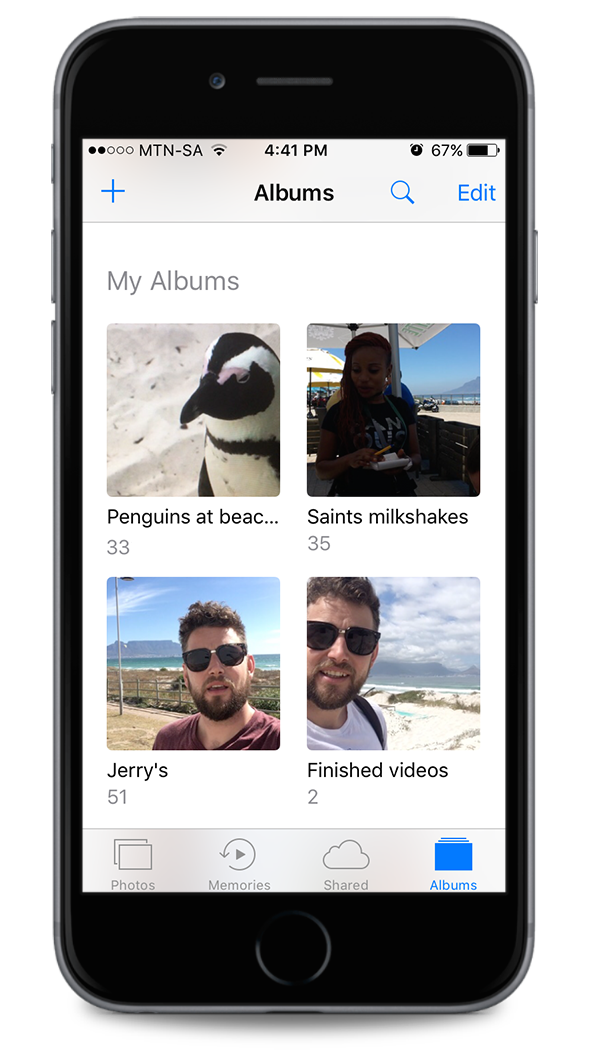
At the end of your filming session, or after a specific activity, go to where your clips are stored and select all the clips that belong together. Move them to a new album and rename the album to something like: “Penguins at beach”. Each time you film a new activity or at the end of each day, group these clips into a new album. This literally takes 2 minutes if you do it right away and saves you hours later.
TIP 16 - Editing one part at a time
Now that you have all your footage stored in a manageable way it’s time to get to
the editing. Edit each album as new project or a unique video. There are two main
reasons for this:
ONE. It's easier to edit when you only working with bite sized pieces. You can always stitch the pieces together to make a longer video afterwards. But...
TWO. It’s easier to watch shorter videos and people want to watch shorter videos today anyway. The days of sitting through 2 hour home-videos are long long gone. Enter the age of 1min Instagram videos.
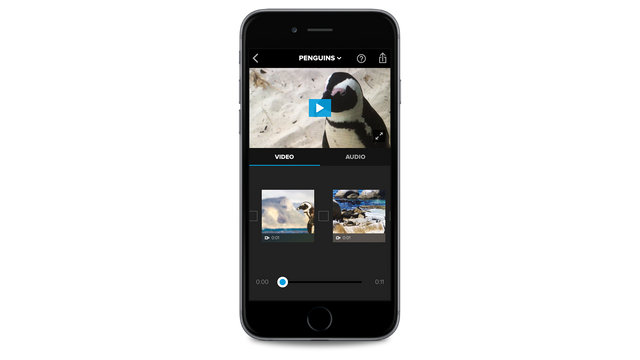
TIP 17 - Import an Album (Exercise)
Getting to know your editing app takes a little bit of time. I suggest you practice with a few clips taken at home. Film 10 clips of anything and place them in an album. (We are using SPLICE by GoPro in the graphic demos).
- Open the App and start a new project.
- Find the option to import that specific album.
- Select all clips and add them to your project.
TIP 18 - You can't break it, so play.
Ok, here you are. Ready for your first edit. What now? It’s simple. Tell your story from beginning till end. Follow these steps:
- Reorder the clips into a logical sequence
- Trim each clip to just its best part
- Add music
- Export
You have to play around. Don’t worry, it’s digital, you can’t break it! Experimenting is the best way to learn. If it completely fails, just delete the project and start again. Remember if you keep your projects limited to 10-20 clips (each 4-6 seconds long) the project stays manageable. This will give you roughly a 1 minute video and should only take about 15 minutes to edit.
TIP 19 - Fancy Video Transitions
Guys, we left the 90’s behind us! As retro as some things may become, those terrible star zoom boom shake cross fade effect are best left out. Straight cuts between clips are more professional and cinematic, so resist the urge to use the fancy ones.
TIP 20 - Remove unnecessary Audio
When you don’t need the audio of a clip, make sure to mute or delete it. Although you may not always hear it clearly on your Phone, it can be noticeable on other devices and is very distracting.
Download this page here: http://travelvids.tv/how-to-create-vacation-videos/
Congratulations @travelvidstv! You have completed some achievement on Steemit and have been rewarded with new badge(s) :
Click on any badge to view your own Board of Honor on SteemitBoard.
For more information about SteemitBoard, click here
If you no longer want to receive notifications, reply to this comment with the word
STOP