Tiny House Episode 4: Foam Board insualtion
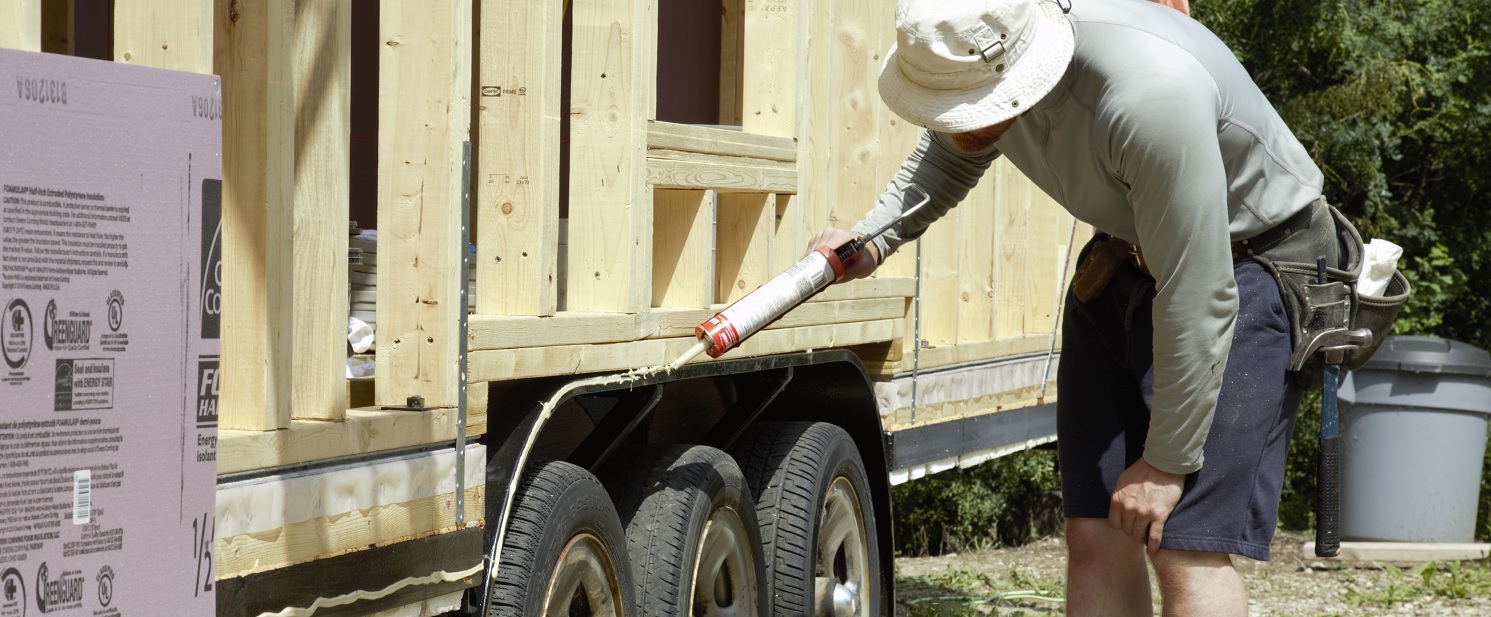
In our severe winter climate, the number one reason we choose to build a tiny house rather than modify an RV was so that we would have adequate insulation. The first thing we tackled was the trailer. As was mentioned in Episode 1 we installed foam board into the trailer frame itself. I was able to get 3" and 2" thick foam board that was left over from the construction of a regular energy efficient home. I didn't get it for free but it was extremely inexpensive which saved us a few hundred dollars. What a lucky find!
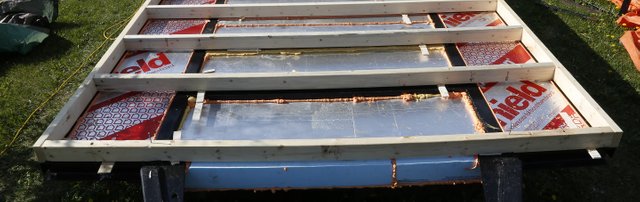
I installed two layers of this thick foam board in the trailer; either two layers of 3" or one layer of 3" and one layer of 2". We didn't have any way to nail or screw this foam board in place so we cut it just a little big to create a friction fit and glued it in with a construction adhesive. If you choose this method, make sure that the adhesive you select won't melt foam. Adhesives will usually indicate on the tube whether they are compatible with foam but testing small amount on a piece of waste foam first is always a good idea. The last step was to use spray foam to seal any cracks or potential air leaks where the trailer met the foam board.
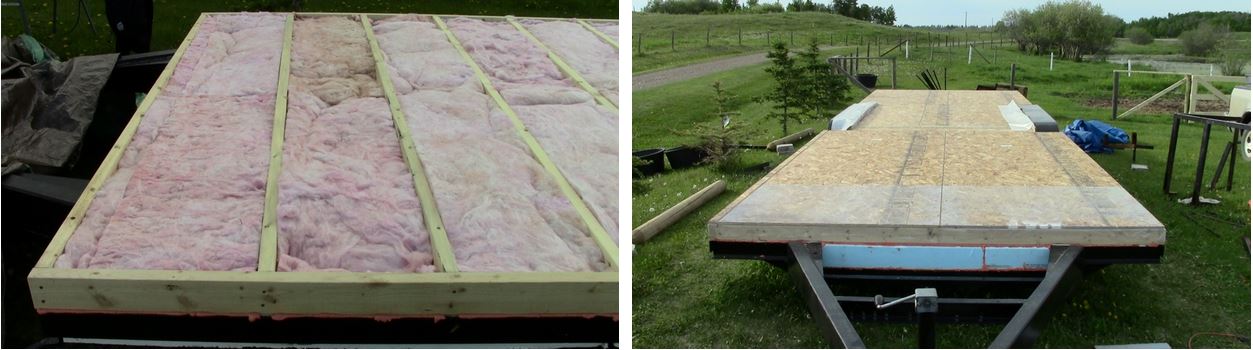
Once the foam installation was done we added the main trailer deck, which also had fiberglass batting in it. All in all we have R25-30 of foam board in the trailer plus R-12 of batting in the floor. Once this was completed we moved onto the walls. We debated whether we should use 2x4" or 2x6" walls. Eventually we decided on 2x4" walls with a half inch of foam on the outside. This decision gave us almost the same insulating value as a 2x6" wall without foam and allowed us to have 3" more width on the interior of the trailer. The maximum width of a trailer that can be pulled without getting permits is 8'6".
The foam board, although not extremely thick, does help to prevent thermal bridging and provides a modest but noticeable increase in the R-value of the walls. Wood has an R-value of about 1 per inch of thickness. With 2×4″ walls this would give us an R-value of only 3.5 at the studs. The 1/2″ foam board has an R-value of 3 so where it overlaps the studs the R-value is increased to 6.5 which is almost double. This makes a big difference in the winter by reducing cold spots along the walls.
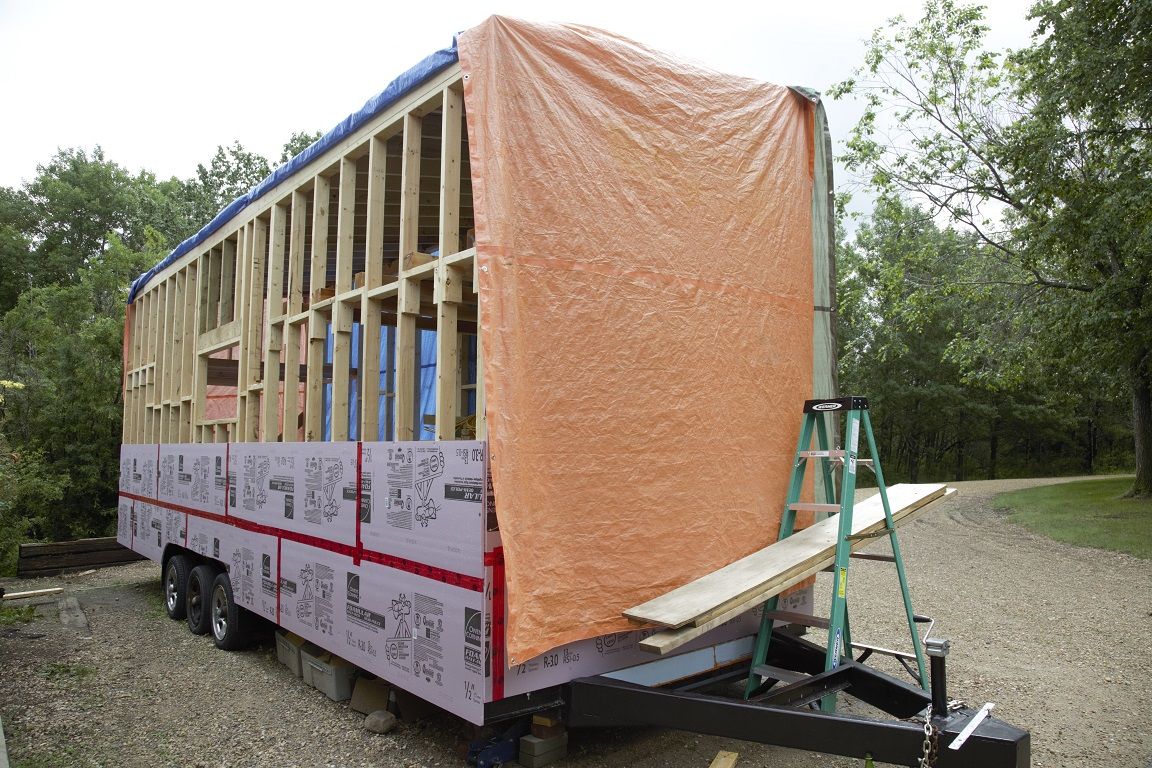
The first step to the foam board installation was to measure and run a chalk line along the studs to ensure the foam boards were installed evenly along the house. The house is quite long so I had break up the chalk line into three different segments along the sides.
I secured the foam board with 1 3/4" roofing nails. There are special nails made specifically for foam board but they are expensive and wouldn't have laid as flat as the roofing nails anyway. Where the foam board came into contact with the metal trailer I couldn't use nails so I used construction adhesive instead.
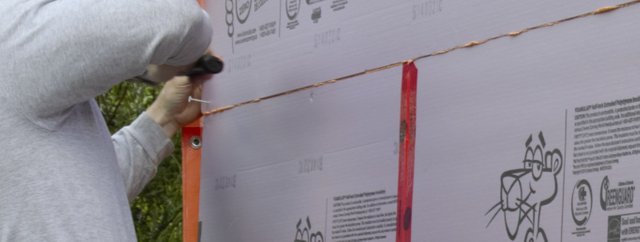
By spray foaming and taping the seams of the foam board it is now able to perform double duty as both insulation and a vapor barrier. I also made sure to nail close to the edges of the board so the tape would cover the nails to prevent water and air leaks. At this point in the build waterproofing the house was important for us because we didn’t want to have to deal with another flooding incident.
A short progress video I made where I discuss the foam board installation.
If you would prefer to watch the video on Dtube I have uploaded it here.
I was having some issues with Dtube, I think my file size was too big. In the future I will be posting any relevant videos to Dtube sooner and linking to them in the main blog post.
Way to go @canadianrenegade!
Thanks!