Awesome Screenshot - Browser Snipping Tool
Introducing Awesome Screenshot

Are you tired of using the same old Print Screen command? Tired of editing and removing the taskbar and browser tabs on the screenshot? Then if you are this post is for you.

I will be sharing a valuable tool that I always use. As a Web Developer I always need to screenshot the browser, taking screenshots of errors, or even creating instructions on the interface on how to use some certain functionality. It is very essential to have this tool in my opinion. Well this tool is not only for developers as it has many uses too. Some of my posts here on Steemit have screenshots from websites which I used Awesome Screenshot. I will be sharing this tool to you today. I know this tool will be useful to everyone.
What is Awesome Screenshot?
Basically it is a tool to capture any part of a web page. Add annotations, comments, and quicly download the image. This tool is available as browser extensions/add-ons for browsers like Google Chrome and Mozilla Firefox. You can find it here for Chrome and on Firefox
You just need to install these extension or add-ons to use it. Once you are done installing it, it will then be added to your browser. A lens icon will be added at the top of your browser It will look something like this.
So basically here is the flow
- Get a screenshot of the page.
- After the screenshot you will be directed to a editing tool where you can make some edits to the image.
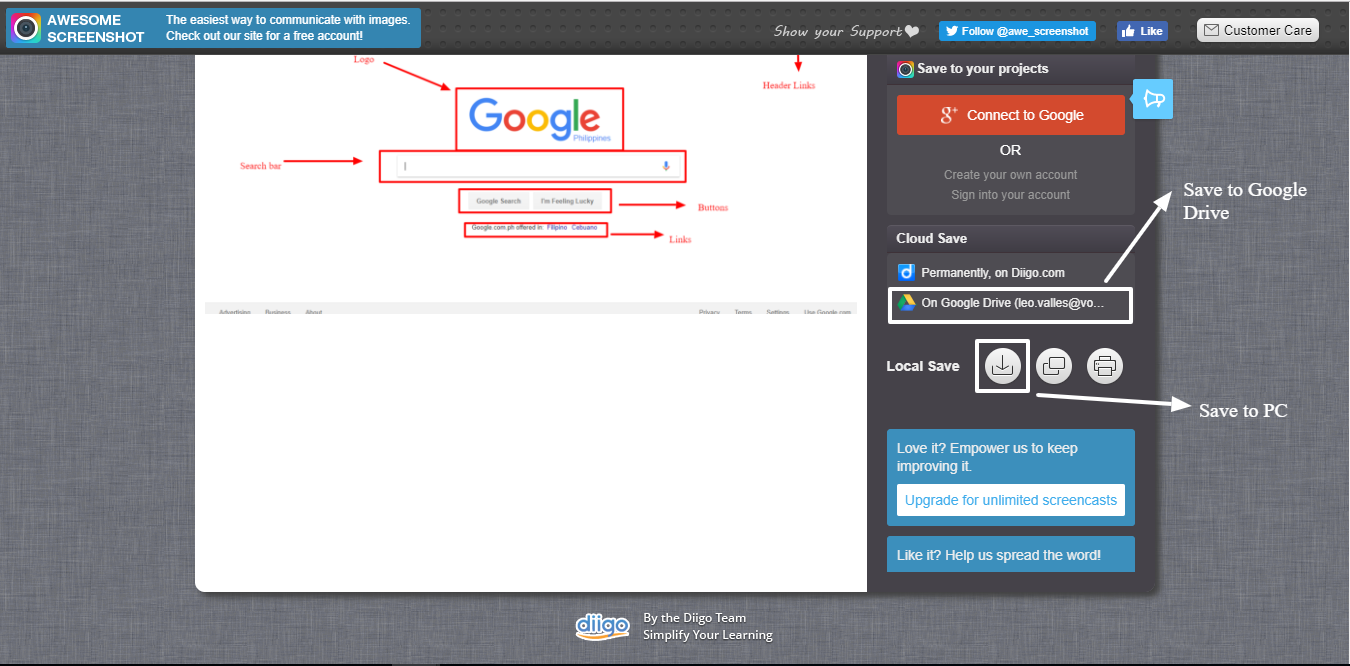
- Save the screenshot either save it to your PC or save it to the cloud on Google Drive.
How to use it
To use it you just have to click on the icon and a dropdown will appear. There are also shortcut keys to execute commands. On the dropdown there are many options at your disposal namely:
Capture Visible part of page - Capture the visible part of the page which means it will capture the part where you are on the site the visible part. You can also set it capture with a delay with the Delayed Capture Option. Here is an example of the result:
Capture Selected Area - When you select this option a selector will appear and you can drag and drop the selector it is similar in functionality with the crop tool.
Capture the entire page - This will capture the entire page, scrolling from top to the bottom of the page.
Select a local image - This tool has an image editing tool buit in where you can add text, shapes, lines, and crop the images. Here is what the image editing tool looks like:
After editing the images you can now save it click on the Done button at the top right corner of the page. You have 2 options to save the image either save it locally or save it to google drive.

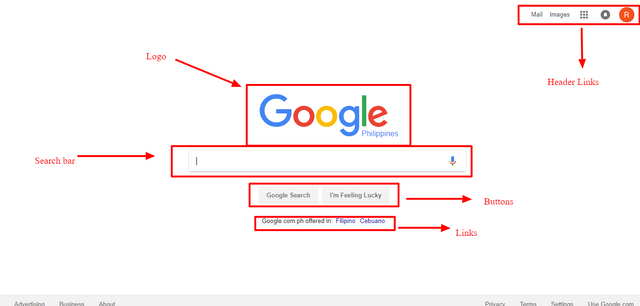
Final Result:
An example on what can be done using the image editing tool.

I hope you learned something new today. Thank you very much and Steem on!


Image sources:
https://www.canva.com
https://addons.mozilla.org/en-US/firefox/addon/screenshot-capture-annotate
https://giphy.com/


It's quite a handy tool. I'll be using it in the future. Thanks :)
You surely will i have been using it for years one of the great tools to have on your browsers.
This tool has been very helpful to me
Thank you.
Cheers!
Cool! Yes this tool is awesome. Cheers!
That's amazing tool man, like it.
Thanks man it will be helpful to everyone, I have been using it for years. I use it frequently for my steemit posts too.
I will definitely try it.
@vallesleoruther got you a $7.56 @minnowbooster upgoat, nice! (Image: pixabay.com)
Want a boost? Click here to read more!
This post has received a 0.45 % upvote from @drotto thanks to: @banjo.
nice
Thanks for commenting, you should try using the tool :) Cheers