How to Install Linux BASH on Windows 10
BASH is a Shell or Command Line Interpreter that is used to execute text commands on UNIX based operating systems such as Mac OSX and Linux. Microsoft has now made it possible to install and use a Linux BASH terminal directly on Windows 10.
This is not some kind of BASH emulation; you can use an actual BASH terminal running on a real Linux distro (within Windows).
Why would you want to do this?
Well, certain software development tools may be designed to work exclusively with BASH (and hence you would previously have required a Linux/Mac OSX machine to run them). For example, its preferable to use BASH with certain blockchain development tools (such as Ethereum or EOS).
Microsoft’s new Windows Subsystem for Linux allows you to install Linux distros (which run on top of Windows) and allow you to use your BASH based development tools while in Windows 10.
What’s more, Microsoft has made it really simple to install. Here’s how to do it:
Note: You must have Windows 10 installed, and fully updated (this won't work with earlier versions of Windows)
1. Turn on ‘Windows Subsystem for Linux’
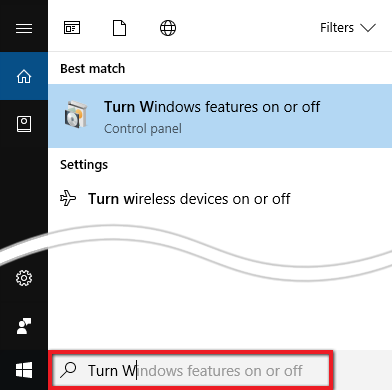
Go to the Windows Search Box and type:
Turn Windows features on or off
Even before you finish typing this phrase, an option to do this should appear in the Start Menu. Click on this.
A Windows Features window should appear.
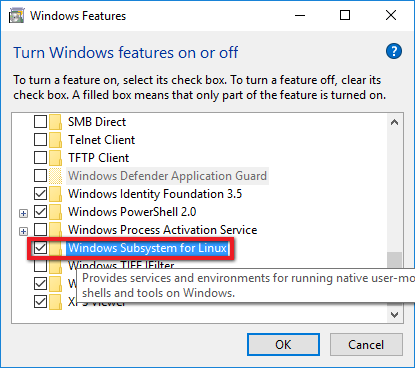
Scroll down the list of options, and tick the checkbox labelled ‘Windows Subsystem for Linux’. Click the 'OK' button.
Once Windows has finished installing this subsystem, you will be prompted to restart Windows:
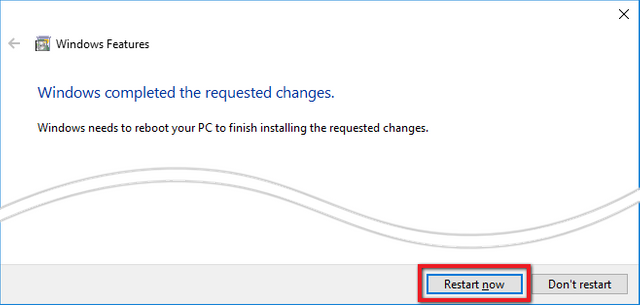
Go ahead and click the ‘Restart now’ button.
2. Install the Ubuntu App
Once Windows has restarted, open the ‘Microsoft Store’.
(You’ll probably find this in your Start Menu. If not, you can find it by typing “store” in the Window Search Box, ‘Microsoft Store’ should then appear as a suggestion in the Start Menu.)
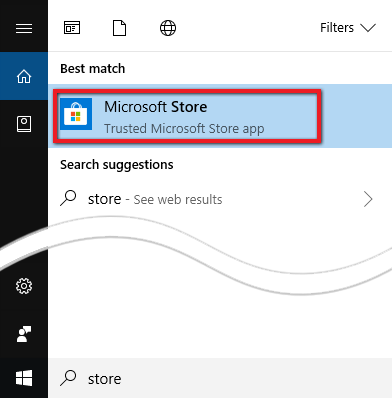
The Microsoft Store window should open.
We are going to install a version of Linux called Ubuntu (there are however other Linux distros available through the store if you prefer)
In the store’s search box type:
ubuntu
Click on the Ubuntu App suggestion in the drop-down menu.
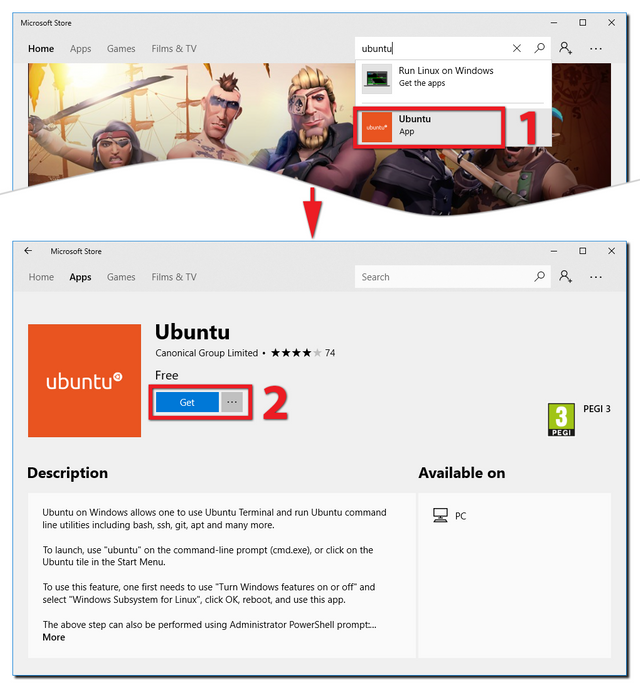
On the Ubuntu app page, click the ‘Get’ button.
Once the installation is complete you will see a ‘Launch’ and a ‘Pin to Start’ button.
(You can click on ‘Pin to Start’ for easy access to the Ubuntu Terminal later on.)
Click on the ‘Launch’ button.
3. Configuring your Ubuntu/Linux installation
The Ubuntu BASH Terminal will now open.
Since it is the first time that this has been opened, it will still need to install a few things.
You will see the message:
“Installing, this may take a few minutes...”

Once installation is complete you will be prompted to provide a UNIX username and password for your user account (Linux/Ubuntu is a UNIX based operating system).
Make sure you make a note of these, you will need them when making changes to your Linux installation.
Next, we will need to run a couple of commands to make sure our Ubuntu installation is fully up to date.
Firstly, enter this command into the BASH Terminal:
sudo apt-get update
You will be prompted to supply your UNIX password.
Ubuntu will start updating package lists, this may take several minutes...
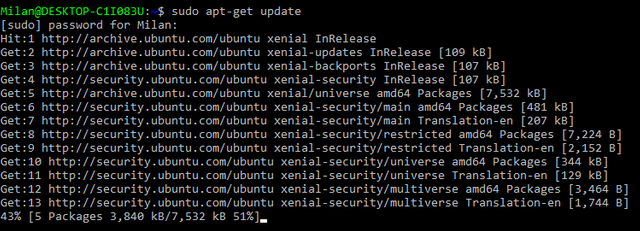
Secondly, use the command:
sudo apt-get upgrade
If you want to know what the sudo apt-get update and sudo apt-get upgrade commands actually do, please take a look at: https://itsfoss.com/apt-get-linux-guide/
All Done!
Once BASH has finished upgrading your installation, you are ready to go!
Just to test your new BASH Terminal, use the command:
pwd
(this is short for Print Working Directory)
The Terminal should respond with:
/home/YourUserName

Ok, that’s it for now. In a future post I will cover a few basic commands, as well as how to work with the BASH Terminal in Windows.
