How to build a $15 Old-School Arcade Emulator and Netflix-Worthy Media Center
Cheap Chinese electronics... They are usually made on the same production lines as major 'quality' manufacturers. Which means that (usually) the quality is right up there with the brands we all know and trust.
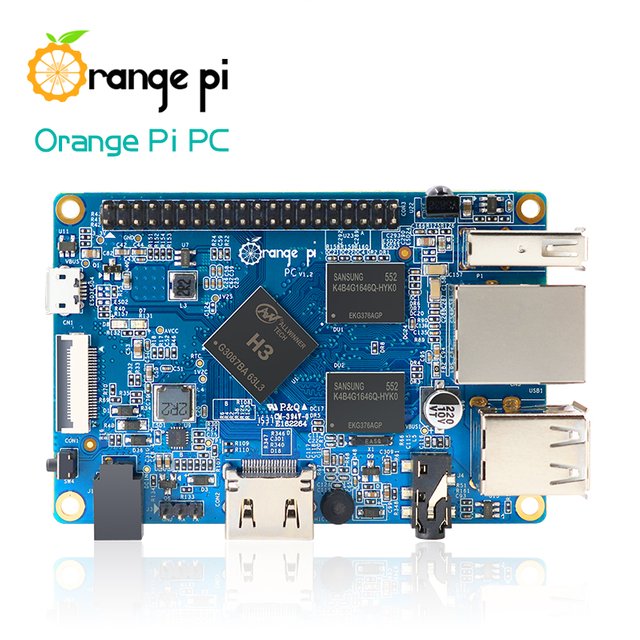
Two months ago, @faddat showed up in Siem Reap for the SE-Asian Steemit meetup. In his bag were 4 small circuit boards. Turns out they were cheaper versions of the Raspberry Pi, called the Orange Pi PC. These funky little devices are the Chinese versions of the Raspberry Pi, complete with 'Sansung' (sic) memory chips!
But I can't find a bad thing about them though. After a week of tinkering I had a full blown arcade and (older) console emulator. Combined with SMB shares to create a fileserver AND a full working version of the Kodi media player. Get yourself an Orange Pi, Aliexpress still has a few vendors that sell them.
Make sure you get the Orange Pi PC, there are quite a few models out there. The link above is for the correct version.
Orange Pi PC
| Hardware specs | |
|---|---|
| CPU | H3 Quad-core Cortex-A7 H.265/HEVC 4K |
| GPU | Mali400MP2 GPU @600MHz |
| Memory | 1GB DDR3 |
| Storage | TF card (Max. 64GB) / MMC card slot |
| Network | 10/100 Ethernet RJ45 |
| Video input | A CSI input connector Camera. Supports video capture solution up to 1080p@30fps. |
| Audio input | MIC |
| Video output | HDMI |
| Audio output | 3.5 mm Jack and HDMI |
| USB | Three USB 2.0 HOST, one USB 2.0 OTG |
| Peripherals | 40 Pins Header,compatible with Raspberry Pi B+ |
| Supported OS | Android, Lubuntu, Debian, Rasberry Pi Image (unofficially a lot more!) |
| Product size | 85mm × 55mm |
| Weight | 38g |

Installing your image

This couldn't be easier. All you have to do is install the image file on the sdcard, slide it into the Orange Pi, boot the damn device and you're done!
I know, it's ridiculously easy...
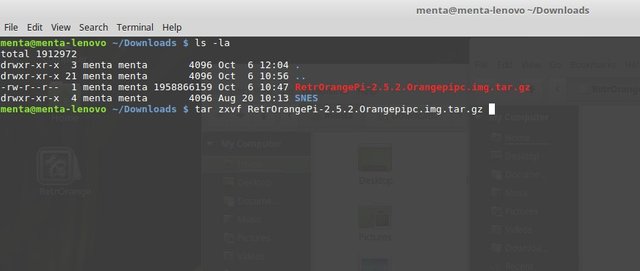
The image we're looking at is called Retropie. This cool piece of software turns your device into a retro-gaming machine. We'll install it completely from scratch by using a pre-built image for our device.
You'll want the correct image for your device though. Luckily, some geeks have already done all the hard work for us, and we can just grab the image file from a shared Google Drive location!
The people at orange314.com, have listed all the resources we needed. You can access the latest ones here: https://drive.google.com/drive/folders/0B8Dh1_wAL84aLVJXa2lsdDFIYk0
For this tutorial, we'll use the Opi-PC 2.5.2 image. Download the 1.8GB image to a folder on your hard drive. In the meantime format the sdcard in FAT32. If you're using Windows, you'll have to use win32diskimager to copy the RAW image to your sdcard. If you use linux, follow the next steps to get the image on your sdcard.
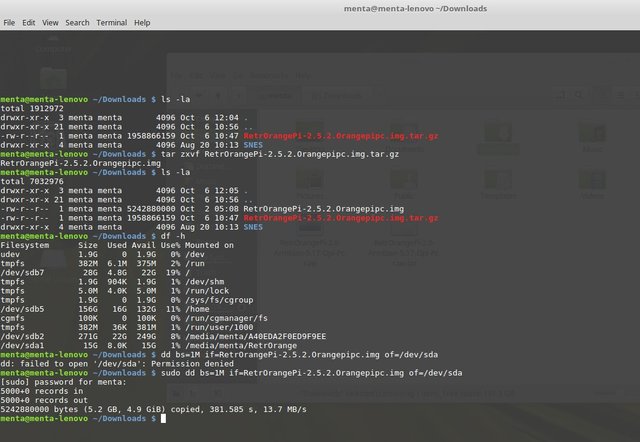
Once it's done, remove the sdcard and plug it in your Orange Pi!
(Windows users, use this guide to install the image on your sdcard.)

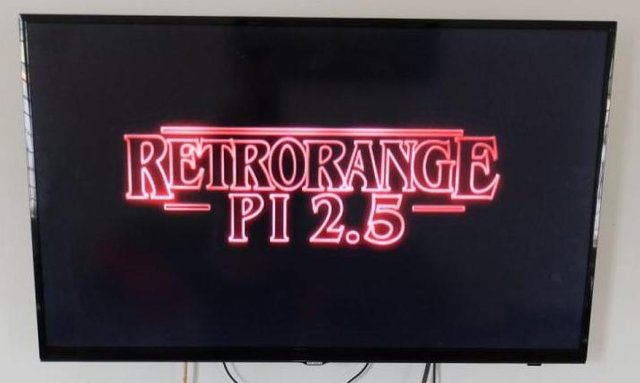
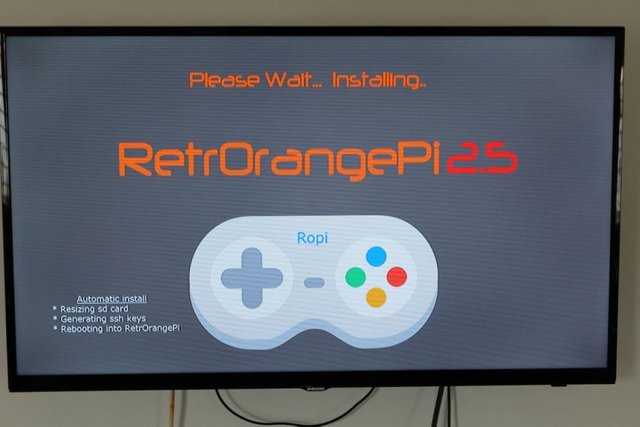
Time for the exciting stuff. Connect your Orange Pi to the network, TV, and power and see the magic happen. You can connect any controller you want. Or just use a mouse and keyboard. The Orange Pi's 3 USB ports give plenty of possibilities. I had an Xbox controller lying around that worked straight out of the box. After a couple of seconds you'll be greeted by an awesome RetrOrangePi 2.5 intro and the system will start installing all by itself:
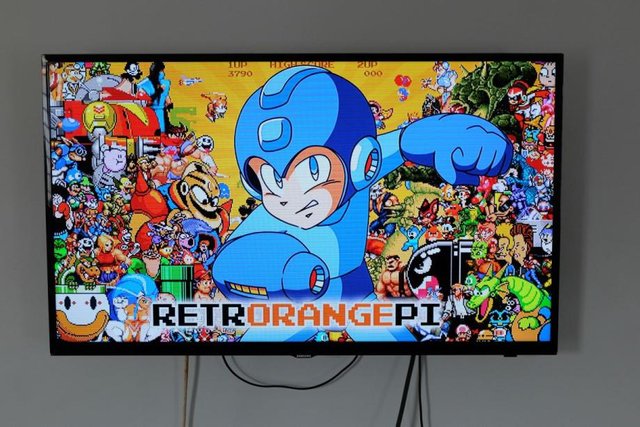
And we'll be greeted by an awesome retro splash screen once it's done:
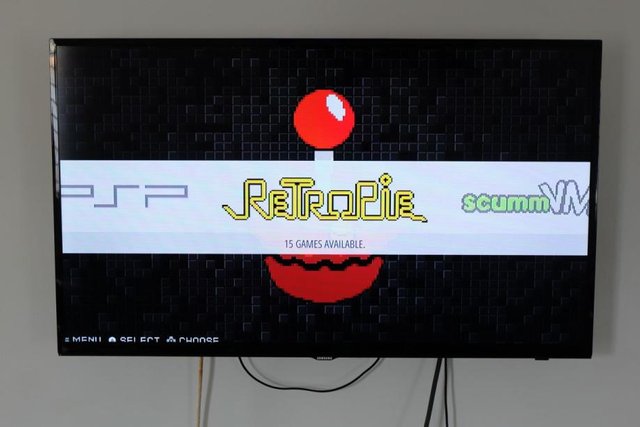
And eventually you end up in your main Retropi menu.
That's it. You now have a working media center and retro-gaming station. But to get the most out of it, we'll also enable the filesharing capabilities of Retropie by creating samba shares. These will be then accessible by any device on the network.
The following steps show exactly how to enable your shares:
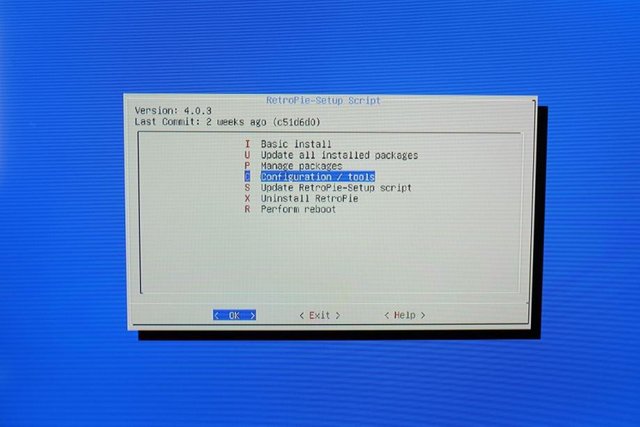
First go into the Retropie settings menu and choose 'Retropie Setup'.

In the next menu, choose 'Configuration / Tools'
Scroll down until you see the menu option 'Samba - Configure SAMBA ROM shares'
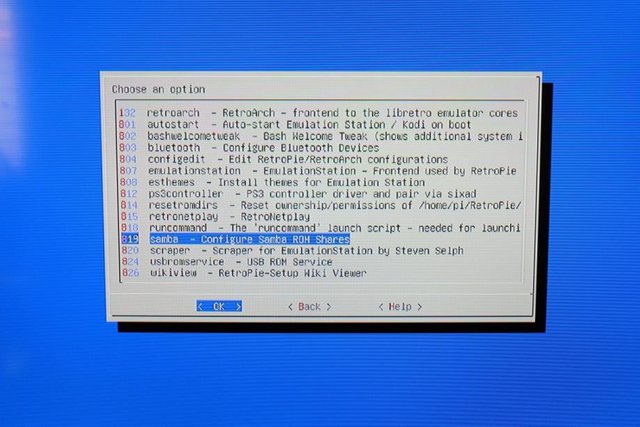
And finally choose 'Install RetroPie Samba shares'

You can now access your Retropie on the network! Windows user can access the shares by going Start => Run and typing \retrorangepi
This will open up a explorer window with the filesystem of the Orangepi.
Linux and mac users can do smb://retrorangepie to access the shares.
And that's about it. You can now enjoy your $15 media center and impress your buddies with old-school arcade gaming in the living room! The media center is called Kodi and has tons of cool features. I think it blows netflix out of the water. Especially with certain addons installed! But since that brings us in uncharted legal water, I'll leave it up to you what those addons are!
If you want to know more about this kind of stuff, feel free to hit me up.
See you later!
Menta
More info:
http://orange314.com/RetrOrangePi
https://github.com/RetroPie/RetroPie-Setup/wiki/
reminds me Shenzhen :D cc @faddat
Right?
Fucking GFW. I never knew that I'd meet another GFW refugee on a blockchain-based social network, though... lolz
Much approval of this message. OPi is some of the best HW available at any price, available at a volume-driven incredible price.
Was just talking with a friend of mine about arcade sims today! Had no idea about it really, but super interesting stuff. So funny to see this post pop up on Steemit today. Followed.
great article. thank you. I have known the same thing about the factory line so that was cool you mentioned that too.