How to shoot 4K video on your iPhone
4K video is all the hype now and it is being implemented as a feature in many high end smartphones. It is also a feature that is commonly overlooked and forgotten about by the masses. Most users just want a device that record video extremely well and most companies do a good job in fulfilling that requirement. Nevertheless, there is a niche crowd of photographers and videographers who prefer having 4K video to assist with their takes.
If you are in that crowd, you will be pleased to know you can shoot 4K video on your iPhone. Moreover, you can even change the frames per second to give you the smoothest video with the highest number of pixels. The first iPhone that was able to shoot in 4K was the iPhone 6. This means if you’ve got the 6 or a more recent iPhone running at least iOS 9, you’ll be able to super-charge your camera’s shooting.
How do I enable 4K video on my iPhone?
This process is not as easy as one might assume. You can not just open the camera and start recording. It involves a bit of tweaking in the settings menu but rest assured it is not too difficult to accomplish.
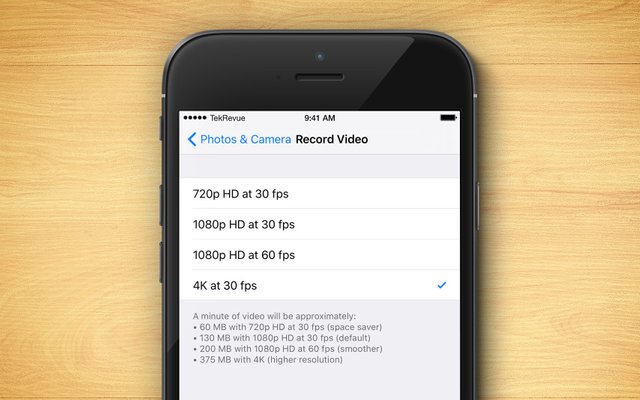
On your iPhone go to the Settings. From here click on Camera. Once you are in this menu click on either Record Video or Record Slow Mo. Once you are in this, you are given an array of options in a list form. Select from these your preferred resolution. And that’s it! You are done. You can now continue shooting videos in your required resolution.
Do not forget the fact that increasing the resolution and frame rate of the video will cause an increase in the final video that will be saved on the device.

