How to create a USB bootable.
To begin explained to them that it is a USB bootable. A bootable USB is known as a Pen drive that works as executable from any operating system or various applications depends on your needs.
The use of bootable USB as time goes by is becoming more common, since many times we find that some discs no longer work for us, because carrying a USB is more convenient or simply because the disk drive of the machine that we want to configure does not work or does not have one.
The latter was the case that happened to me a few months ago, I needed to format a PC but it had a damaged disk drive and I felt the need to learn to create a USB of these characteristics to be able to do this work, then I will give you a brief review of how to perform this simple task:
- We must connect the USB drive to the computer. This must have a minimum capacity of 4GB.
- Click on the Start button and type cmd.exe.
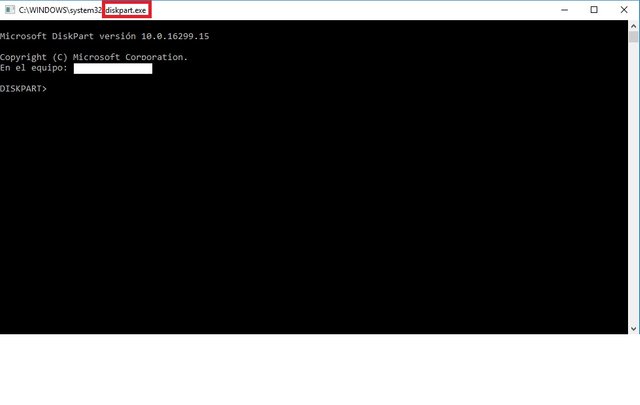
- After opening the cmd, we write diskpart.exe and press enter.
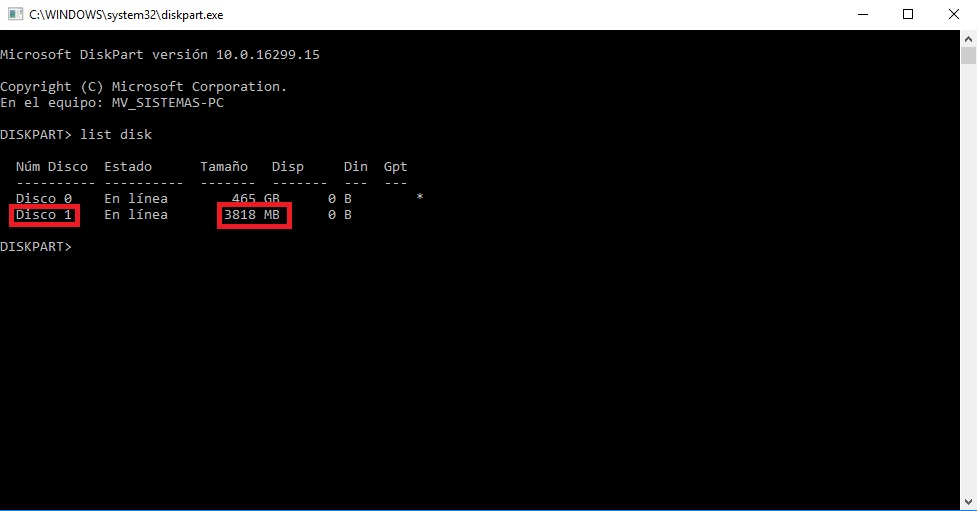
- In DISKPART, we write list disk and enter to see the list of available discs and here we identify our USB.
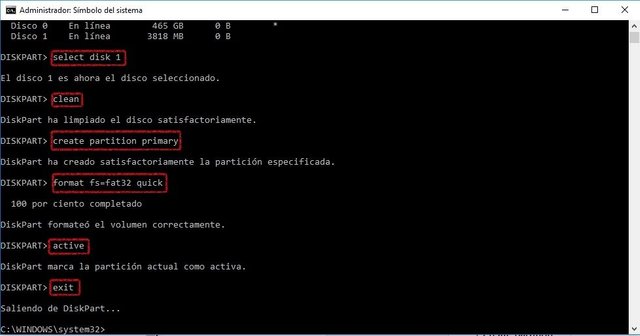
- Now we are going to introduce each one of the indications in the order that I explain to you next:


- Select disk 1 to select our USB (1 = number of the removable disk in the list of your PC).
- Clean this command is to erase all the information that this unit contains.
- Create partition primary here we will apply a new primary partition.
- Format fs = fat32 quick This command executes a fast format with the FAT 32 system.
- Activate here we will mark the selected partition as active.
- exit To exit the diskpart.

To continue with the process we must enter a CD of the operating system that we need, in my case use one of Windows 7 and follow these new steps:
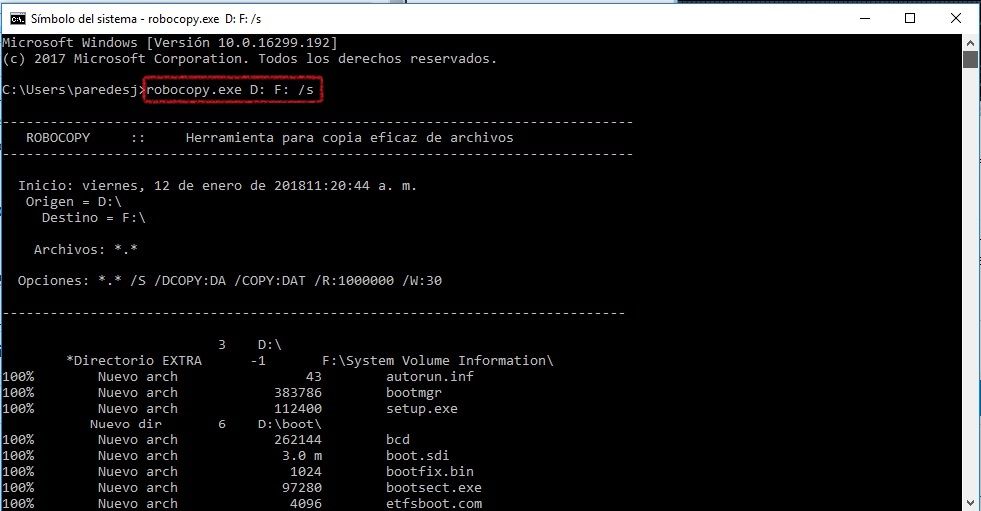
- In cmd.exe we write the Robocopy.exe command as shown in the screenshot below:
- Now we can install our OS using our USB. Making sure that our PC is configured from the BIOS to start with the USB drive.

Once the process is finished, it is shown as follows:

NOTE: Before starting the process we must make sure to backup the USB information if needed.
I hope this educational POST is to your liking and that we can take advantage of it.
So long!
Nice post @jpareds. Well detailed write-up, easy to understand.... With the look of things this post is your, but for future reference it would be nice if you state that the post is your original work and all statement used are yours.
Copied. Yes, it is totally original. Thanks for your contribution @abiye.
Nice step by step tutorial @jpareds, clearly written and well illustrated with screen caps. Cheers - Carl
Thanks my friend. Regards! @carlgnash