How I learned Unity and Created a VR project in 2 weekends — Part 2
A few weeks ago I created my first VR project using Unity. As mentioned in my previous article HERE, I’ve been working in Virtual Reality for more than 3 years on the business side and wanted to get my hands on Unity for a while.
Setting myself the challenge to create a working Virtual Reality project in just two weekends forced me to put my head on it. I knew it was possible after seeing so many great projects during the hackathons I organise every month but was never sure I would really make it.
It’s been now a few weeks since I did this challenge, I took a step back on my experience and can now have a better understanding of what worked, what didn’t and what I should have done. Many people also asked me about the materials and assets I used so I am going here to share as many links as possible that could help anyone interested in doing the same challenge. In case you just want to learn Unity at your own pace, you can still use all those resources and have your own schedule depending on your availabilities and your own project.
I have also been running a hackathon since this Unity challenge and realised I was able to help more teams and guide them more than I used to. This is fantastic and even just for this, the entire experience worth it!
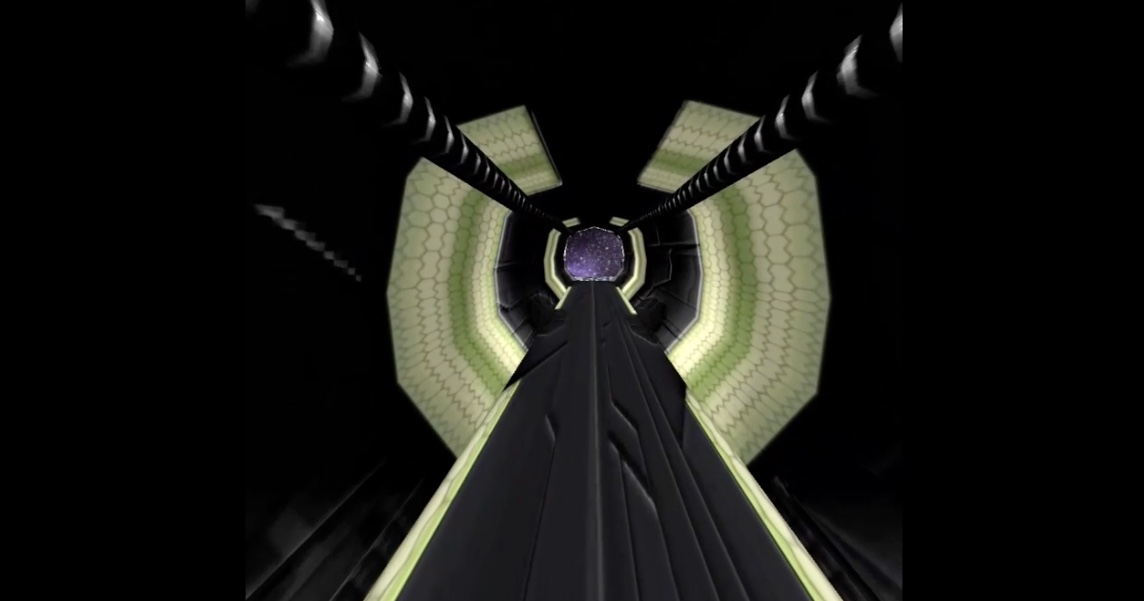
Check out the video of my project:
GETTING READY BEFORE STARTING
Before starting your project, there are a few steps to follow to get ready. I am not going to explain all the steps as many VR friends did it very well in the following articles. Please note those articles are for GearVR apps, if you want to develop for the Vive, Rift or using Cardboard apps, you will need to use different sdk and potentially add some steps to those guides. Basically you need to: get your computer ready with the latest Unity version, link to the right sdk and make sure to get the tools for the platform you want (such as android studio for GearVR), get your device id, enable VR in Unity.
Sam Watts — Develop mobile VR w/ Oculus & GearVR (including best practices and others useful tips!) https://virtualrealitypop.com/develop-mobile-vr-w-oculus-gear-vr-8f1ce266e179
Adam Sinicki — How to create your first GearVR app
http://www.androidauthority.com/create-first-gear-vr-app-690512/amp/
Milan Prucha — Getting started with GearVR development using Unity 5
https://www.linkedin.com/pulse/getting-started-gear-vr-development-using-unity-5-milan-prucha
TIP: Before starting your project, do a test with a simple scene with only one capsule and export it to your VR device. This way you make sure you did all the foundations well and if there is any issue in the future it is linked to your project and not to the initial set up.
THE MATERIALS I PREPARED VS THE MATERIAL I USED
My plan was clearly to spend the Weekend 1 learning the basics of Unity and VR specificities and Weekend 2 doing my project. The day before starting this challenge, I pre-selected articles and had a look at some resources to start with. As I mentioned this experience on several chats and on social media, some VR friend also sent me encouragements and links including the Udemy Course “Pass the Unity Certified Developer Exam ». I had a look at the content of the course and bought it (with a 90% discount) but ended up not using it at all. https://www.udemy.com/unitycert/
Why didn’t I use it? Simply because I didn’t have the time to follow step by step the course. Videos were nice and the course looked really high level but if I wanted to learn AND create a project in such a short time, I couldn’t afford to go through an entire course and watch 100+ hours of videos. I tried to use the material (slides and pdf) included in the courses but I guess the main information were in the videos. I will certainly go through this course later on the year to improve my Unity skills or to build a more complex project alongside learning C#.
Lots of Unity documentation and help available
Who wants to learn Unity will, of course, spend lots of time on Unity website. The platform has many useful resources, including a forum and many tutorials. I started going through the « Essentials » tutorials and then the VR tutorials. Both were interesting and helpful but it is only when I started playing with some free assets and existing projects that I understood what I read. As explained in my previous article, I got a massive headache during this first learning phase. If I had to do it again, I would have skipped all those reading and would have started by opening assets, playing with some settings and making a really simple scene before reading all the different tutorial, especially the VR ones.
Yes, Unity tutorials are good but when I read the VR dedicated tutos, I felt a bit lost as there were many things I didn’t get, certainly because I needed first to understand Unity basics.
Once I felt more confident, I used a lot Unity Scripting Reference to better understand how the tech part worked, the Unity Doc manual and quite often - not to say all the time - looked for specific answers on Unity forum.
TIP: Better play with existing assets and scene and just look for the information you need to do what you want unless you have the time (and the motivation) to follow an entire course
THINGS I STRUGGLES WITH AND APPREHENDED
When starting the challenge, I quickly identified 4 areas that I knew would be tricky and needed a specific attention.
Locomotion
Interactions
Collisions
Animations
Other things I wish I could explore further
Locomotion — I based my project on a GearVR use and — unfortunately for my partner — had a specific locomotion system in mind. What I wanted was the user to look at a direction and tap on the GearVR touchpad to walk in this direction
This sounds pretty straight forward right? This VR movement isn’t the most used but you can find many games using it so I thought as soon as I would find the right name for it, I could find a script online to use… How naive was I!
After spending hours on forums, I asked for help to VR folks online and was told I couldn’t find such script ready to use and had to do it myself. Reading Chris experience from Robot Invader as advised helped me better understand where I was going.
TIP: If you are starting a project to learn how to use Unity for VR, it will be easier and faster if you are flexible on the locomotion especially if you are not a developer. My partner (essentialy) and I (to support) spent hours to understand and write the locomotion script.
For those interested in building their own first VR project and don’t have a developer friend to help, check out VRTK, a library of scripts especially made for VR. Many hackathon participants I know use VRTK to quickly build their project in the time allocated without rewriting all the scripts. I personally didn’t use it in my project but initially wanted to so I wouldn’t have to rely too much on my partner (I know it was a fail).
Interactions & Collisions — For the interactions and collision, I first used only the graphic interface and kept all the interaction scripts for the end. Basically, for this project I didn’t use any controllers input (unless for the locomotion) and based all the actions on the user position in the scene. Once the user gets close to a specific area it triggers some actions (objects appear, animations start…). For this I used some trigger script (what I also used to change scenes) that my partner helped me adapt for my project.
Animations — I started digging a bit into animations while playing with some assets during the first weekend. However, I spent so much time on the locomotion and interactions that I didn’t have the time to do more than just import some existing free animations or animated assets from the Unity Store (as for the butterfly flying or sparks).
Sound — if you watch the video of my project you can see there is no sound, this is not linked to the video capture but to the fact that I was running on time. At the beginning of the challenge, I knew sound would be a nice to have in case everything would go smoothly. As it didn’t, I made the choice to sacrifice this part and maybe dedicate a specific weekend later on to learn more about VR sound.
Light — Oh boy how many times did I break the lights while moving boxed in the warehouse! I know light is a powerful asset to get a clean and nice 3D scene but it was clear I wouldn’t have time to prep the details of my scenes so I used the lights effects included with the free assets (plus a few simple home made spots).
ASSETS
Many people asked me about the assets I used. Here is a list of the different assets used in my project, they are all free assets and some of them come with animations.
Scene1
Warehouse — complete and already built warehouse including lights and particle effects.
https://www.assetstore.unity3d.com/en/#!/content/3439Pod and sci-fy elements — no animation but a really nice variety of elements to build your own space.
https://www.assetstore.unity3d.com/en/#!/content/3426Animated butterfly.
https://www.assetstore.unity3d.com/en/#!/content/20985
Scene 2
Ramps — same pack as in the scene 1.
https://www.assetstore.unity3d.com/en/#!/content/3426Space sphere — planets, constellations and more, the package can be hard to move and adapt to a different scale.
https://www.assetstore.unity3d.com/en/#!/content/38913Animated butterfly.
https://www.assetstore.unity3d.com/en/#!/content/20985Hail particle — includes different physics mode
https://www.assetstore.unity3d.com/en/#!/content/62038Robot — animated as walking, I wish I had the time to see how to animate it myself and give it a specific path.
https://www.assetstore.unity3d.com/en/#!/content/33469
…And that’s it! I didn’t want my first project to be too complex as I had to keep track of the time and do this challenge in just 2 weekends. I saw so many assets I wanted to try but it will be for the next time!
TIP: for your first project keep it simple, the more assets you have the more demanding Unity will be with your computer. It will take also more time to build / export your project if you have many heavy assets. I understand compression and optimisation are not a priority when experimenting with a new tool but if like me you are not using the latest powerful computer to create your project, it will at least prevent too much lag.
I have a lot more to share but will try to keep this article readable — so not too looooong to read.
If you have any specific questions do not hesitate to leave a comment or get in touch on Twitter @AmandineFlachs! https://twitter.com/AmandineFlachs
Another article might follow soon :)
I would like to take this project further or create another soon but there is also other technologies I want to explore. Happy to hear your suggestions and thoughts!
The next step? Why not doing a VR project on a Vive…

- This post was originally posted on my personal Medium account *
Hi @amandinef, really cool project, crazy impressive that you pulled this off in two weekends.
I would advise putting a little note at the bottom of a post if it is a repost of content that you have previously posted elsewhere (as this is), it is common courtesy on this platform as many curators are looking for original content (as in, not only your own content, but also content that is original to Steemit - not posted elsewhere).
I am happy to follow you as you are obviously talented and a great writer. Looking forward to more of your awesome original content in my feed :)
Cheers - Carl

Great tip, thanks carlgnash! I mentioned it on my previous post but forgot for this one ;)
Cool that you got your first project done. I bookmarked this article so I can go back and use all the resources. I have some ideas for my own VR project thanks for the inspiration. I am going to work on doing my own first project with my Vive. Nice to meet other VR veeps here.
Sounds great! Don't hesitate to let me know when you start your project if you need any more resources. I wrote 3 articles, the first one is already published on my profile, second is this one and the third (where I take the project to the Vive) will be out in the coming days! Happy to help out if I can :)
Oh cool I will check them out. I have had VR since DK1 days, about time I started on a project. I am thinking of setting up my Allowistic islands 🌴 as a VRchat space, so this may be as good a time as any. Now I need to go back and read part one. Thanks for the encouraging push....
Congratulations @amandinef! You have completed some achievement on Steemit and have been rewarded with new badge(s) :
Click on any badge to view your own Board of Honor on SteemitBoard.
For more information about SteemitBoard, click here
If you no longer want to receive notifications, reply to this comment with the word
STOP