DIY TV Stand for my Desktop~! 自制的电视架~!
Hello everyone, want to share about my DIY TV stand for my desktop~! I start to do this project due to the TV is quite low for my eye level so i DIY a TV stand to make it higher to ease my neck pain.
So firstly, prepared the stuff. The stuff is the MDF Board (Medium Density Fiberboard), Utility Knife, All Purpose White Glue, Ruler (prefer metal), pencil, cutting mat and some weight plates (if done have weight plates can use some book which is heavy). Attached Photo 1 as part of the stuff. Those items can purchase at Popular Bookstore, Daiso, Art Friends, Craft Heaven, etc.
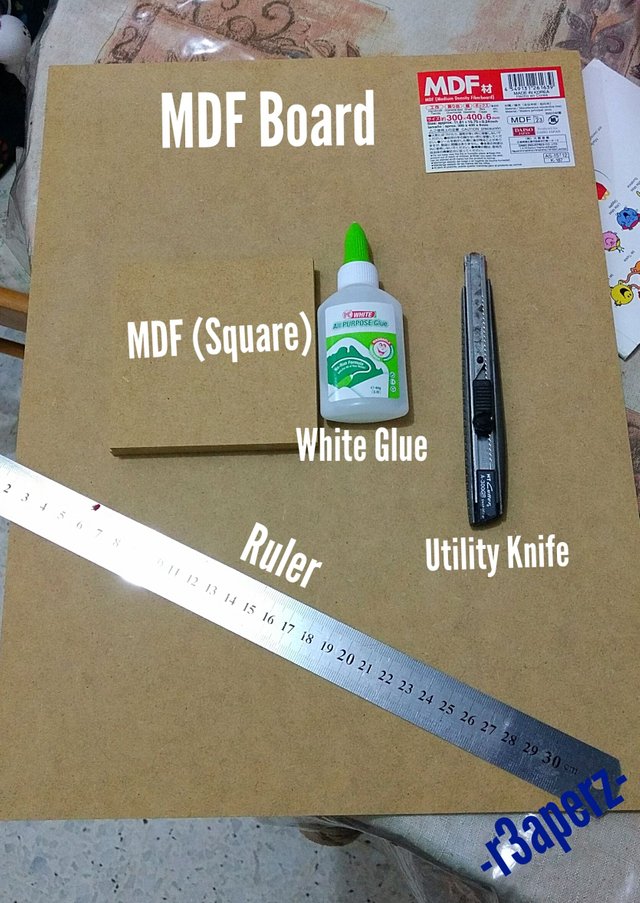
(Photo 1)
Ok, now measure the width and length which you require and draw the sketch onto the the MDF Board. After the sketch has prepared, you are ready to cut the MDF board. Use the Ruler to align with the line and slowly follow the ruler and cut it. It will require at least few times only able to cut thru. If you had a Jig-Saw or Rotary Tools , its is more easier and can do complicated cutting.
After cutting all the pieces, its time to glue all the pieces. Glue the pieces one at the time and at least let it dry for an hour if possible leave overnight with the weight plates to press more firmly for better result. After everything had piece together, it will be like Photo 2.
I forget to take the photo on the gluing part.
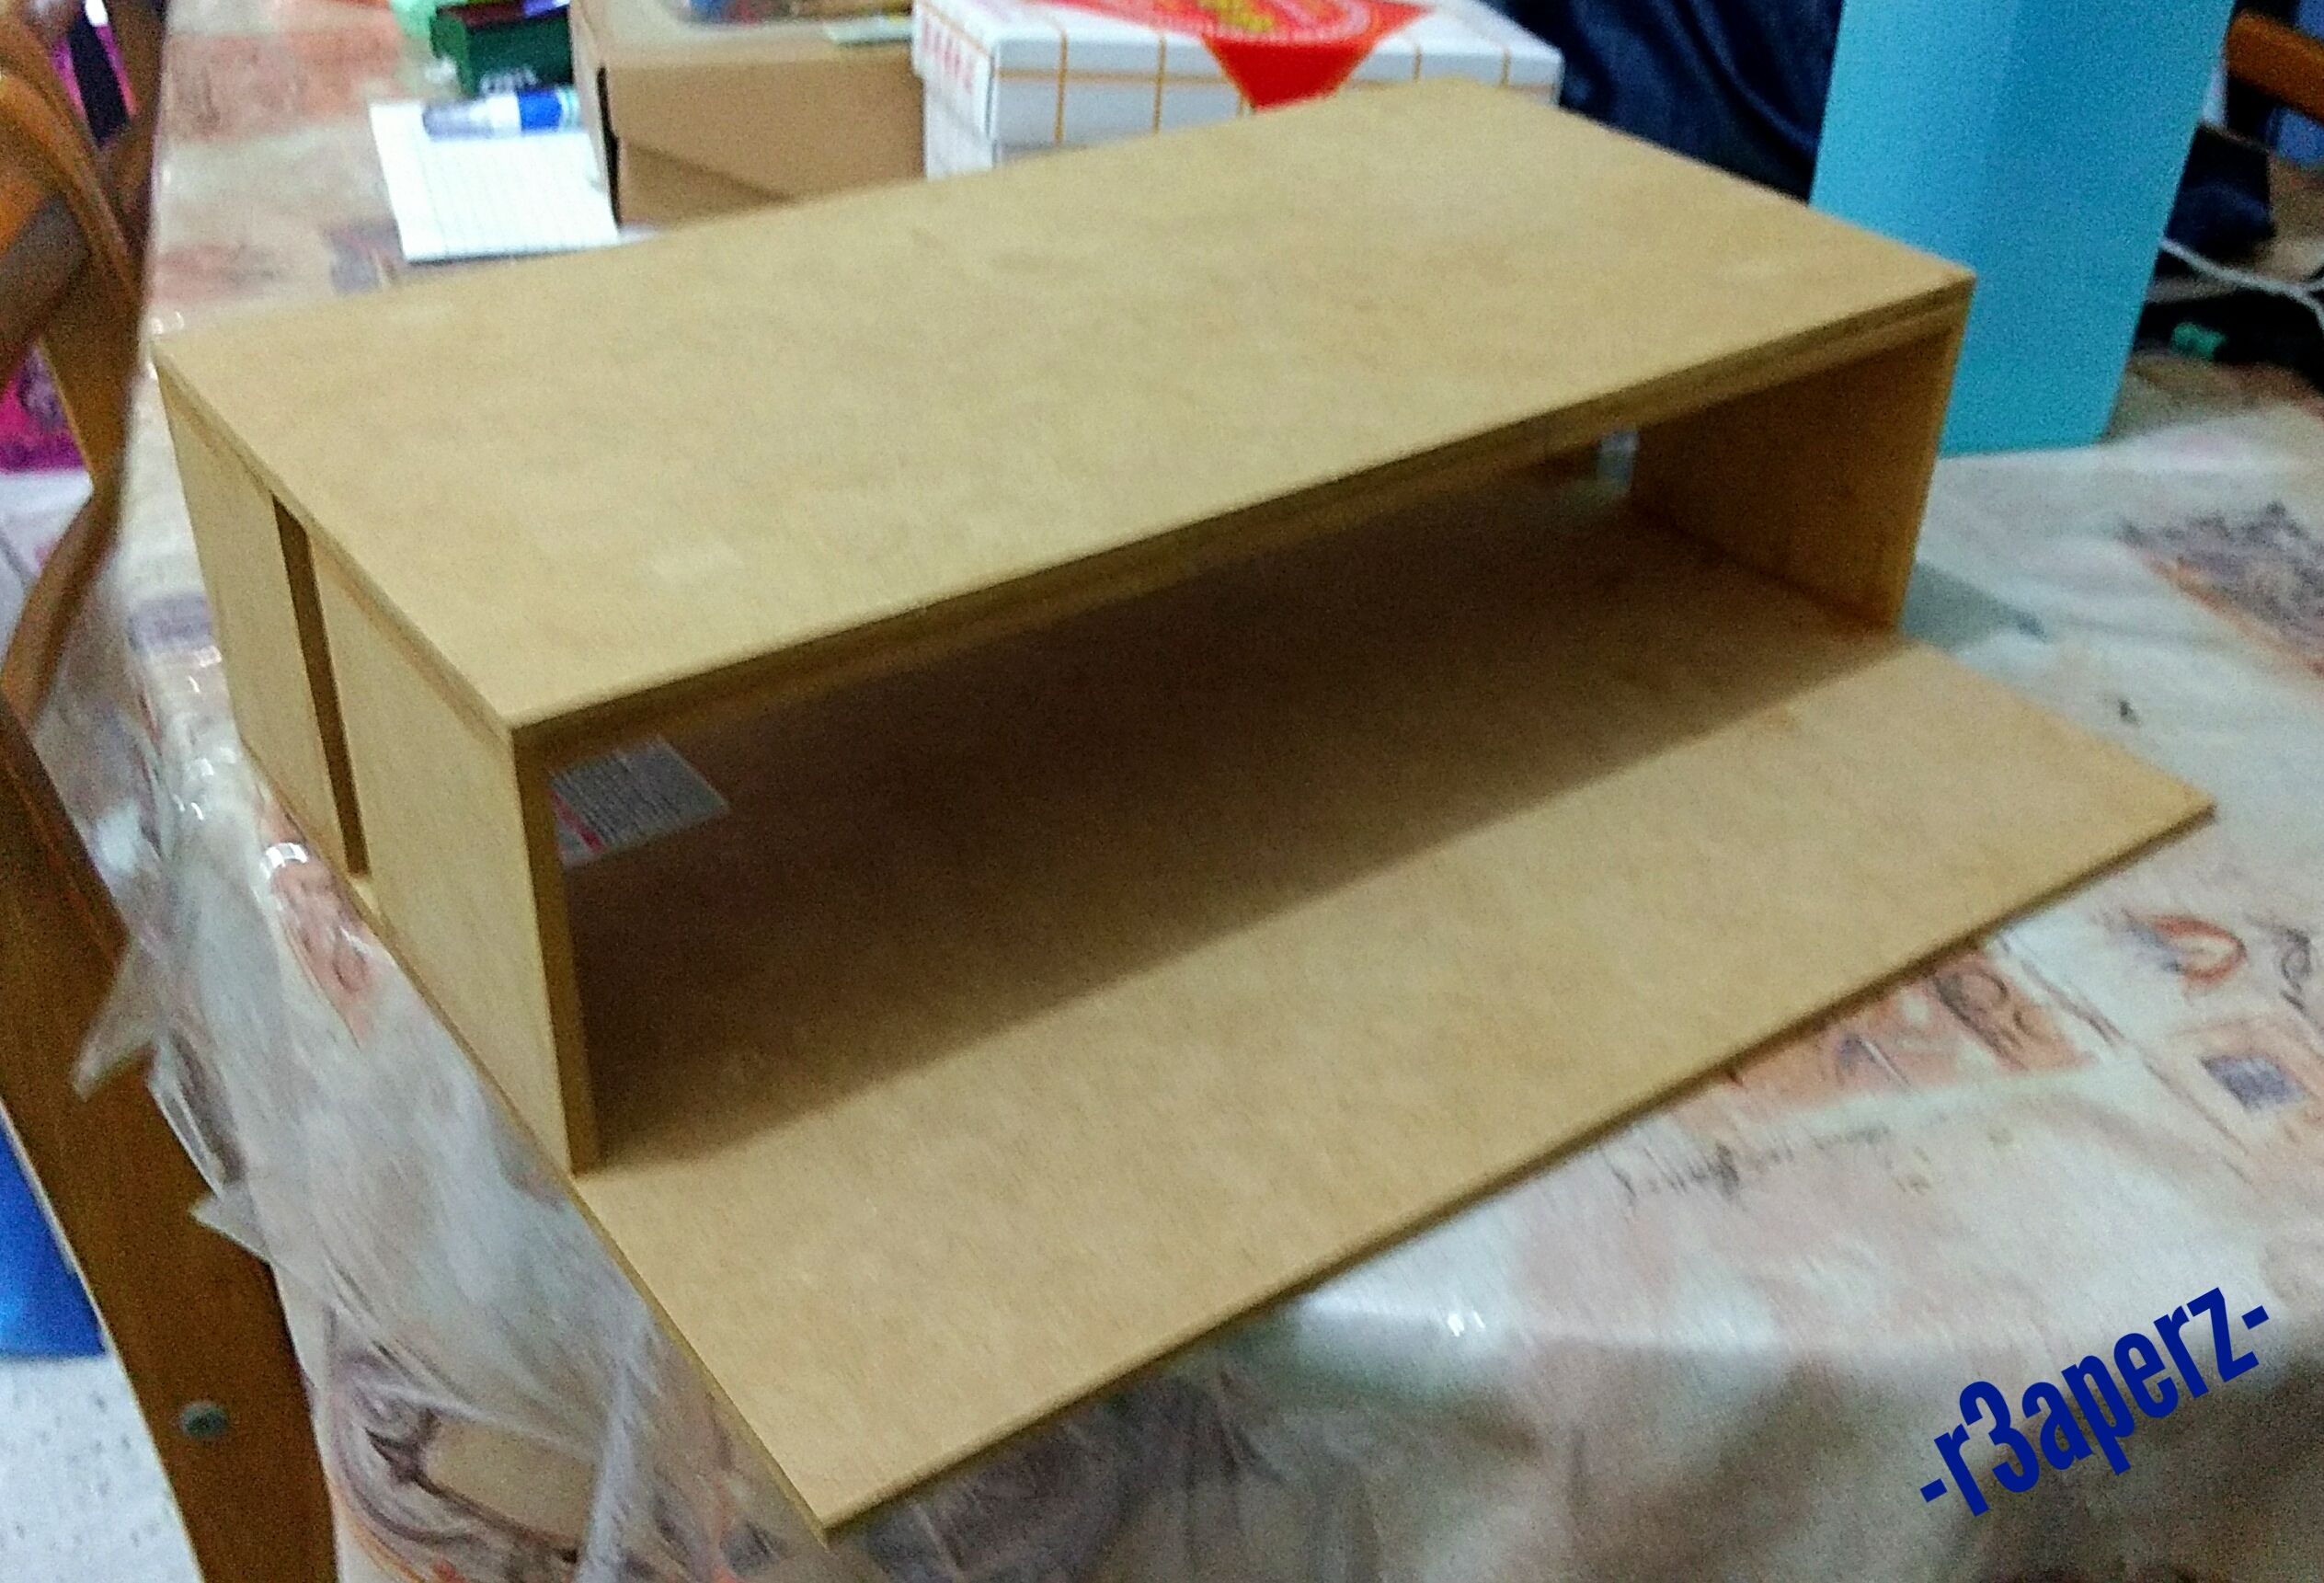
(Photo 2)
After all the glue has dried (i leave it for overnight), you can start to do sanding if you wan. I mostly sand off the edges (Photo 3) and some uneven parts.

(Photo 3)
After all the sanding part is done, you can either color it or leave it as is. I need to color as white which wife request to make it same color with the table. I'm using a some acrylic paint and spray can. If using spray can, kindly do few light coats in between 10-15mins drying times for better result (if you got uneven coats, you can do light sanding on that uneven part and spray again) . After all done, will be like Photo 4.
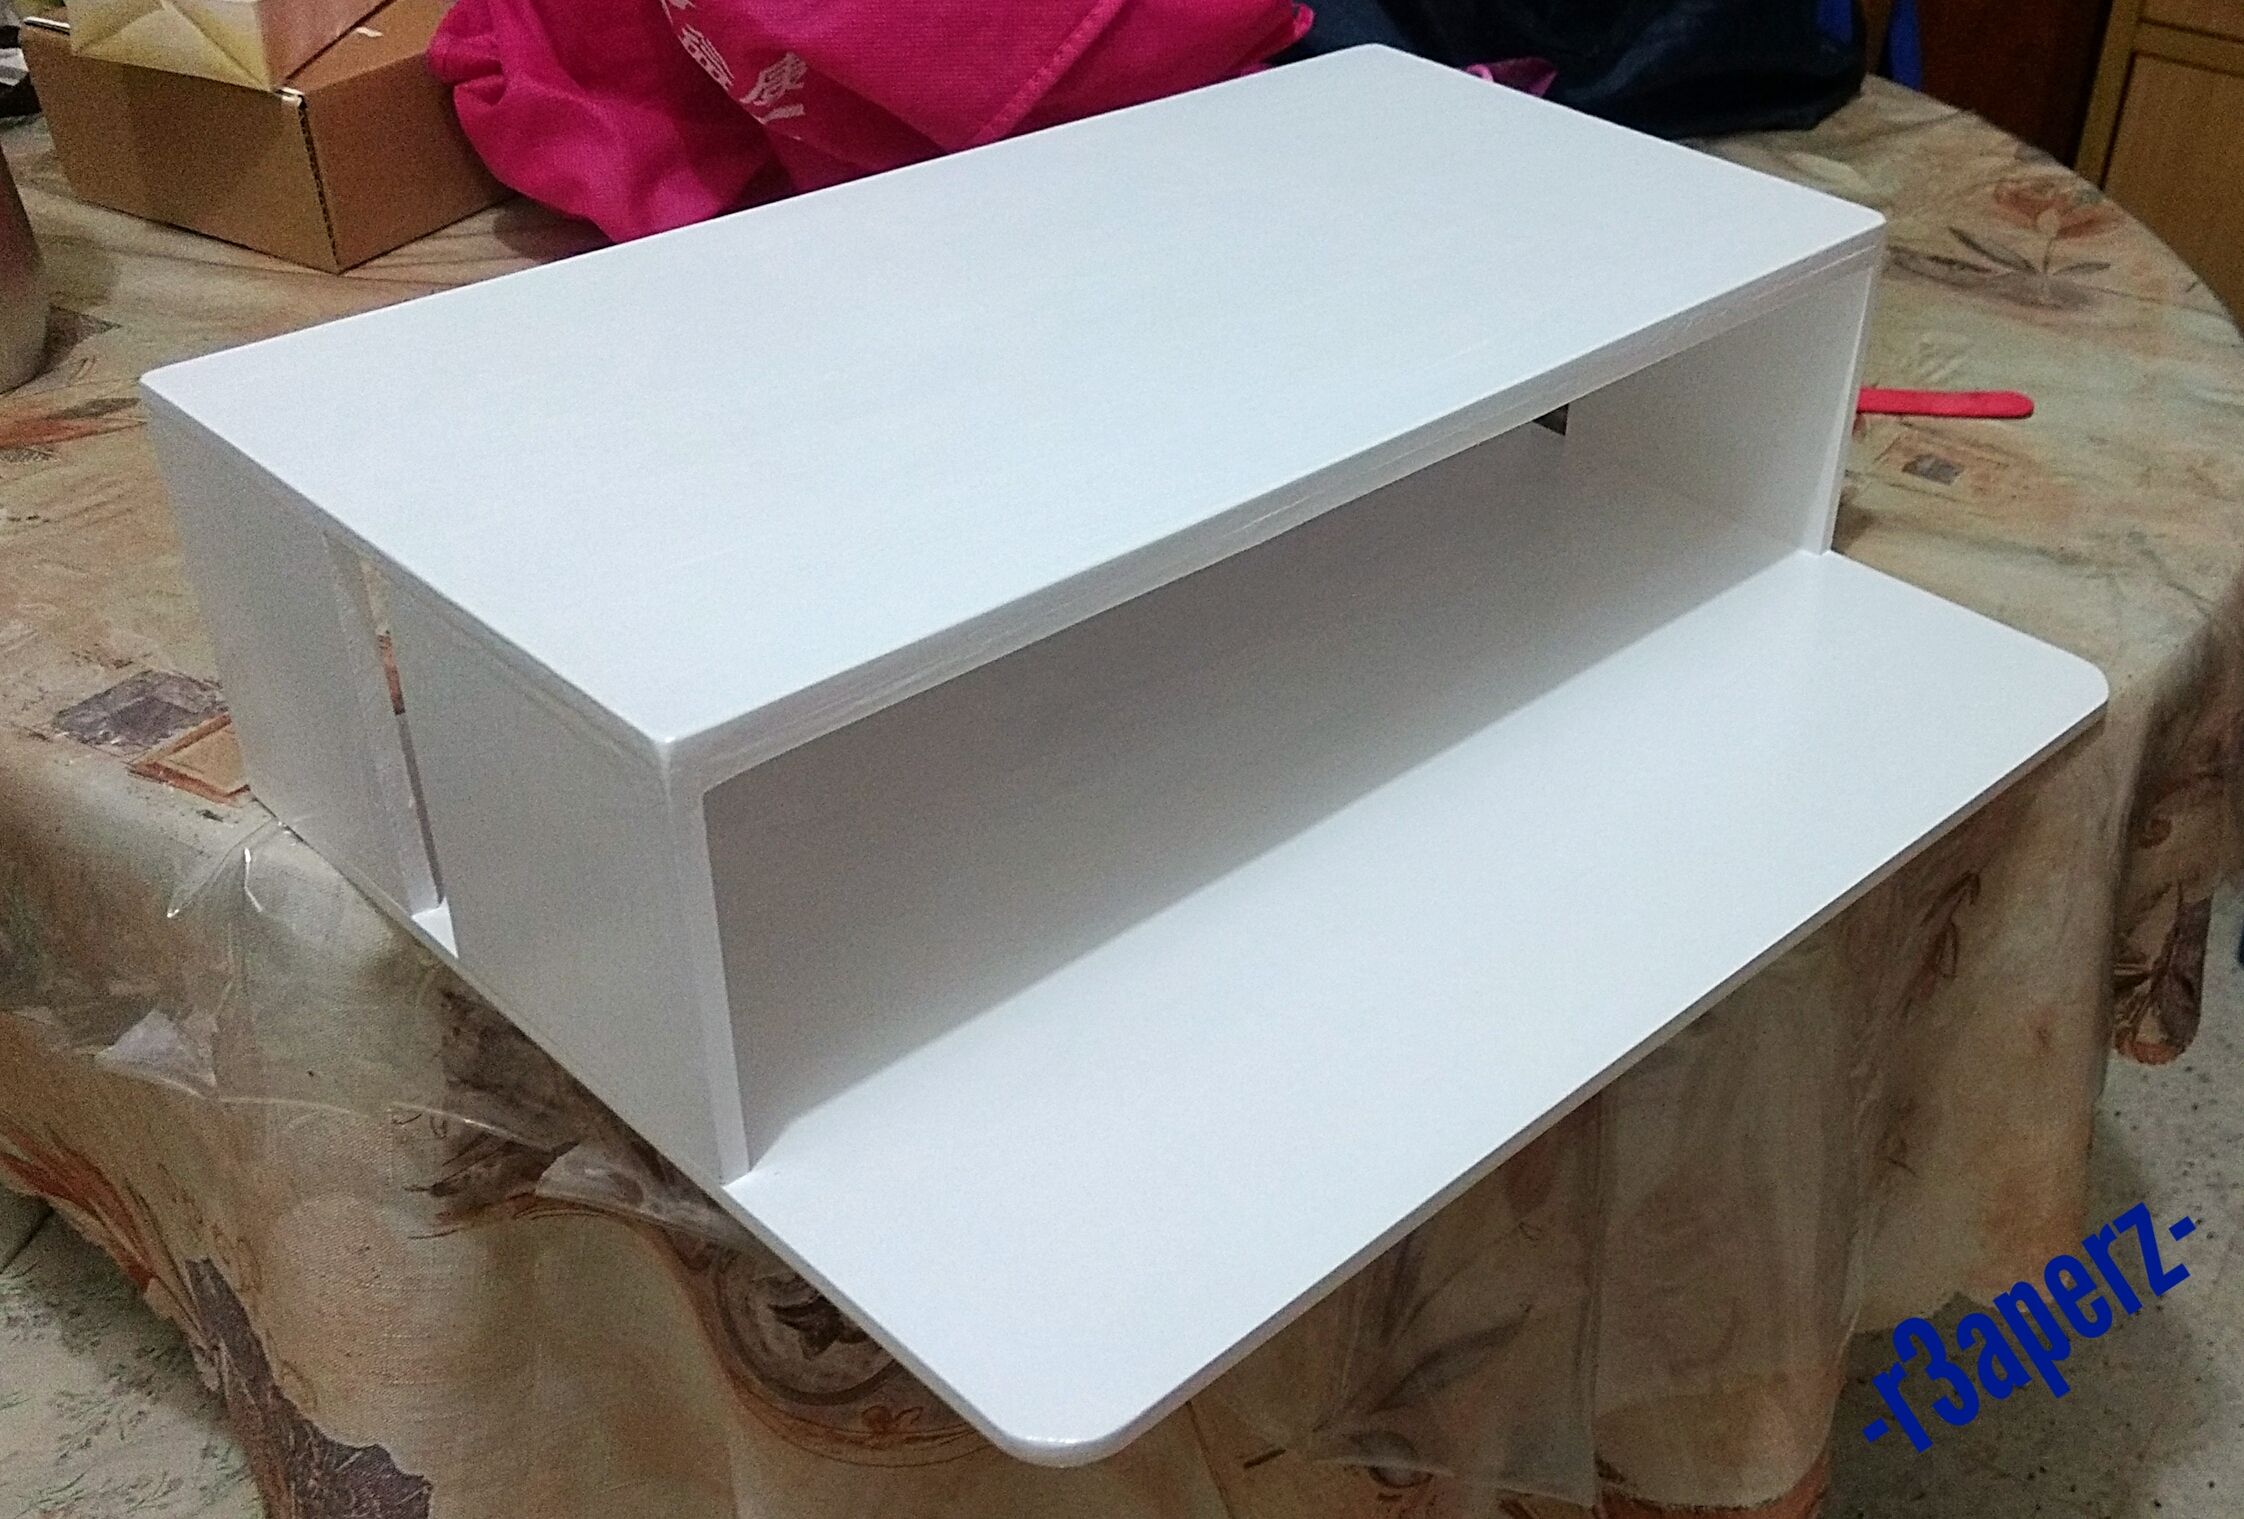
(Photo 4)
This item i add in last minutes as i found it in my storage box which can serve as the legs, its a non-slip sheets which use to stick to the carpet to prevent moving (Photo 5). I cut into four pieces and stick to all side edges as Photo 6.
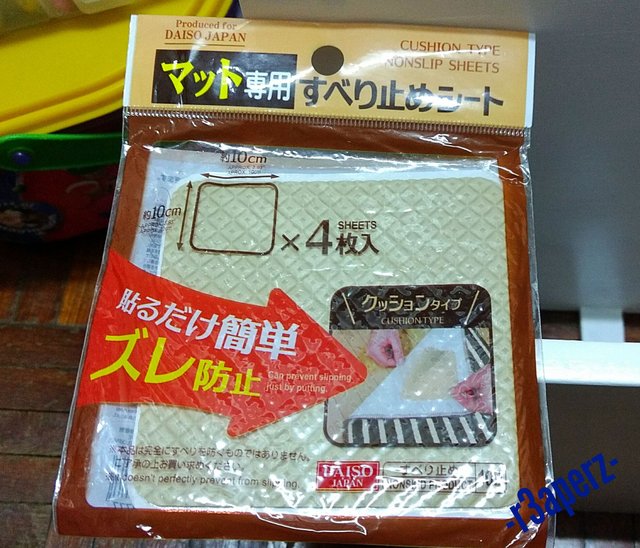
(Photo 5)
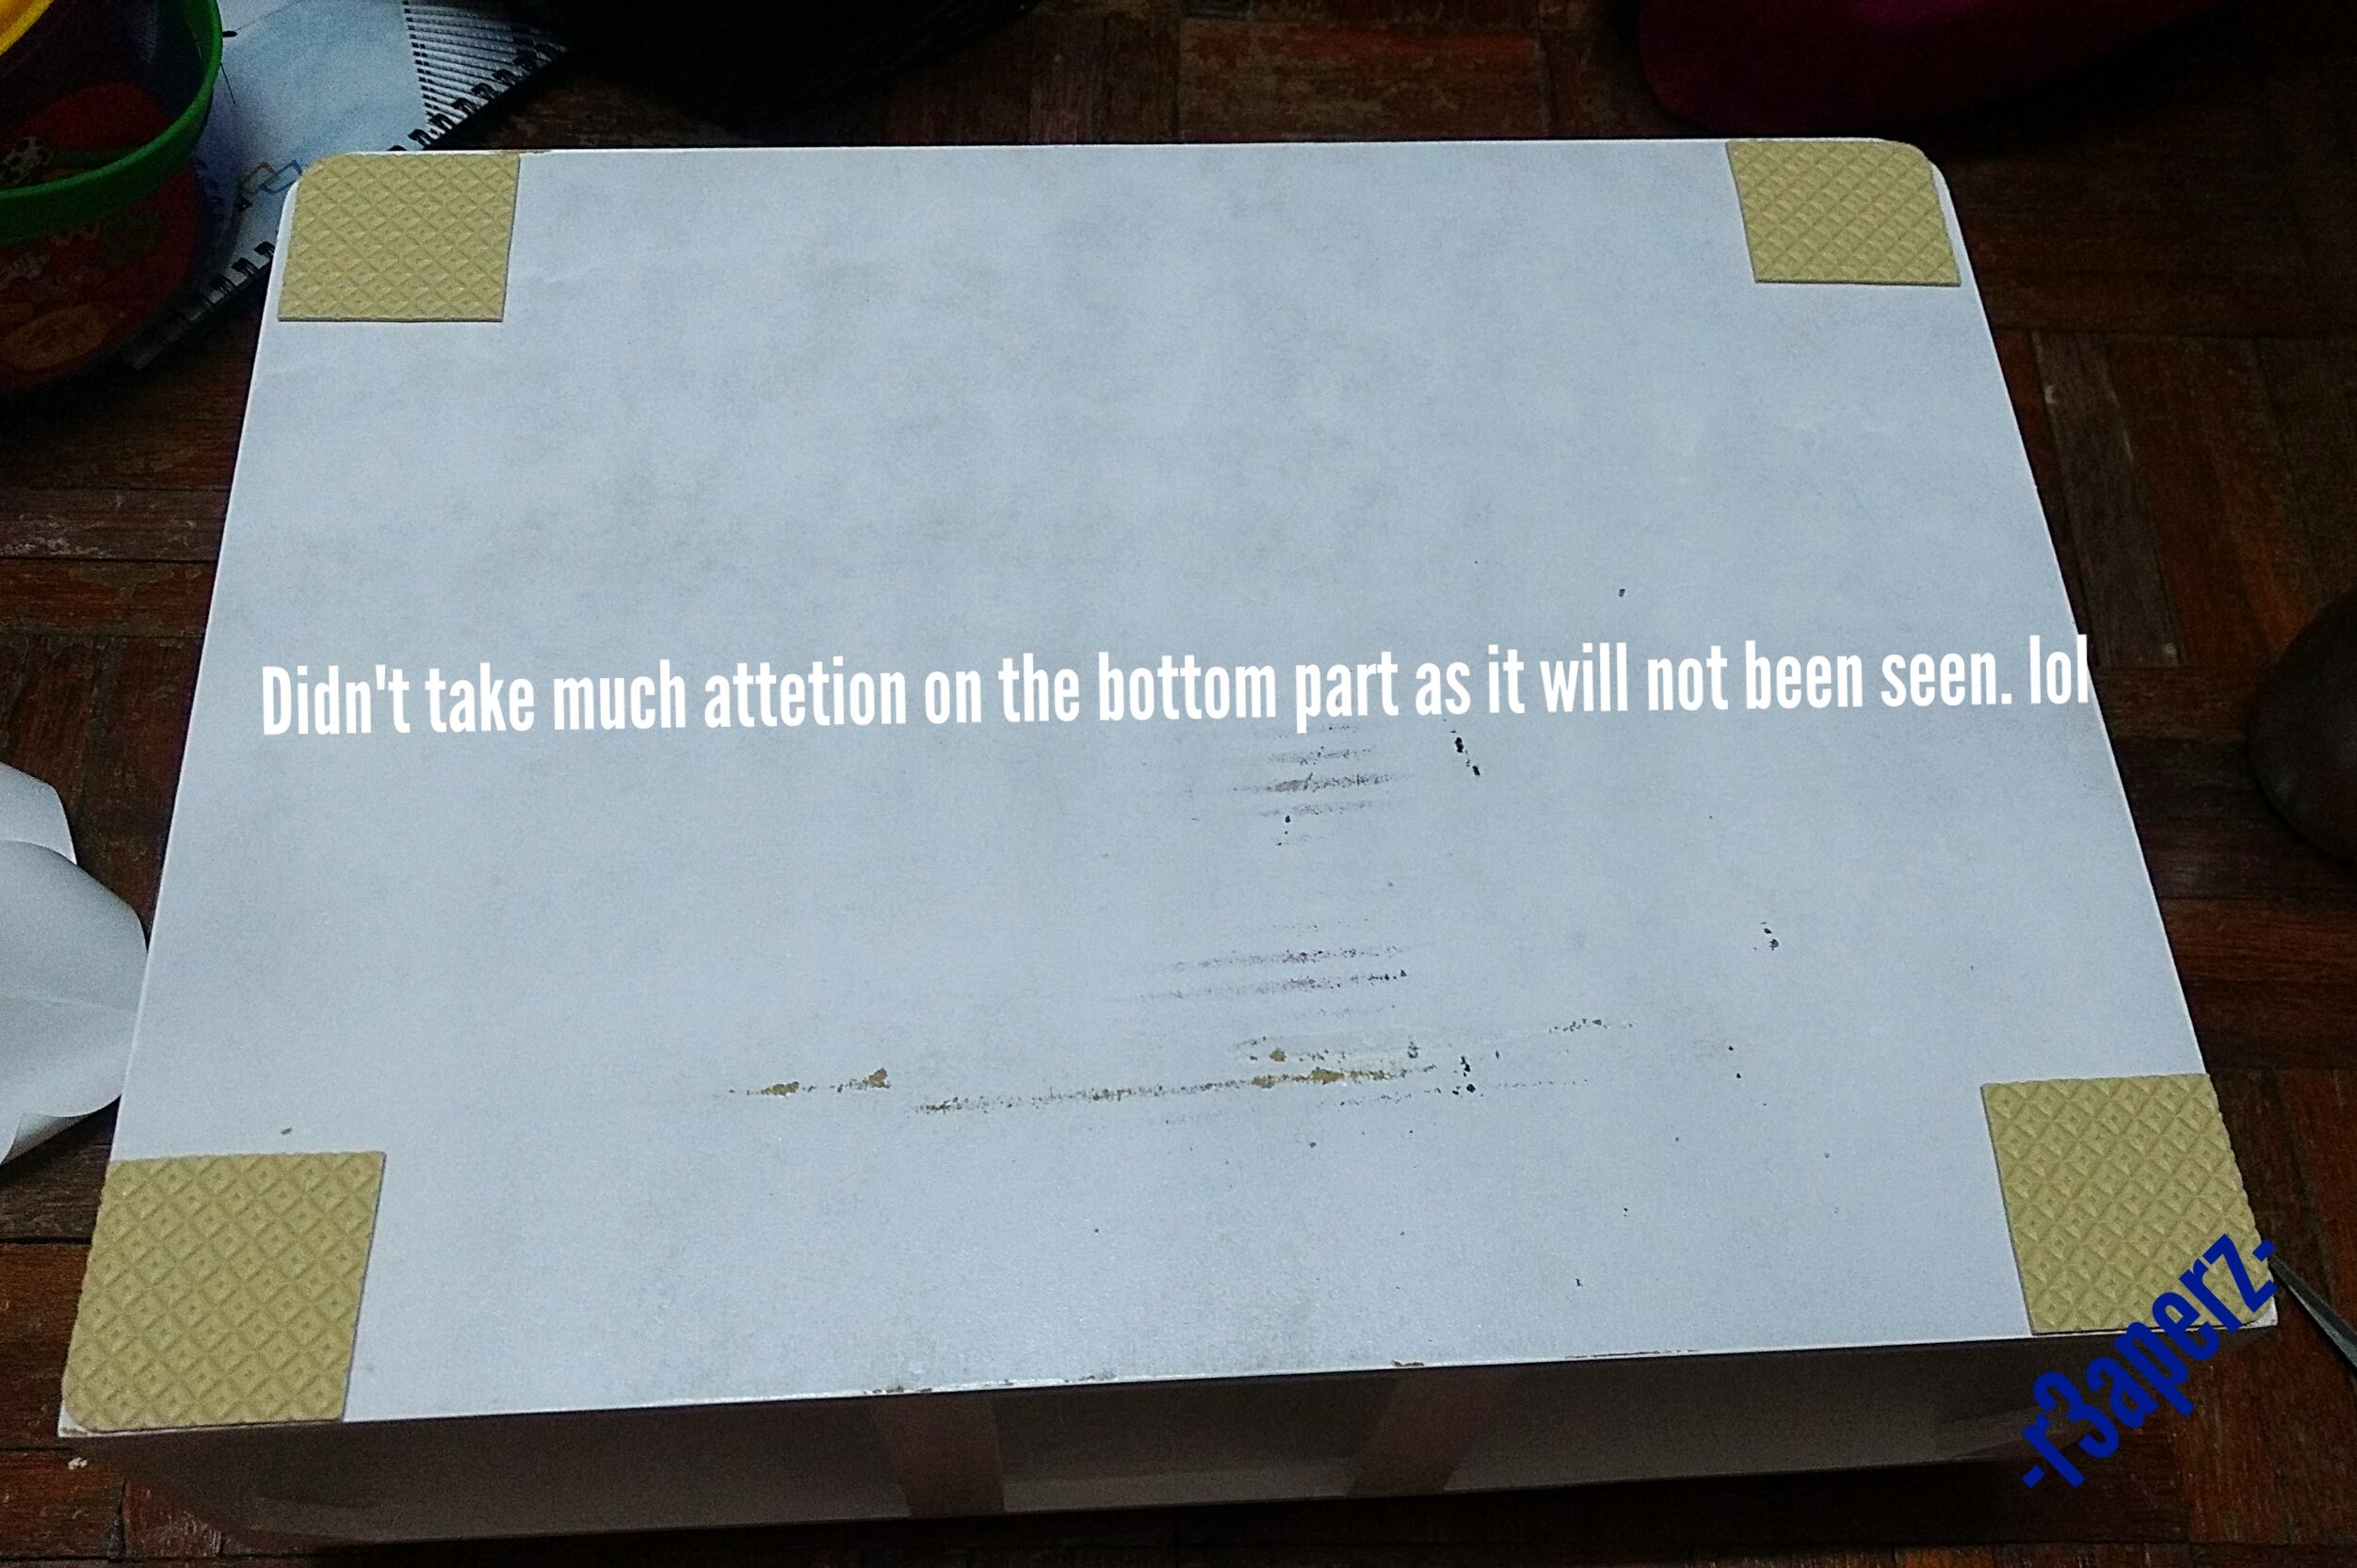
(Photo 6)
Overall, i think its quite nice but still need to improve on my sanding part. Hope you all like it~!
Thanks for viewing~!
(Close View)
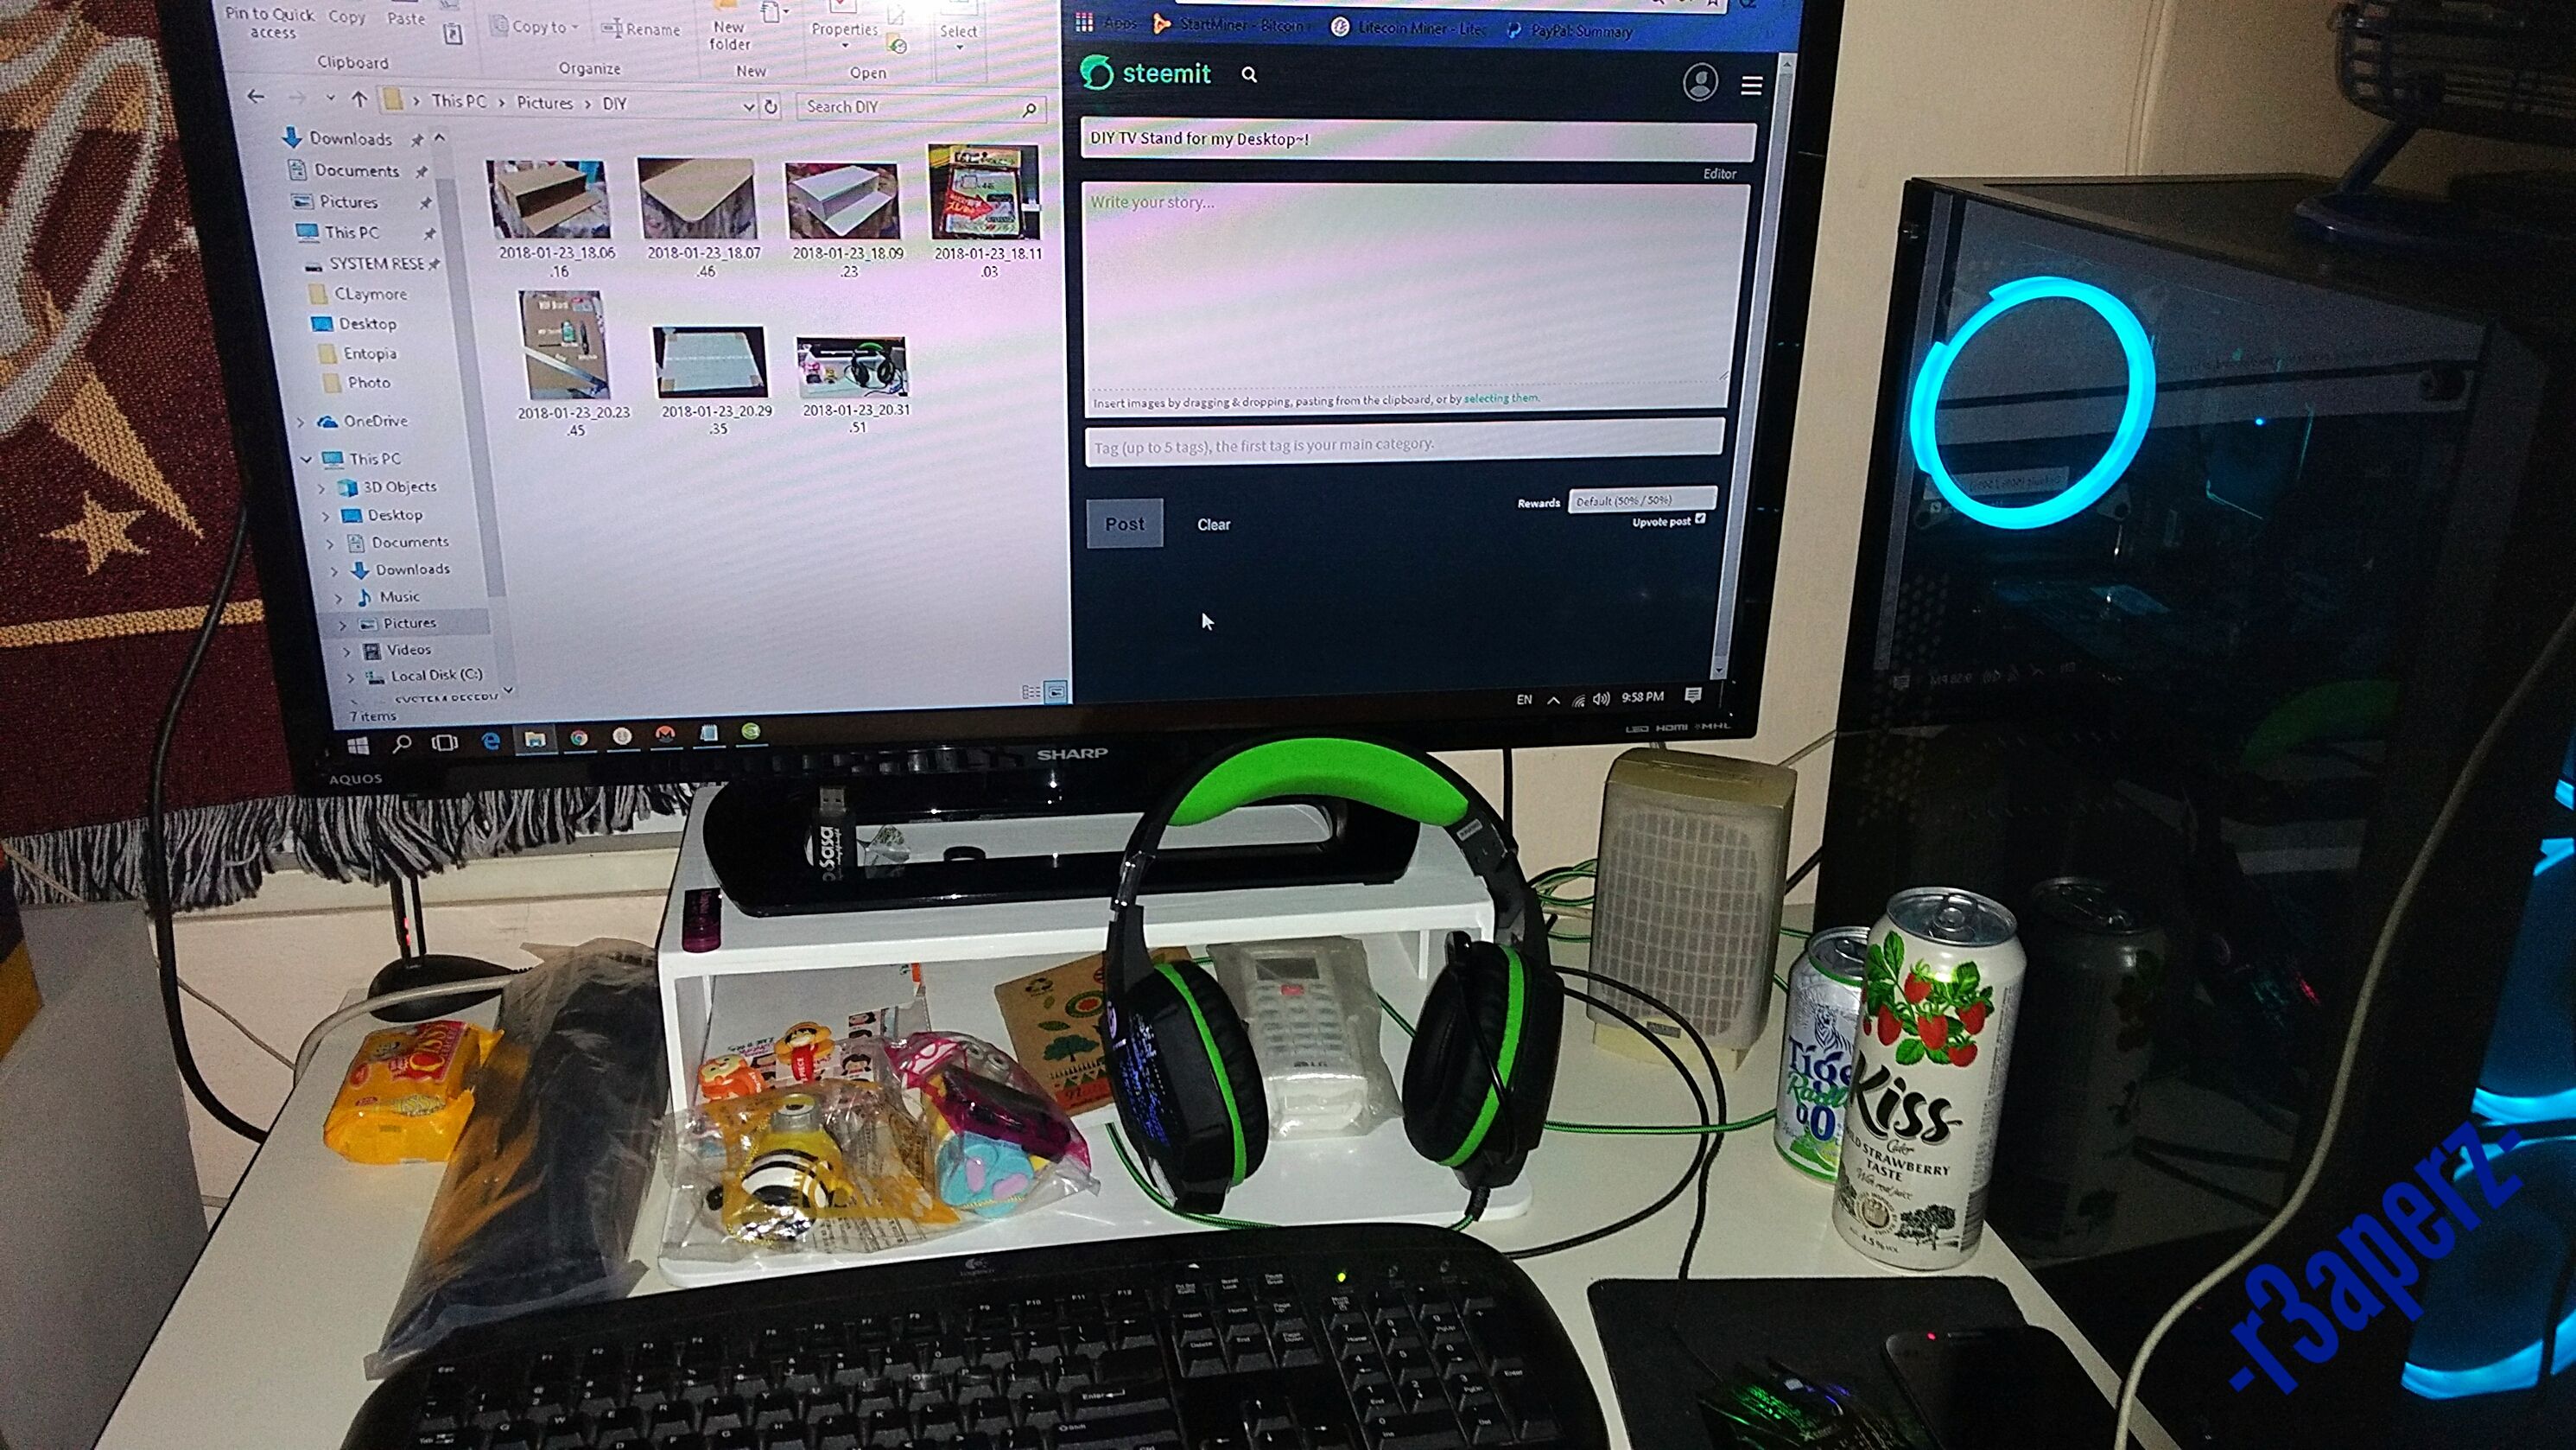
(Normal View)
大家好,我想分享一下我的自制的电视架! 我开始做这个计划,由于电视机对于我的眼睛水平来说是相当低的,所以我自己自制的电视架来让它更高,以减轻我的脖子的酸痛。
一开始要准备的 东西是MDF板(中密度纤维板),工具刀,万能白胶,尺(最好用金属),铅笔,切割垫和一些重量板(如果没有重量板可以使用一些重的书)。 Photo1是一部分的东西。 这些物品可以在大众书局,Daiso,Art Friends, Craft Heaven等等。
好的,现在量你需要的宽度和长度,并将草图到MDF板上。 草图准备好后,您就可以切割MDF板。 使用尺与线对齐,然后慢慢地按照标尺对割。 至少需要几次才能切断。 如果您有一个Jig-Saw或Rotary工具 (对不起,不知道华语叫什么),它会比较容易割还可以做复杂的切割。
切割完后,把所有的板都粘上去。 要一块一块的粘上去,然后让它至少干一个小时。如果可以的话,让它干过夜和把重量板压上去是为了获得更好的效果。 把所有都拼凑起来之后,就像Photo2。
我忘记在胶合部分拍照。
等所有的胶水干了之后(我把它干过夜)。如果你需要,你可以开始打磨。 我打磨主要是边(Photo3)和一些不平的部分。
所有的打磨部分完成后,您可以上色或保持原样。 我需要涂白色因为妻子要和桌子的颜色一样。 我正在使用一些Arcylic Paint和喷雾罐。 如果使用喷雾罐,请喷上几个轻层, 然后在每一层给10-15分钟的干燥时间,以获得更好的效果(如果有不平均,可以在不平均的部分上进行轻度打磨并再次喷涂)。 喷完了后,就会像Photo4。
这个东西我在最后才添加,因为我在储物箱里找到,可以作为脚。它是一个防滑片,用于贴到地毯低部,以防止移动(Photo5)。 我把它切成四块,并把所有的边缘贴上如Photo6。
整体来讲,我认为相当不错,但仍然需要改进我的打磨部分。 希望大家都喜欢〜!
谢谢大家的观看~!
动手能力极强!!
謝謝你的誇獎!我還是個初學著而已。還要多多學習。
@OriginalWorks
最喜欢diy了!
你也可以一起來diy啊。
我最喜欢diy。
謝謝分享,很棒的DIY。
谢谢你。还好而已, 还不是很完美。
@r3aperz 你太厉害,我看了都不知道怎么做 XD
没有很厉害啦。可是对不起,我有很多步骤没有写得很清楚。改次还有机会,我会把一个一个步骤写清楚点。
嗯,期待你PO更多DIY的帖子 :D