Galaxy batik
I am staying in Borneo. From my home, the furtherest I see is the mountains. You know, I don't see much looking around from where I stand.
Something too small that can't be perceived by our naked eyes. But how about something too huge to see it?
Something that is right in front of you but you can't see the whole picture.
In reality, space, cosmos, gallaxy and all, are quite imaginary to me.
How do you get to know about solar system and stars so far away? I only discover them by school, TV, magazine and other materials and planetarium as well.
They are kind of a legend or fairy tales. I wish I have the tools to observe them every day.
That is why, mystery element always pulls me to the stars.
Source
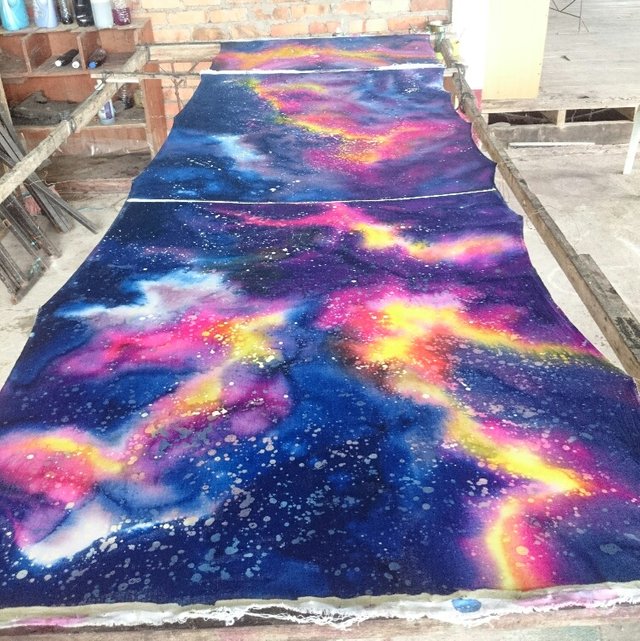
So this is the batik I made last weekend.
I am learning Malaysian batik, and the technique is much more like watercolor, and with galaxy, that was a super good match !!
I didn't draw any draft because there are no lines, which saved a lot of preparation time!
So last weekend, I took this National Geographic magazine special edition to show my batik teacher that morning.
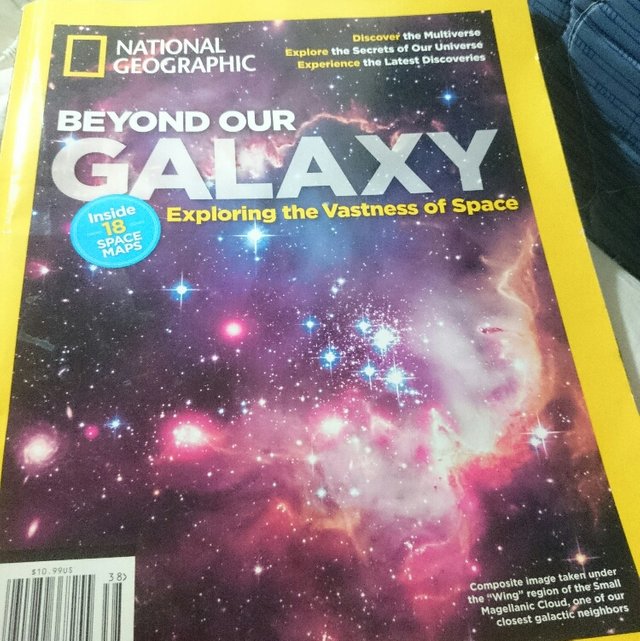
Huge appreciation, very thanks to him, I learned how to do.
Before I began, I chose the colors by looking at the cover image.
Yellow, pink, red, purple and dark cobalt blue.
The preparation in done!!
1st thing to do was splash the melted wax around the fabric so that remains white, looks like supernova.
You know, we can't dye white unless you use bleach which might damage or worn out the material. So always keep in mind of where to leave white.
2nd step was to apply the color. Use light color first then to darker colors for this project. This won't apply to other batik work, so I have to remember according to each expression and technique.
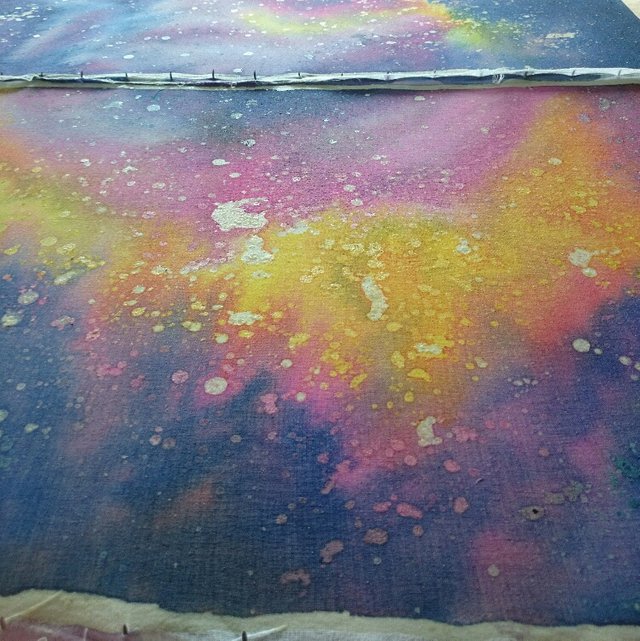
So yellow was done by wiggly wormy brush stroke, then immediately apply clear water around its' edge so they would fade.
Yes, the batik pigment application is exactly like in watercolor but dries much more faster. And batik makers prefer fading edge so always have clean brush and water handy.
Next before the water dries, apply pink around, then water on their edges again. Repeat this till all the colors are applied.
You could finish here if you are in a hurry.
If you want further richer application, wait till all becomes completely dry. Yes, if the room temperature or weather is cold, not suitable for batik because it would take ages to get them crisp dry!! My place is in tropics so no sweat, but still, I use huge industrial fan I borrowed from my teacher so I don't have to wait long!
Then 3rd step, redo the 1st and 2nd steps again. Which means, splash some more melted wax around for more milky way stars appearance.
Then no more yellow because it looked too strong, but pink, water to blend. More red where it would look like burning😄, then water to blend. And went on to purple and blue.
I noticed more pink on blue to make them more deeper hue.
Well, that was it.
I haven't done until the color fixing and washing the wax away, but looking forward to see it soon so I can make them into a shirt!
Just to mention, all the images are taken by me, @naomipangolin
It's look really fantastic! Great job!
Thank you @sweettais😄
Very beautiful @naomipangolin! I 😍 Malaysian batik!
😍😍😍😍😍
That's really exciting to create your own design @naomipangolin... Will you post an update to show what it looks like after the colour fixing and washing the wax away please?
Yes, thank you for your attention! Actually, in this photo, the colors were still wet. It appears dark and super good but... 😅
Now in my hands it looks more light color and I am thinking "where did my misty romantic galaxy had gone to!?"😂
My husband said it looks hippy😂I will make them into shirt and post it later❤