A Few Guidelines For Tabletop Miniature Painting
For gamer folks who prefer an analog pencil and paper tabletop experience such as Pathfinder or Dungeons & Dragons over computers and consoles, the physical materials such as the maps, miniature models, dice, handouts, and props all contribute to a fun, visceral, and memorable experience.
Miniature painting is another realm of gaming where art, creativity, craftsmanship and gaming overlap. Gamers old and new alike use miniatures. The differences in quality and workmanship between those pre-painted versus those painstakingly painted with hours of loving dedication are quite apparent.
As a gamer I enjoy pieces that are colorful, textured, and detailed, but I also understand the frustrations, time, mistakes, learning, intuition, and mastery required to paint miniatures reasonably well. I am no professional or master painter by any means, but I do like to add my own style to the table, and feel very loved when someone gives me a piece they’ve taken the time and effort to paint. I also love being able to display them as 3D fantasy art in my home.
I’m writing this post with some guidelines and tips to encourage people to take creative risks, briefly explain what I do creatively and technically in my painting, and to keep it as approachable as possible so that my ideas are both easy to understand and helpful, regardless of what level you paint.
I present some basic guidelines that I find make miniature painting less daunting and more approachable, which I hope will slowly help you build confidnce over time. Use what works for you and discard the rest.
Priming your models usually yields more even painting and better results. The WizKids models (Deep Cuts and Nolzur’s) are the one exception I’ve found to this rule, and they do fine without priming. If the miniature is metal or some other plastic, such as Reaper or the like, you NEED to prime it, otherwise the paint job will look horrendous and lack depth.
Always go from broad/general to specific/detailed. Your detailing will be better and you can fix mistakes more easily.
The bigger the model is the more paint it will require, but the easier it will be to paint than a smaller model. You have a bigger area and more room to paint over or alter mistakes, and fewer tiny details to worry about (see item 2). The opposite is also generally true; a halfling bard is probably going to be harder to paint than a beholder or unicorn for the reasons stated above.
When working with paints use the darkest and broadest colors first; this allows for a gradual dry brushing effect for highlights that will make the model look more realistic and less flat (again see item 2).
Use the classic “fat over lean method,” that is to say, start with paints that are thinner and each time you layer or drybrush on top use a slightly thicker paint (even if it is the same color) because the paint will more easily stick to the surface of the model.
The middle layer colors are going to be the main colors so make sure they are light or dark enough for the intended effect. Models generally become lighter in color or shade as you paint them.
When layering or dry brushing start with a bigger brush and go smaller each time. Remember, as your brush gets smaller, so should the area you are painting with that brush. This is how highlights pop up because you are catching smaller details each step.
Do shading and inking first in the recesses/crevices THEN do dry brushing and highlighting on the folds and bulging textures.
Let the paints and inks dry! I cannot emphasize this enough, otherwise everything will look muddled and lacking in contrast.
Do the base of the model last. Even if you are using a bottle cap or something to hold the model this is generally the most handled part and you are going to keep chipping paint that will need to be touched up.
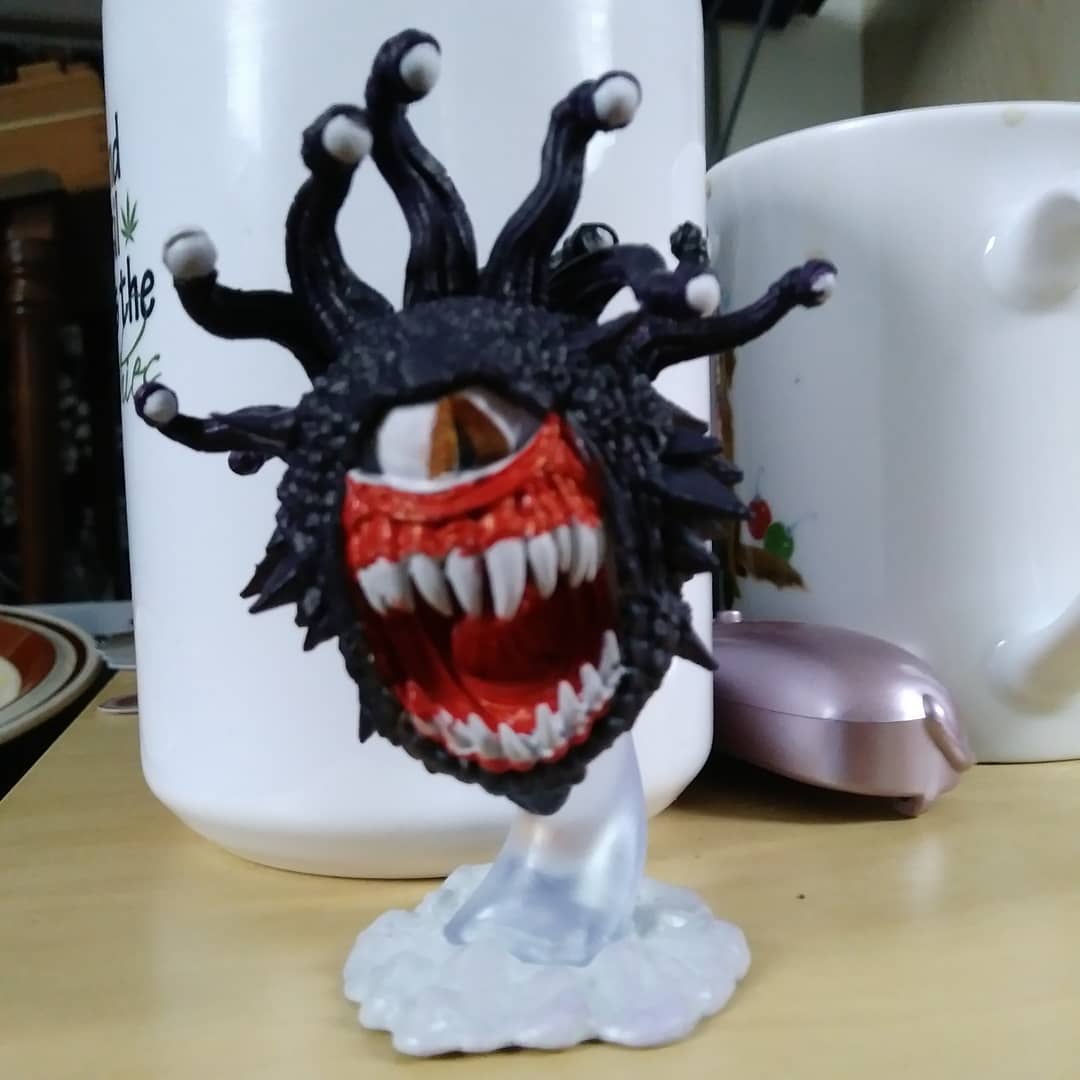
To demonstrate the results of my style I am going to share a few pictures of the steps I took painting this Beholder model which I consider one of my best recent works. I am missing every specific part, but hopefully these 5 pictures will demonstrate a general progression that I hope makes sense.

Figure 1: When I first started I painted the entire model black, except for the teeth, mouth, and eye areas, then I very broadly layered a dark purple and my darkest red for the mouth/jaws.
Beholder Part 2 Basic Dry Brush.jpg
Figure 2: I applied broad basic middle color purple dry brushing on the body.
Beholder Part 3 Touch Up and Inking.jpg
Figure 3: I used contrasting inks for shading and detailing the crevices and also began working on the base.
Beholder Part 4 More Dry Brushing Inking And Eye Details.jpg
Figure 4: I did more inking and dry brushing with some freehand design on the smaller eyes, and I touched up white spots and mistakes.
Beholder Part 5 Base Finished Glued and Varnished.jpg
Figure 5: I finished the base, last details, and varnished the model for added protection shine, and finally glued the base to a model base. We have a model I think is quite fearsome and suitable for the table.
I would love to hear your ideas and thoughts in the comments below.
Happy painting and gaming!
These are the kinds of posts that should be trending. You have a knack for describing the process in such a way that makes sense.
Thank you. I have made a lot of mistakes in model painting and I figured it would be helpful to post advice based on my most common pitfalls and stuff I wish someone had told me.
"Learn from my fail" is a very powerful teaching tool...
Omg
???
Thank you! This opened the door to a completely new field of geekery! I didn't even know things like that existed!
It's all the fun of gaming and art rolled into one. I encourage you to give it a go.
Painting is really relaxing. And playing is great to share time with friends... we play infinity :)

Makes a lot of fun!
Great colors and patterns! Happy gaming!
Thanks you too 🤗
Dude that mini looks so detailed! How long did it take you??
Thank you. Just sitting and painting I would say about 5-6 hours. I am slow but also do things in phases. The whole thing took a few days with waiting for stuff to dry and working on other things. The hardest part of this one was getting all the texture of the scales covered in paint and not having any white showing.
thank you for sharing hat was well thought of
Thank you for sharing.
How fun...
This is a good post with a lot of detail.
That beholder came out really well! In the past, I painted a number of D&D minis, some came out better than others. I still have a few of them in a little display case.
Congratulations @jestermage, you have decided to take the next big step with your first post! The Steem Network Team wishes you a great time among this awesome community.
The proven road to boost your personal success in this amazing Steem Network
Do you already know that awesome content will get great profits by following these simple steps, that have been worked out by experts?
This is straight up awesome. Loving the work with the teeth and eyes. How long have you been figure painting?
About 18 years, but I have been a lot more focused in the past 5.