Experimental Designs - II
Here is something that I printed in order to test the capabilities of the 3D printer. When the software prepares the 3D print, if there is an overhang between two structures, it is known as a "bridge", and because of the way the software is configured, you do not need supports in order to ensure that the bridge is properly formed. However, because the 3D printer I use at home makes use of the fused deposition modelling (FDM) method, if the bridges are too long, the material will start to sag, notably for the first layer, where there is no support.

Fig. 1 - The CAD Model with bridges of different lengths.

Fig. 2 - A better look at the various lengths.
There are CAD models online for you to test your own 3D printer, but I decided to design one myself in order to make sure my skills are still warm.
Each of the lengths is at 5mm increment. So the first length is 5mm, the next is 10mm, and so on. Each layer is also printed individually - so they are of different heights, with the shortest being of the lowest height and so on.
So here is the final print.

Fig. 3 - Final Print
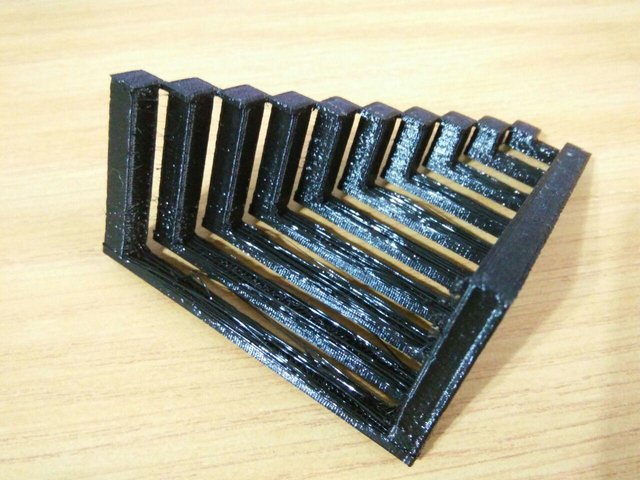
Fig. 4 - Better view of what happens on the underside
Up until 20mm, the print still went fine. From 25mm onwards, the material started to sag, and from Figure 4, you can see that the lines are sagging, most notably on the final one.
This helps with future designs, in knowing what we can print comfortably without the need for supports, and where our limit is.