Reviving a Vintage Transmission Electron Microscope - Part 6 -> I HAVE A BEAM-<
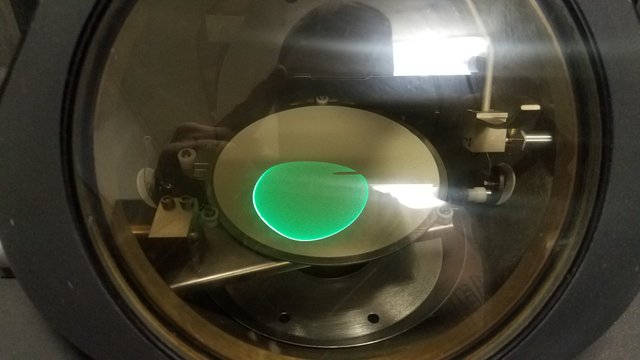
Figure 1- Beam! A bit distorted, among other problems. Looks like the condenser stigmators are messed up. Hopefully just bad regulators or Digital to Analog Converters (DAC).
Progress has been magnificent that last few days. I even achieved Ultra High Vacuum. I have been concerned that the Ion Getter Pump was going to be a problem. Many times I have set up an older TEM and the IGP was dead. Not this time tho! This scope will run without an IGP, but I would like to put a brighter Lanthanum Hexaboride Filament in it, and the vacuum that a Oil Diffusion Pump can obtain is insufficient for this.
So when I plugged in the IGP it did this thing where it turns off and on, over and over. It will carry on doing that until it “catches” and starts to pump. If it does not stop cycling, the IGP is bad the majority of the time. When this cycling happens I give it about 10 minutes to catch, if it does not, I turn it off and wait a while. Basically let the rest of the vacuum system pump out more gas. The next day I plugged the sucker back in, and the analog scale was holding at 90. About 2 hours later the IGP was pretty hot. Now, this can mean thing is about to die, or there are still some high gas levels in the instrument. I am guessing on the later. Now this scope has been down for a while, which gives ample time for the metals within to absorb gases from the air. Platinum for example can hold a lot of hydrogen. This scope and many others have Platinum apertures, and just cleaning those things can degrade the vacuum enough that you will have to wait until the next day to use it. After about 2 days the scale dropped down to 45, and the IGP was just warm. I took a picture with a thermal imager before and after.

Figure 2. Thermal image of the column and IGP, which is the hottest section. Resolution on the thermal is not great, so I put a 10Meg at about the same scale, from my phone next to it.
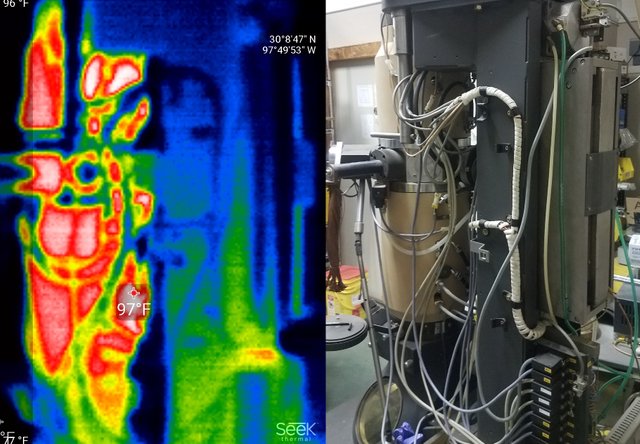
Figure 3. Thermal Image today...not so hot! Notice that the pump is NOT the hottest part of the TEM now.
A few notes on the analog gauge. It it is a logarithmic scale, and I think the idea behind this was that it would be easier for the operator to use the scope if the vacuum readout is all in the same range.
Under normal operating conditions you want to see these readings or better.
PV1 (M1) < 15, presently 10. (10^-1 Torr)
PV2 (M2) < 15, now 10. (10^-1 Torr)
PV3 (M4) < 15, now 0. (10^-2 Torr)
HV1 (M3) < 0 to 20 presently 10. When <7.10^-5 Torr IGP can switch on.
HV2 (IGP)< 55. (10^-6 Torr)
Now that the vacuum is sufficient in the column, I will attach the gun. This can take two people, but if you are careful you can lift the thing onto the column yourself. It sits right on top of the gun valve (V7). It is then attached from above to the jack by 3 M6 metric bolts. The jack can lift the wehnelt and insulator out of the chamber, or any section of the column or the entire thing. The next step is making the indium seal. Indium is used as a vacuum seal in a few places in the scope where a lot of X-rays or heat is generated. It can last indefinitely to my knowledge, unlike fluoroelastomers or Buna which are used everywhere else in the instrument. The indium seal is very tricky, it is a 0.7mm thick wire which needs to be cut to length, wiped down with alcohol, then wrapped around a special tool and slipped into a copper interface (Figure 5 and 6). Once the indium is laid into place, a Xray aperture needs to be inserted and a lead shield that wraps around the V7 valve block.
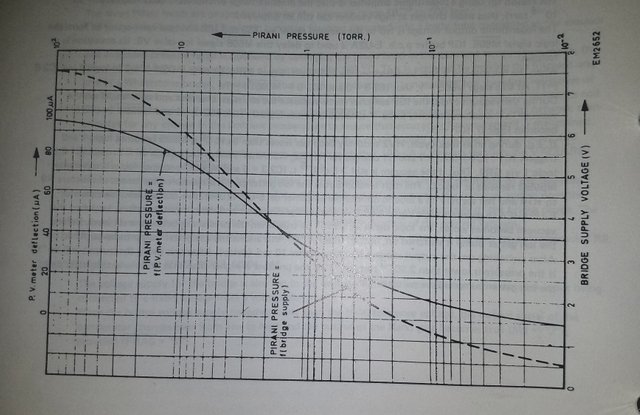
Figure 4. Chart showing vacuum levels versus scale deflection for pirani gauges.
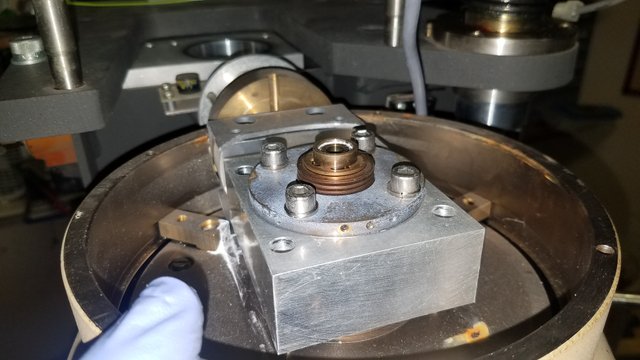
Figure 5. Gun valve and seal. Valve is inside the aluminum block, and the seal goes into the copper recess above.
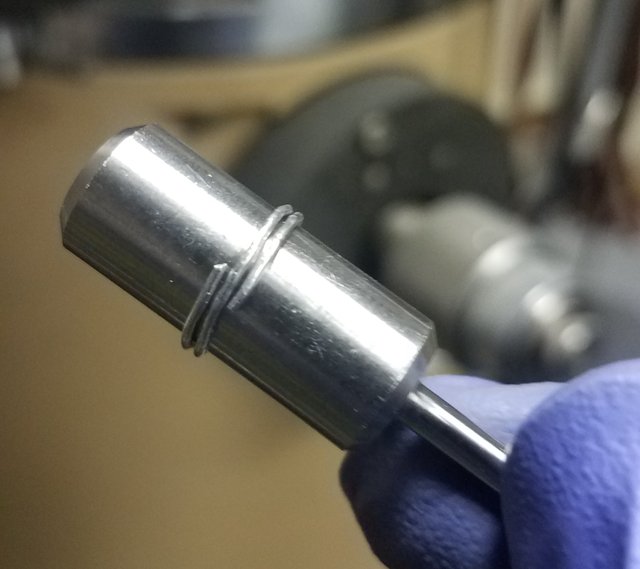
Figure 6. Wrapping 0.7mm indium wire around guide tool.
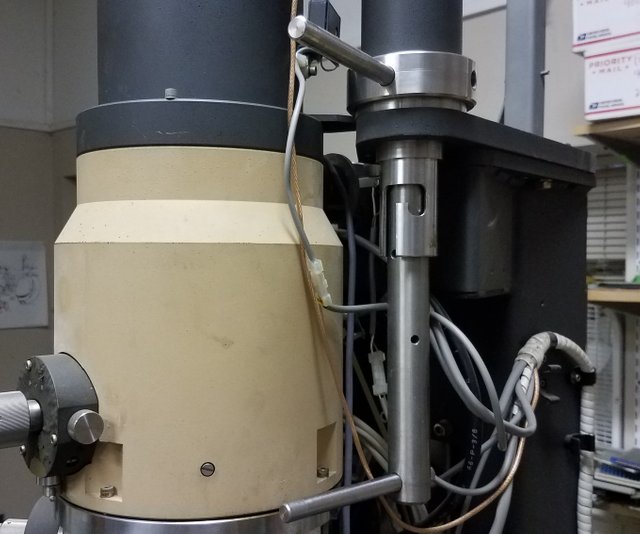
Figure 7. Column jack and upper column. Upper handle is attached to a very robust thread that slowly lifts any section. Lower handle is for lifting Wehnelt and Gun Insulator out of the emission chamber for filament exchanges.
Next we lower the Emission Chamber down slowly. I did not mention it earlier but there is an adjustment that needs to be made at the yoke on the top of the jack. You basically line up the EC with the top part of column by turning a ring that is bored off center. Once its lined up you attend to the seal. As the EC is lowered 4 screws are threaded in, alternating them much like you do with the lug nuts on a tire. You can see one of the M4 or M5 bolts towards upper left of figure 7.
Once the EC is on, I like to restart the whole system, then plug V6 and V7 back in immediately, so it can run through its cycles gently. If I just open those valves immediately there will be an extreme change in vacuum levels from one chamber to another which is not really good.
I had previously polished the gun chamber (600 grit) and wiped it out thoroughly with 80% Isopropyl and Kimwipes, so it will take a while for the vacuum to recover, but boy does it look nice!
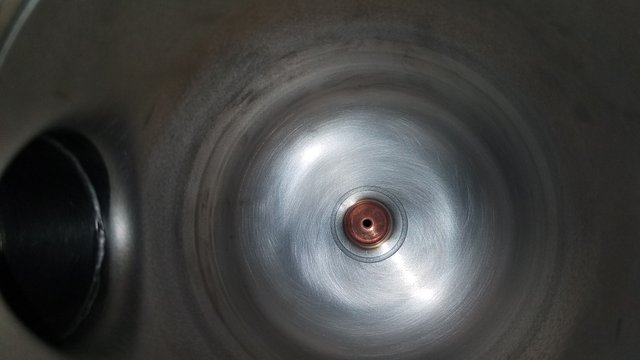
Figure 8. Polished emission chamber and copper anode. The anode is around 20mm wide, in case you were wondering.
All right, a day has passed and the beast is ready for High Tension. I think a video is best for this.
Turning up the filament on the EM420
I have the voltage set to only 40kV, and the HT light stays on, when the button is pushed which is good. Next, I slowly turn up the filament, and you can see the beam slowly appear. Unfortunately the scope is really out of alignment and also has a few coils giving bad readouts. I will attend to this next, so keep posted! I need to set up a desk lamp with a dimmer to use this thing or until my hands remember where all the controls are ;-p.
This post has been voted on by the SteemSTEM curation team and voting trail in collaboration with @curie.
If you appreciate the work we are doing then consider voting both projects for witness by selecting stem.witness and curie!
For additional information please join us on the SteemSTEM discord and to get to know the rest of the community!
Lanthanum... Whole my life I've been thinking that the only application of Lanthanum is to fill the crosswords...
Lanthanum is also used in Atomic Absorption spectroscopy to stabilise the signal of some elements. I think I used it quantifying Mg or Mn once, but never the less it stabilises some elements signals. It is also used in TIG welding, as well as Cerium and Thorium. These elements added in small concentrations to Tungsten electrodes, increase electron emission, among other factors. There are some interesting parallels between TIG welding and EM. ha!
Cool facts!
That indium wire step seems a bit crude compared to all the other steps. Either way, it's really cool that you've got a beam. Good luck perfecting it.
It does require some skill, haha. There are 5 more indium seals in this TEM, and this one is the least difficult. Thanks!