
Not Your Ordinary Pop Quiz!
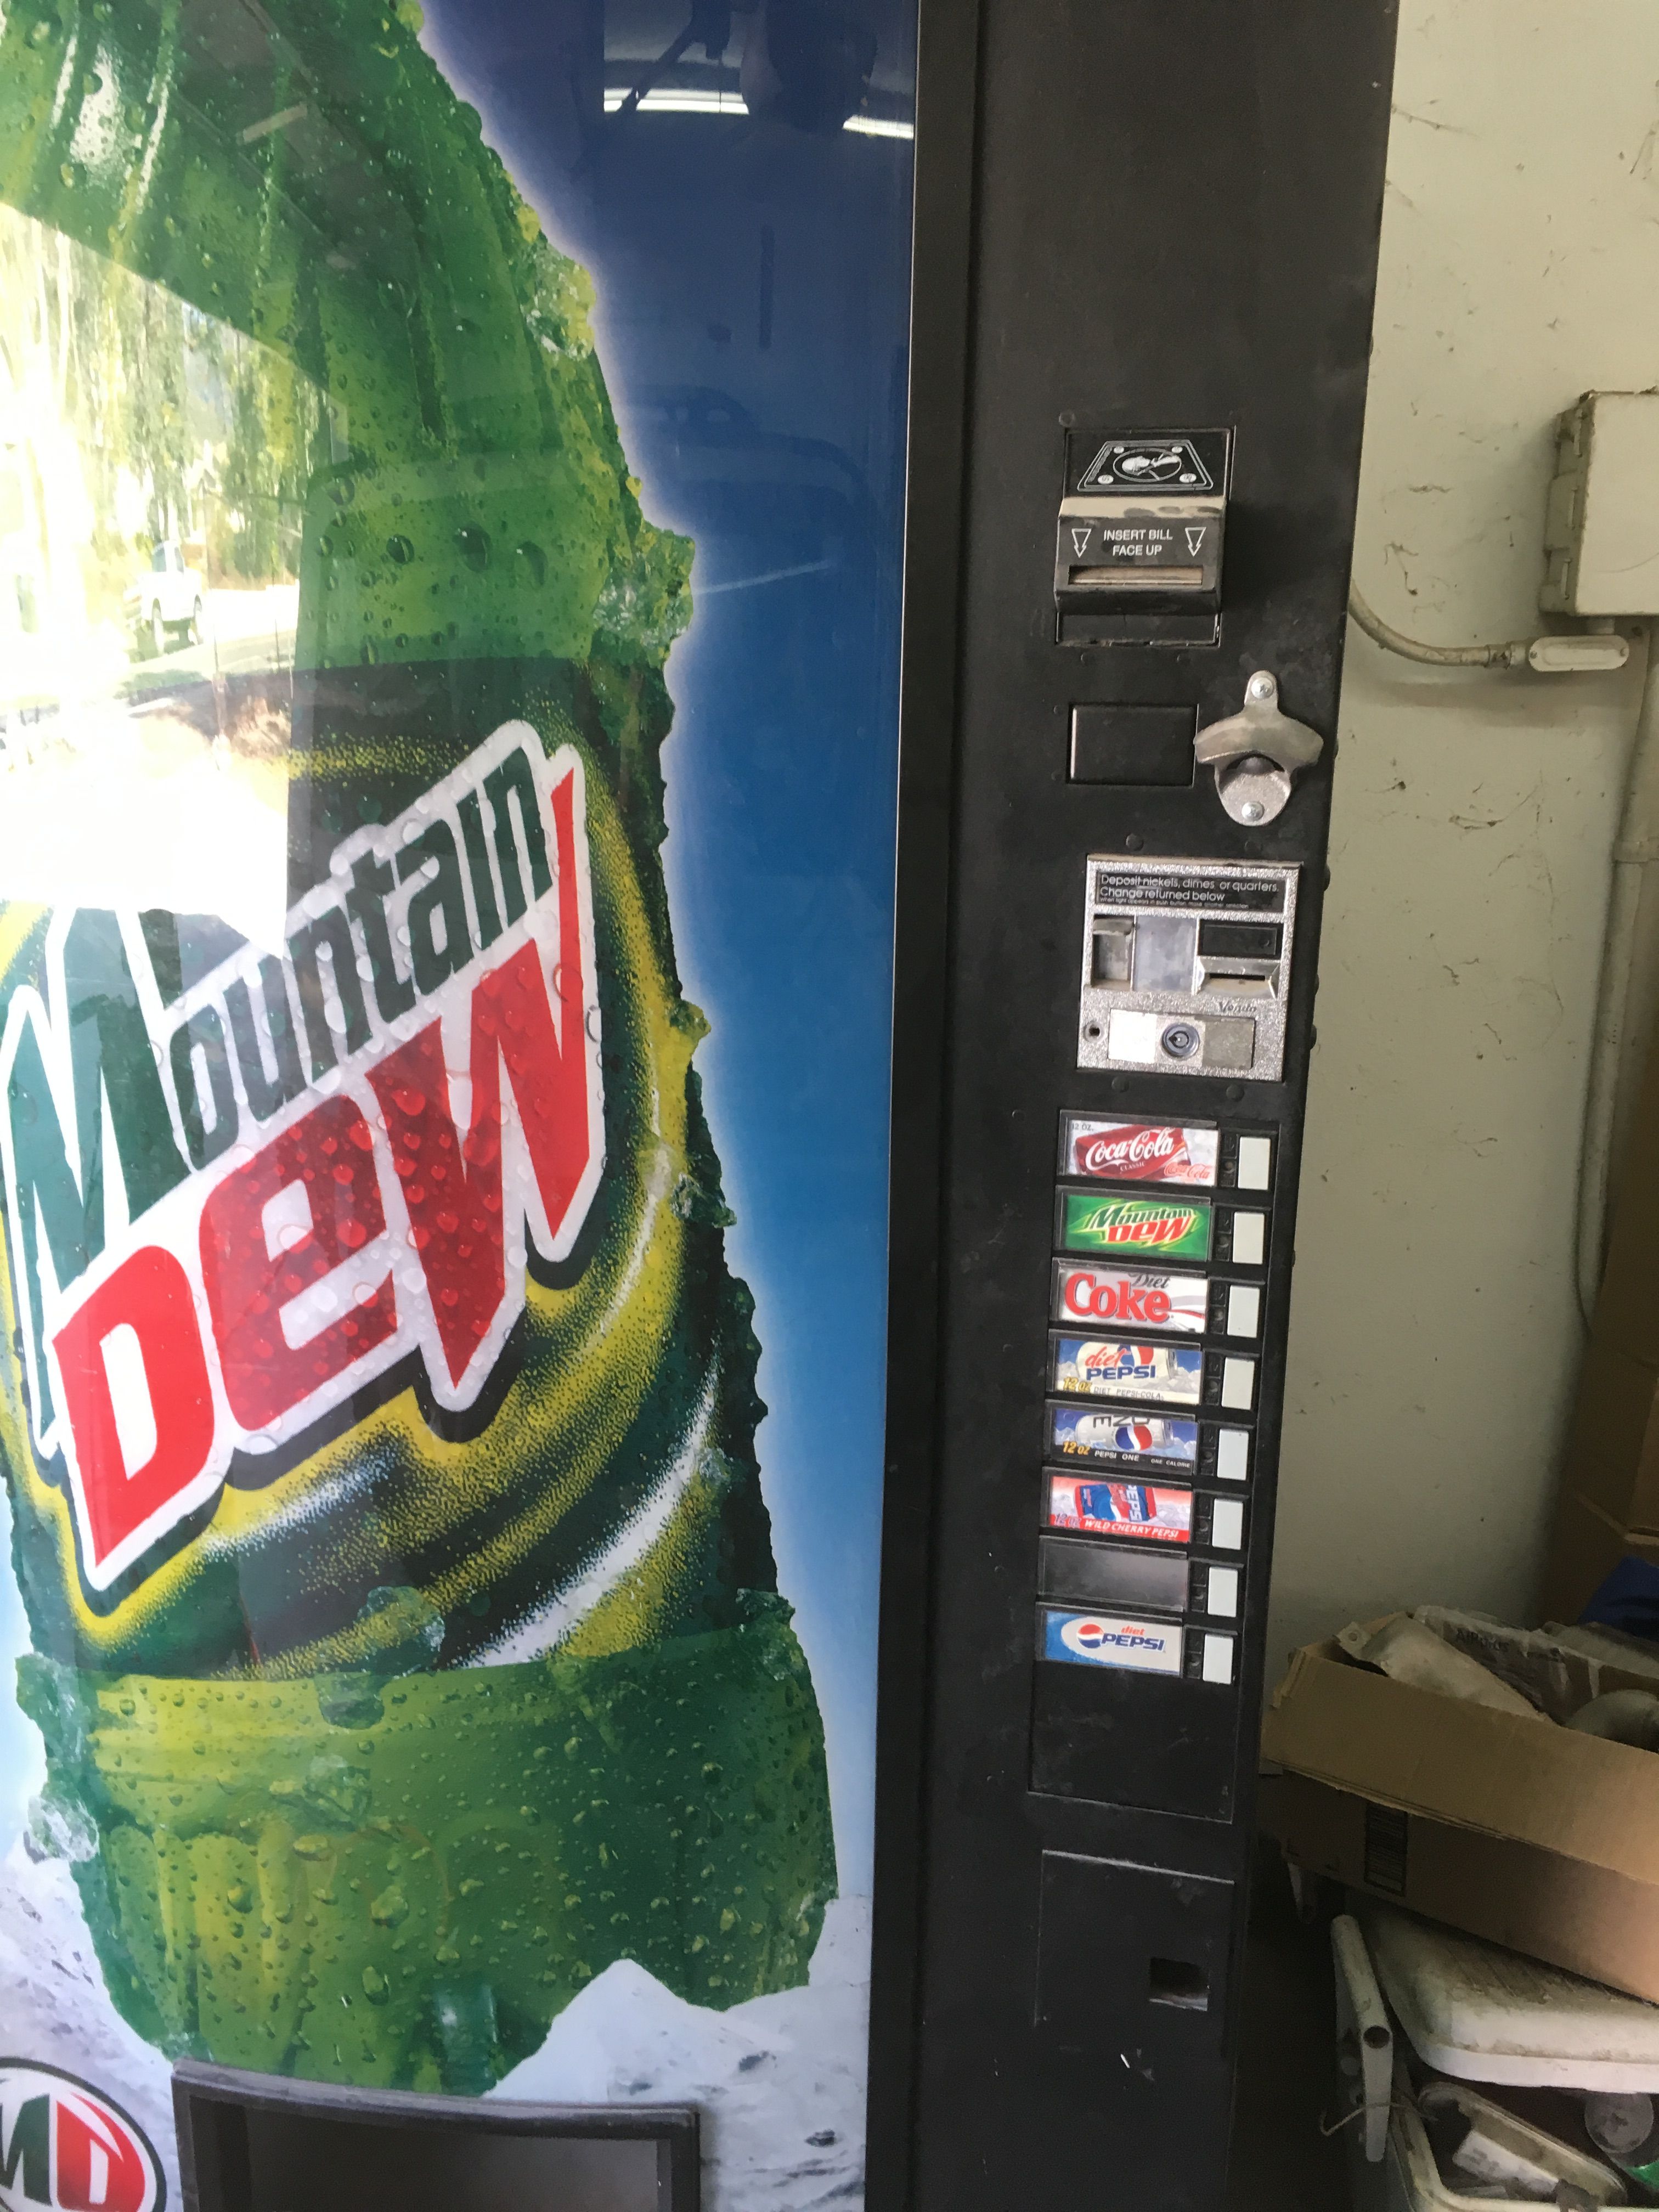
 How are all of you out there today? While moving into the place @beckymeep and I reside, the previous owner was kicked out and had left various items in the dwelling. One of the more lucrative items was a soda machine that did not work and was left to us to remove. This huge thing weighed a lot and would be a nightmare to toss out. I figured this was a nice project to undertake and try and flip. I set out to see what exactly was wrong with it and if I could get it back to fully working order. This soda machine is a Vendo v475 Single Price Vending Machine.
Unfortunately though, the machine was locked and was not accessible internally as I did not have the key to it.
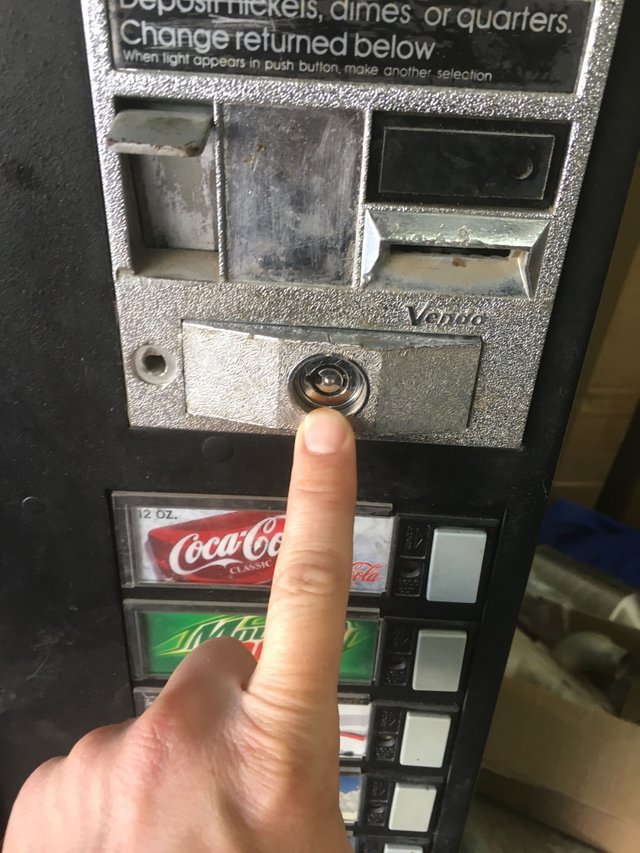
The only way to access the inside without picking the lock would be to drill it out. After a few hours of trying to pick the lock, I resorted to the drill. I grabbed my punch to try and center the initial small drill bit.
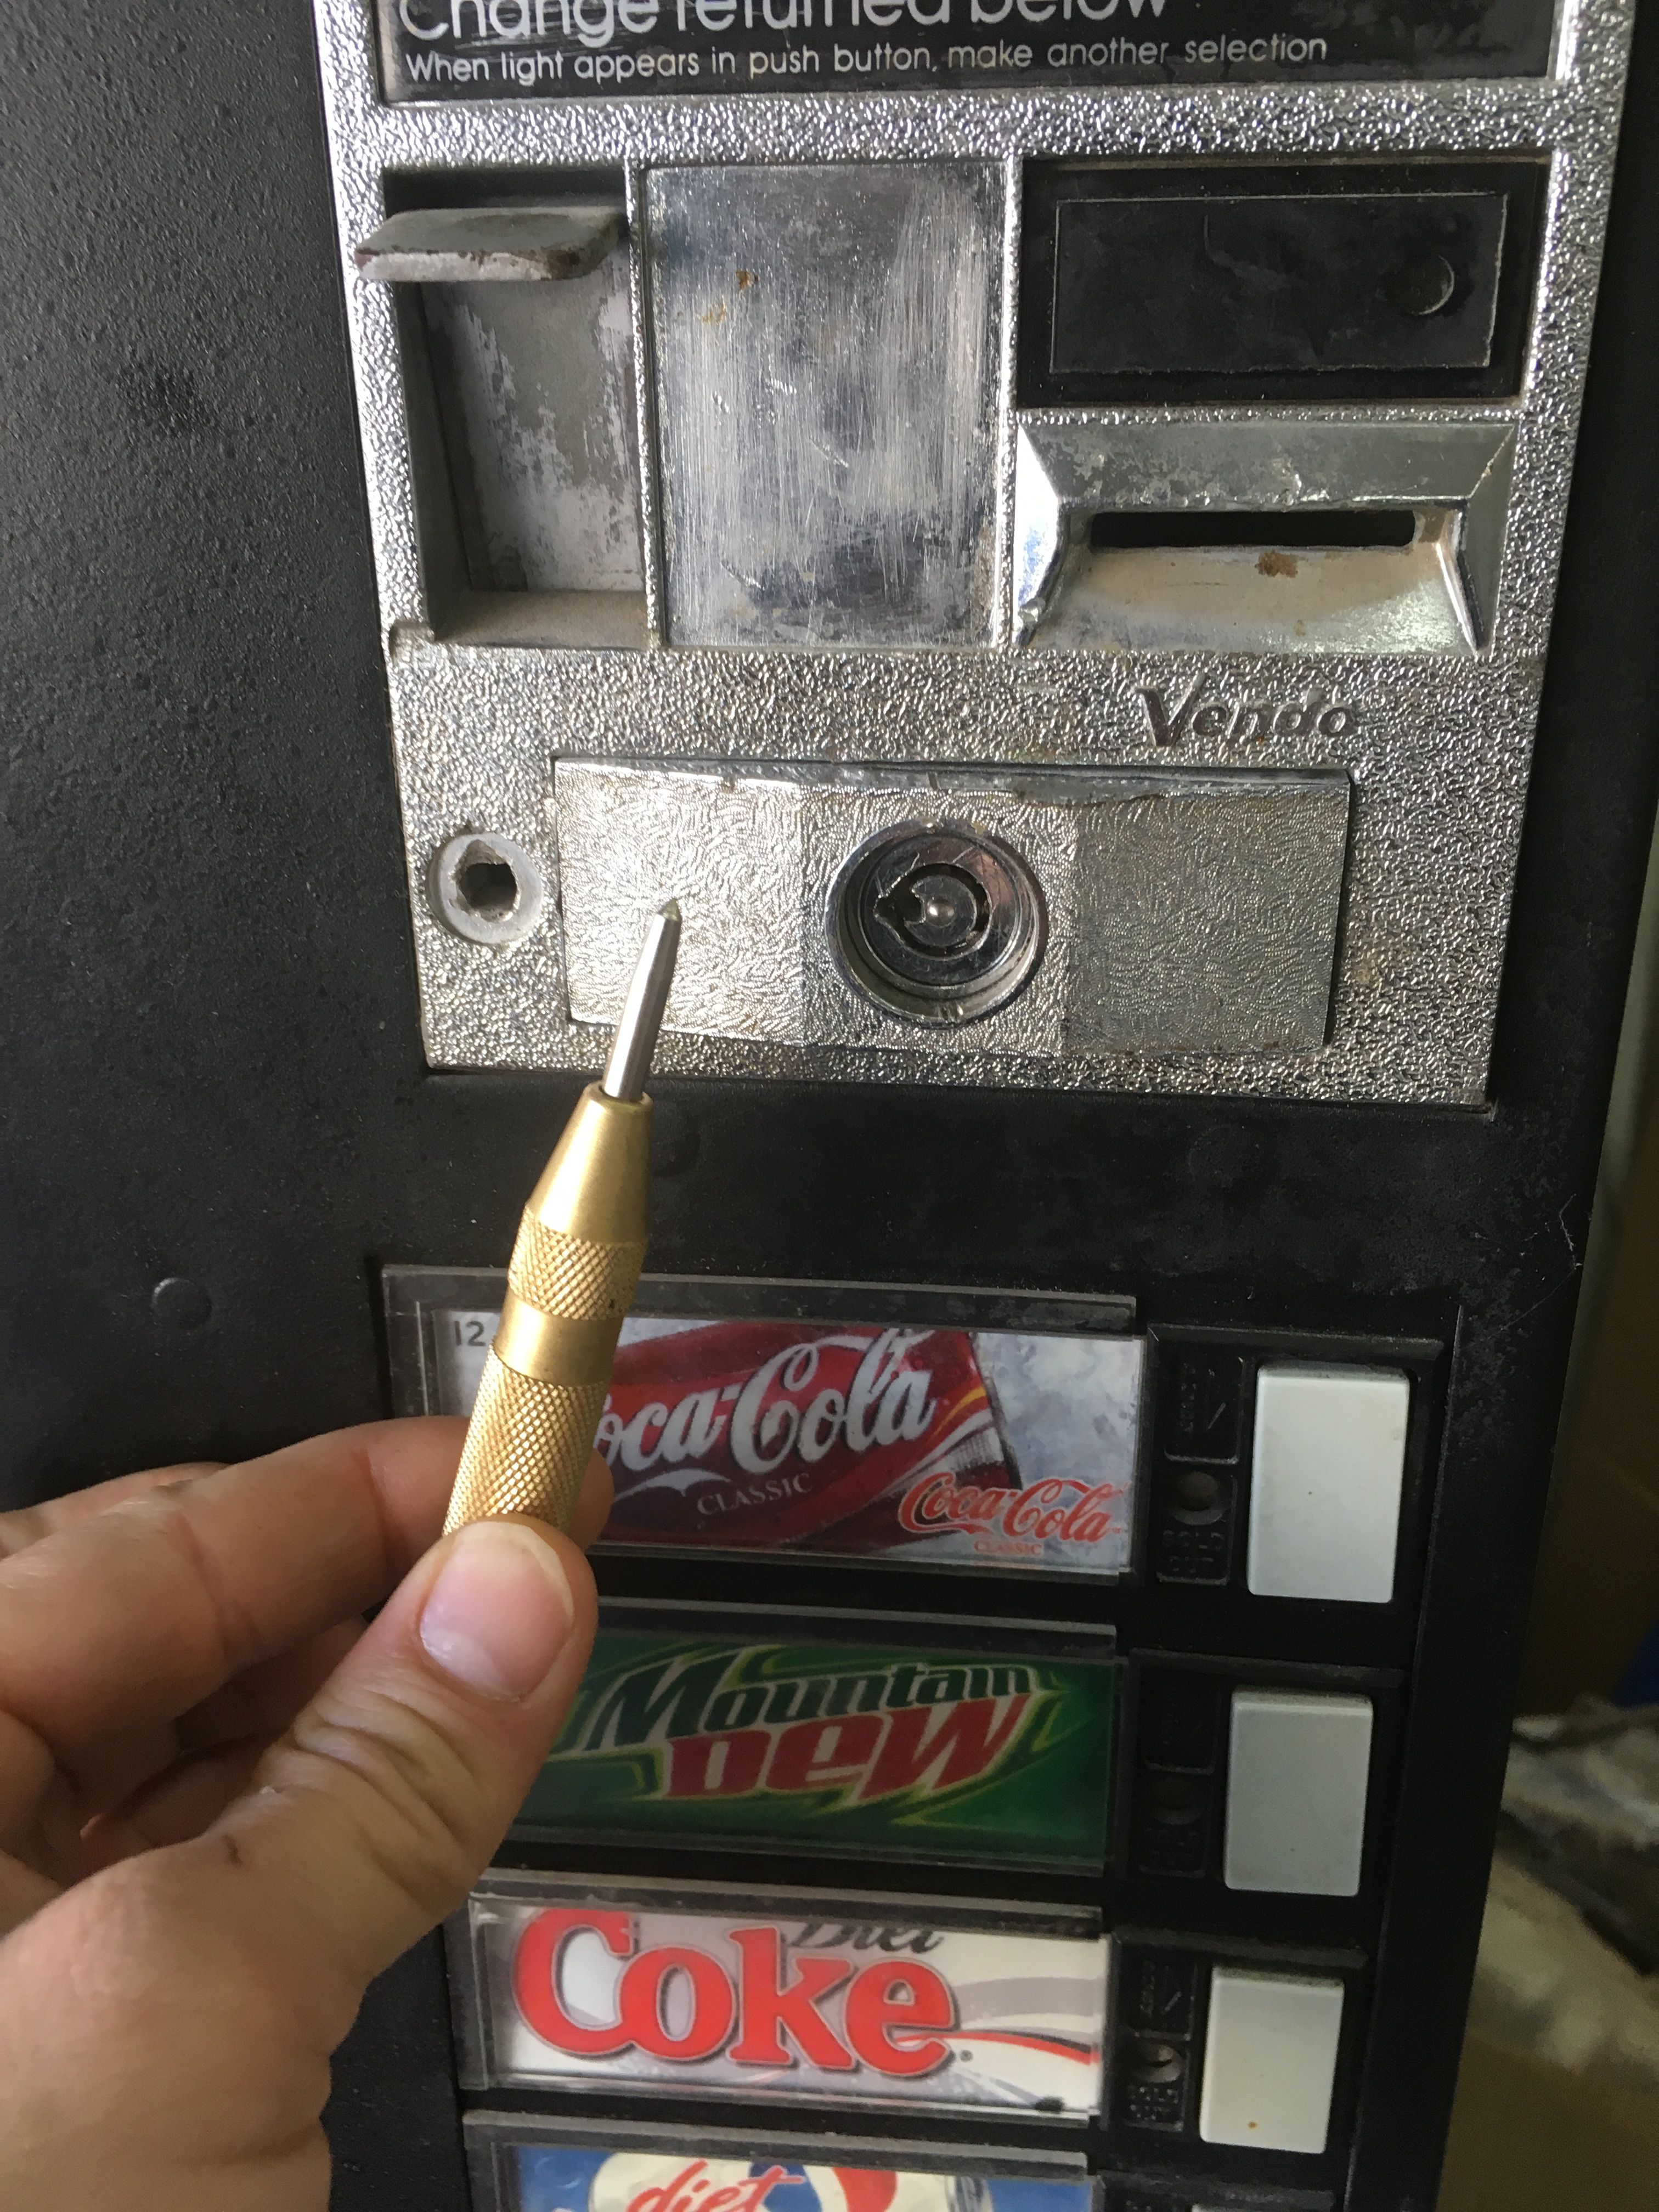
I started with the smallest bit possible to create a pocket for larger bits.
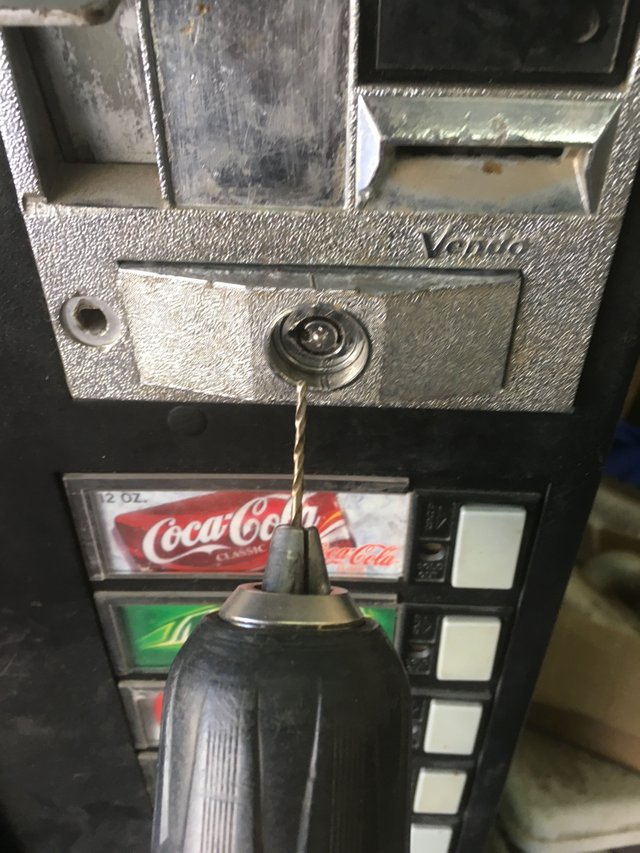
I then worked my way up in bit size in a fruitless attempt to penetrate the hardened lock.
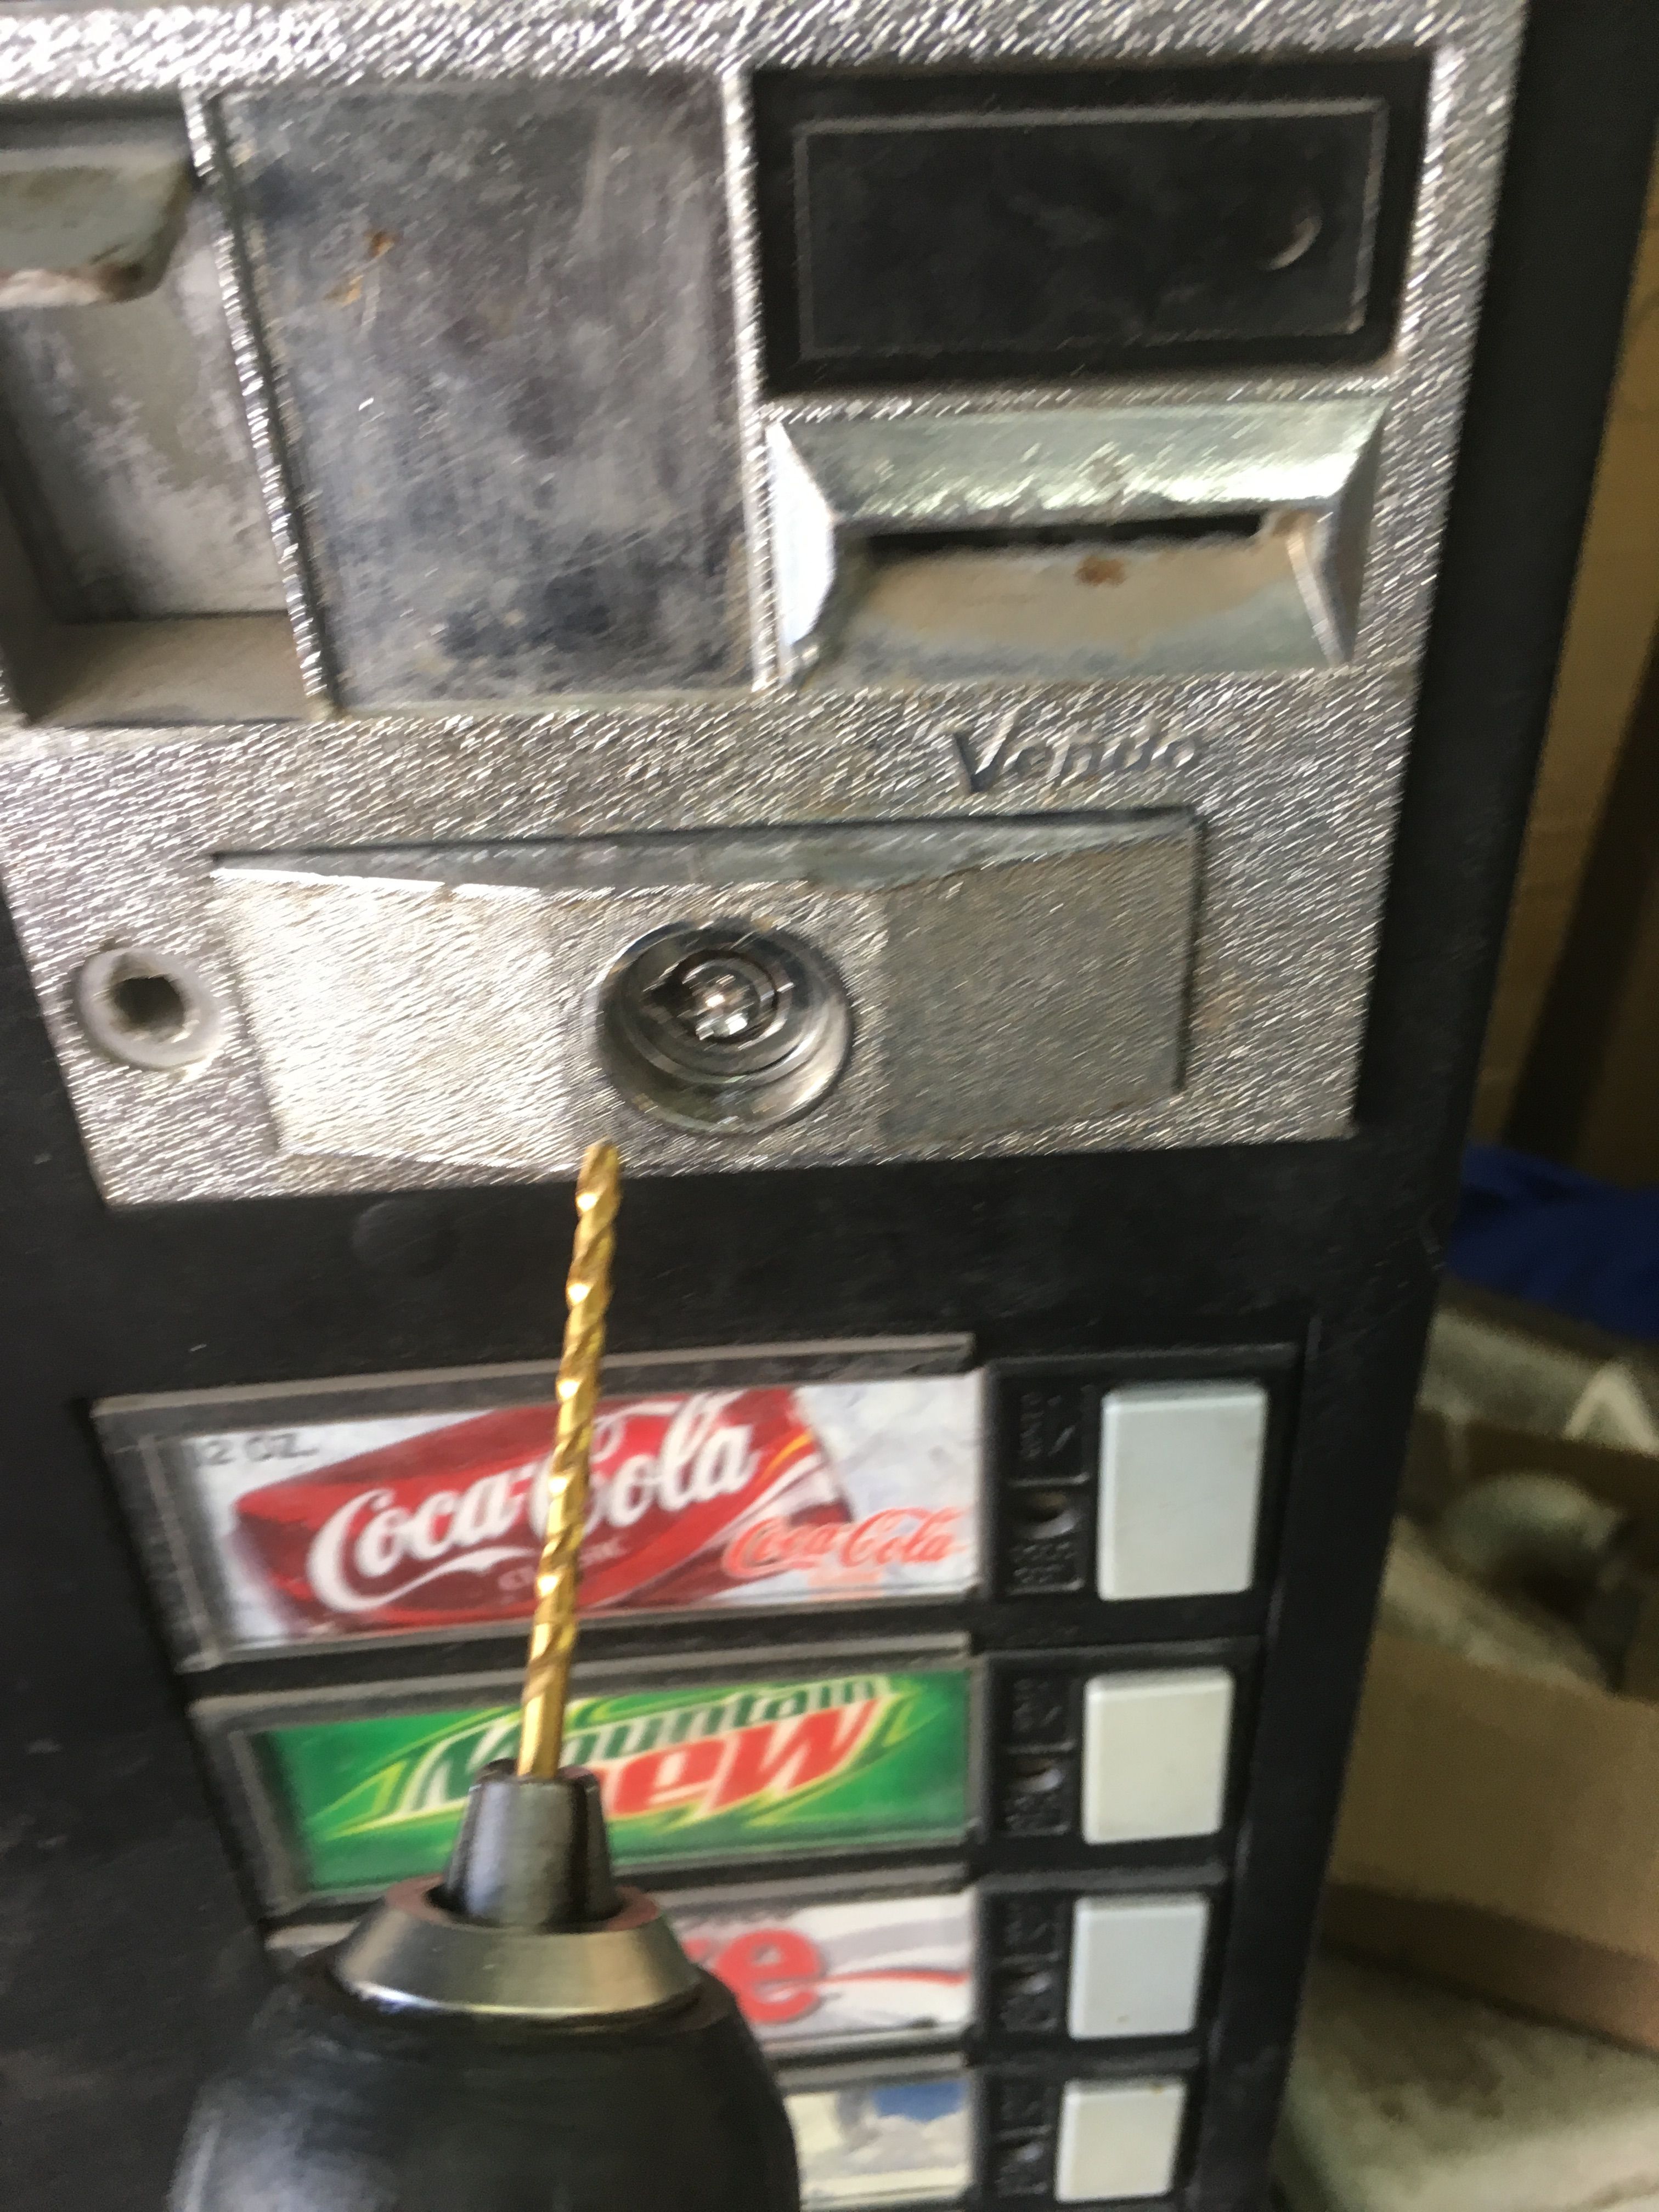
I drilled for hours with carbide bits and was not getting anywhere. The power drill did not have enough torque or ability to work through the lock

I knew of only one thing that would get through this lock, a Hammer Drill with an appropriate sized Masonry Bit. I have drilled into concrete before using a Hammer Drill and as it has the ability to cut through a quartz doped material, I figured hardened steel would be no problem. The hammer action of the drill helps cut through hard objects and remove the excess material. Once the lock was drilled enough to compromise it, the whole handle popped out from the locked position.
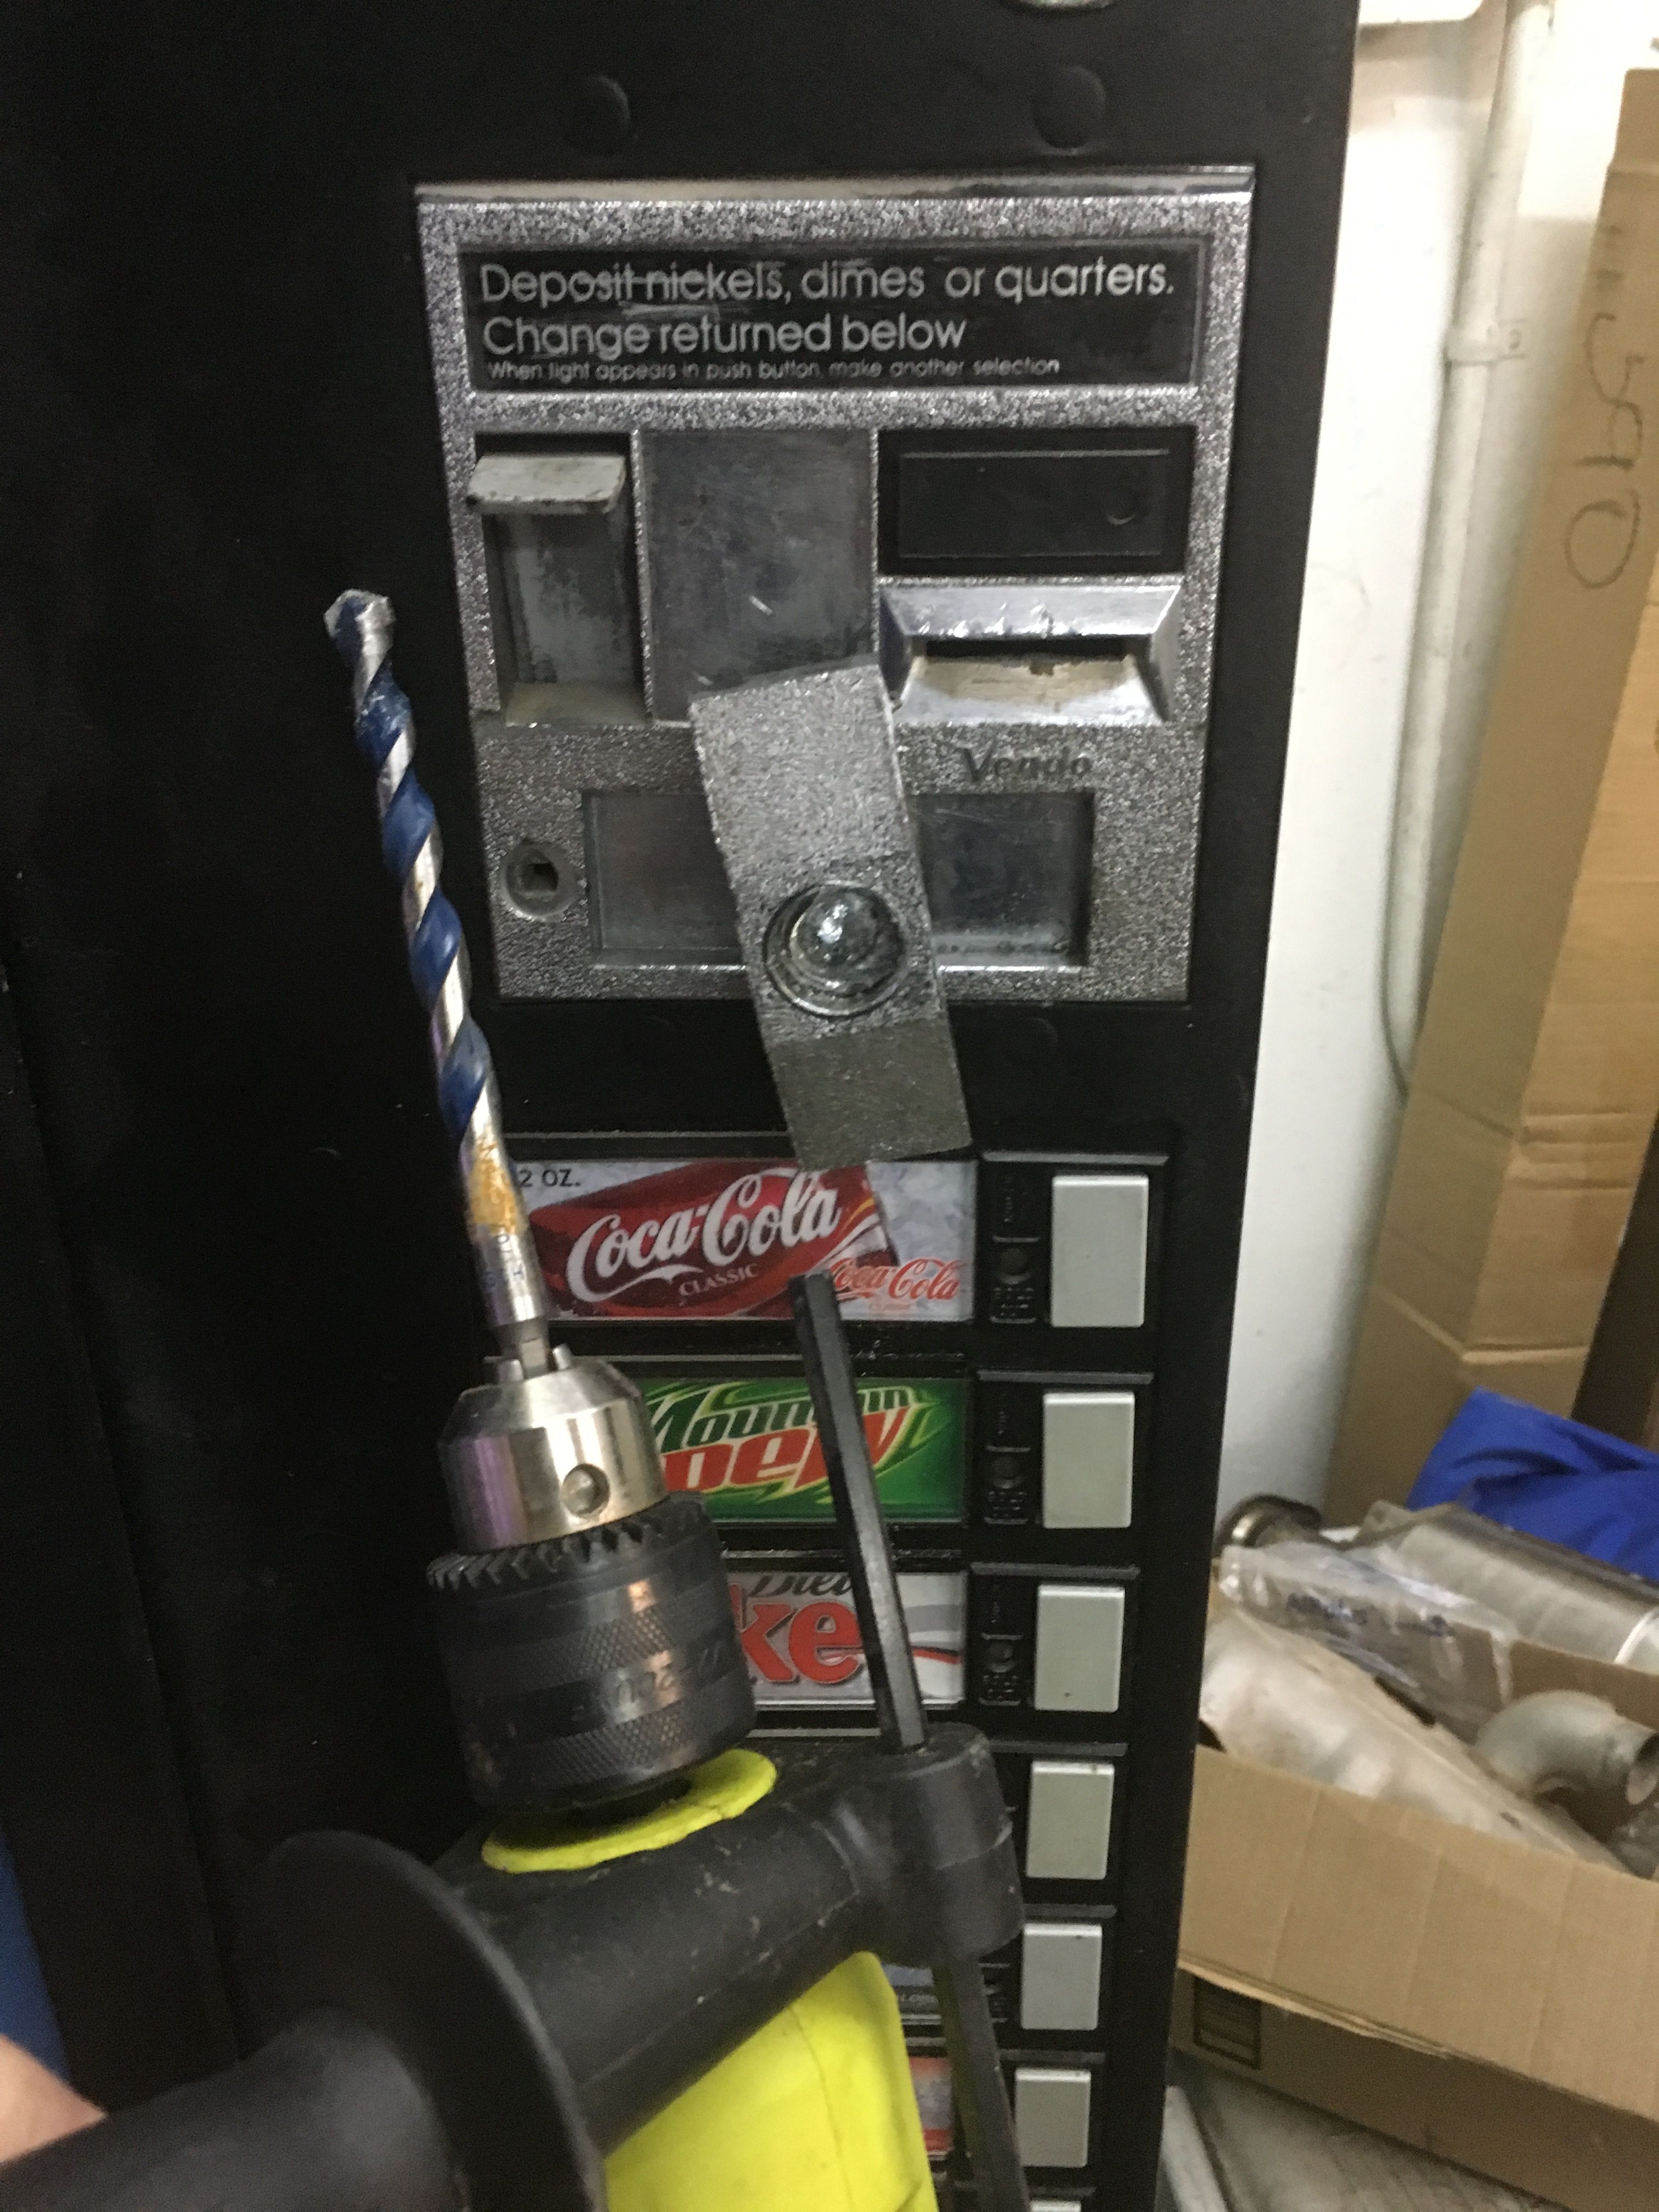
Once the handle popped out, the rear of the lock was accessible and it could be removed from the machine. I used a small Flathead screwdriver to press in the retainer and dislodge the drilled out lock.
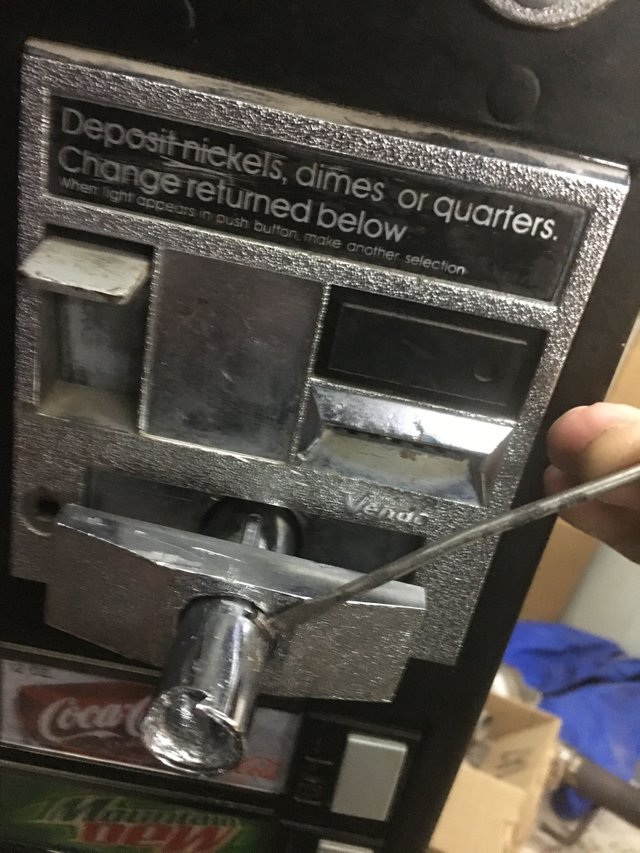
Now that the lock was drilled out the handle (that unscrewed to open the machine door) was able to accept a new lock that I had already purchased.


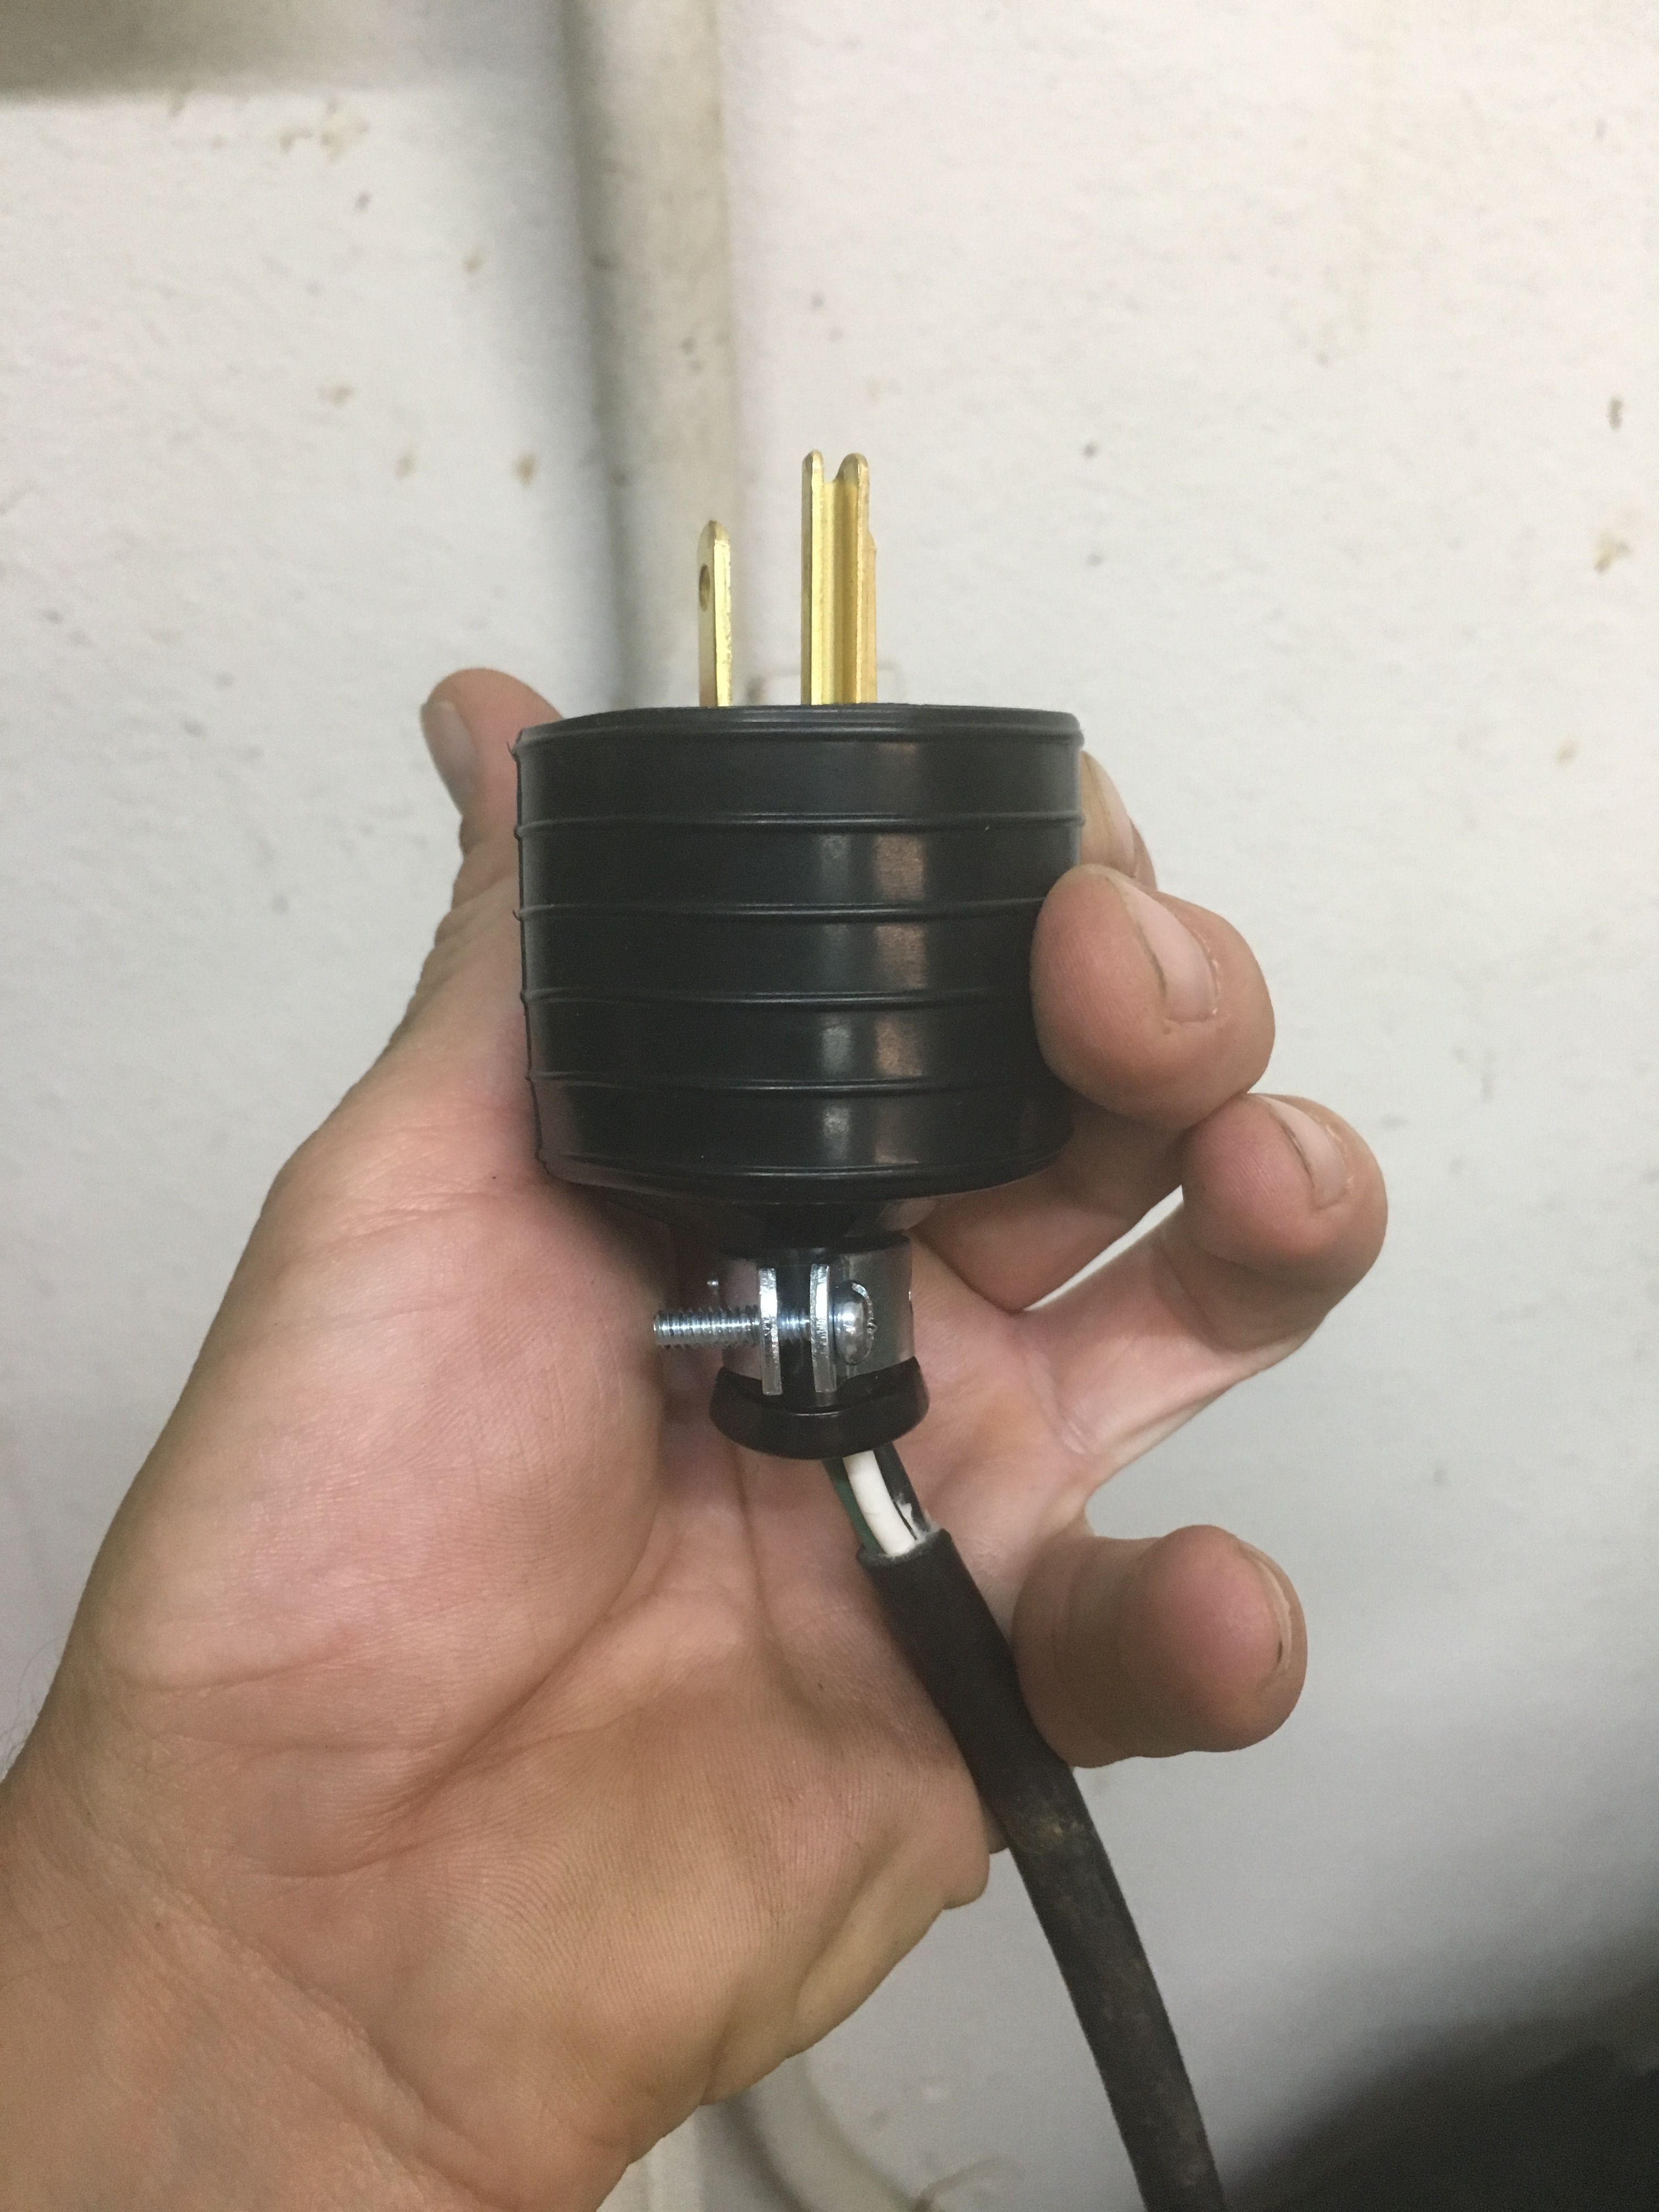
Before delving into the internals of the machine I noticed the plug was cut and made the easy fix from a store bought plug. I made sure the plug was rated for the maximum 15 amps at 125v a household circuit would put out in the US. As per the instructions of the plug, the white wire went to the silver screw, the black wire went to the brass screw and the green wire went to the green screw.
I could now test the internal components of the machine with power. I opened it up to see what was inside. Posted on the inside of the door were warnings, instructions on how to maintain the machine and contact information encase of emergency.
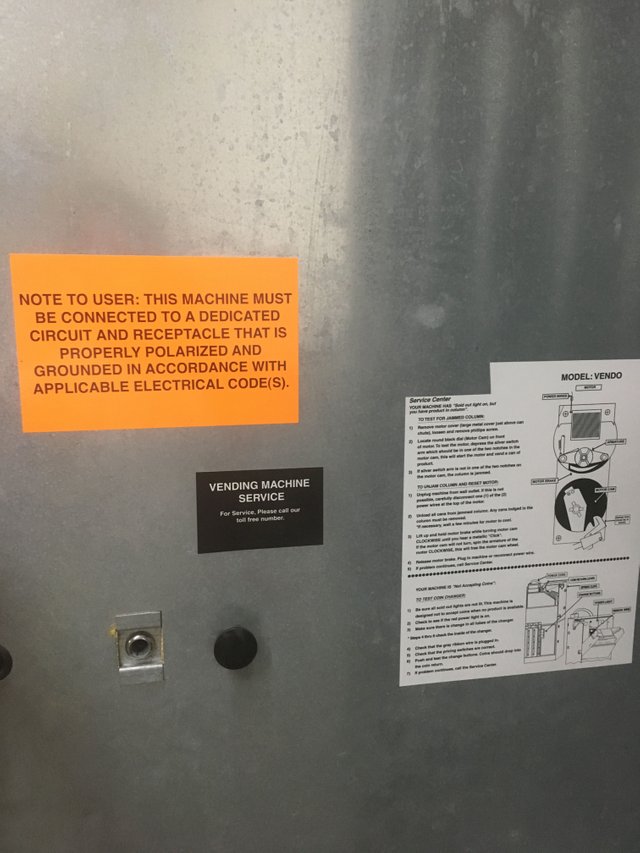
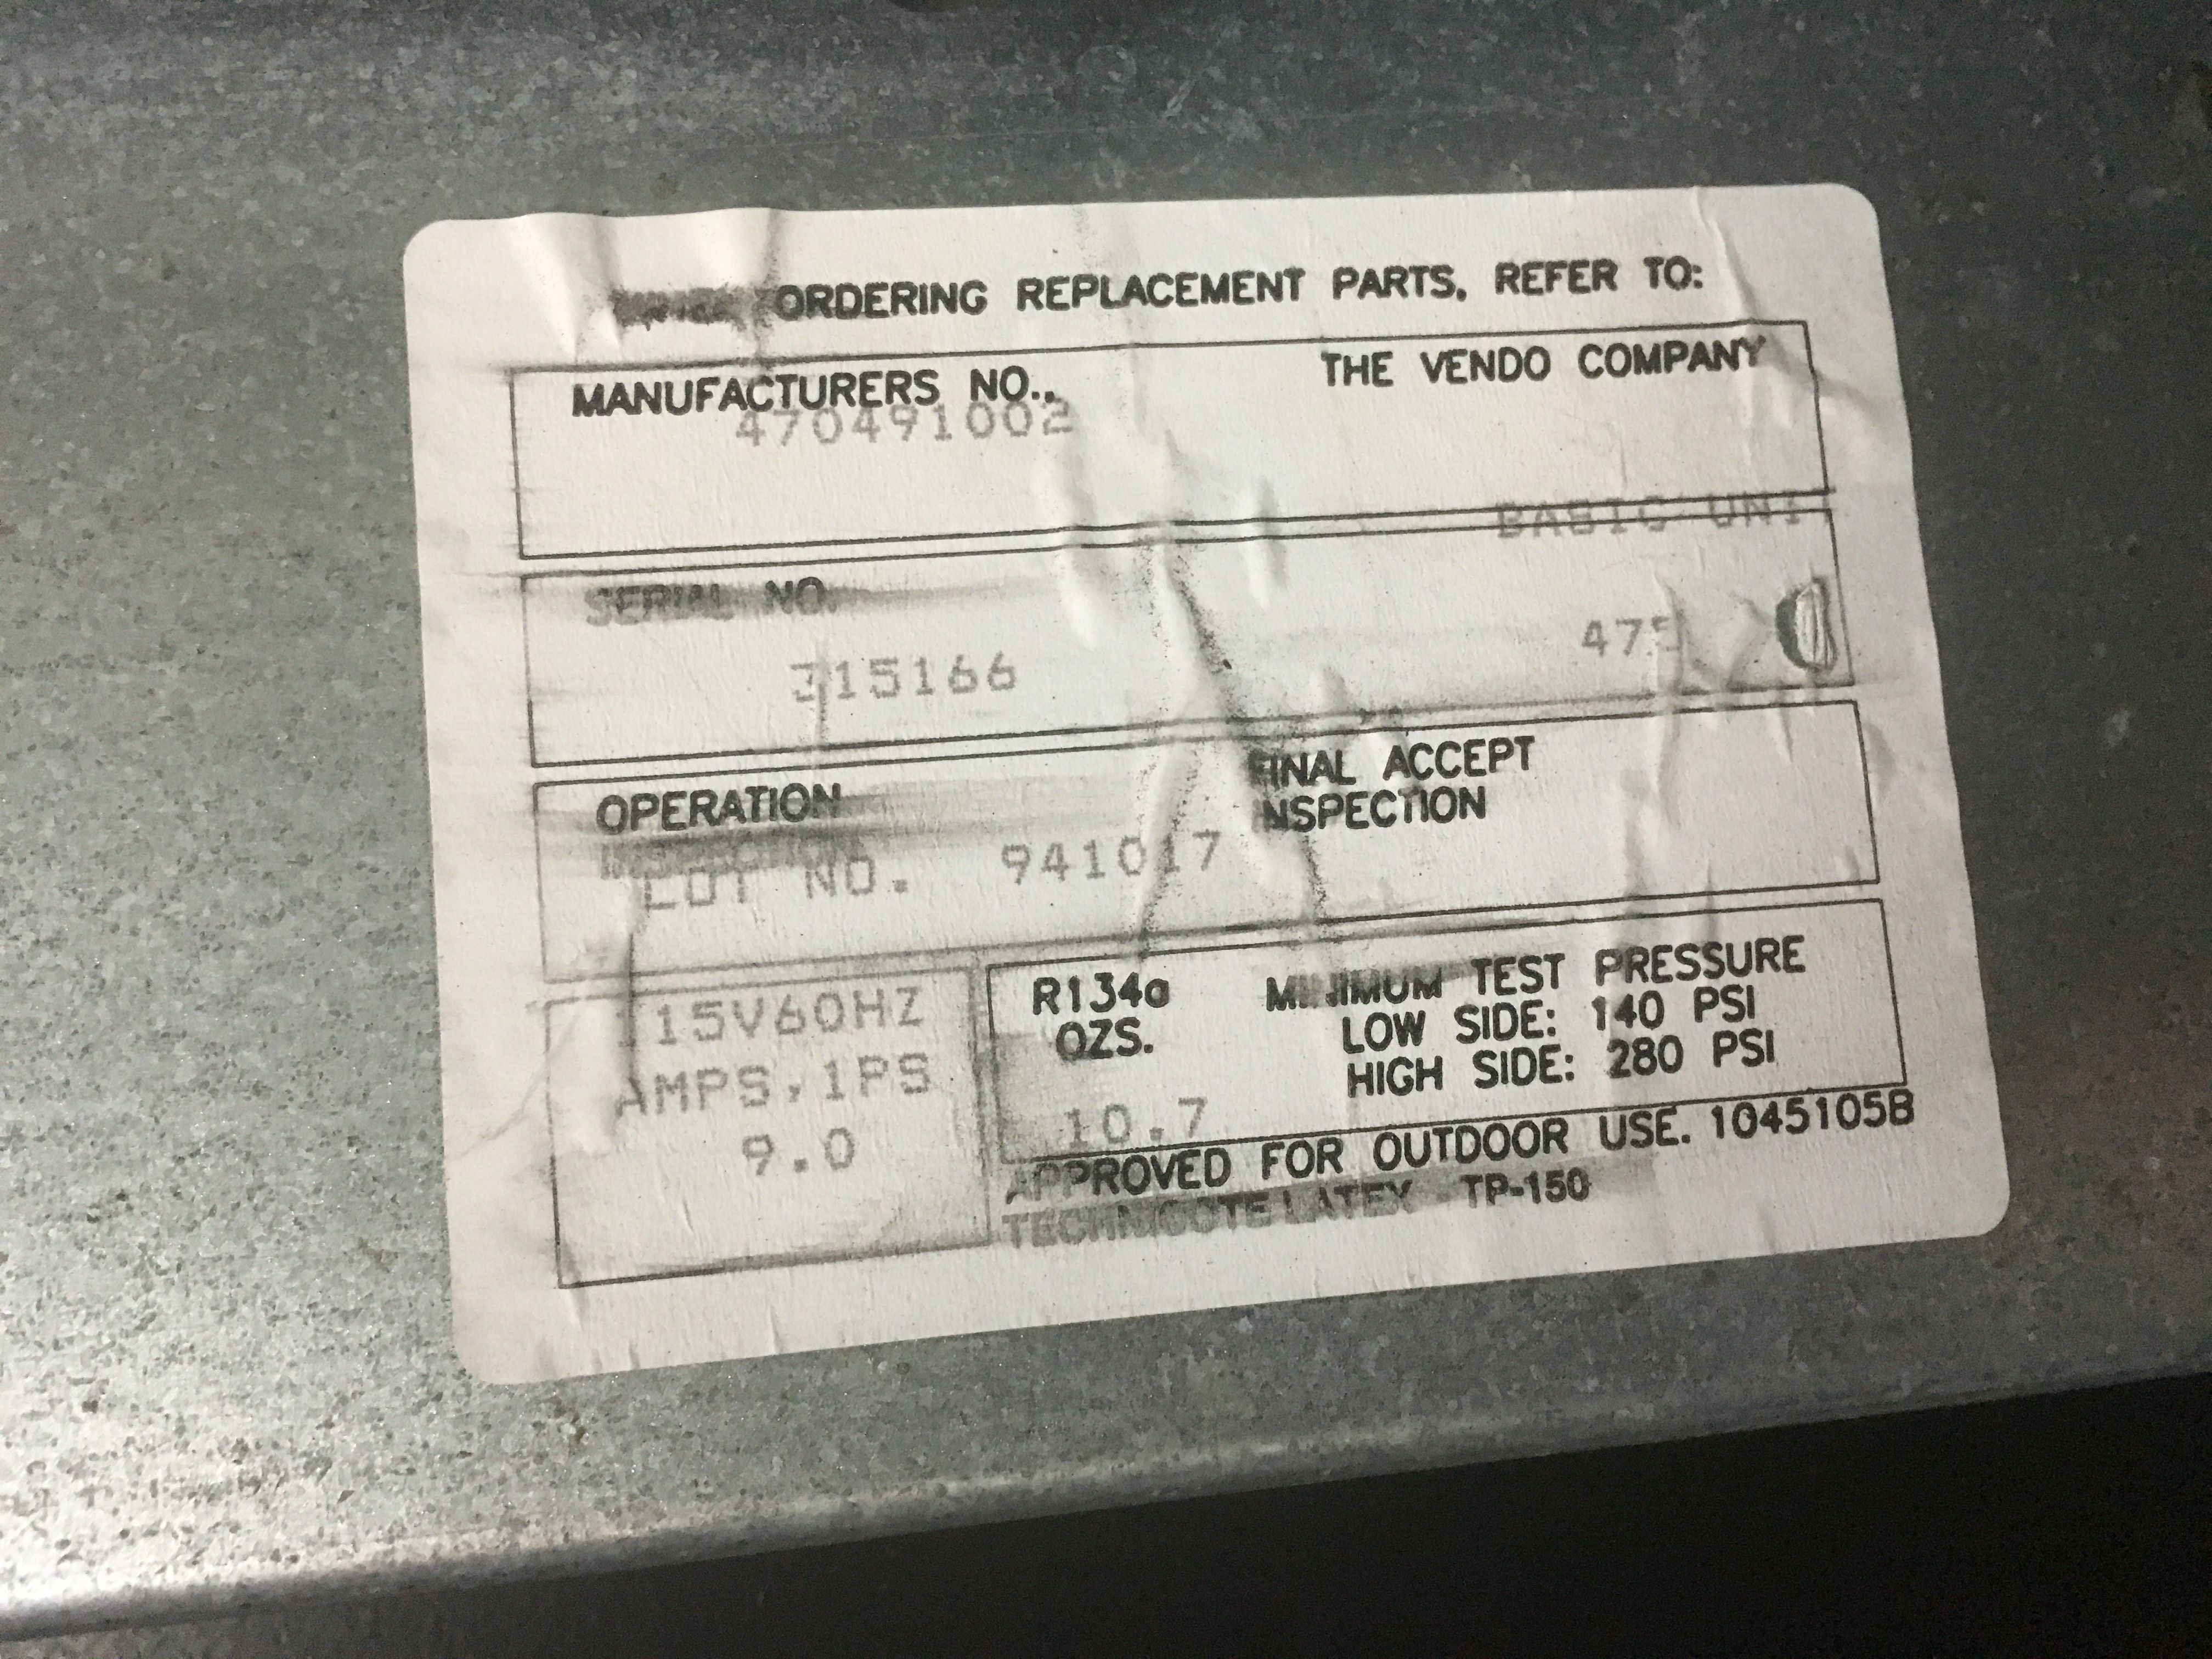
On the model tag it stated this machine was rated for outdoor use! SCORE!
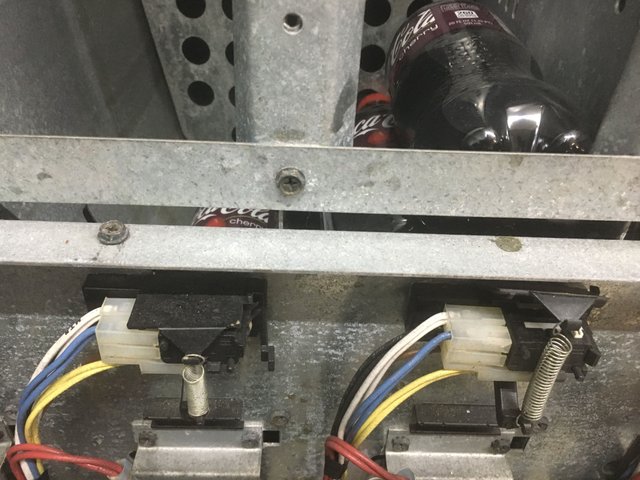
The Machine consisted of an AC compressor (hidden below the working mechanisms of the machine and accessible from the rear) that cooled the cans that sat in the various columns. At the foot of every column was a motor to drive the dispenser that would feed out a single can or bottle.
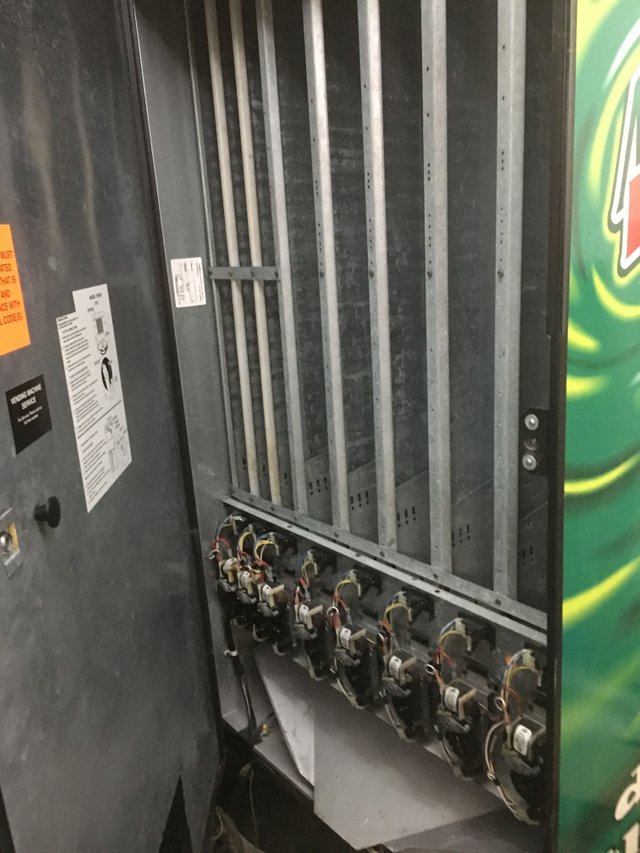
Five of the columns were larger than the remaining 3 and could accept 16 Oz bottles or go two 12 Oz cans deep. The rear sections of the columns could be moved forward or rearward depending on the owners desires.

If the column is filled sufficiently a small hinge is lifted, opening the loop to the front button "empty" light, therefore staying off and showing the soda is in stock.
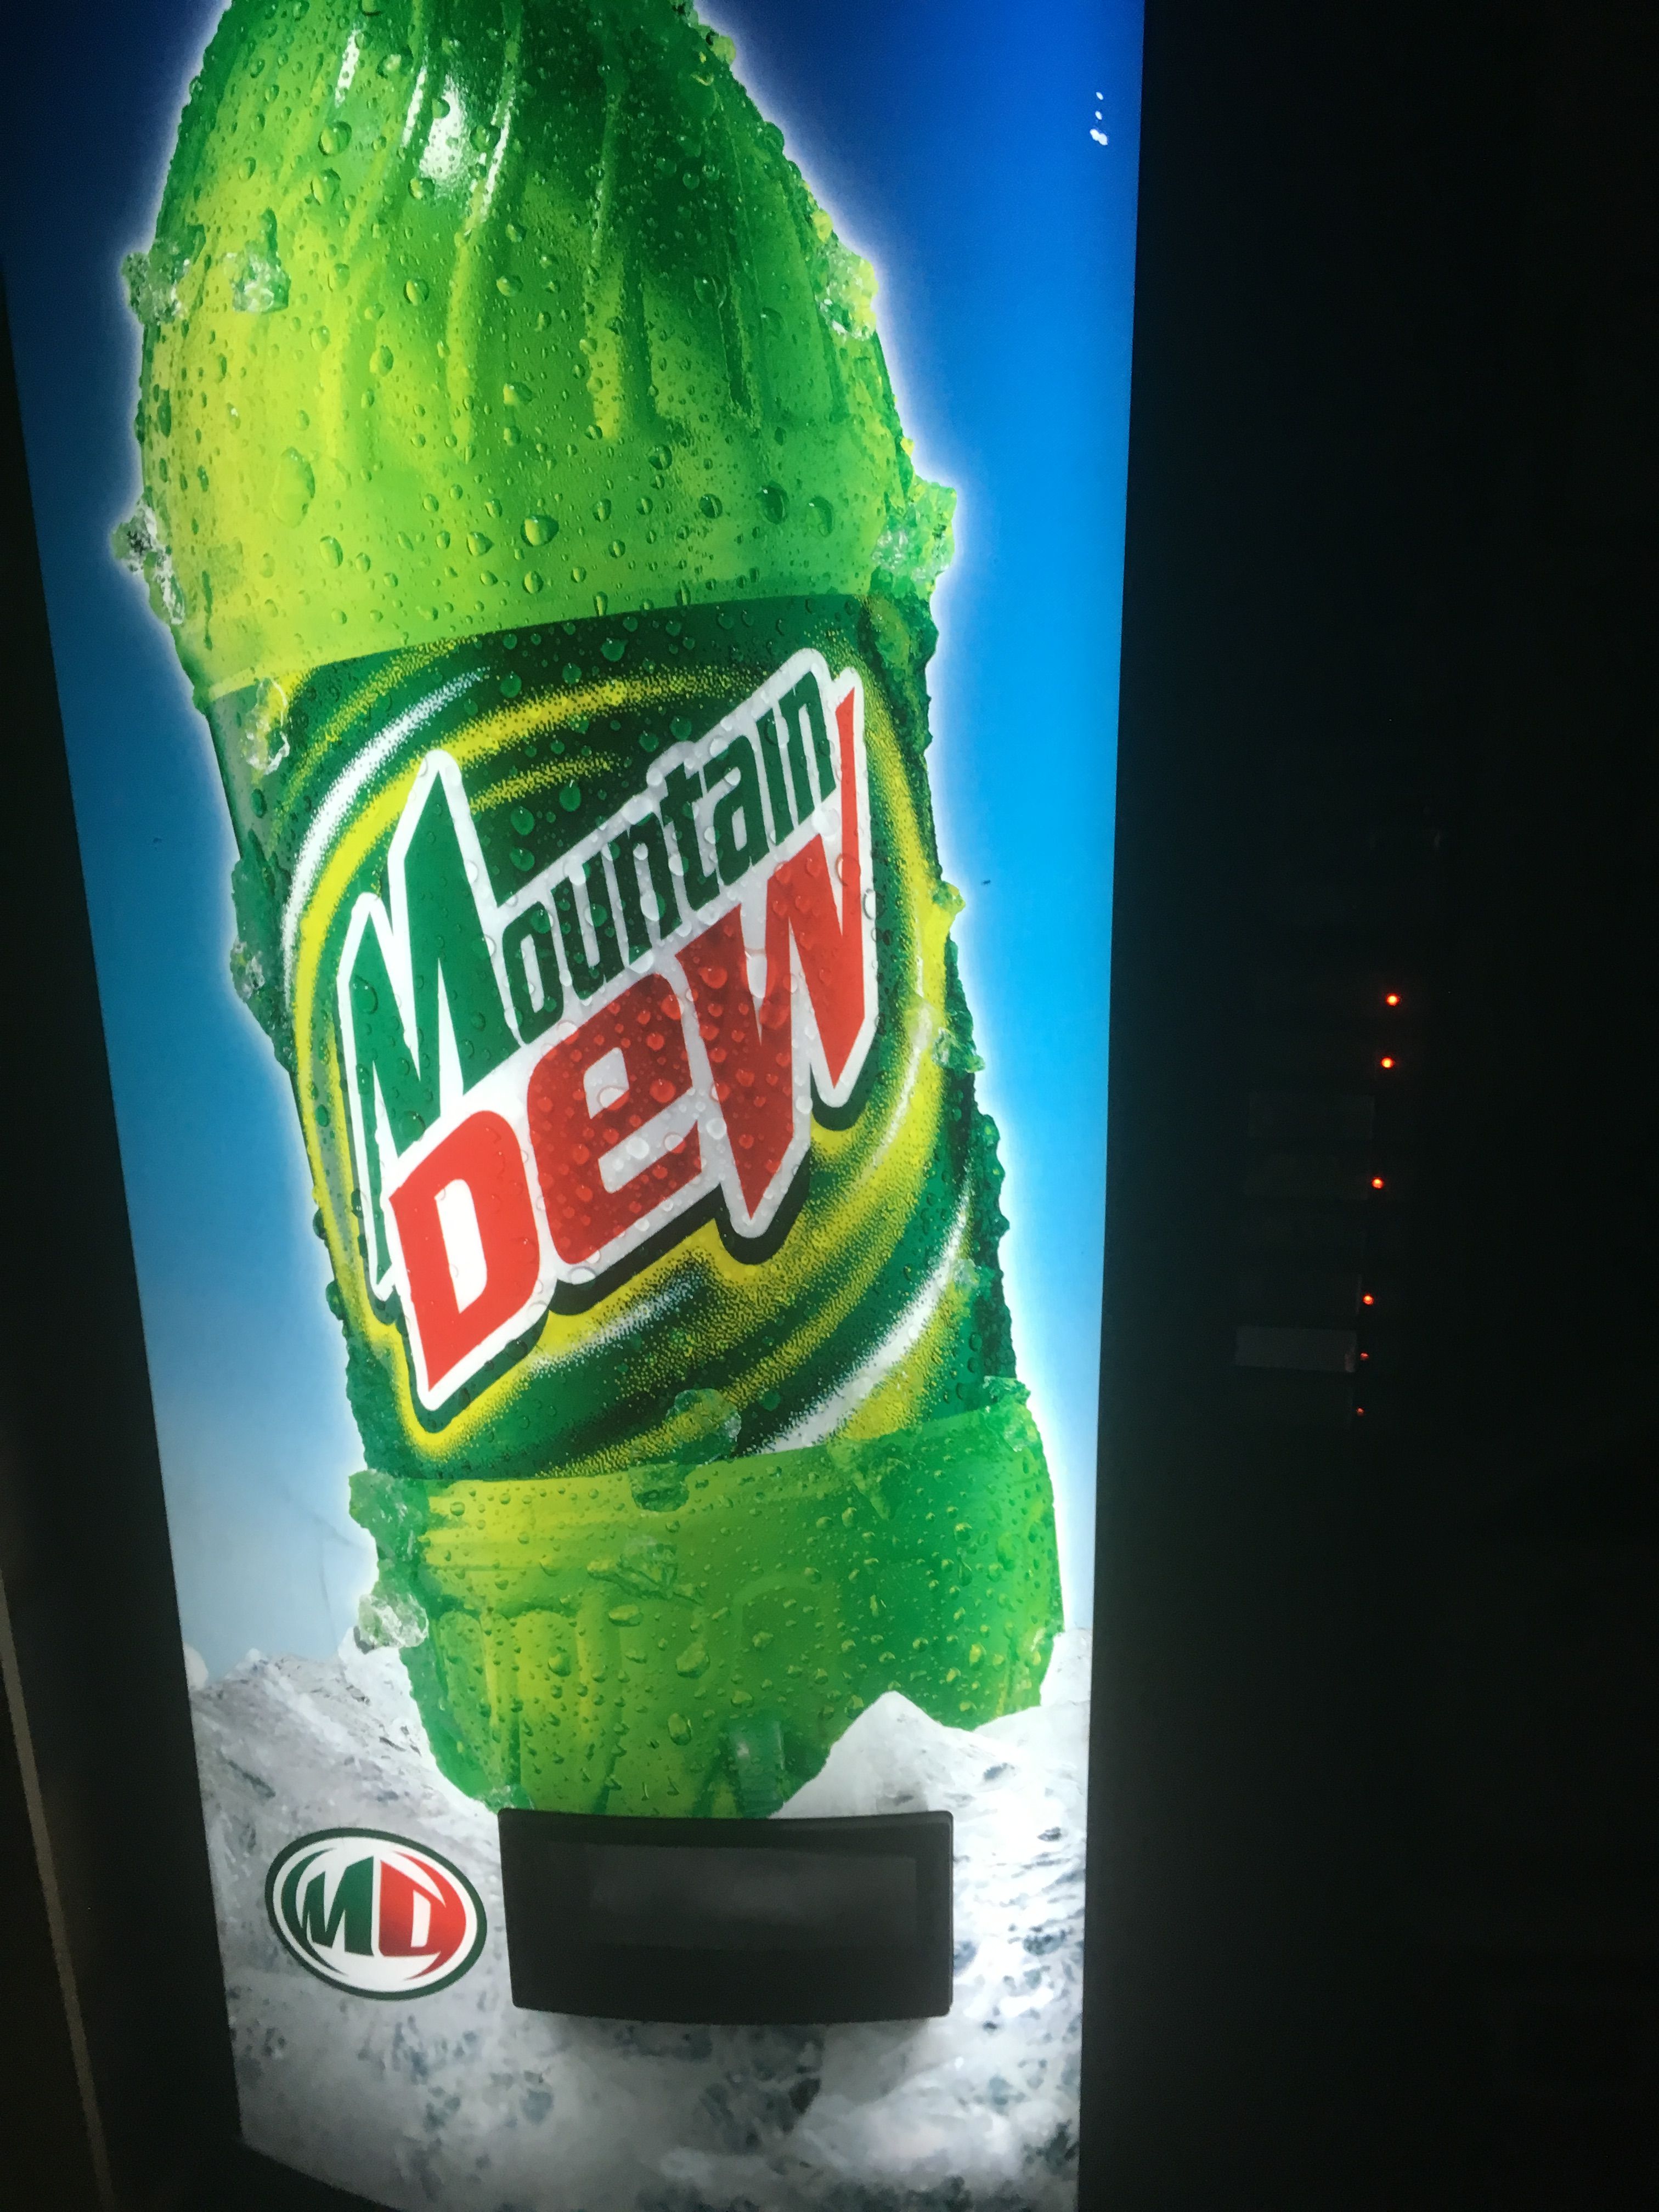
After plugging in the machine and hearing the AC click on and actually put out cold air I was EXTREMELY relieved, as a working AC is the main clutch of a soda machine. I figured I would start with the door and test everything on it to make sure the machine was in working order. It was obvious when I opened it up one of the bulbs was just sitting in the case and not actually plugged in. I figured it was a blown bulb but didnt see any signs of it so in it went and both lights lit up like the forth of July.
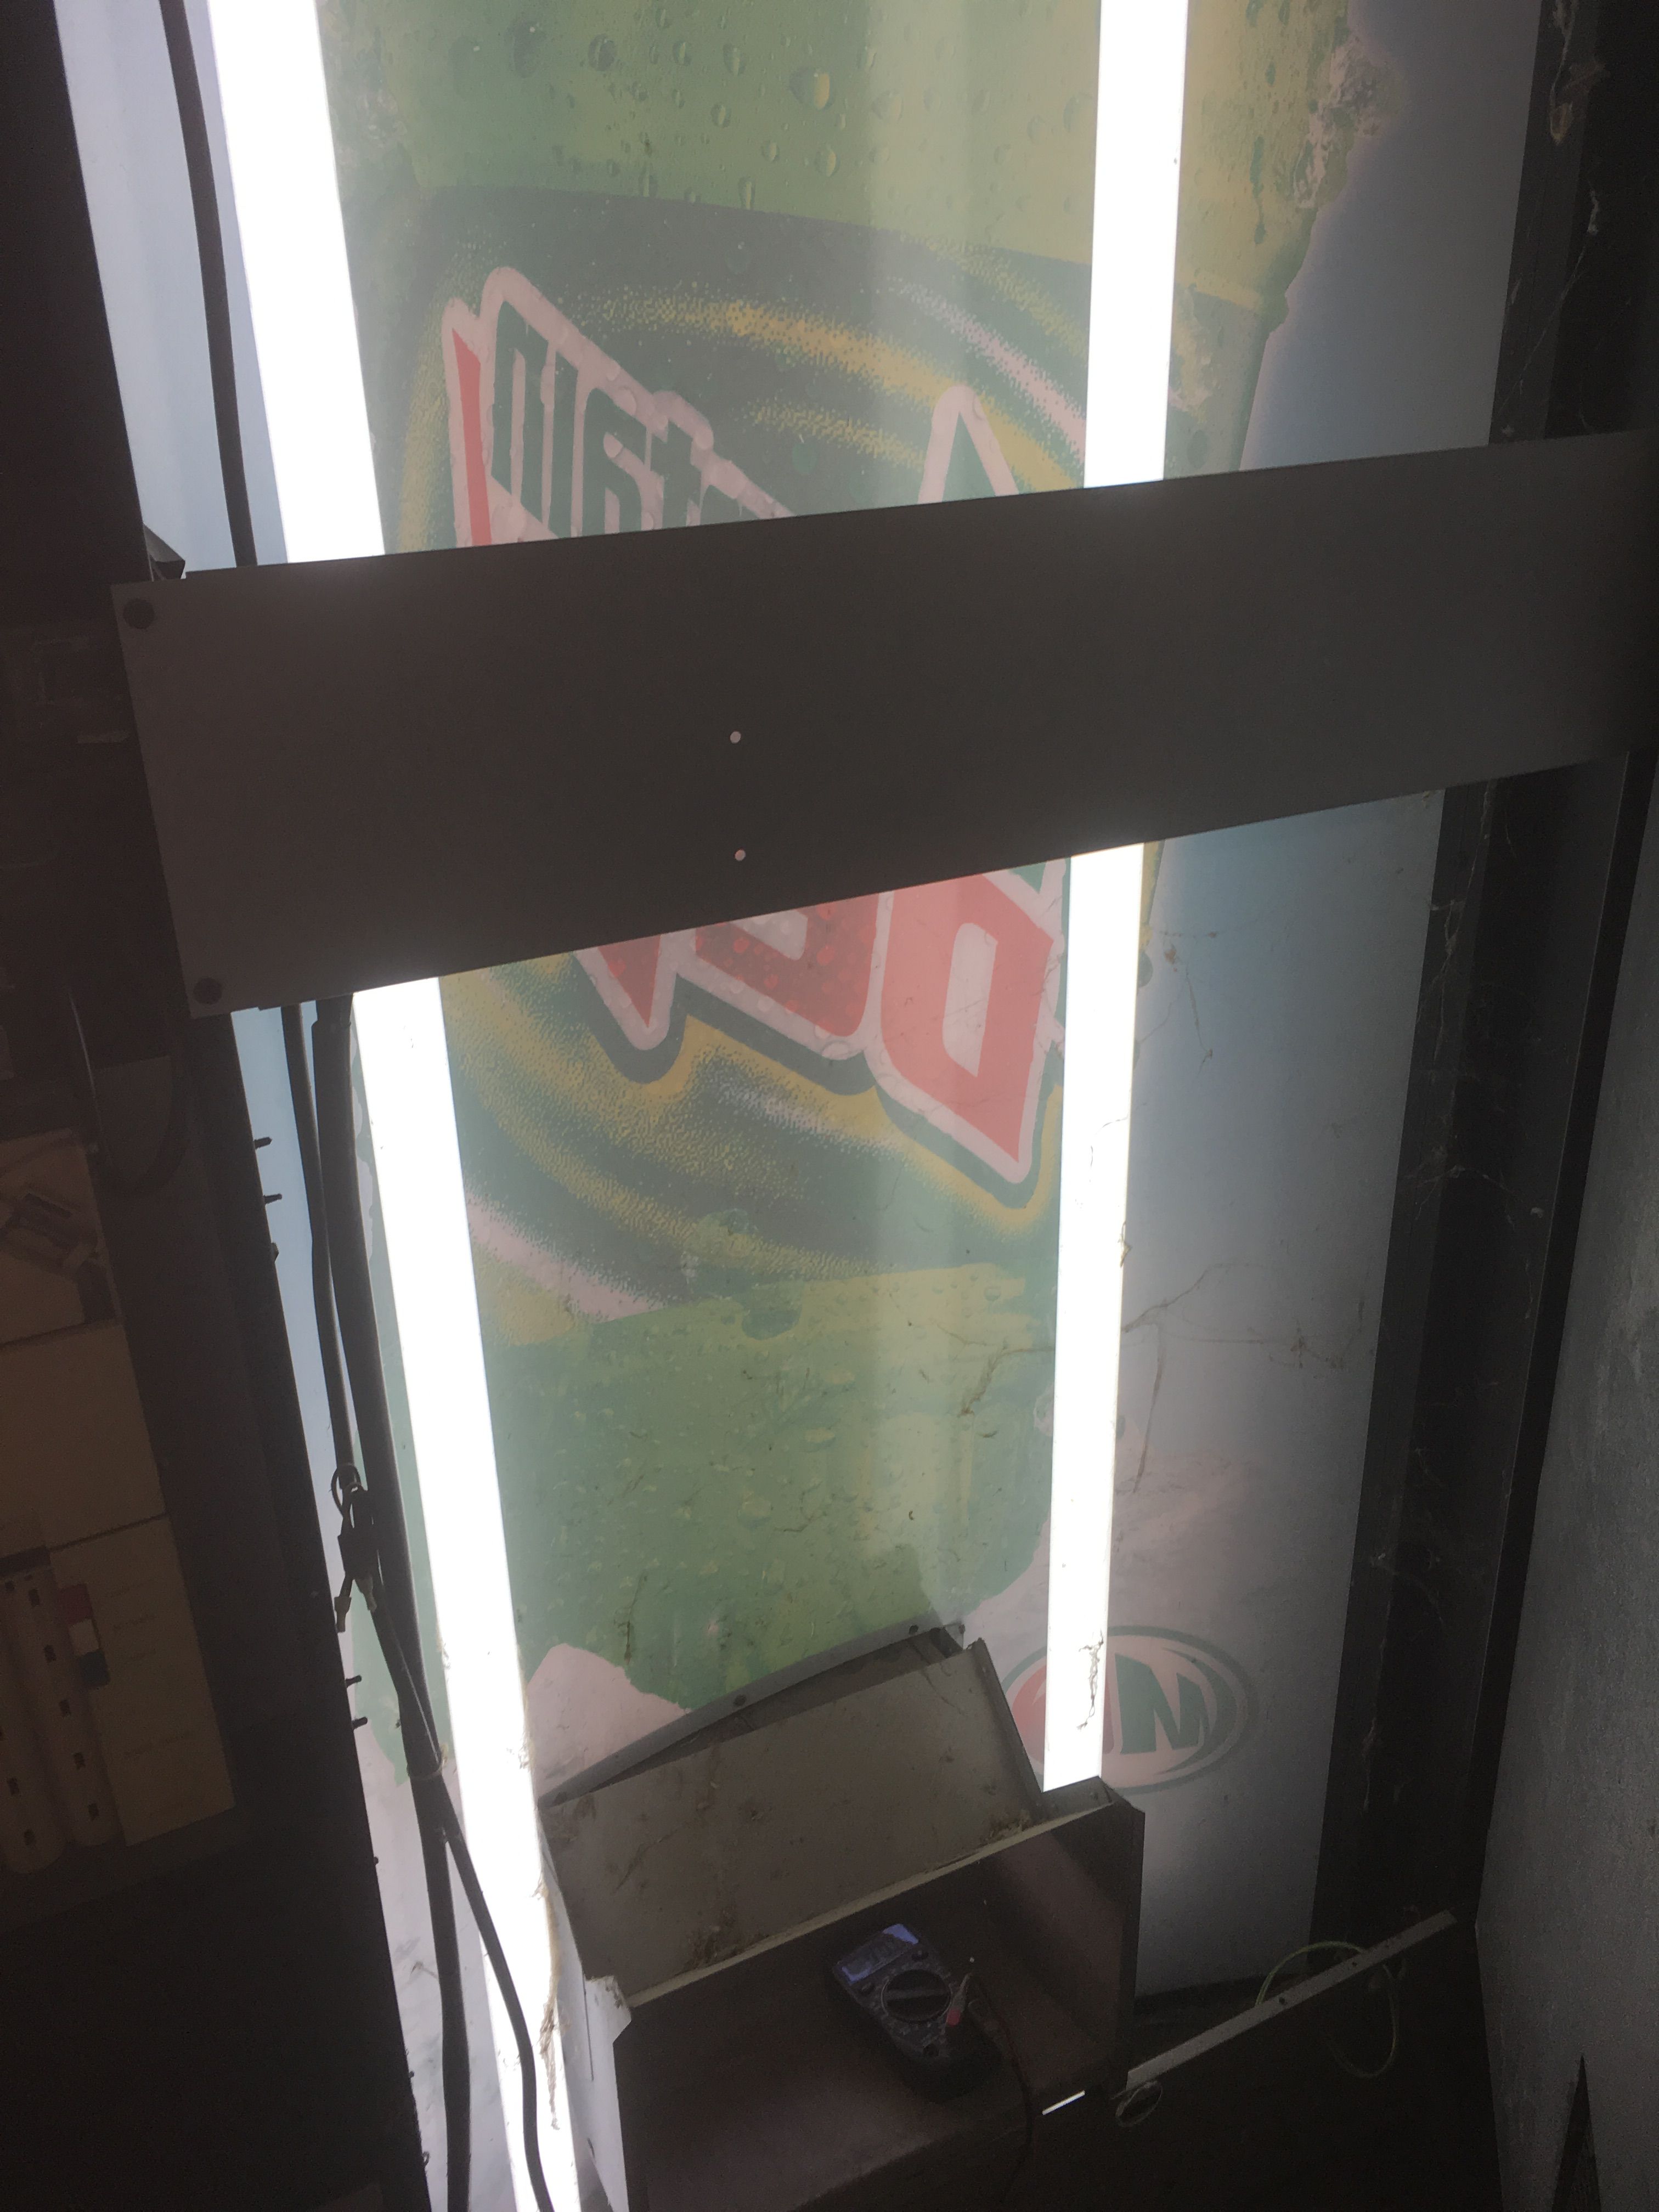
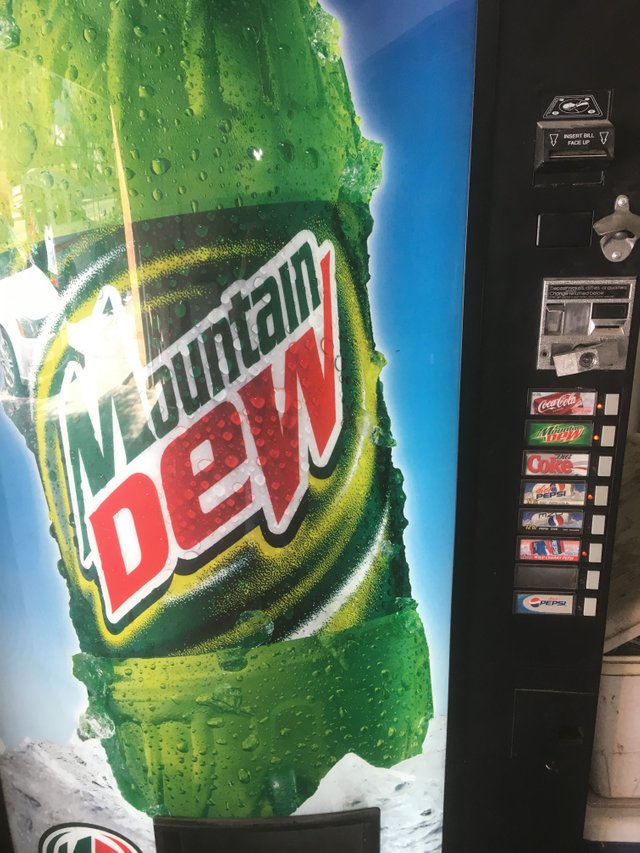
It was not until I darkened the room that I noticed the two bottom empty lights were just very dim. All empty lights worked and the only two that were off in the picture were the columns I had filled with bottles. The Machine looked really nice in the dark.
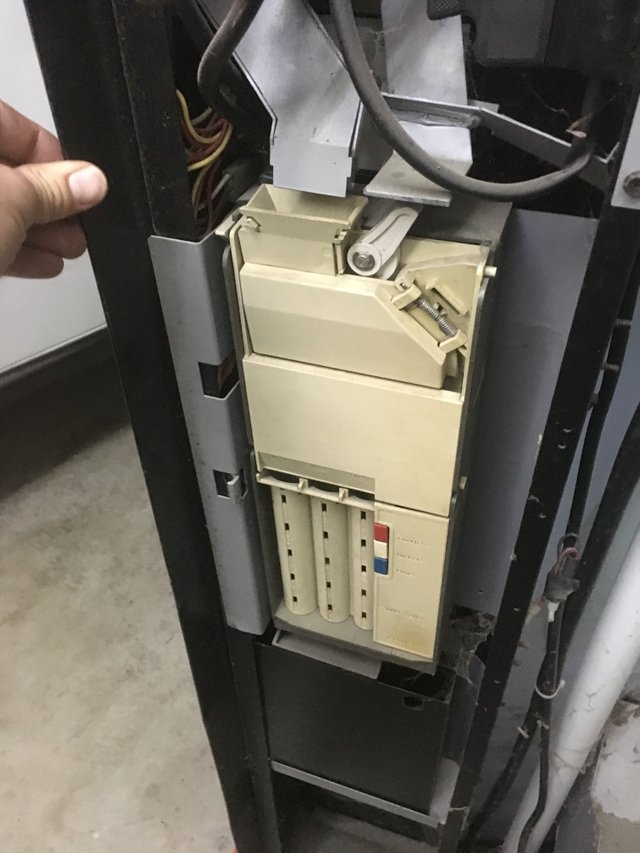
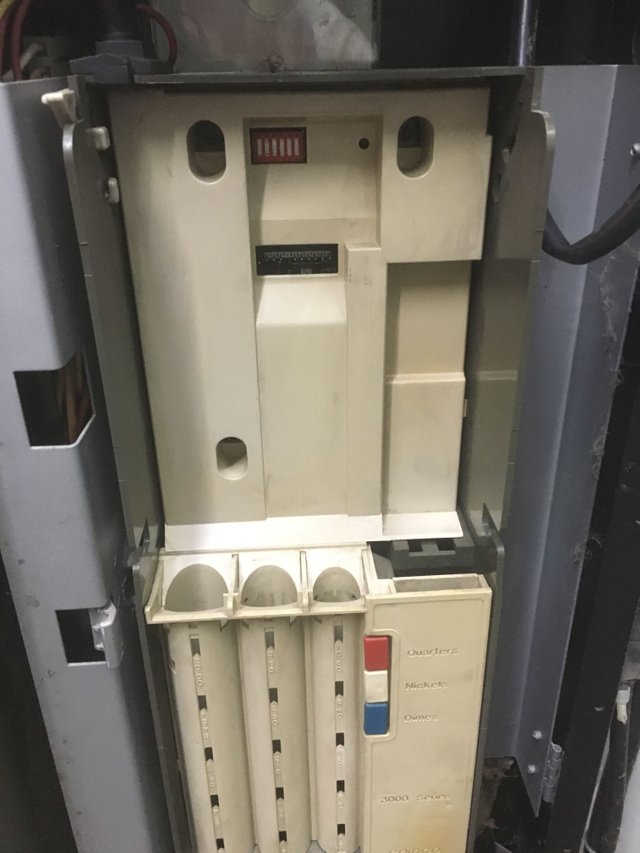
I moved on to to the the coin and bill machines that resided in the door. The coin machine was a Coinco 3340-S Single Price Changer.
This model accepts quarters, dimes, nickels and, if programmed with the latest firmware, gold dollars.
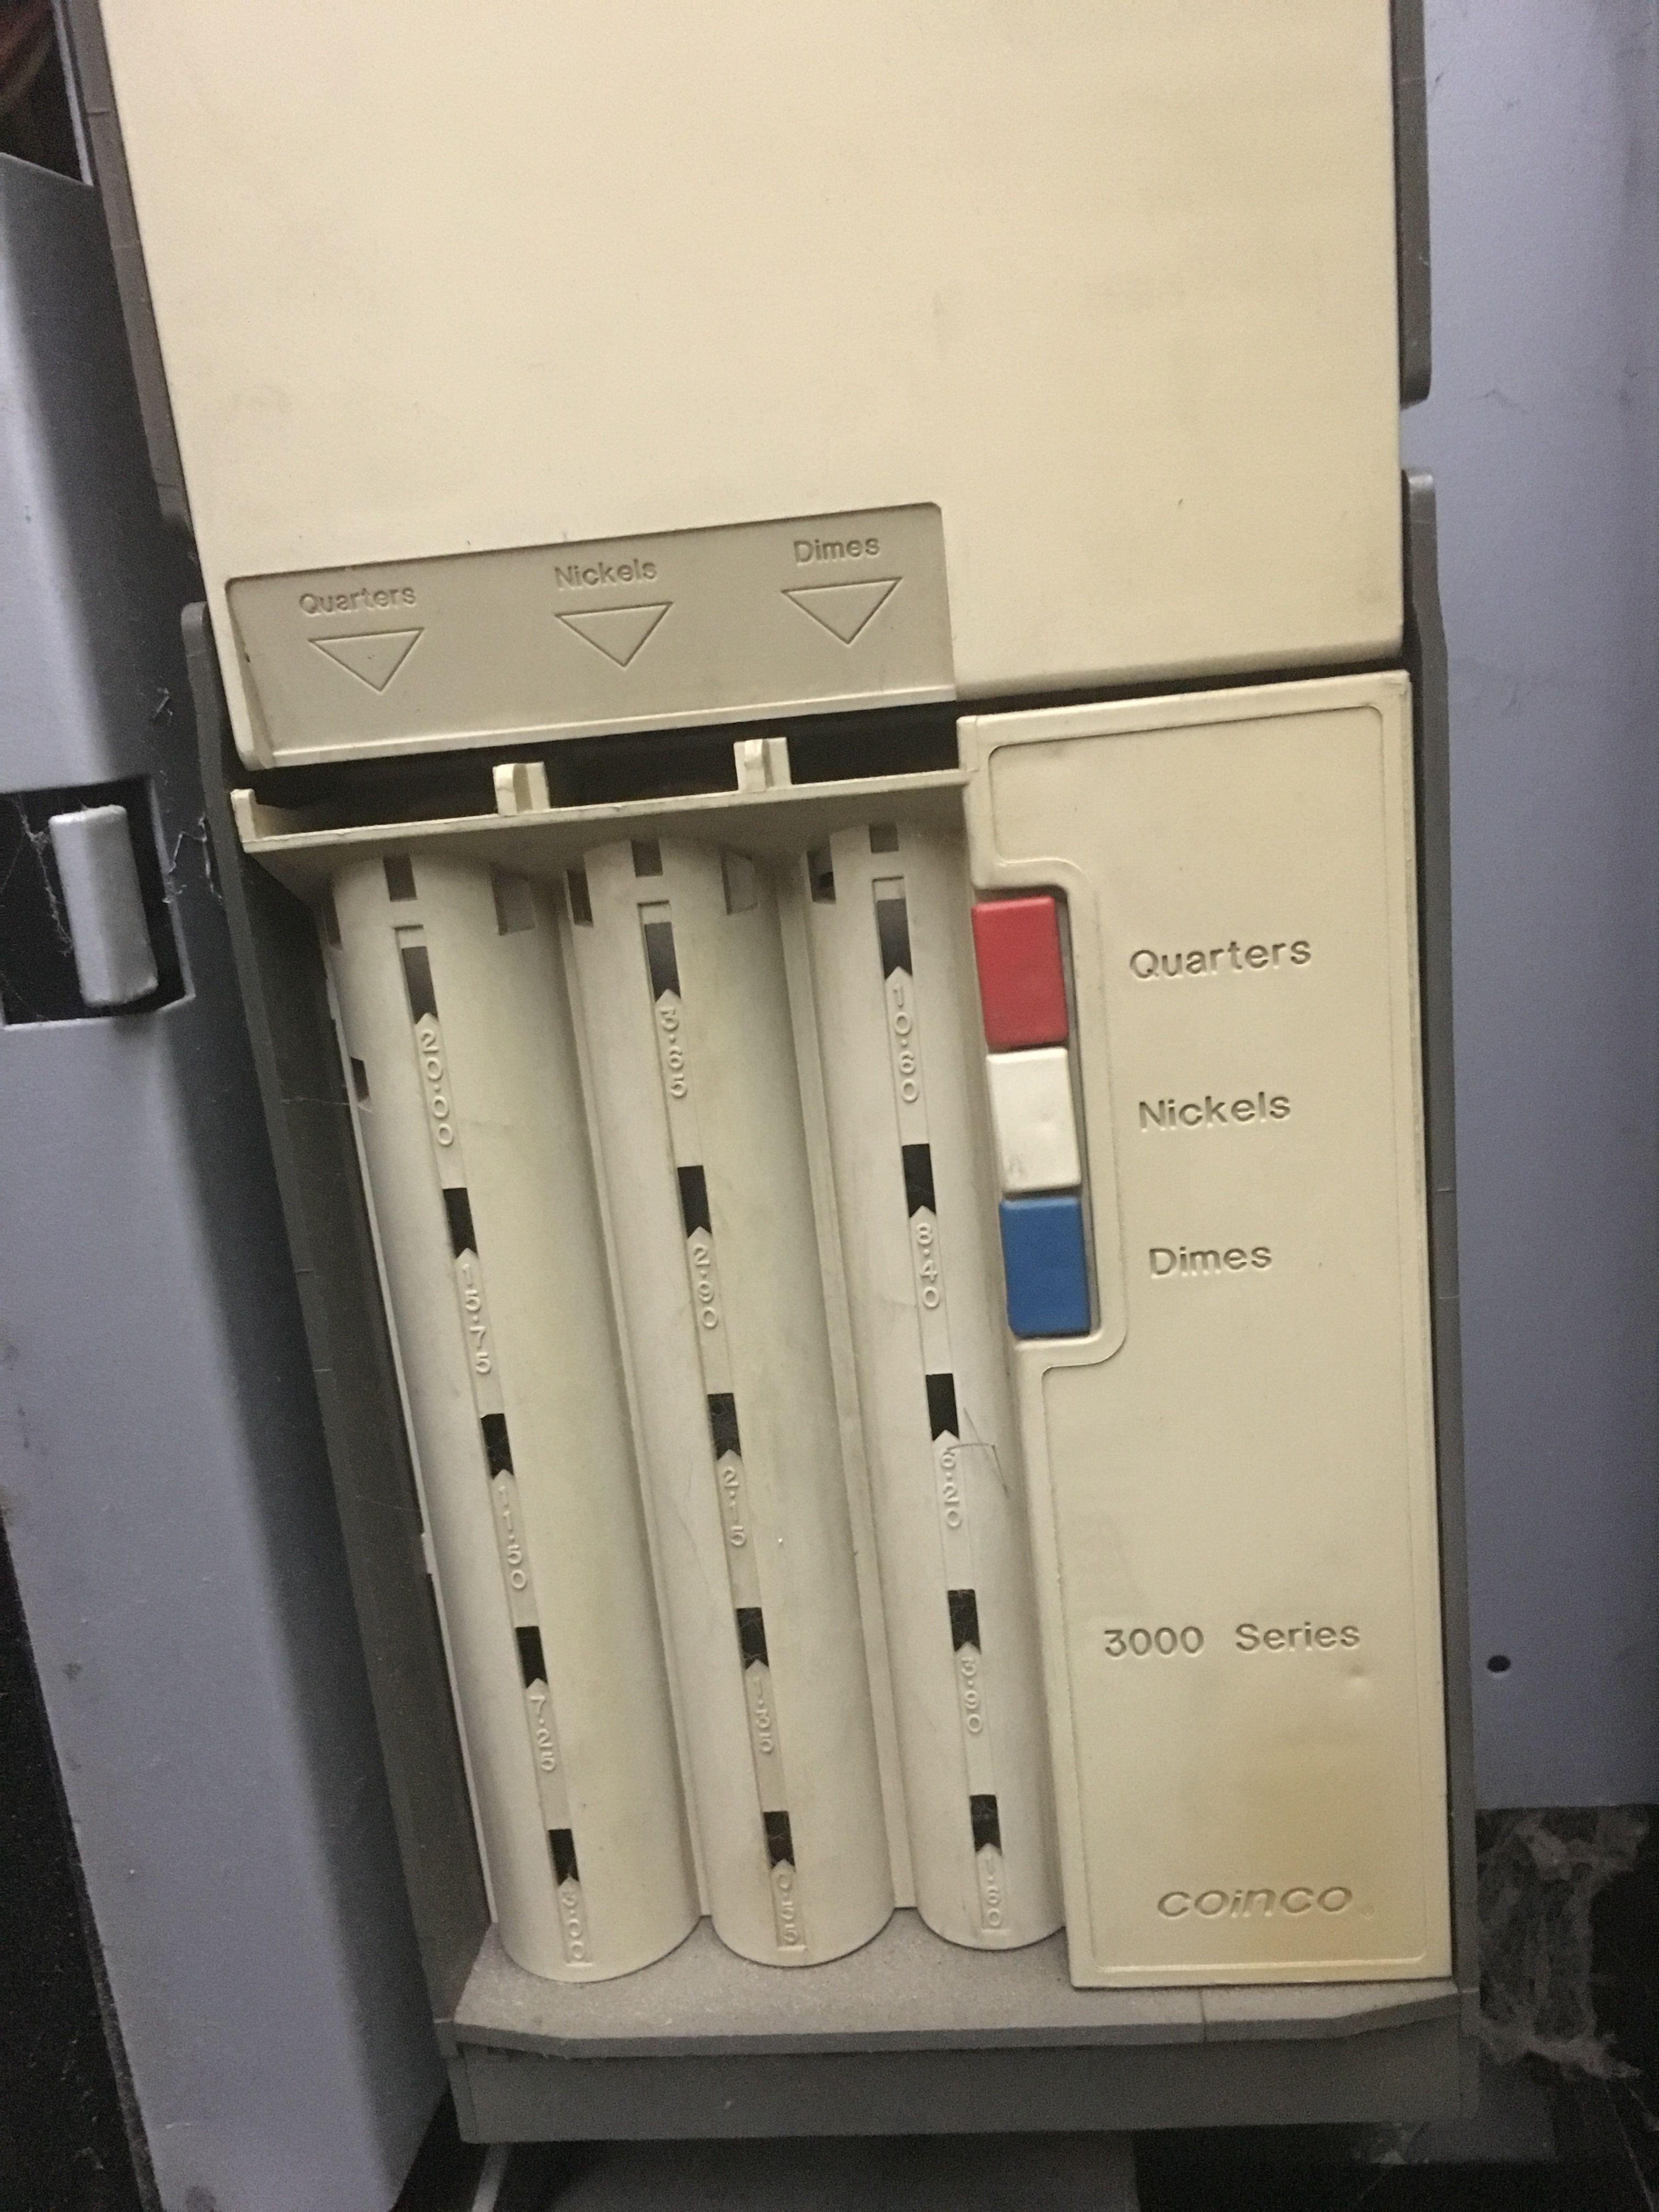
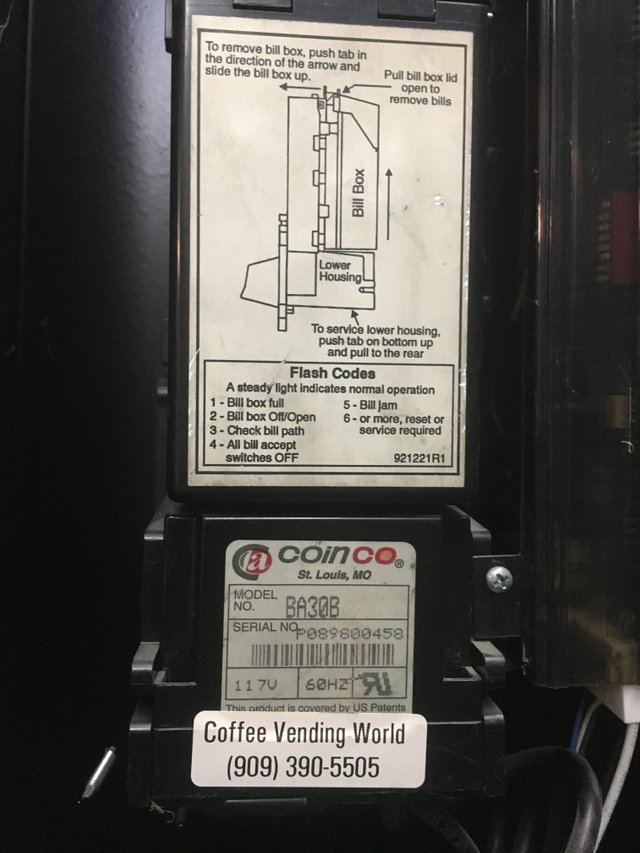
The bill exchanger that worked with the change machine was a Coinco BA30B and this model accepts $1, $5, $10, and $20 USD bills.
I tested the coin machine and all coins seemed to just drop strait through so I did a little homework. The coins are detected once dropped in by sensors on either side of the chute. Those coins are either sorted into their respective tubes or outright rejected back into the coin return. Cleaning the chute of gunk helps maintain the machine.

Was this thing even getting power? I pulled back the coin chute to reveal a little red LED next to a series of rocker switches. The LED was not lit indicating the board was not powered up and the machine would not function correctly.
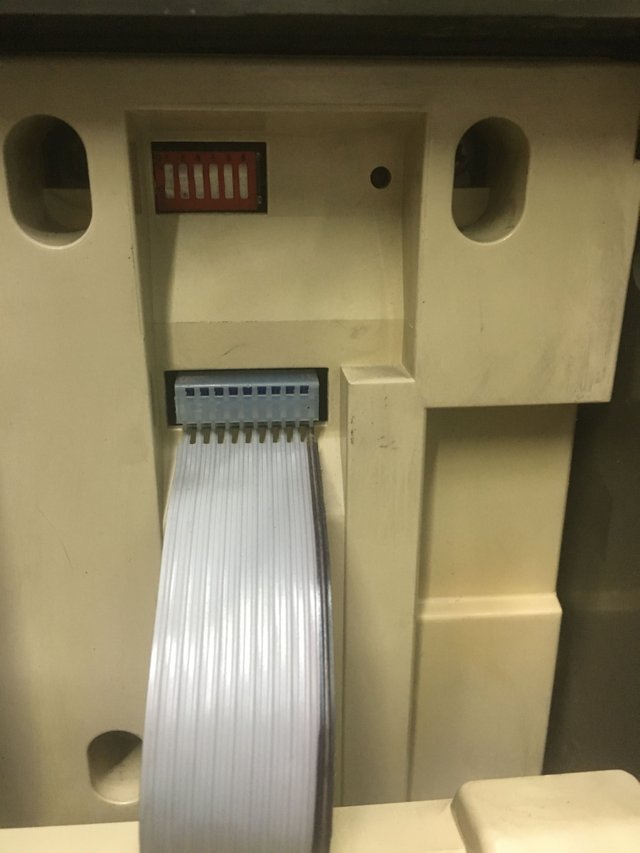
The plugs going to the machine indicated 118v was present so the problem was with the machine itself. I referenced the service manual and ended up needing to disassemble it to check if the harness was transferring power to the main board. The chute section came off simply by unplugging the ribbon cable and sliding it off.
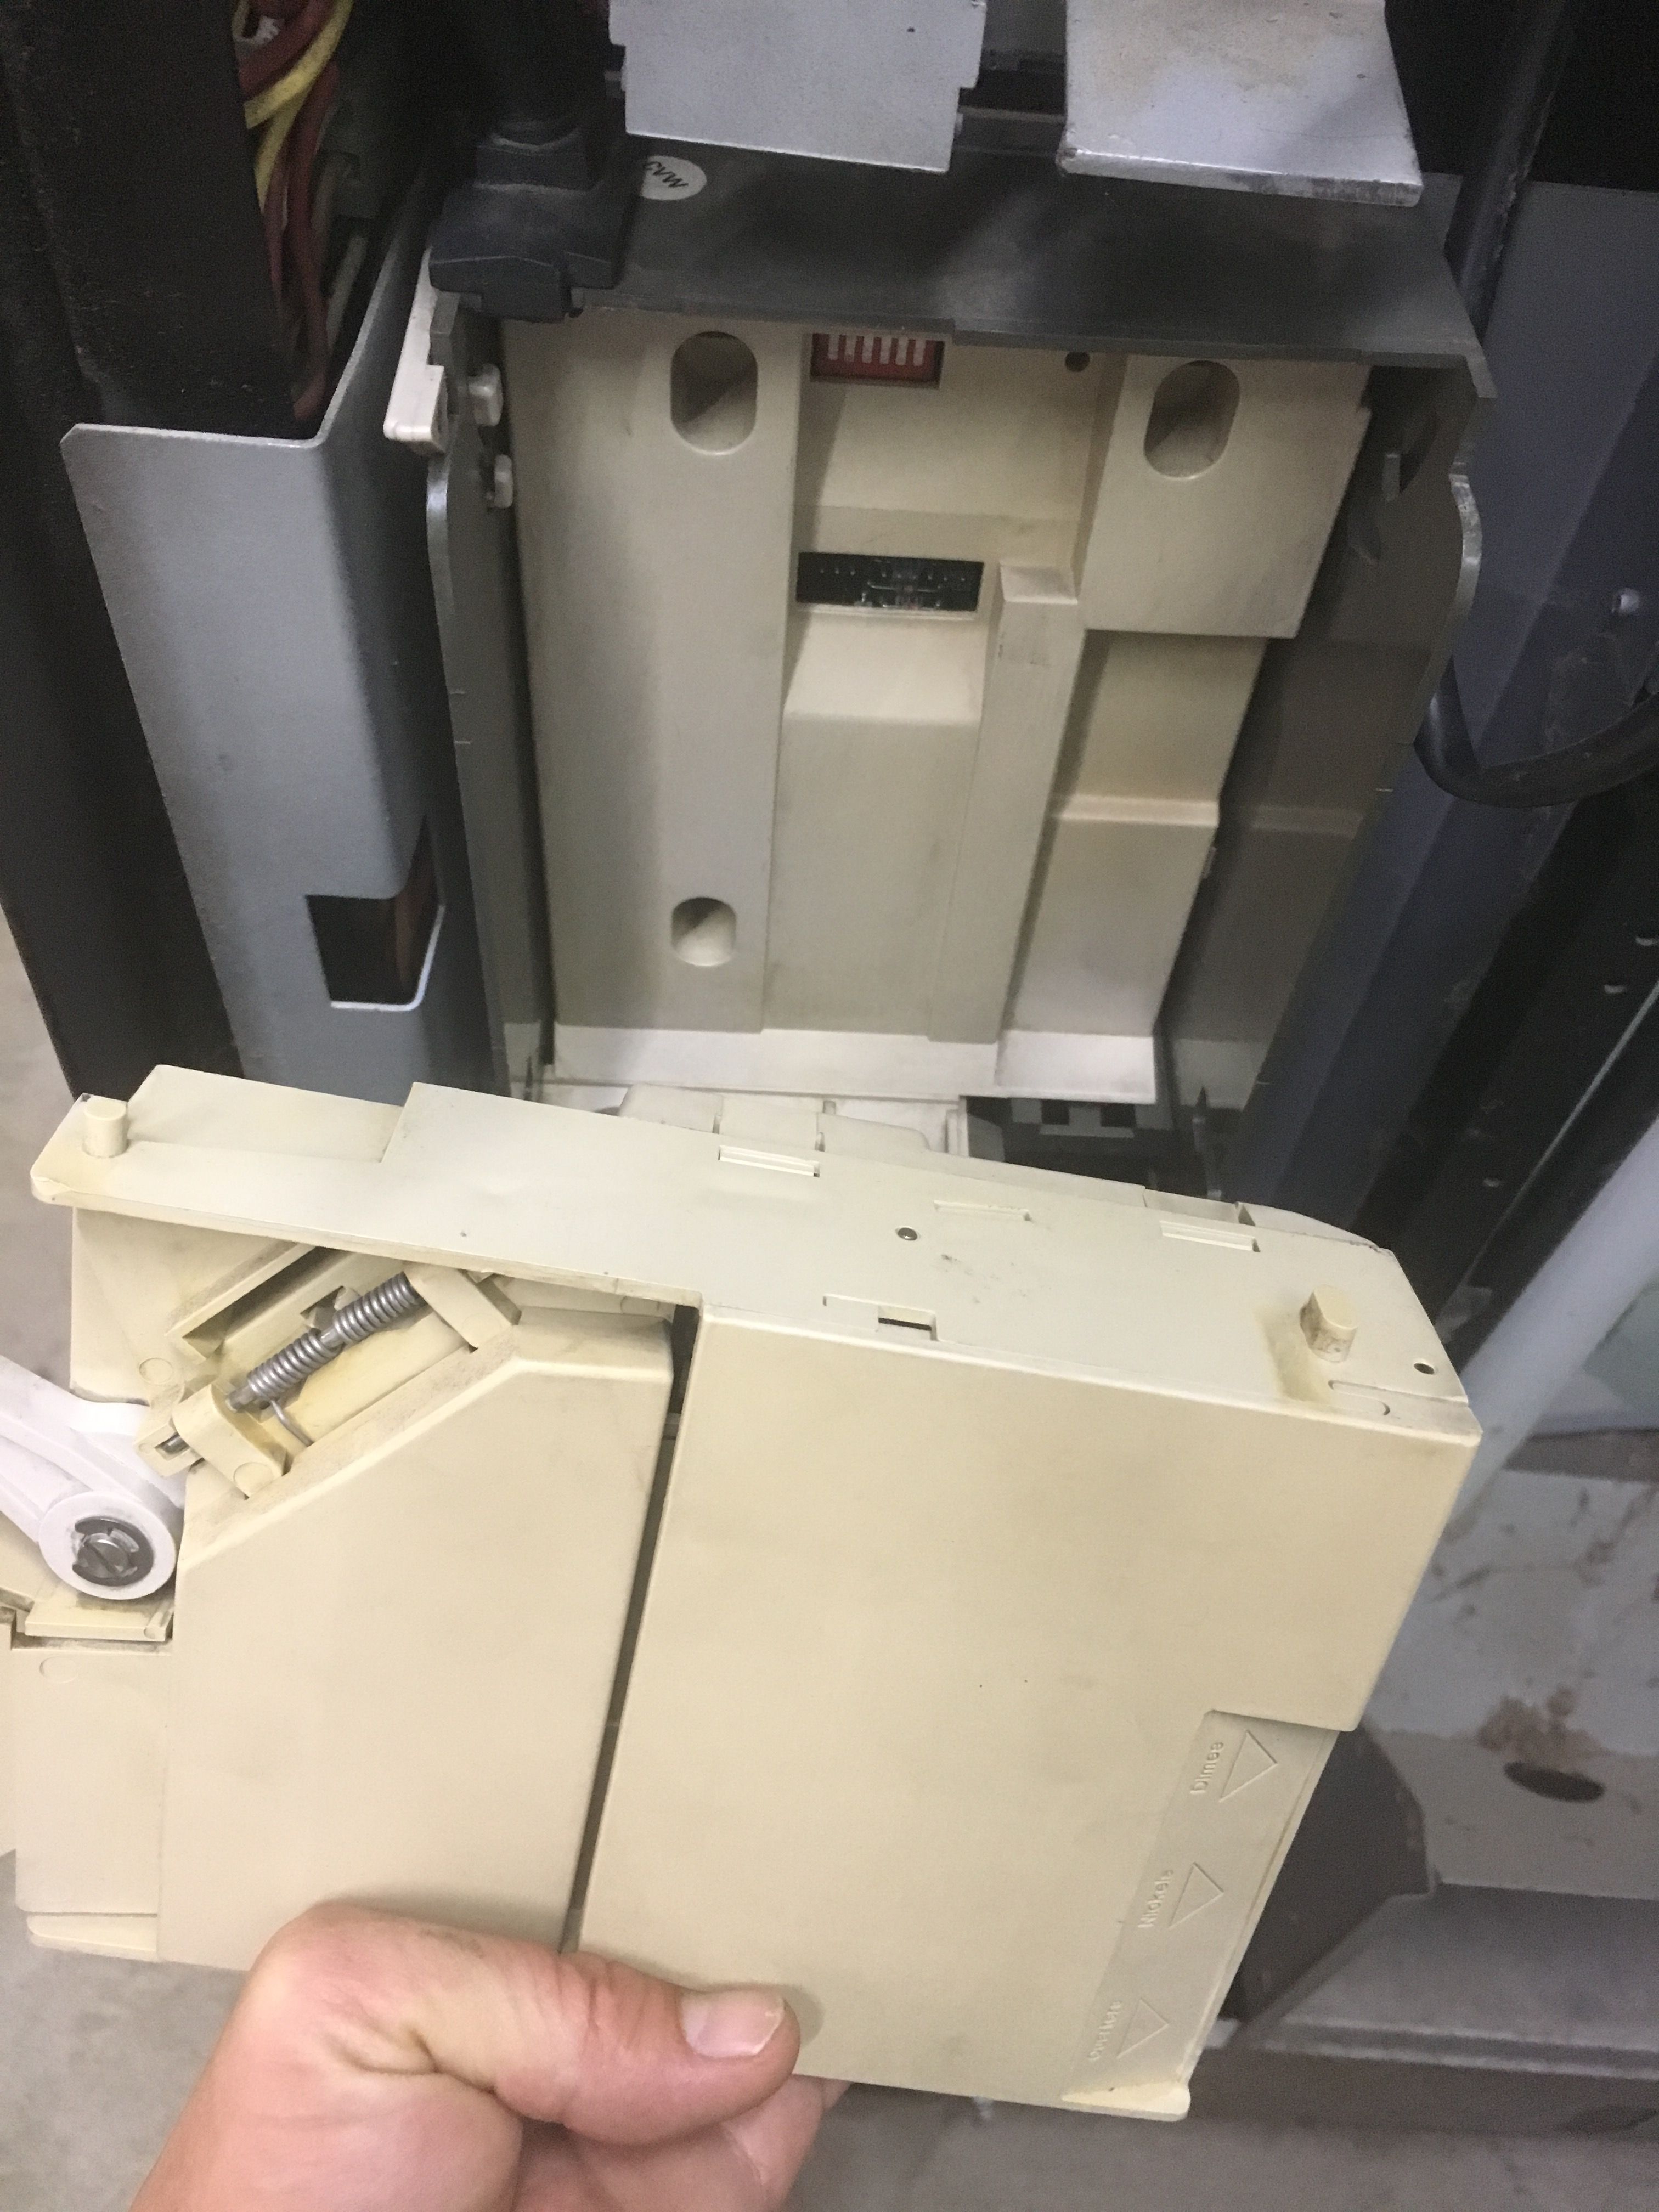
Three screws secured a plastic bezel to the main board. These same screws also secured the coin machine to the door of the vendor.
2 smaller screws on either side of the machine needed to be removed to allow the coin tube bezel to be cleared away.
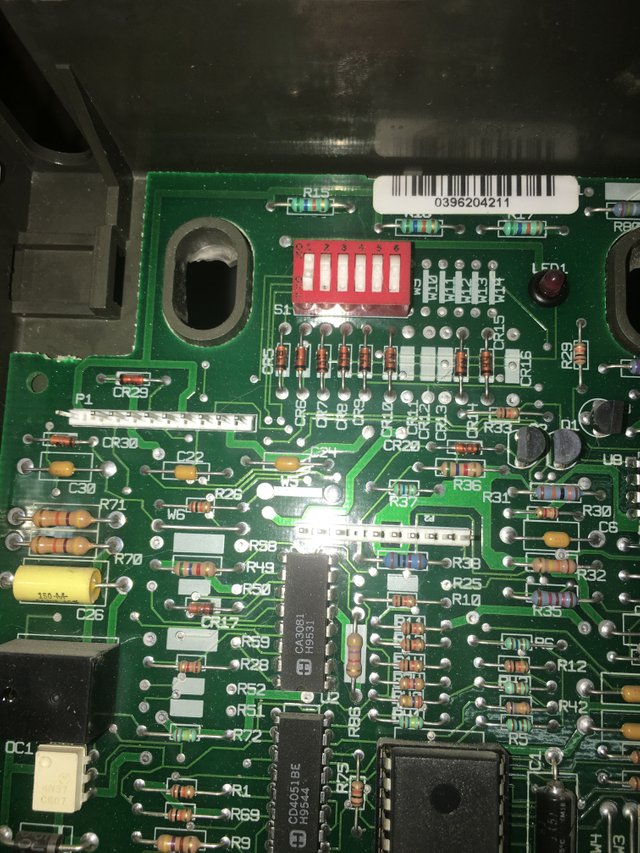
Once the main board was visible all the components of the machine were in clear view. It was astonishing how incredibly simple this machine was built.
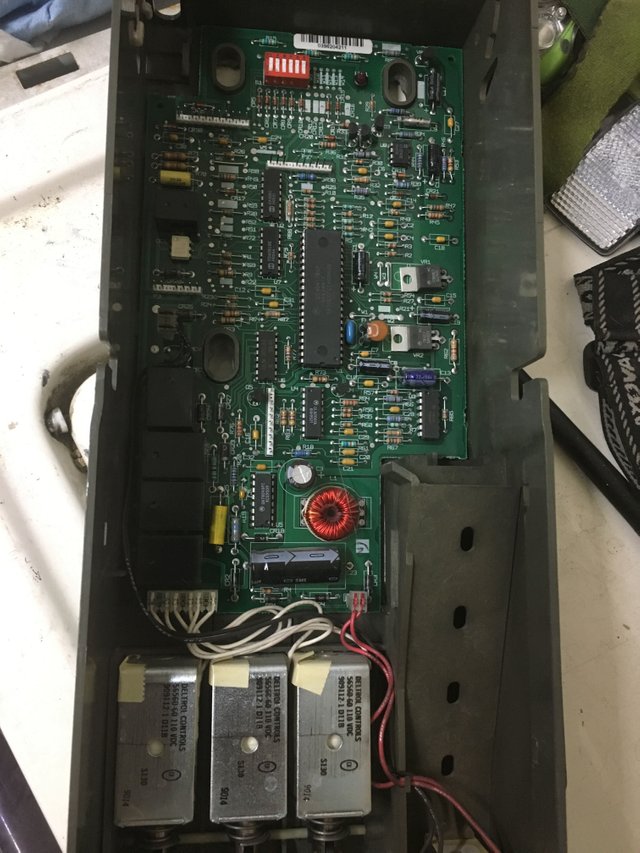
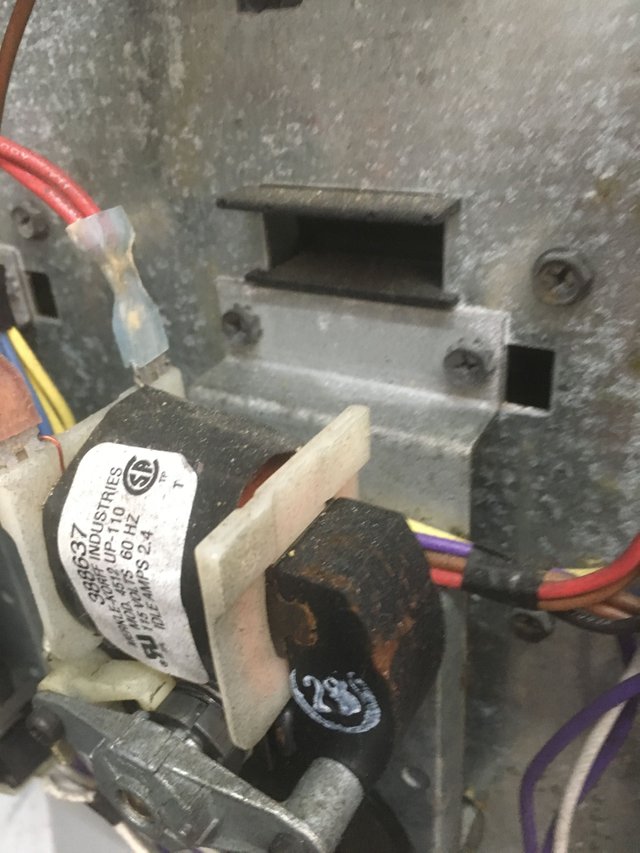
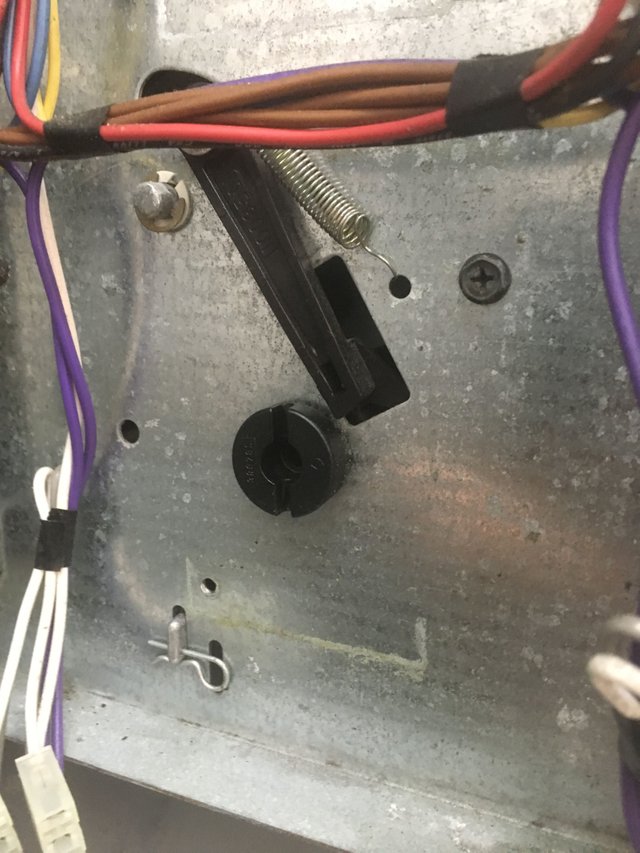
At the bottom of the machine were three motors that actuated small arms against springs, allowing for the ejection of a single coin at a time to the coin return.
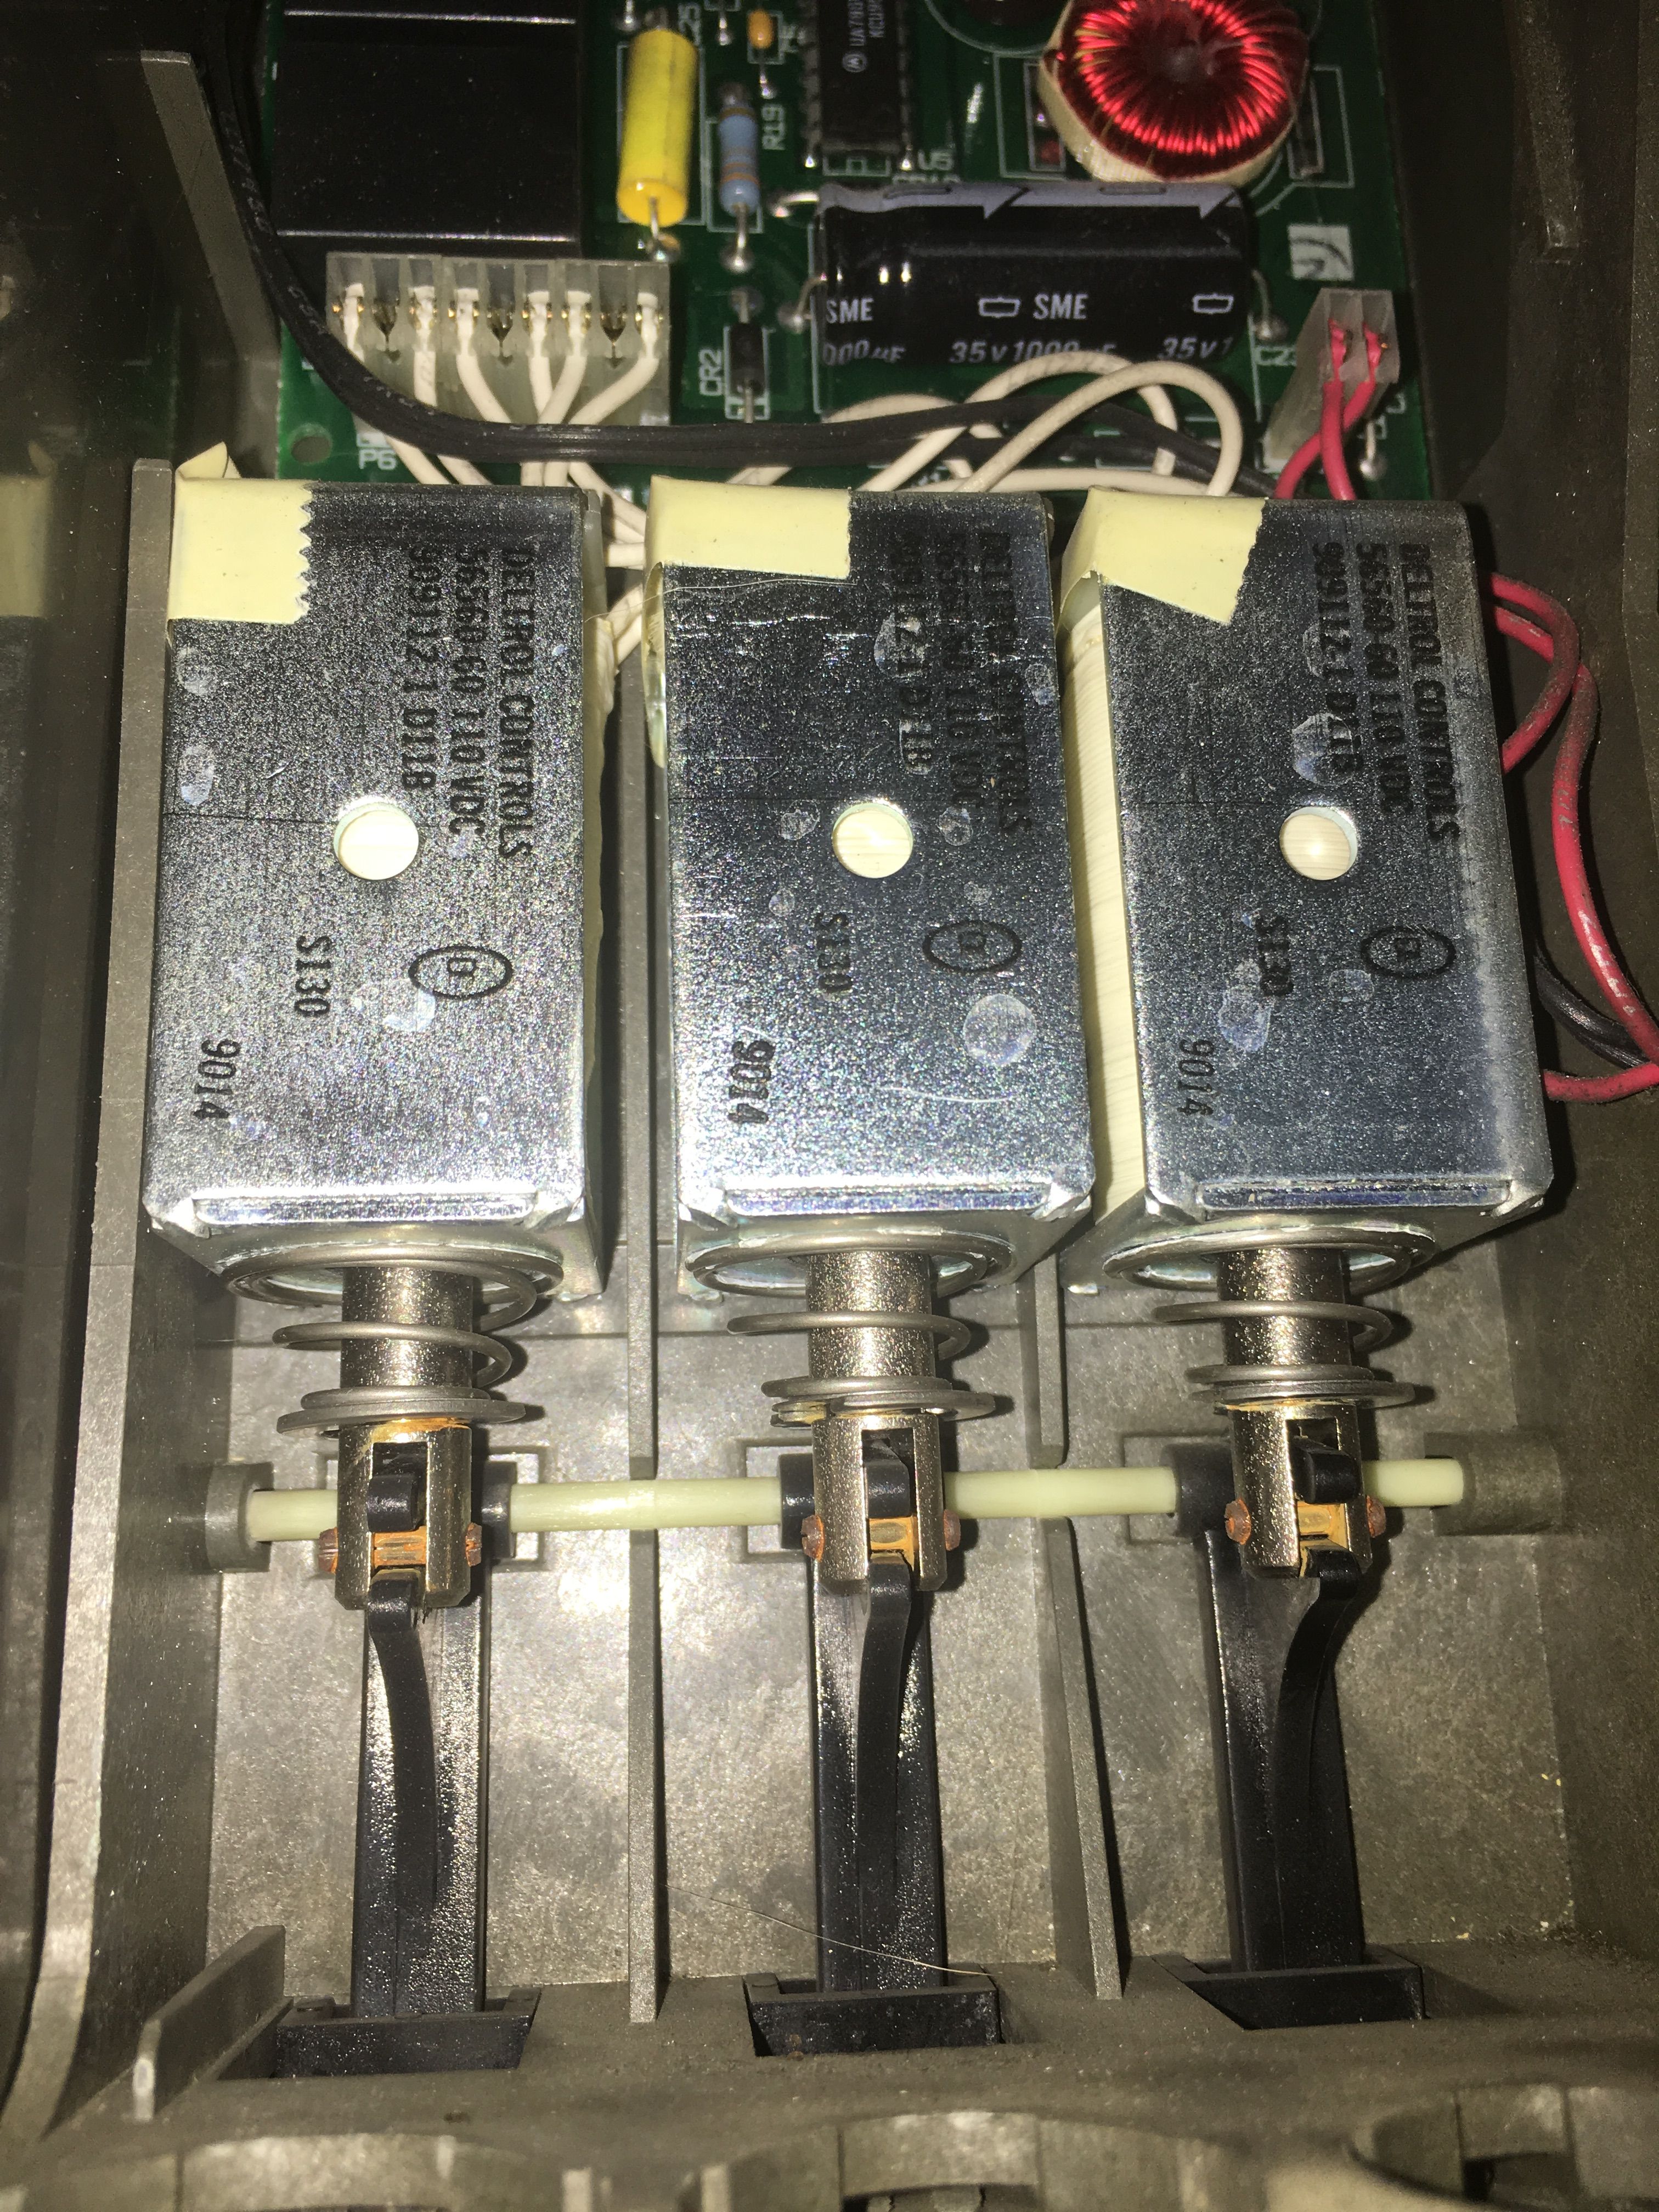
To the right of the motors was the transformer that supplied the right amount of power.
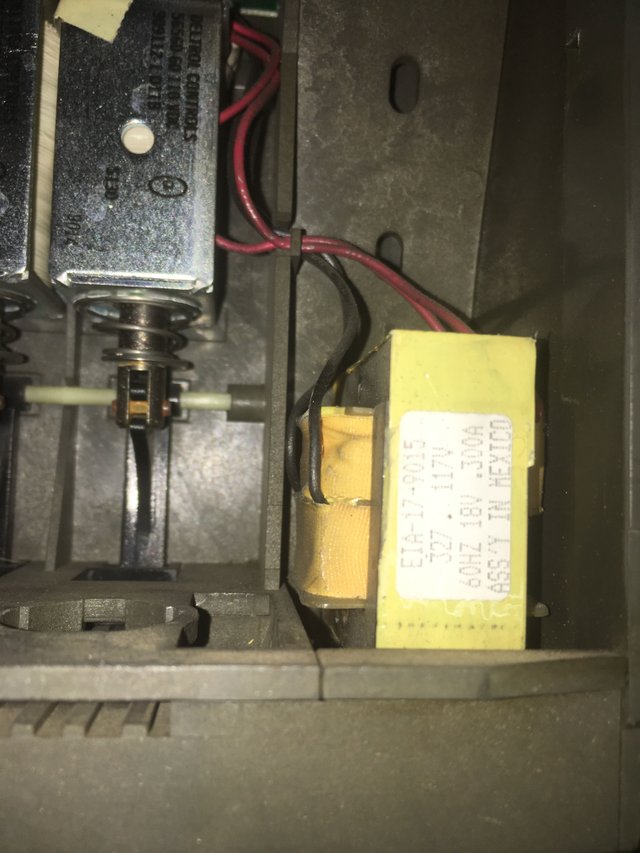
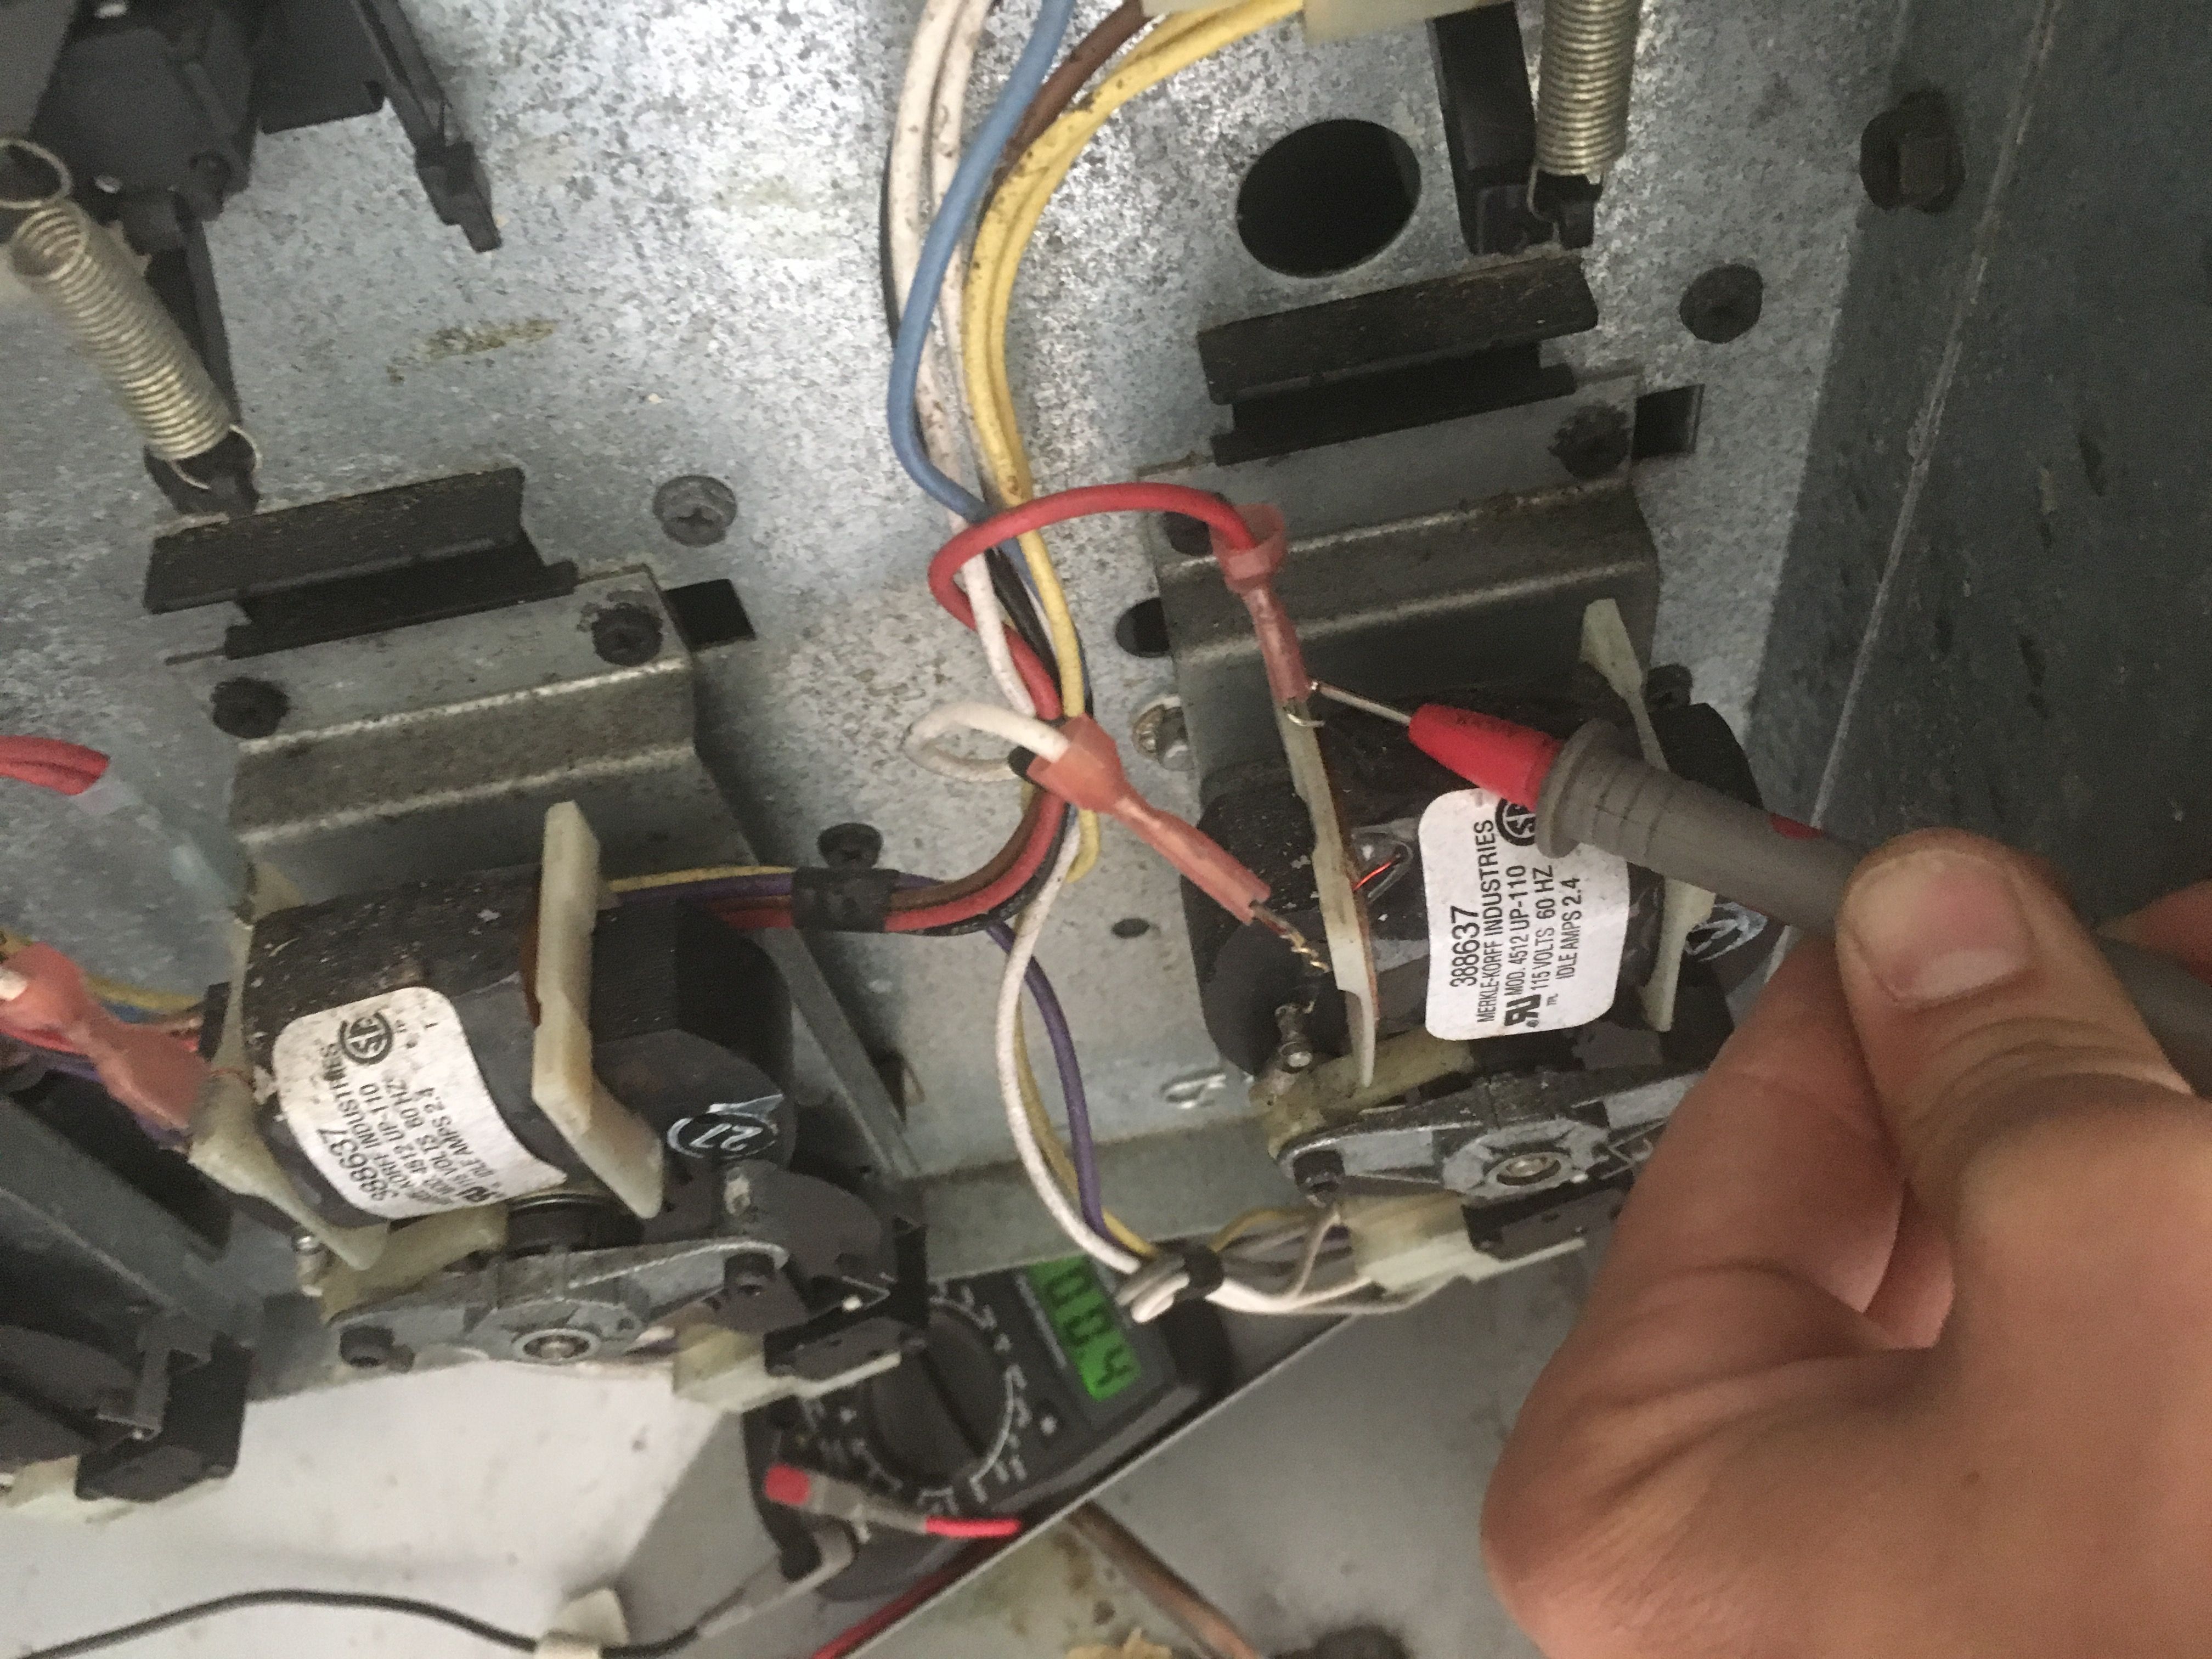
Above the motors, attached to the main board were a series of relays (black squares) that connected to the motors. To the right of those relays was a large capacitor that helps maintain the supplied power at a constant voltage. Above that, a very shiny toroidal transformer. In the center of the board was the brains of it all, a large CMOS or Complementary Metal Oxide Semiconductor chip.

At the top of the board were those rocker switches that were actually used to set the price of the soda machine. Each switch was associated with a certain denomination and when activated added that denomination to any other rocker switches that were turned on. To the right of those switches was the red LED that would not come on.
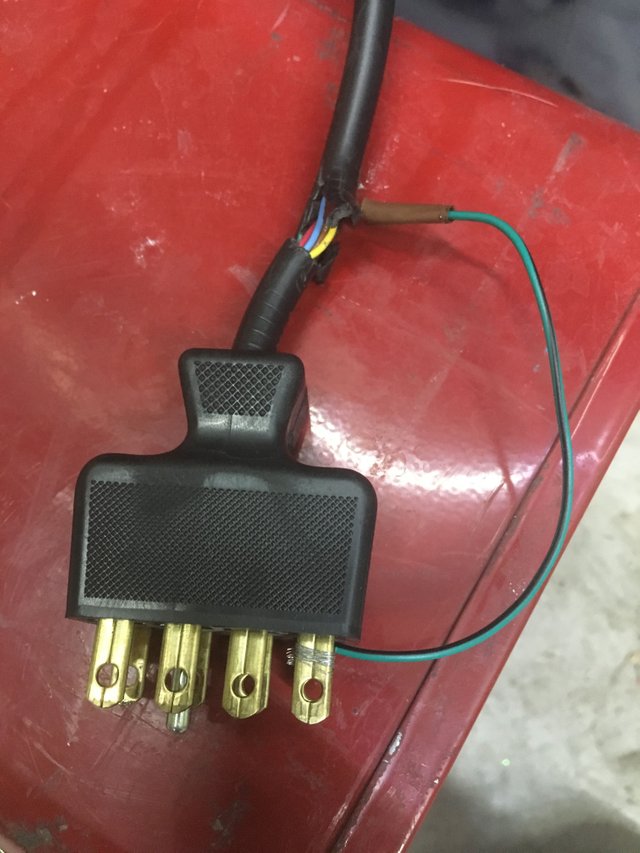
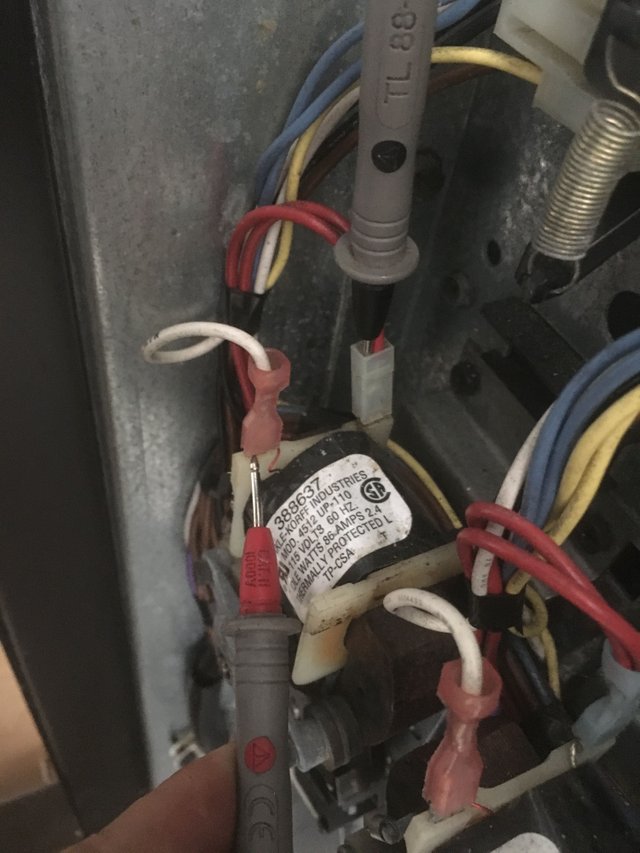
The service manual stated that if there was no power to first check continuity on the wiring harness. The harness consisted of a "Jones Plug" at one end and two of the prongs, #1 and #2, were the ones to be tested. On the other end, continuity needed to exist for the circuit to be complete through the harness. Three wires were tested and two of the three passed but the green wire was not continuous with prong #2.

The manual said if this was the case the wiring harness was bad and needed to be replaced. I figured if the wiring harness needed to be replaced, why not cut into it and see if the problem was between the two plugs or at one of the plugs themselves. I cut away a section of sheathing and exposed a small portion of copper on the green wire just behind the Jones Plug. STILL NO CONTINUITY! The problem was in the Jones Plug itself and that was way to much rubber to cut through and dissect. I bypassed the plug with a small jumper wire and severed the green wire were I had exposed the copper. Hopefully this fixed the power issue...
I buttoned the coin machine back up and plugged everything back in to see if my makeshift fix worked.The harness now had continuity at all three wires tested.

STILL NO POWER! The manual called for the tearing down of the machine again and inspecting a "foil fuse" at the rear of the main board. After tearing apart the harness with no success I was burned out at this point and decided to move on to other things that may be wrong with the vending machine. No point in touching the bill exchanger, as it was linked to the coin machine. One thing I did notice was every time I plugged in the vending machine, one of the column motors continuously ran non stop.
As this was not supposed to occur, I checked to see if both power and ground wires had continuity throughout the entire set of motors. They were all daisy chained together so this would tell me if all were receiving power and ground. This was done by sticking one probe of the ohm meter on one end and the other at the opposite end.
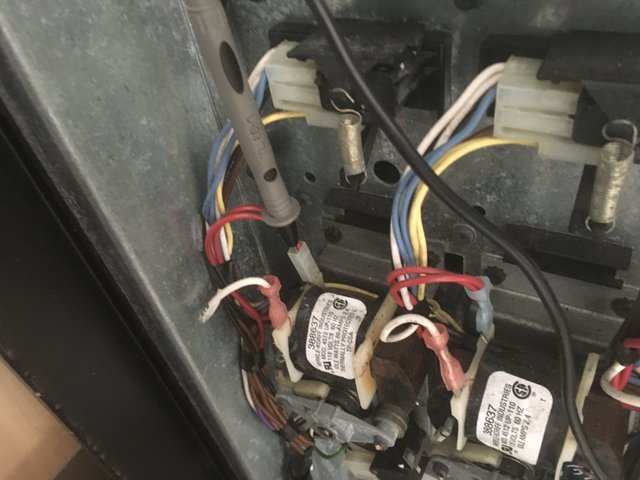
Everything checked out and both power and ground wires were continuous throughout the entire set of motors. For redundancy I check each motor individually with all motors checking out fine with continuity between positive and negative posts.
I then checked to see if there was a short at the button and unplugged it. The motor still ran continuously.

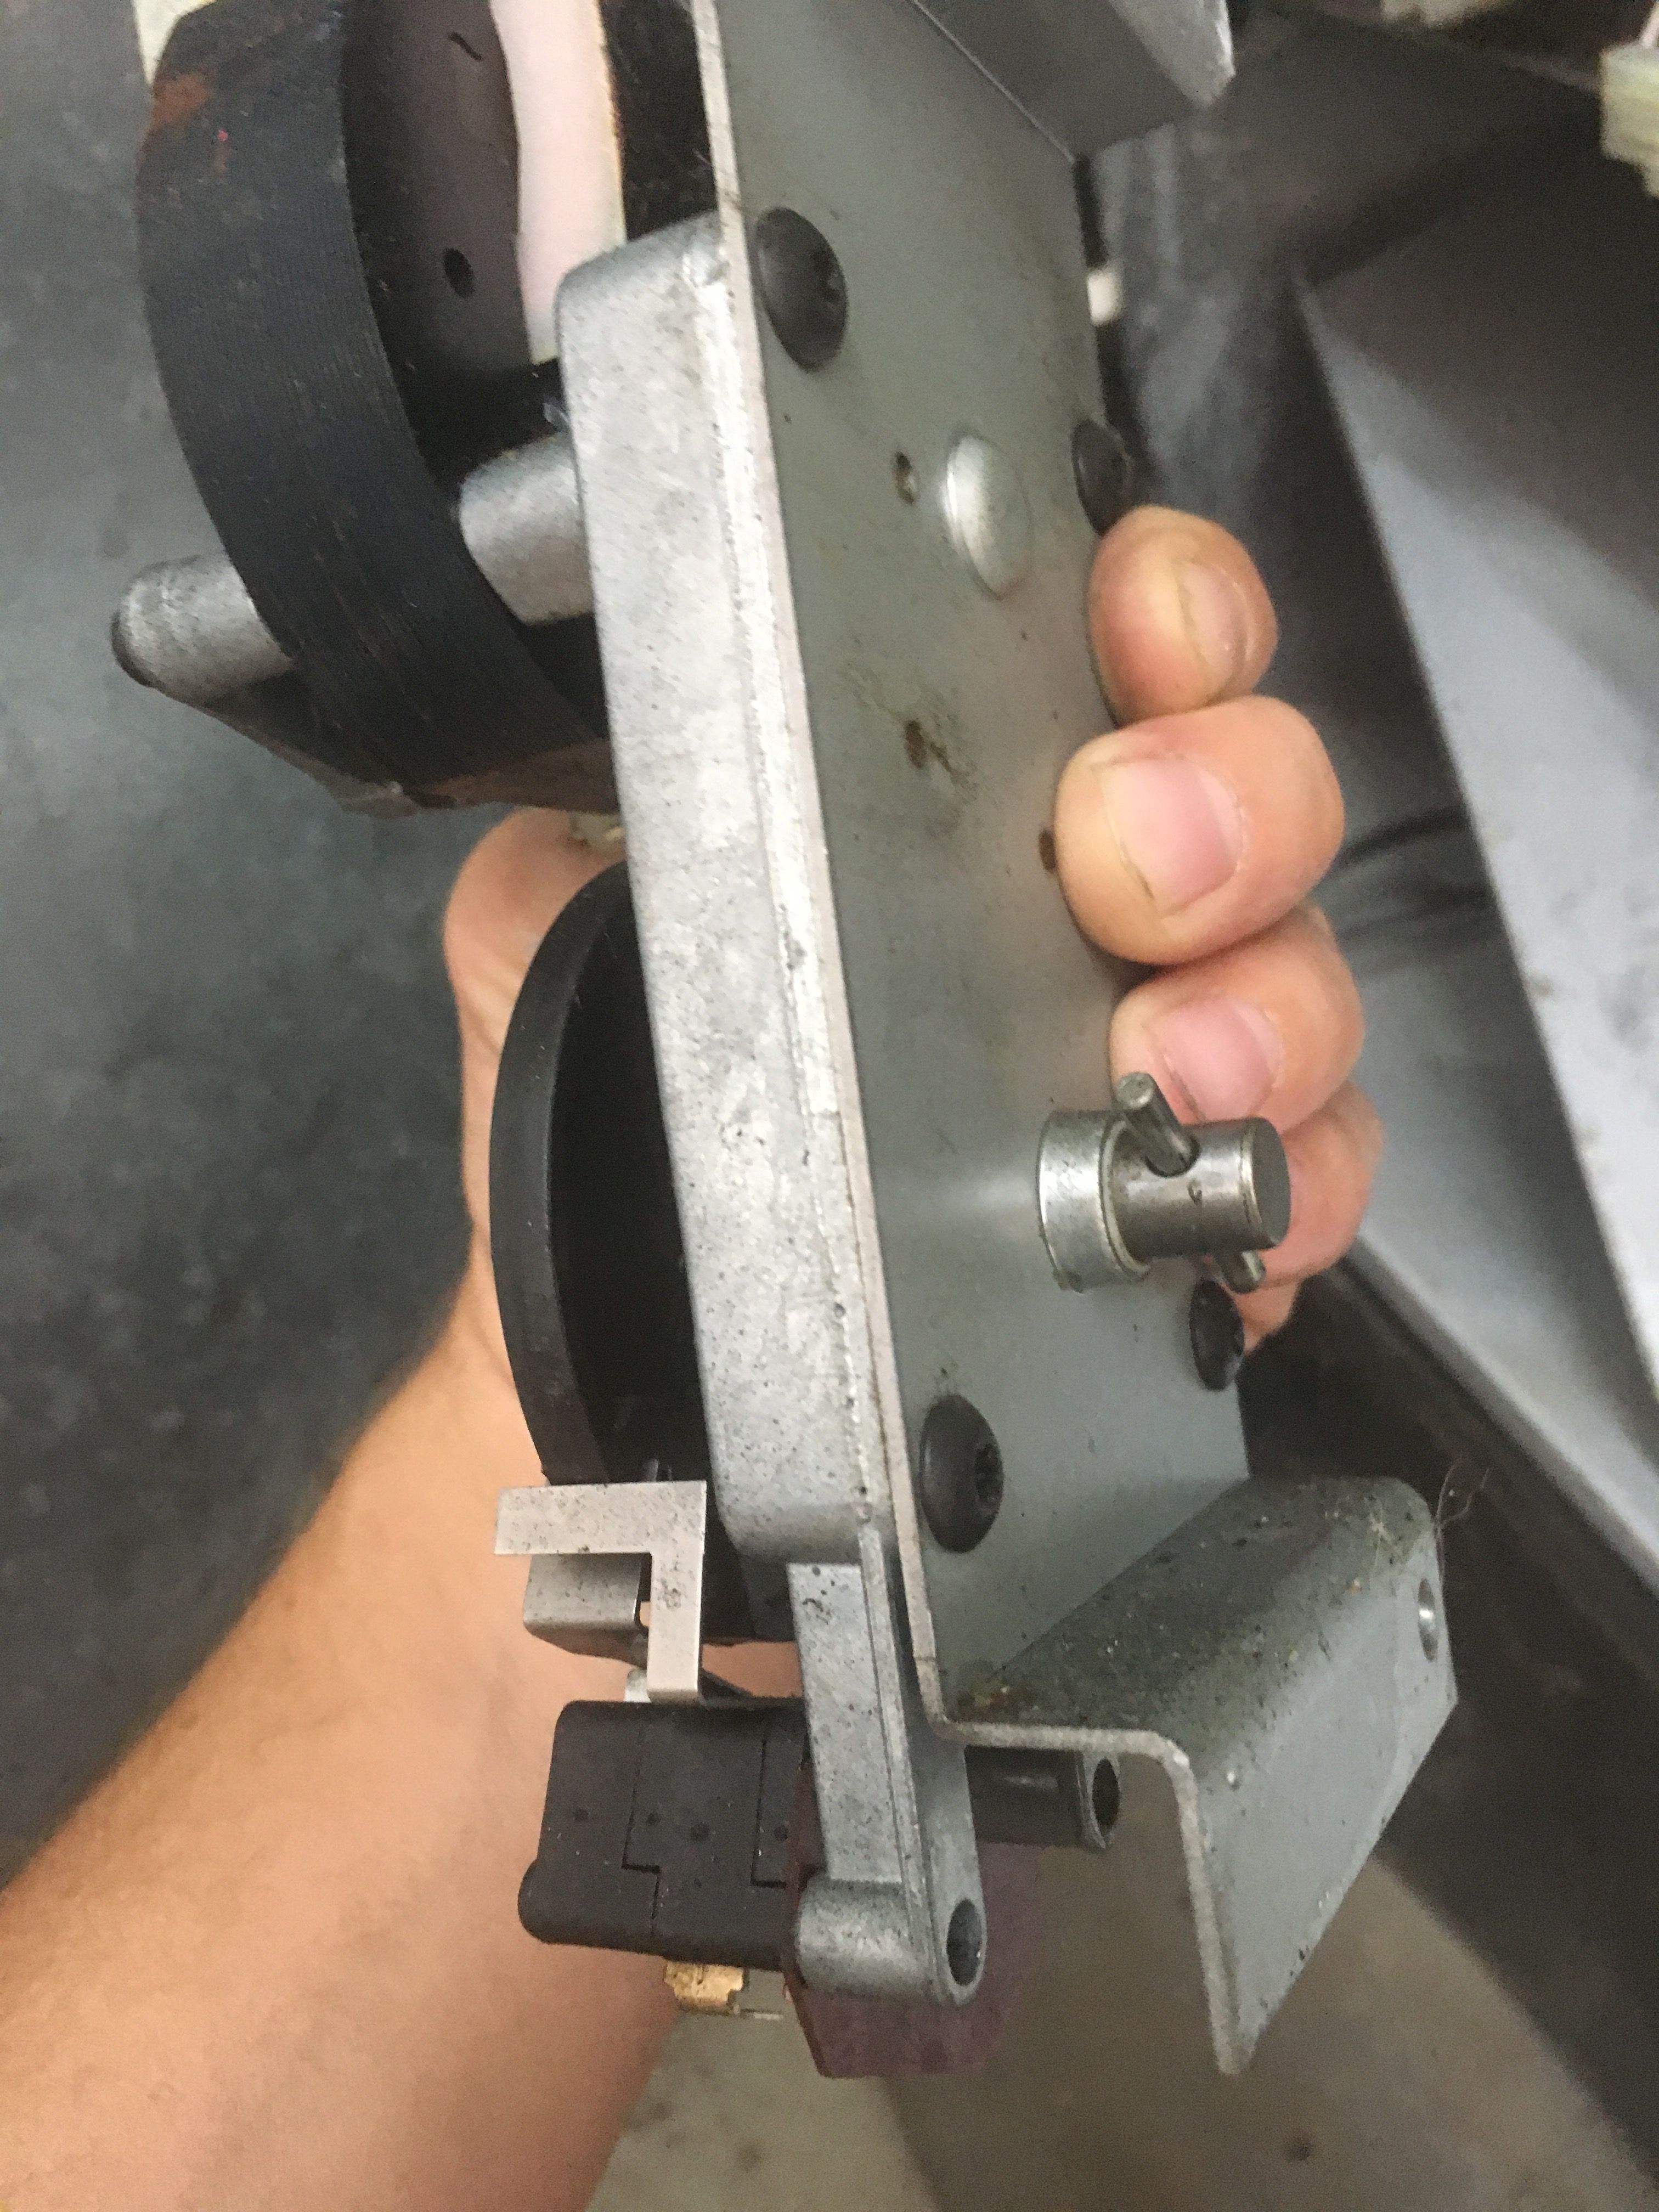
The final thing to do was to swap the motor over to a different position and see if the problem followed the motor or was in the circuit to that column. I unplugged the harness to the two motors and unscrewed the three screws holding each motor in place.
Once the motors were removed I noticed that on the back side of each was a cam that rotated the mechanism in the column by mating with a plastic piece.
I completed the swap and plugged in the machine only to see the problem had followed the motor. This meant the motor had an internal short and needed to be replaced.
With a shorted motor and non operational coin machine I decided to source parts online to see how deep I would be into this project if they were replaced. This model of soda machine could go for $500 USD if in working order. A refurbished coin machine goes for around $100 USD and the motors are around $30 USD a pop. That would put me at about 30% of the total profit and I have yet to test the bill reader. Should I sell the machine as is or continue on with it and purchase the parts? I would really appreciate your input. Thanks for taking the time to follow along with my progress on this project. I hope you learned something new and dont be afraid to comment any thoughts you may have below.
 All photos, unless otherwise stated or sourced, were taken by @csusbgeochem1 and may not be reused without permission. Animations and cover photo created by @csusbgeochem1 using GIMP.
If you found this story interesting you can find more like it by following @socalsteemit and help us expand the Steemit community together
All photos, unless otherwise stated or sourced, were taken by @csusbgeochem1 and may not be reused without permission. Animations and cover photo created by @csusbgeochem1 using GIMP.
If you found this story interesting you can find more like it by following @socalsteemit and help us expand the Steemit community together

Join the SoCal Steemit Discord group today and meet others around you
I would fix it and sneak it onto campus filled with beer.
It would pay for itself quickly in an area with a lot of foot traffic. I also believe that once fully functioning they are worth more than $100, and more like $1,000. So I think IF (not that I doubt your abilities but electrical components can be insane to figure sometimes) you can fix then maybe it should be worth $300 - $500.
Here is link to similar machine for nearly $1,000 Vending machine for sale
I know this is a really late comment but thanks @streetstyle! I agree on foot traffic, I just need to come up with the liquidity to throw at it.
I've always wondered what was inside these, thanks for the super detailed teardown. Also, this is the first time I've ever heard of a vending machine conveying with a property.
Now, just modify the Coinco to accept SBD and other crypto. Even if no one uses it for that, it'll get you in the news. :)