How to experimentally determine the famous constant "h"
Hello to all the scientific community today I bring you another quite interesting and simple experiment, many of the bloggers in Steemstem have done this experiment, especially those who studied the degree in physics. The objective is to determine the famous constant of the Nobel Prize winner Max Planck who, with the help of other scientists, was able to determine this constant called h. Next I will explain what this wonderful experiment is about.
In the present publication it is proposed to experimentally obtain the famous Plank constant, since 3 light-emitting diodes LEDs are used, these devices are made of a semiconductor material that has the particularity of emitting light when they are subjected to a Potential feature according to its color. To achieve our objective we make use of the statements of Max Planck and Albert Einstein on the quantified energy and the equation of the photoelectric effect [1], for which we obtain the threshold voltage and the characteristic wavelength of each diode and thus obtain the measurement experimental of h[2].
Credits
The origin of the planck constant is derived from the problem based on the radiation of a black body, in search of finding a coherent relationship between the theoretical findings and the experimental observation. Planck came up with the idea of making a model in which the energy dissipates in the form of discrete packages instead of being a continuous variable [2]. Through this rigorous work Planck managed to find the constant of proportionality and then denoted by h and this definition as follows:
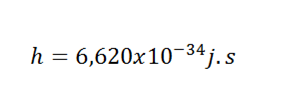
Where j is joule and s are the seconds, that is, h has units of 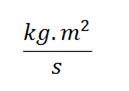 or energy for time.
Planck discovered that his constant is intimately linked with energy and in one of his
equations formulates that the following:
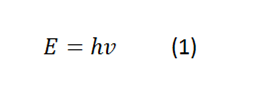
Where ν is the frequency, in this case what is meant is that the energy absorbed or emitted in an interaction process of an oscillator is proportional to a constant by the frequency with which it oscillates.
Also the wavelength has a relationship with h as follows

Where p is the linear momentum of a particle, remembering that p is not more than the mass of a particle by its speed, in this way we have that if we know the linear momentum of a particle we can know its wavelength.
Once the Planck constant is defined, we can begin to define the units in which Planck developed your theory
Albert Einstein argued that the absorption of light by a metal corresponds to the emission of electrons. This means that for diodes, the photoelectric effect occurs when the energy supplied through the voltage is equal to the minimum energy needed to detach an electron from a quantum level, therefore the function of the work is equal to zero, obtaining the following relation [2]:
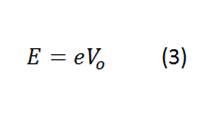
Being E the energy of the electron, this energy is the necessary one to extract this electron from the atom.
e, is the charge of the electron (1.602x10⁻¹⁹ C).
Vo, is the voltage of the wavelength that is associated with the electron extracted from the atom.
Tthe inverse effect of the photoelectric effect occurs when voltage is supplied by circulating current in the led to obtain light or photons [3].
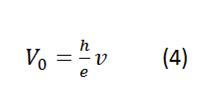
By matching (1) and (2) an expression can be obtained that relates the voltage to the wavelength of each LED, in proportion to the constant sought:
In order to determine the planck constant through the use of LEDs, we must first have at our disposal the following materials:
- 3 LEDs of different colors.
- Adjustable voltage source (3 V - 2A).
- Ammeter (± 0.01 A).
- Voltmeter (± 0.1 V).
- Banana-banana cables.
The next step is to build the circuit to make the corresponding measurements of each led (in this case we will use red, green and blue LEDs).
A connection will be made in series from the voltage source to the LED.
Connect the amperemeter in series to record the current values.
Connect the voltmeter in parallel to take the voltage values. Note: must take into account the capacity of each diode to not exceed its voltage above 4V, which would cause the damage of the LED).
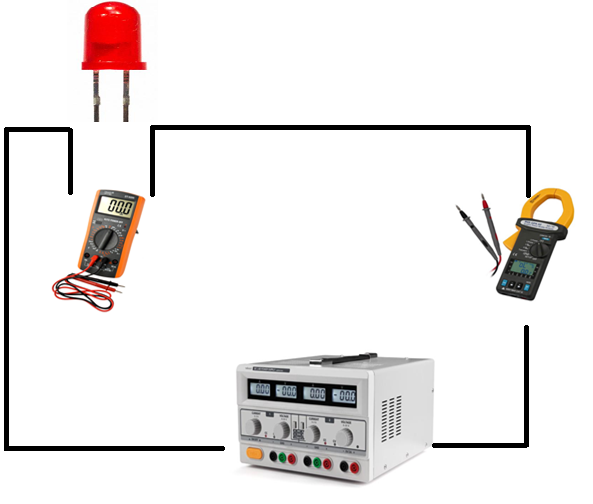
Diagram of the configuration of the circuit for the determination of the constant h.
Later on when the circuit is finished, each led will be measured and the value of the voltage and current will be obtained.
A table will be constructed where all the values of the measurements will be recorded.
Then the values are taken and a graph is constructed.
The graphs will show the variation of the current as a function of the supplied voltage, by which the cut-off voltage of each of the LEDs is calculated, where they start to emit photons, by means of a linear regression in the points where it grows quickly. current.
Using the known wavelength for the light emission of each led with the equation (4), we can experimentally obtain the value of the famous constate h.
The results obtained during the experiment for the determination of the Planck constant, using LEDs, are shown below.
RED LED:

Table 1. Data obtained from measurements with the red led.
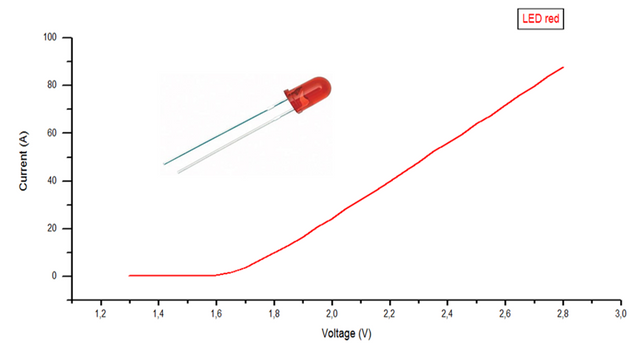
Figure. Graphical representation of the data obtained from the red led.
GREEN LED:
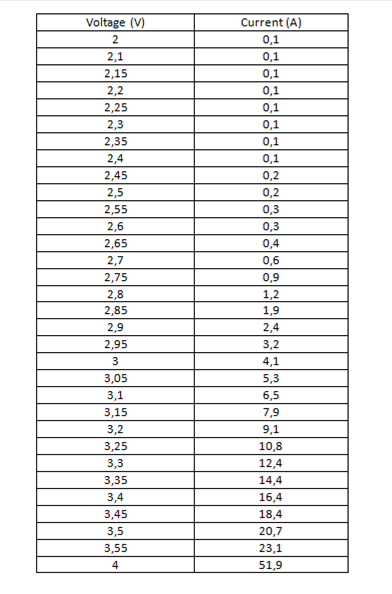
Table 2. Data obtained from measurements with the green led.
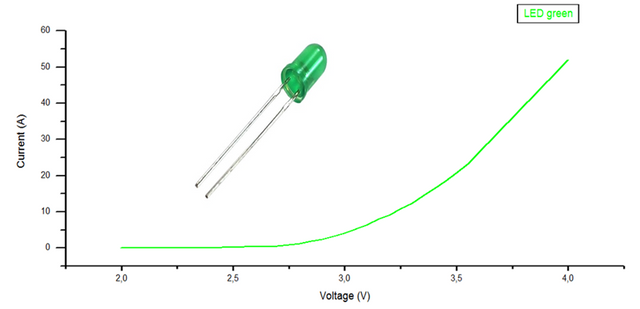
Figure. Graphical representation of the data obtained from the green led.
BLUE LED:
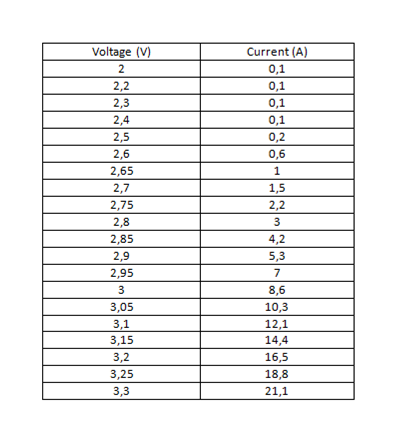
Table 2. Data obtained from measurements with the blue led.
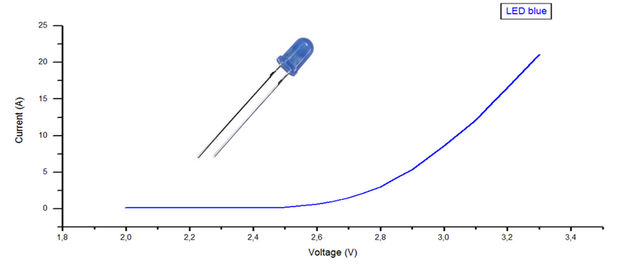
Figure. Graphical representation of the data obtained from the blue led.
Of the 3 curves corresponding to each led and by means of a linear regression, the voltage value is obtained, for which they begin to emit photons, with this and the wavelength the planck constant is calculated according to the equation (4), as seen in table 4 and 5.
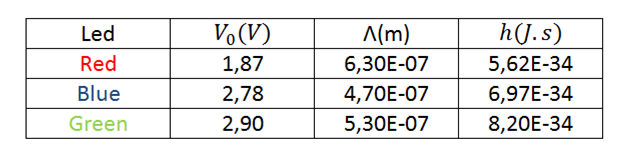
Table 4. Results obtained from h for each led.
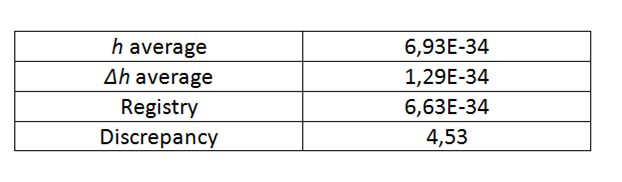
Table 5. Results obtained from h for each led.
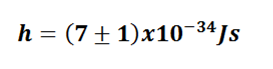
To finish we have the value of the constant h:
The discrepancy with respect to the record obtained is 4.53% and an error in the measurement of 18.84%.
With the analysis of the results obtained in the determination of the Planck constant by means of LED diodes, it can be concluded that it is possible through a relatively simple procedure to experimentally obtain this important physical constant, which despite being a little resulting measure Accurate, you can rescue a clear and simple procedure to achieve your goal.
it is advisable before carrying out the respective measurements to verify the quality of the instruments to be used, first and at the time of data collection, the results will be as precise as measurements are taken, so that the disposable values can be identified and taken those that contribute in the expected measurement.
REFERENCES.
[1] Carson, Cathryn. (2000). "The origins of the quantum theory". USA. P: 2-3.
[2] Eisberg, Robert y Resnick, Robert. (2011). "Fisica Cuantica, atomos, moleculas, solidos, nucleos y particulas". Mexico Editorial: Limusa. P: 19, 25-35.
[3] R. A. Milikan. (1916). "Direct Photoelectric Determination of Plancks h". Phys. Rev. 7,355.
If you want to read more scientific articles of excellent quality, do not waste time, and visit the label steemSTEM, is a great project that has grown enormously in recent months, this project seeks to promote high quality scientific publications.
Join us or if you wish to have more information you can visit the blog @steemstem or you can enter your channel
Excellent post of a classic experiment my friend @carloserp-2000. Regards!.
My be usefull