How to setup and install the new Facebook Pixel
Are you using the Facebook Pixel correctly?
All the work you do researching and setting up a new Facebook ad campaign can be worthless if you aren’t tracking the results and then optimising the campaign.
If you don’t install the correct tracking then you’re flying blind. You won’t know if your campaign is delivering the desired results and you won’t be able to track your ROI down to the penny.
Campaign tracking on Facebook comes from your Facebook Pixel. This is a piece of code that you install on every page of your website.
In this article you’ll learn how to setup the Facebook Pixel in your Ads Manager, how to install it on your website and how to create website custom audiences.
Step 1: Where to find the Facebook Pixel
The Facebook Pixel is located in your Ads Manager under the “Pixels” tab.
Go to Ads Manager.
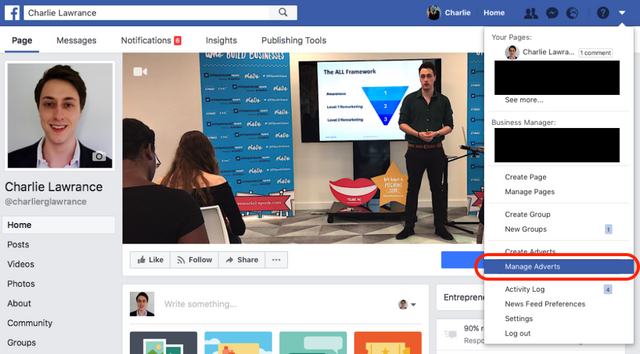
Then click the top left menu button and under “Assets” select “Pixels”.
Here you’ll see 1 of 2 screens.
If you haven’t yet created your pixel yet or it has been inactive for while you’ll see a screen like this:
Click “Set Up Pixel”. A new pop-up menu will appear asking you how you want to install it.
You have three options when it comes to installing the Facebook Pixel:
- Use an integration or tag manager.
- Manually install the code.
- Email instructions to a developer.
If your site builder is listed then you’re in luck as the pixel setup and install is now super simple…
Click on your platform and follow the instructions.
If your website builder isn’t listed in the integration menu and you don’t have a developer to email the instructions to, you’ll have to setup and install the pixel manually.
Here’s how you do that…
Click on “Manually install the code yourself”.
A new menu will appear with the 3 steps…

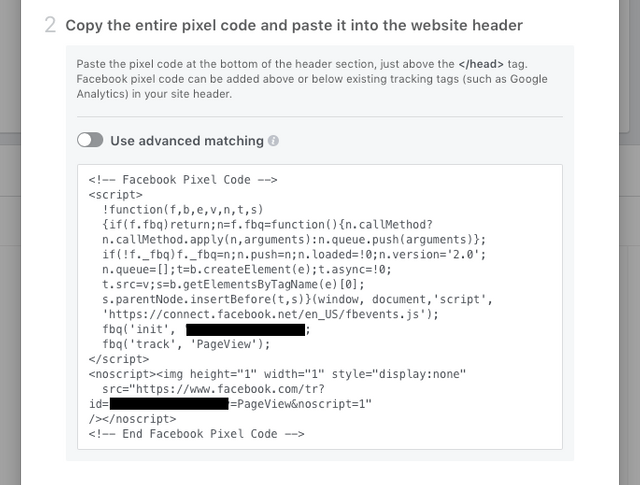
Your Facebook pixel code can be found at step 2.
This is known as the base code and will need to be installed on every page of your website in the header code that you locate in step 1.
The platform your website is built on will determine how much of the 3 step process you need to use.
For example, for WordPress websites there’s an awesome free plugin called PixelYourSite that allows you to easily install the pixel across your whole site with just one click. You don’t need to go into the header template of your website, like it suggests in step 1 of the manual install process shown above.
If you’re website is not in WordPress, here’s the how to install it on:
Step 2: Facebook Pixel WordPress installation
Go to the plugins menu and search for PixelYourSite.
Click install.
Activate the pixel.
Once you’ve installed and activated the plugin go to the PixelYourSite dashboard.
You’ll need to enter your Pixel ID into the section called “Add your pixel ID”.
To find your pixel ID, go back to the “Pixels” tab in your Facebook ads manager, it’s located in the top left corner under your pixel name.
Copy your Pixel ID and paste it into the Pixel ID field in the PixelYourSite plugin dashboard.
Scroll to the bottom of the screen and click “Save settings”.
Congratulations, you’ve now installed the Facebook pixel on your site. Now when someone visits your site, from any source: search, social media, email etc, they get tagged by the pixel, matched on Facebook and you can then start building up website custom audiences of people who have visited your site.
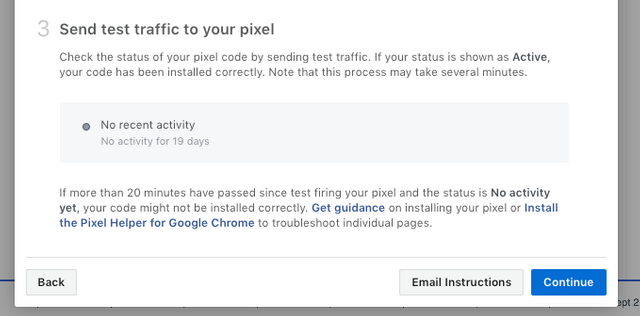
Step 3: How to check the Pixel is working
To check that the pixel is working, go to your website and load a page.
Then head back to the “Pixels” tab in Ads Manager and in the top right next to details it should have a green dot and say when the pixel was last active.
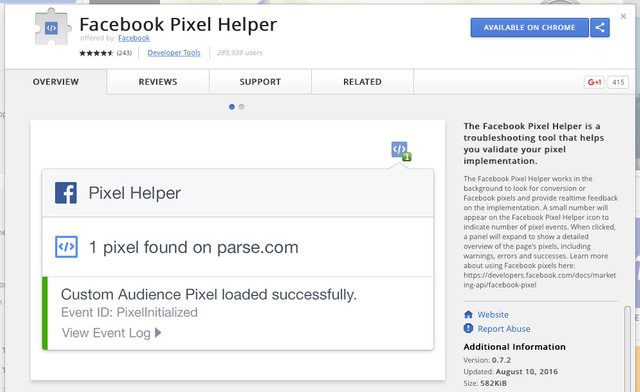
You can also use the Facebook Pixel Helper Chrome browser extension just to be sure.
Step 4: How to build your website custom audience in Facebook Ads Manager.
Now that you have created your pixel and installed it on your site, it’s time to create a custom audience of people who have been visiting your website.
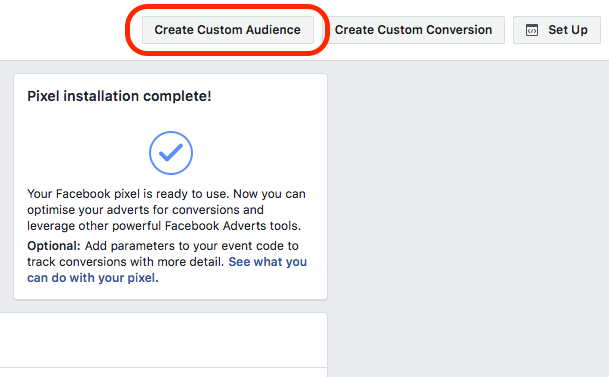
Go to your Ads Manager and select “Pixels”. In your pixel dashboard click on “Create Custom Audience”.
A pop up will then appear that looks something like this:
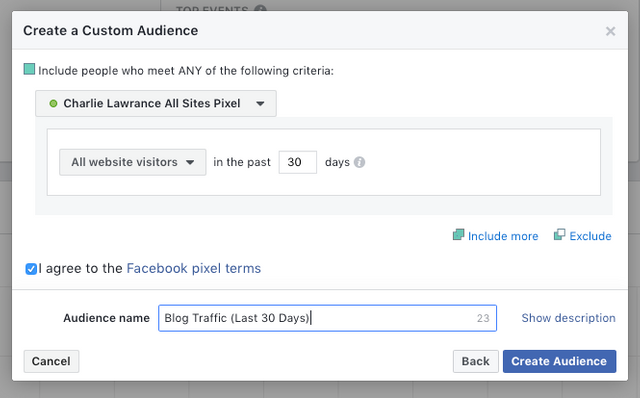
For now we will create the most basic website custom audience that is, everyone who visits your site.
Pixel: Make sure your pixel is selected and the dot is green, meaning it is “Active”
Audience: Keep as “All website visitors”.
In the last: You can change the number of days field from 30 up to a maximum of 180 days. But bare in mind that if you are running a retargeting campaign the greater the number of days from someone last visiting your site the lower the CTR.
Audience name: give your audience a name such as Blog Traffic (Last 30 Days).
Click create audience.
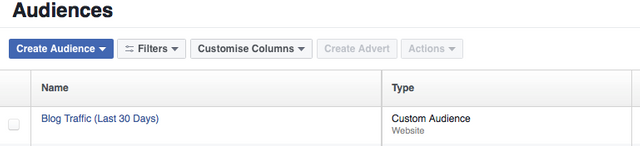
You’ll then see a message that’s says your audience is being created. To view your new audience go to the “Audiences” tab the same way you navigated to the “Pixels” tab.
Conclusion
To recap then:
Step 1 is to create your Facebook pixel in your Ads Manager by navigating to the “Pixels” section under the “Assets” tab.
Step 2 is to install it on your website, if you are using WordPress you can do so easily with the PixeYourSite plugin and just your Pixel ID.
Step 3 is to test to see if the pixel is active. To do this you can either load a web page and then head back to the “Pixels” tab to check on the pixel status or you can use the Facebook Pixel Helper Chrome browser extension.
Step 4 is to create your website custom audience of all visitors in the last X number of days.
Posted from my blog with SteemPress : http://ziplinks.io/wptest/how-to-setup-and-install-the-new-facebook-pixel/