Casein Plastic - Lets have some fun with milk!
Making “magic” with milk.
Magic is just a rhetorical term for what we are going to do today.
My four year old is at an age where he loves to experiment and enjoy new things. Ok, yes, he is just four, but he constantly needs something to keep his busy brain occupied for a period. So, yet again I took the road of researching.
He enjoys fun, interesting activities so that was the focus of my research. And I found this fun activity.
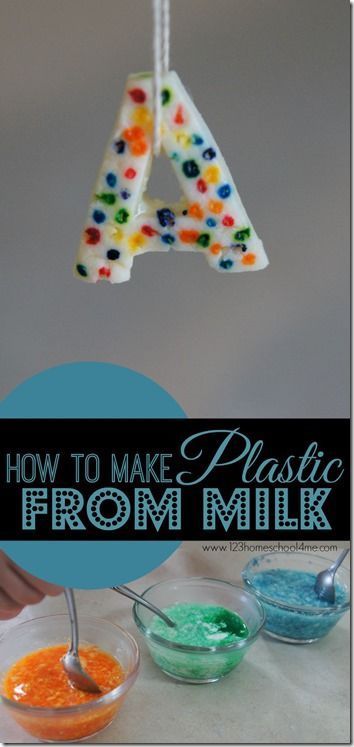
Make plastic from milk.
Before 1945 plastic products where made from milk, also known as casein plastic. After 1945 synthetic plastic were introduced.
Today we are going to make some plastic letters or toys, depends on what mold you can get a hold of.
You will need the following:
- Stove top or microwave to warm the milk.
- Milk (The lower the fat content the better.)
- White vinegar/ Lemon juice
- Bowl
- Spoon
- Strainer (If you don’t have one, you can create one with a cheese cloth.)
- Paper Towel
- Molds (Lego mini figures or any mold you can get a hold of)
This experiment will take about 30 to 90 minutes to be done, but up to 2 days for the drying of the figure. If you want to paint your figure add an additional day.
Instructions
- Measure out 1 cup of milk. (Makes about 4 minifigures)
- Heat the milk on the stove top. The milk must just be steaming.
- Remove from the heat and then add 4 teaspoons of vinegar or lemon juice. Stir gently.
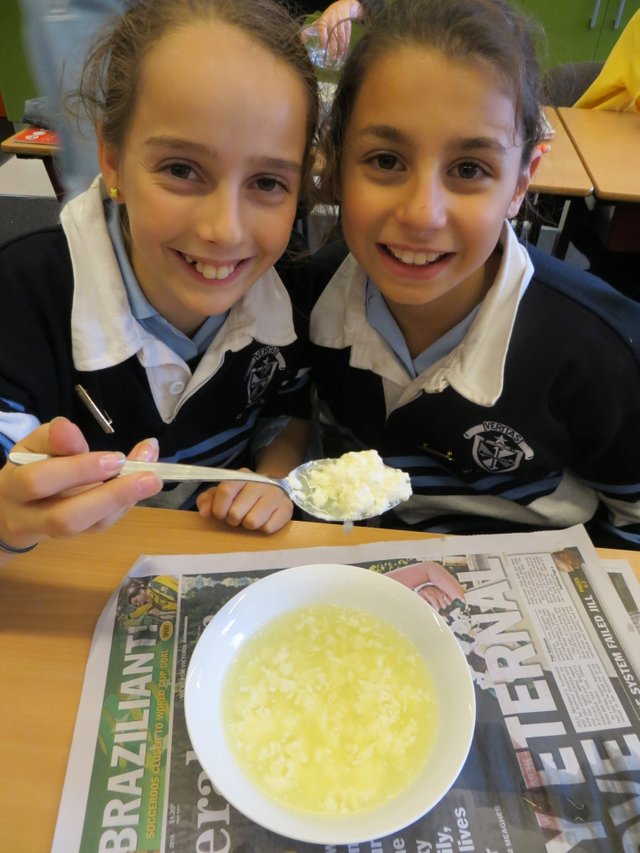
- NOTICE that the milk immediately begins to curdle.
- Stir gently for approximately one minute. This is for the full reaction to finish and al the curds form. REMEMBER be gentle.
- Strain of the whey using the strainer.
- Let it drip for a few minutes until all the liquid has drained off.
- Remove the curd.
- Place them in a few layers of paper towel.
- Carefully Pat and squish to remove more of the liquid.
- Repeat a few times until you have removed as much of the liquid as possible.
- Start squishing the curd together, shaping the product.
- If you would like to make your product smoother, soak the curd in vinegar for an extra hour. Repeat the drying process.
- Start shaping and molding your curd into the desired product.
- The drying process will take approximately 2 days, depending on the temperature in your area of the world. Here in Namibia it takes approximately a day.
- After it is dry you can use dry markers or acrylic paint to colour our product.
Enjoy and have fun!

Team South Africa banner designed by @bearone

Great ur post my friend
Good luck @tanyaschutte 👍😉
Good post you, I like to visit it. visit my post also @fakhrurradhi
Interesting experiments for children to learn and grow @tanyaschutte
nive post.congratulation.happy new year