Spice up Steemit Cover image ... Simple way!
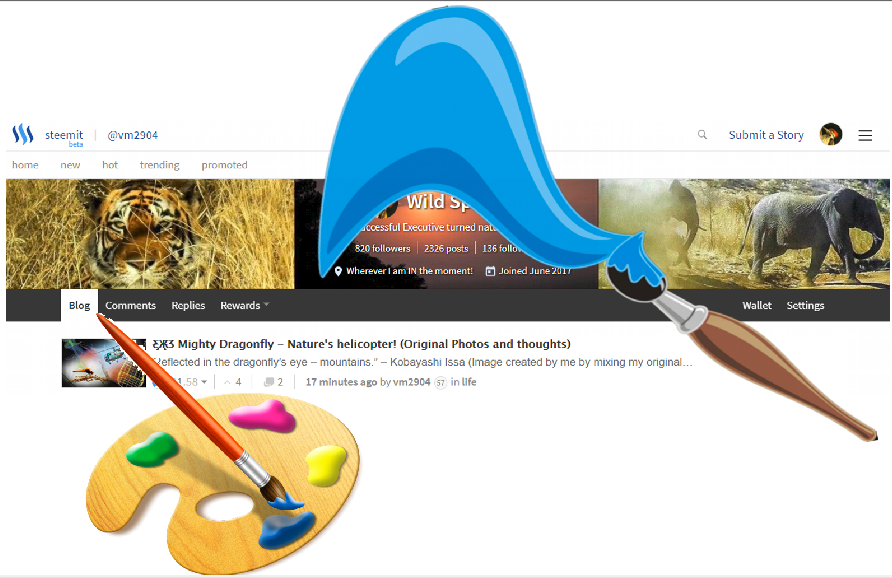
Hot: Now you can create your own snazzy cover on Steemit page.
You need not be a great Photoshop artist for that.
Instead of the drab blue cover page header like earlier, now you can paint a pretty picture on your cover page.
A recent change appears to have been introduced on Steemit today/yesterday that has started showing a background image suddenly as cover image. I am not aware if this feature was available earlier. I suddenly noticed it because the image I had set in ESteem App as cover image started showing up on my blog page as cover image. This has happened on most of the blog pages I have seen.
Of course - the images most people have are not appropriately sized and therefore, on many blog pages, images look ugly. For some pages, where the image showed people, due to the peculiar crop size of the Steemit cover image, people are appearing headless!!
Here is how we can create a fairly interesting cover image simply using free web based apps.
- Step 1: Navigate to the collage maker page of free web based app BeFunky here
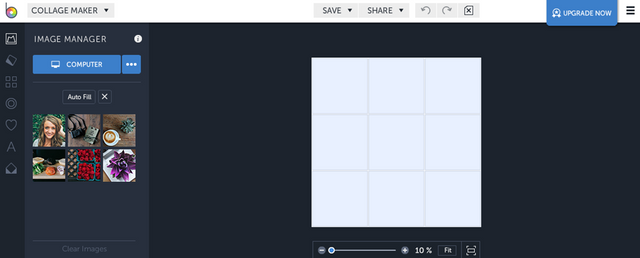
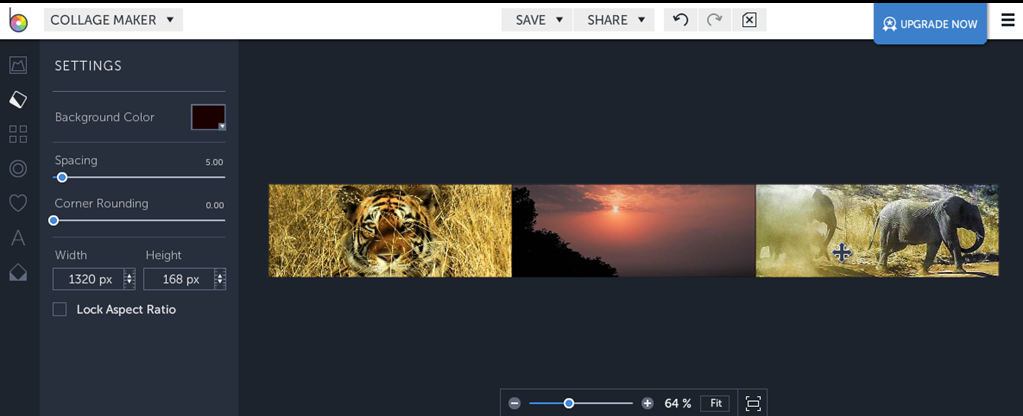
- Step 2: Set image size of 1320 pixel width and 168 pixel height in the image settings by clicking second icon from top on the left.

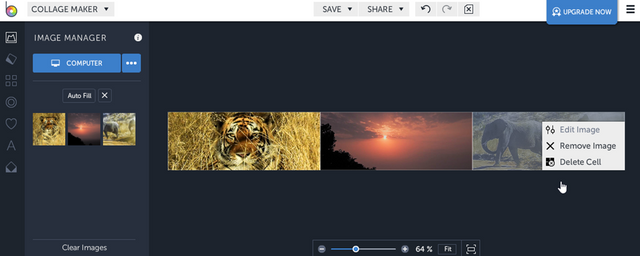
- Step 3: Make a 3 x 1 collage configuration by deleting extra collage boxes (from the 3 x 3 default grid) by clicking on an unwanted box and selecting delete:
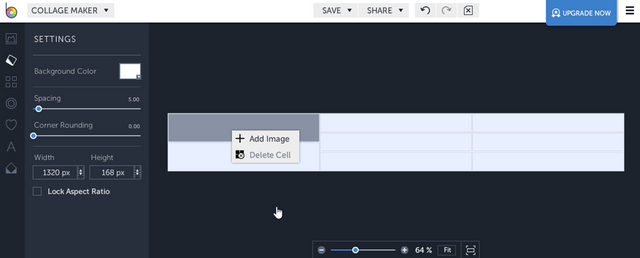
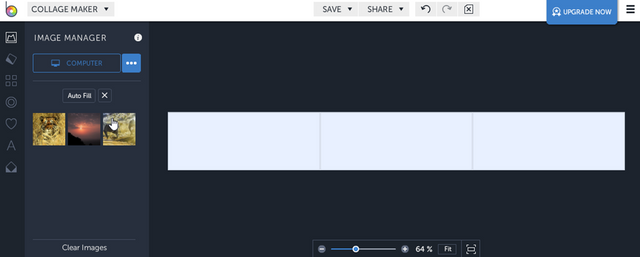
- Step 4: This is how your collage box will look in a 3x1 configuration suitable for cover image. Now you are ready to add images.
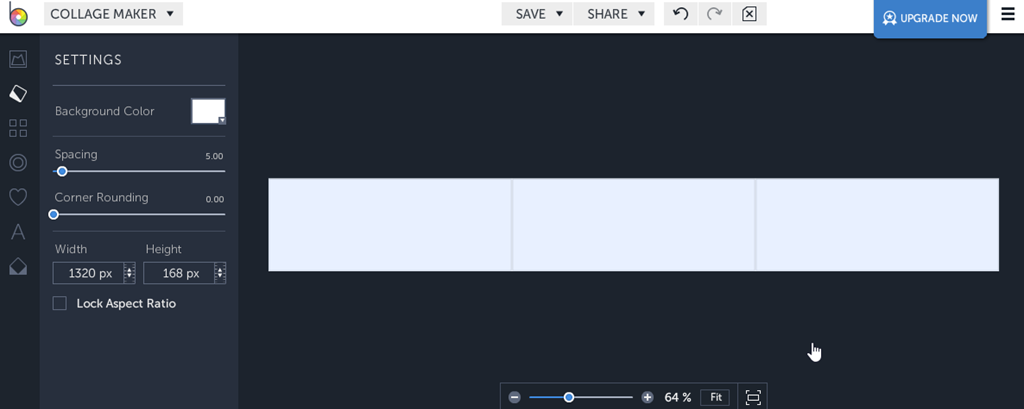
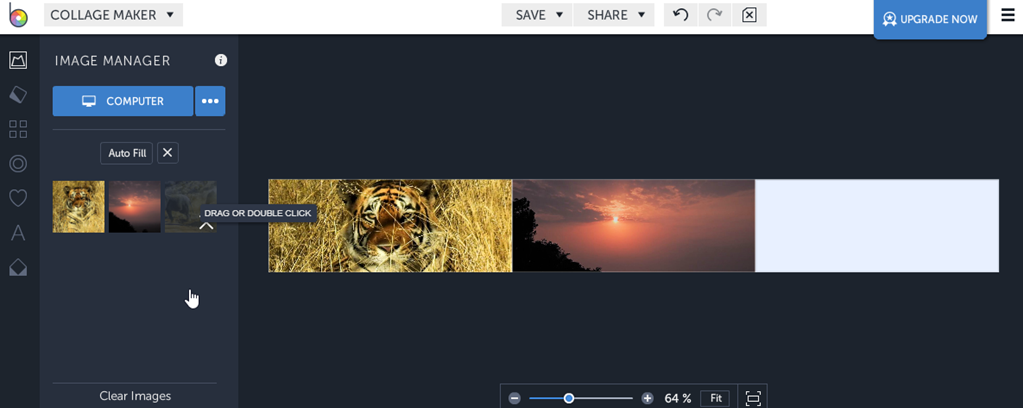
- Step 5: Select and upload images you need from your computer to BeFunky collagemaker by clicking on the Image manager button on the top left in BeFunky window. Click on 'Computer' and then, navigate to the location of your images on your computer in the dialog box that opens. Upload the 3 images you want to use on the cover image. Ensure that the middle image has dark background so that the text of your username, follows etc, which Steemit puts in the middle of the cover image will be visible.
- Step 9: Click on Save to computer and save the image on your computer.
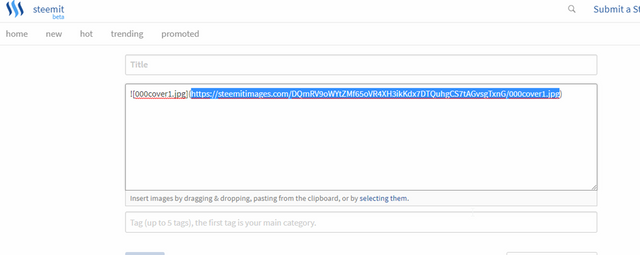
- Step 10: Upload the image to an image hosting site such as imageBB. You can even click open a 'Submit Story' page on Steemit itself, drag the image in the blog creation space and copy the URL (as shown in highlights in the image below) as the picture URL:
- Step 11: Click on Settings (on the right hand side of your Steemit blog main page) and paste the URL in the Cover image box. Click on Update and save.

Tadaaaaaaaa. You will now see your cover image changed to the one you created!
Please create your own Cover images and share them in comments. It will be fun to see everyone's creative effort. Thanks
Note: First image created by me by mixing a screenshot of my Cover image, image credit 1 and image credit 2.


Upvoted your article rather interesting.Will follow you and upvote you as well just need a little help from you kindly upvote my article dedicated to my friend who has cancer @rogerblu thanks a million @vm2904
Thank you so much for your comment and support. Will take a look at your blog shortly. Hope your friend recovers soon.
Thats a nice walk through , will apply this! good job!
Thank you so much. I am glad it was helpful
Bro.. What an epic banner!
And you say you aren't good at designing? :D Nonsense! Beast.
Talk soon.
Thanks Bro. It is just a 'quick' method to create a Cover image. I am glad good artists like you like it.
yes perfect :))) i was just telling people same thing yesterday!! :)
Thanks Alla. It is an honour to see a visit from you to my blogs. It has been a long time.
Please feel free to spread the messsge and let people benefit from this simple method.
Thank you!!! I'll be sure to make use of this. Very helpful :)
wow. I feel proud to be able to present something that an expert like you finds helpful. Hope this reaches many people. It has not been noticed much so far.
These are creative artists who are helping us to suit the situation.
Thank you so much for the appreciation. Hope you are able to use it to create your own image
Congratulations for the good work done dear friend @ vm2904, I really liked the finished work.
Have a great day
Thank you my friend. Your appreciation means a lot
Worth to try
Do try it friend. It will be great to take a look at your creative work
Wow, this is really helpful tutorial! I made my ugly cover yesterday, but now after reading your tutorial, it seems that I need to change it!! ;-)
Excellent tutorial! Nicely done and, as always, your photos are fantastic.
Thank you for your encouragement. As always, it is great to see Senior Steemians like you appreciate my work. Your cover image is fantastic and harmonious by the way. I have to see how I can use my technique but produce a 'themed cover image'