A Comprehensive Guide on How To Install Steempress in Wordpress

Wordpress wouldn't be the most popular blogging platform if it wasn't for plugins.
So what is a plugin?
It's an app/software/extension or whatever you want to call it that can improve your blog and extend its capabilities. Without plugins, Wordpress will just be for blogging.
And with plugins, you can transform your blogging site to an e-commerce or portfolio one and there are important ones like Yoast for SEO or Akismet for anti spam and so on.
What is Steempress?
Steempress is a new plugin created to sync Wordpess and Steemit. Basically, when you make a post on Wordpress, it will also be posted on Steemit saving you great amount of time if you're blogging on these 2 platforms.
This tutorial will teach you how to install a plugin, specifically Steempress to get your blog started on both platforms.
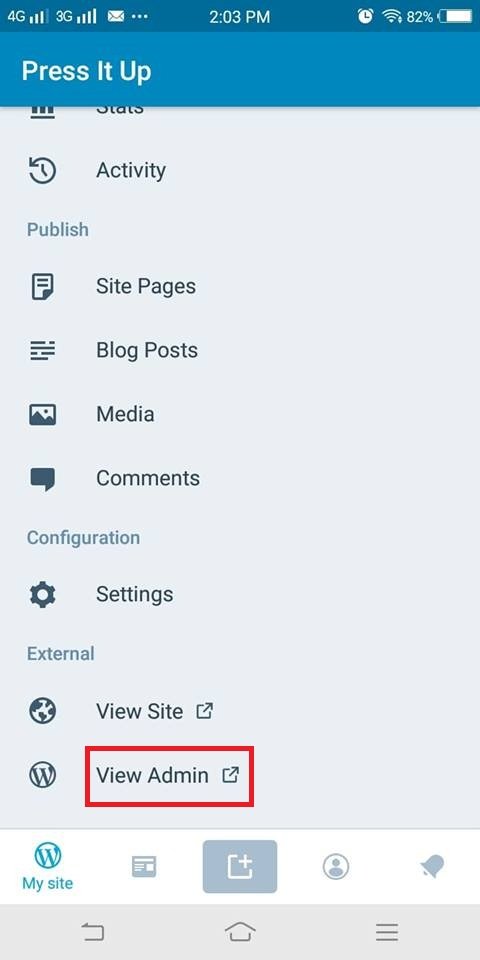
If you are using the Wordpress app for mobile, you need to go to your dashboard which can be done by scrolling down and tapping on view admin.
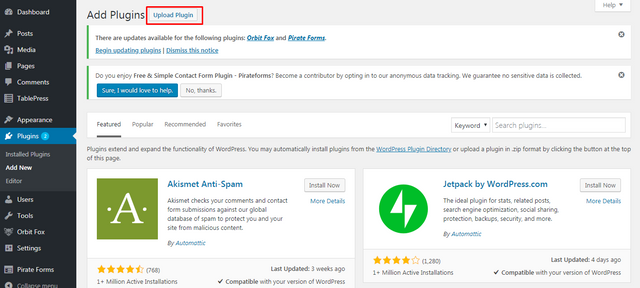
There are several ways to install a plugin, let's start with the easiest one.
Installing from the Dashboard
On the left side of your screen, locate the plugins section. Type in the search bar the name of the plugin you want to install, hence Steempress and click on install now. After installing, click on activate to successfully install it to your blog.
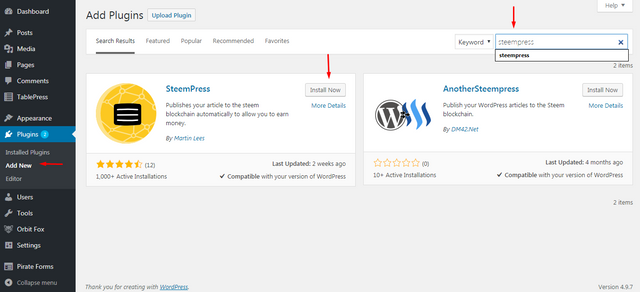
Furthermorecan also check the details of any plugin like faqs or ratings especially if it's compatible with the version of your wordpress, then click on activate.
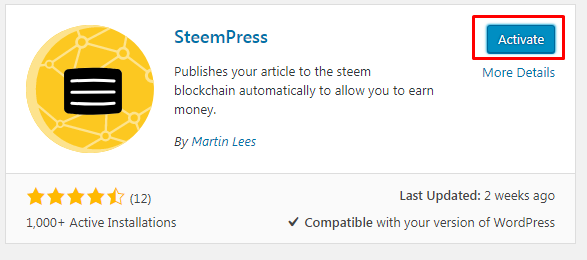
That's it, you've successfully installed Steempress.
Let's go to the second method.
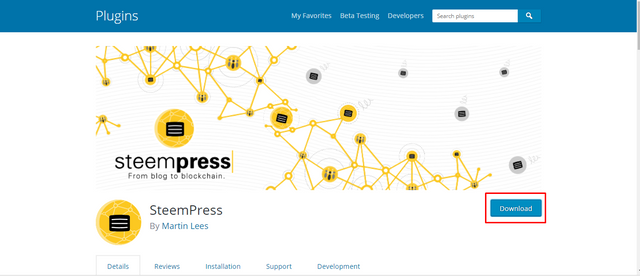
Downloading and installing.
The first thing to do is go to wordpress.org/plugins/steempress, click on download and you'll get a zip file of the plugin.
Once downloaded, go back to the plugins section and click on upload plugin at the top, choose Steempress. It will prompt you to install and activate it.
What's next after installing?
Setting up Steempress
The next thing to do is configure the settings of Steempress to connect it to your Wordpress blog.
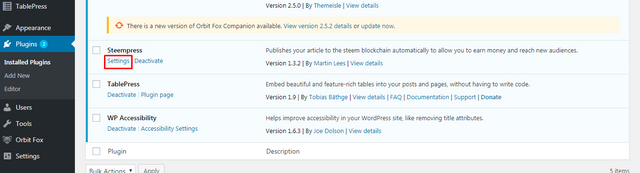
You can go to plugins, locate Stempress and click on settings.
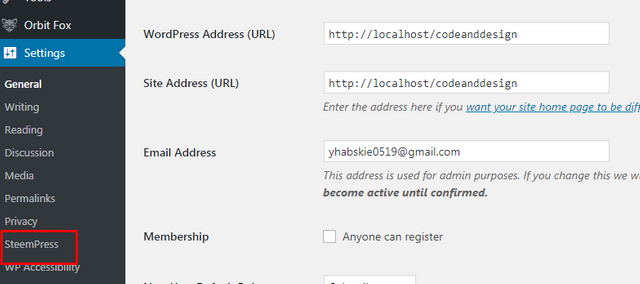
Or another way is to go to Settings, locate Steempress and click on it.
Once you're in the Steempress settings, fill out the details like the username and put in your private posting key. You can then choose what kind of rewards, tags and you can even add additional users if your blog has multiple writers or bloggers.

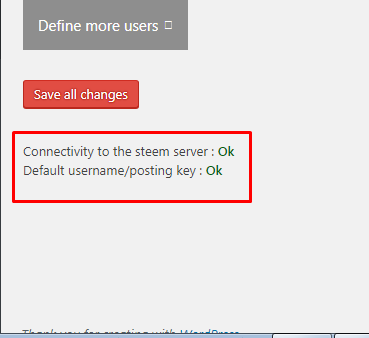
Finally, after clicking save all changes, you can scroll down at the bottom and see that the connectivity is okay.
Hope this guide will help you in linking your Steemit and Wordpress blogs.
Sharing is caring, if the guide was helpful, don't forget to share it with your friends.
Posted from my blog with SteemPress : https://pressitup.com/a-comprehensive-guide-on-how-to-install-steempress-in-wordpress/
It is asking me for FTP and I do not have FTP.