Front Mission 4 walthrought Game guide part 3
This is the Front Mission4 walthrought part3
Thanks you all of my friend
This guide is may help you
Walkthrough: Here we are on a narrow bridge, only two squares wide. This does not leave much room to maneauver, especially with those pesky tanks blocking the way. To add injury to insult, we also have nighttime, which lowers accuracy and a blizzard which reduces the range of all but Melee and Missile weapons. Luckily that also goes for the enemy. First have Zead open up with his missiles on the tank in Front of Latona. Then have Latona move in on the tank and use her "Attack Systems Down" on on the tank you wish to attack (the one in front of Latona). Then move Hermes with one square space in between in front of the other tank. Now have Elsa move on the square that Hermes left free and attack the tank in front of Latona. The setup should look like this: | Tank | Tank | | Latona | Elsa | | | Hermes | This will trigger a linked battle where all three attack the same tank with, if you followed my advise to use "Link 2" instead of "Link 1" to link those three together, the chance that you increase the damage because of a skill chain. On the enemy turn the sniper and the assault that where on the left of the drop zone will start to move over the small bridge connecting to the main bridge. You should first make short work of the tanks with the above tactic. After the first tank has been destroy have Latona move beside or behind the tank while Elsa and Hermes move to the other side of the bridge to have an unimpeded field of fire (especially through friendly units). If it is Hermes turn, then only attack if no other unit is damaged and if you couldn't use the link with Elsa efficiently (meaning he would have to fire through Elsa). Else use him to repair. After the tanks, attack the assault first and destroy him again with a linked attack in the same style as you did with the tanks. Make sure that he is standing on the main bridge. On his destruction (or if you disabled him) turn your attention toward the sniper. From previous rounds you should know whom he picked as his target. Have this unit move a bit down towards your starting position to lure him from the connecting bridge, then destroy/disable him. The next sniper/assault pair should have started moving by now. Retreat your units back to where the two bridges connect to regroup. Then go ahead an produce a bit more scrap metal. Now we only have Dranz and his supporting Assault type left. Concentrate your whole firepower on Dranz first, as he is the more dangerous unit of those left. Repair any damage he or his goon does. When you have assured that he will not be a part of the battle anymore mop up the remaining Assault and any disabled units you might have left. And don't forget to restore any destroyed parts before taking down the last unit. Rewards: 3134$ | ca. 30-35 EP | -- ---------------------------------------_ 8) Stage 06 - Blauer Nebel Base - Somewhere in Germany [BS-08] ---------------------------------------_ Recon: Weather: Clear Time: Night (turns to Morning on Turn 11) Objective: Destroy all enemy units Pilots Available: Elsa, Zead, Hermes, Latona, Bosch Drop Zones: One Allies: None Enemies: 13 |ranate B01|Dmg. 70x1|Ammo Unl.|AP 12x1|Range 6-12(?)|Area 3(?)|Fire|GR Preparations: Simulator: 03 and 09 Wanzer: Bosch: Remains | Gust 500 | Valiant F | Remains | Remains Skills: Elsa: Rank 5, MG Level +1, MAX AP +2 Zead: Rank 3, MS Level +1, Skill Slots +2 (x4), AP Cost: -4, MAX AP +1, AP Charge +1 and ML Level +1. Equip: AP Cost: -4, Fix DMG 100, Piercing Missile, EP Plus Hermes: Rank 3, MAX AP +2, AP Charge +2, Repair Plus II, Skill Slots +4, Panic Shot I, Minus Shot I and AP Bonus I. Equip: AP Bonus I, Repair Plus I + II and Panic Shot I (or Minus Shot I) Latona: Rank 4, ML Level +1, Blast Strike I, Skill Slots +2, Evasion +3% (x2) Equip: First I, Charge I, Blast Strike I, Fire Strike Bosch: Evasion +3%, MG Level +1, Move Plus I, Escape I Equip: Move Plus I, Escape I and Feint I Armor: Anti-Piercing Placement: Elsa | Hermes | Latona Zead | Bosch Walkthrough: For starters move to the single Assault to the right of your current position and attack him with all units. Be mindful of your Elsa links and move Hermes and Latona in position before moving and attacking with Elsa. Also use Latonas EMP freely on any unit you move in on with her. Have Bosch join in with single attacks and use Zead in his role as support fire platform. After the attack on the first Assault the other two should also start to move in on you. Deal with them one at a time. When you've finished the resistance in front of your drop zone move to the small "wood" (actually a few scattered trees) in front of the castle entrace, which was guarded by two MG Assault units. Those will probably have moved up the incline already. To get them and the sniper that is linked to them to commit on a battle on your terms (that means out of range of the stationary Grenade Launcher) use Zead to fire a missile at them at maximum range. He will probably be attacked by both the base launcher as well as the assaults which see him as their target now. Retreat with Zead behind your own lines in the wood and make short work off the Sniper and the Assault's. Repair critical damage, then charge up the incline and take out the first Grenade Launcher. Now it is time to wake up Wagner and his remaining bodyguards. Leave all your units halfway up the incline where it led to the now destroyed Grenade Launcher. It is again Zeads task to lure the enemy and play bait. Have him move towards the last inclined square on the right side and fire a missile at the enemy Wanzers. It is time to play the same game as you did in the woods, but now attack Wagner first, as he dishes out the most damage. Latona should stand beside or behind Wagner and use her EMP on his bodyguard. Bosch and Hermes or Elsa should block the two square wide incline to have a safe retreat for Zead. Hermes also only uses his repair backpack when it is his turn, as he will attack together with Elsa and Latona in the link. Do not try to EMP Wagner as he will be resistant to it. While battling it out with Wagner and his goons the Helos will also start moving, but you have about three to four turns until they reach you. This time should be plenty to at least disable, if not destroy the remaining opposing Wanzer. If they are destroyed/disabled have Hermes repair any damage on Elsa and himself while they make their way towards the second grenade launcher. Latona will accompany them and try to EMP one of the Helos on the way. Bosch and Zead will take care of the other Helo. After this you have finished the hardest stage in the game up to this point. Rewards: 3134$ | ca. 30-35 EP | -- -Ogon |Dmg. 80x1|Ammo Unl.|AP 1x1|Range 1|Impact|Rod ML -> EMPx-Akula F |Systems Down|1 Turn Preparations: Conversation: Talk to Chang several times to get a Kirishima 51 SG. (happens only if you talked to mechanic on Stage 02). Go into shop and talk to shop owner several times. Simulator: USN(UCS) Simulator 01 and 08 Wanzer: Darril: Kirishima 51 | Remains | -- | -- Skills: Darril: Rank 3, SG Level+1, MAX AP +2, Speed I(Rapid Fire I) and Block DMG 30 Equip: Speed I, Block DMG 30 Renges: Rank 3, RF Level +1, MAX AP +2, AP Charge +2, Link Points +2 Chaeffer: Rank 2, MG Level +1, MAX AP +2, Fix DMG 100, Escape I, Skill Slots +2, Speed +1. Equip: Fix DMG 100 and Escape I. Links: Renges: Create Offensive 'Link 2' -> Chaeffer. Armor: Anti-Piercing Placement: As game suggests. Walkthrough: Move Darril towards Chaeffer and Renges. Chaeffer should run towards Darril while Renges moves on to the roof of the building beside him. C | | |Ro NC| | |Ro C | | |Re NC| | |Ro C = Container; NC = No Container; Ro = Roof; Re = Renges Get Renges to the edged of the roof facing the container area. The first line mostly comprised of containers with one free square in between. Get Darril and Chaeffer each on a container which does not border on another one. By the time you have positioned yourself in this manner you should be able to see the first assault coming at you with Vavilov lagging behind in his slow Wanzer. Naturally you attack the Assault first, with Darril attacking when he pleases Chaeffer standing in range and healing and Renges giving fire support with his rifle and triggering Chaeffers attack. The Assault should not be much of a problem this way. Vavilov is even less of a problem if you positioned Darril and Chaeffer on the containers I suggested, as he won't be able to reach you with his melee attacks. He will use his EMP, which, if the Assault is still alive, will disable you to counterattack, but since the effect of this EMP backpack wears off when your turn starts it is not much of a problem. Vavilov is degraded to nothing more than target practice for you. Next up, the second Assault and Ivanova will move. Let them come to you and use the breathing space to repair the damage done by the first Assault. The second Assault will reach you first again, as he has a higher Move rating than Ivanova. You can leave the crates now, but take care that you don't go too far out for Renges rifle's range. Also, while attacking the second assault, at some point Ivanova will join in with her rifle, which does a lot of damage, due to her having level 2 in that weapons proficiency. Try to stay out of her line of fire while dealing with the second Assault. The Assault is scrap metal and Ivanova is about to join him on that. To en- sure this lure her into firing range of Renges, too, and attack her with full force. You might have to take a turn or two without attacking to heal up any additional damage she does during her retaliations (in an ideal case she can attack once and retaliate twice because of her 18 AP). She, too, should not be much of a p Recon: Weather: Clear Time: Night Objective: Destroy all enemy units Pilots Available: Darril, Chaeffer and Renges Drop Zones: One Allies: None Enemies: 3 Zhuk I MG |Dmg. 15x10|Ammo Unl.|AP 5x2|Range 1-4|Piercing -> Zhuk I CN |Dmg. 140x1|Ammo Unl.|AP 7x2|Range 1-8|Impact Zhuk I MS |Dmg. 100x2|Ammo Unl.|AP 10x1|Range 6-8|Fire Preparations: Conversation: Talk to 'Venezuelan Sailor' if you want to get a shortcut to the shop. Talk to shop owner until he repeats his last sentence. Simulator: #02 Wanzer: Darril: Gust 500 | Recsys V | Rec
Thanks you all of my friend
I try to.another way 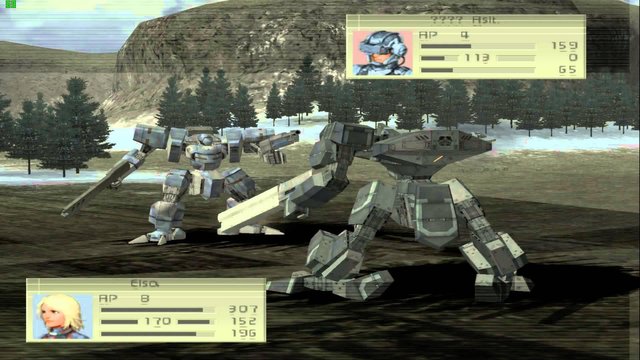
Enjoy the vote and reward!
Thanks you brother