How to change the white balance of a video or photo in Adobe Premiere
![]()
Adjust the white balance is a very important feature in Adobe Premiere Pro. When you record a video or take a picture, you need to be careful that the white is set correctly. If it does not, the image may be the wrong color. However, if necessary, Adobe Premiere allows you to make this adjustment after the video is already in issue. See, in the tutorial below, step by step how to perform the procedure in the main Adobe's video editor. For this, you must use the "Color Corrector" tool.
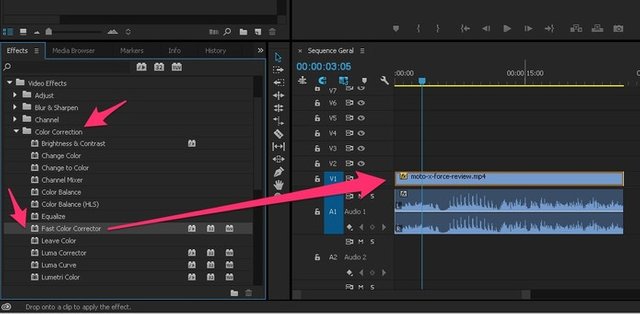
Step 1. In the "Effects" tab, select "Video Effects" option to find the corresponding effect;

Step 2. In the folder "Color Correction", choose the effect "Fast Color Corrector" and drag it into your video;
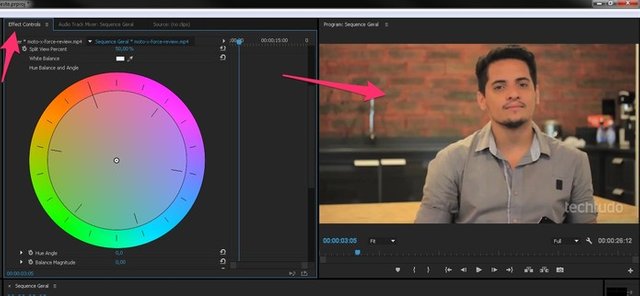
Step 3. Open the "Effect Controls" of your video. After you drag the effect to the video, it already appears as available in this tab;
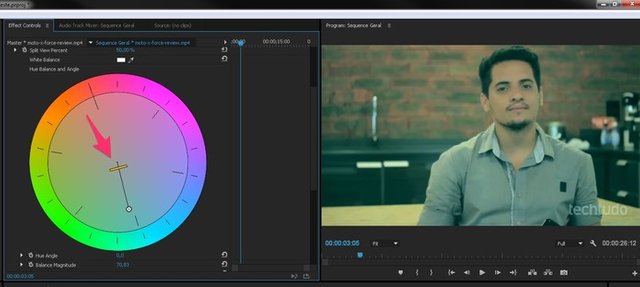
Step 4. Now move the ball in the middle of the circle to change the white balance. Example: if the image is too red, it is likely that you will need to drag the ball to the nearest blue (creating a contrast), which is on the opposite side of the circle;
Ready. With this feature, you can change the white balance of your videos and leave them the way you see fit.
thnks for that
keep up to post.
great post.
i like yours post.