Steemit Wall: Multifeed for Steemit.com
For those not interested in technical stuff:
Check this out!
Check this out!
I met a former coworker a few days ago and while I was raving about steemit.com he was very enthusiastic about Vue.js and told me that I should definitely try it. I did.
Although I still have some problems here and there, it is very clear to me that Vue.js is what I expected Angular to be. Angular was a bit to much for me at the time and I found Vue.js to be a much better startpoint in the field of reactive javascript frameworks. So, for everybody having a hard time with Angular, try Vue.js!
Start with creating a new html file and let the guide walk you through the basic concepts step by step.
The Idea
But to go beyond these simple snippets from the guide we need a suitable idea to play around with. I already used the steem.js API for my Widgets Plugin so I wanted to build something with that. Sometimes I catch myself having multiple feeds from steemit.com open in multiple browser tabs so I decided to make this a bit easier for me by showing multiple feeds in one window, a bit like Twitter's Tweetdeck. Also I always have an eye on my follower count, my reputation and voting power, so I wanted those statistics to be visible too.
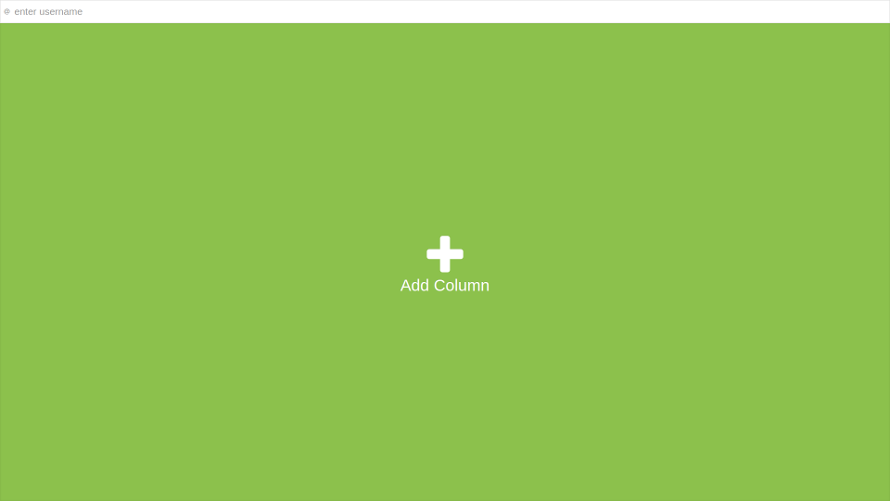
Whenever I start such a project the first thing I usually do is to divide a sheet of paper into four sections to draw up to four important layout setups. I know there are very compelling tools to do this online but I just like to draw sketches sometimes. :)
This time I only used three sections. :D The sketches are really very elementary, just to get a general idea. The layout is divided into a small bar at the top for the user info, the content area, showing the different feeds and a dialog to add new feeds to our "wall". Very simple.
The Layout
I then start to go more into detail by creating an html skeleton with some basic styling.
The end result looks like this:
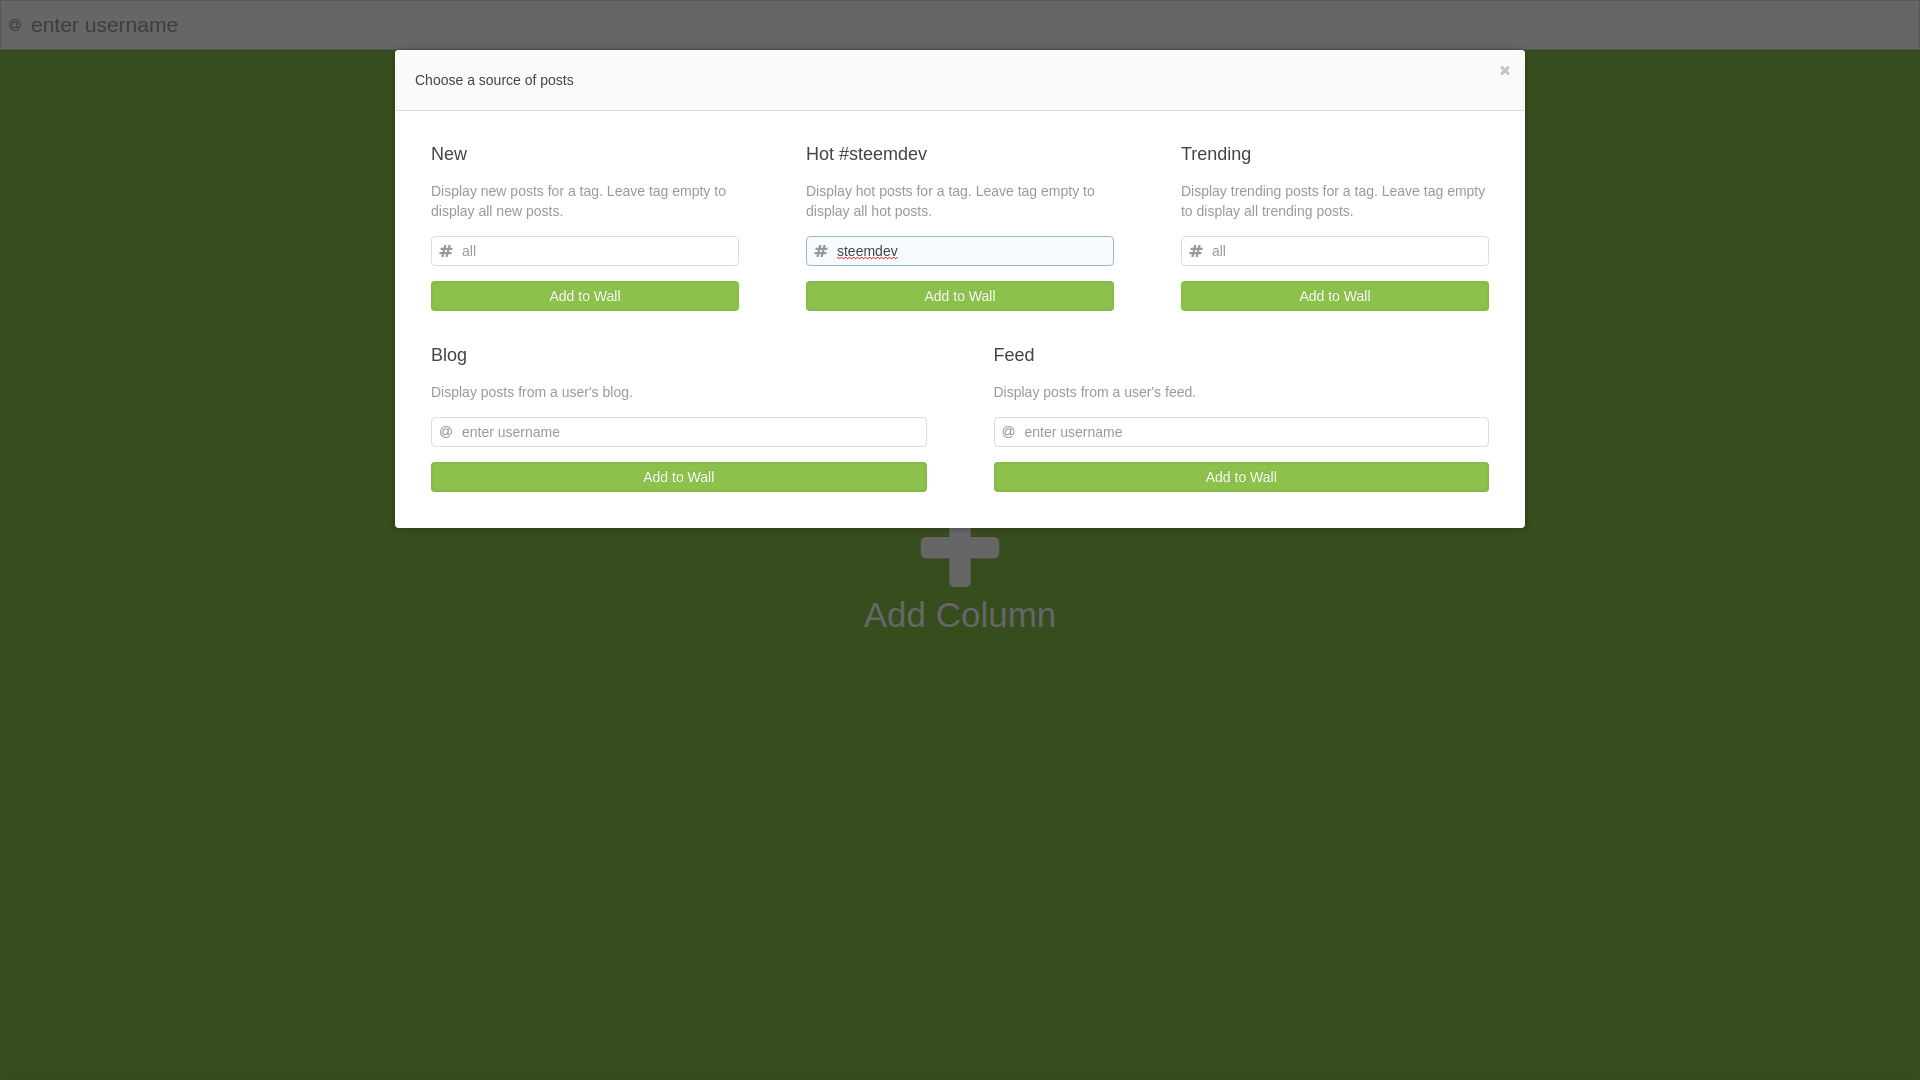
When designing user interfaces I always try to keep it as clean and simple as possible. You have something in mind that you want the user to do when using your software and therefore you have to get rid of all distracting elements to make it as easy as possible for the user. I think the first screenshot really lives this simplicity! :D
The Logic
This is now where Vue.js enters the stage. As I mentioned, getting started is very simple. Create an html file, add a container for your app and include Vue.js at the bottom, before the closing </body> tag. I also created a separate app.js file to hold the logic of the application.
<body>
  <div id="app"></div>
  ...
  <script src="https://unpkg.com/vue"></script>
  <script src="app.js"></script>
</body>
The div container will hold the entire application. Inside it you will be able to work with Vue.js.
The app.js file creates a Vue instance on the app container and declares some data and methods to work with. I chose to start with a username, that you can enter in the top bar and a method to get the information from steemit.com for a given username.
var app = new Vue({
  el: '#app',
  data: {
    username: ''
  },
  methods: {
    lookupUsername: function () {
      // ...
    }
  }
})
To enter a username and work with it in Vue.js we need a text field that binds the input to the username property in our data object.
<div id="app">
  <input type="text" name="username" v-model="username" v-on:keyup="lookupUsername" placeholder="enter username" autocomplete="off">
</div>
You may notice the two attributes related to Vue.js. v-model="username" binds whatever gets typed into the text field to the data property username. On the other hand, when we manipulate the username property in our javascript code, our text field gets updated automatically. v-on:keyup="lookupUsername" adds an event listener for the keyup event of the text field. So every time you hit a key in the text field the lookupUsername method gets called.
To retrieve data from steemit.com we need steem.js.
  <script src="https://cdn.steemjs.com/lib/latest/steem.min.js"></script>
  <script src="https://unpkg.com/vue"></script>
  <script src="app.js"></script>
Now we can actually check the username and retrieve the information we want. Inside the lookupUsername method we can now access the username data property by using this.username.
data: {
  username: '',
  account: null
},
methods: {
  lookupUsername: function () {
    // call steemit api
    steem.api.getAccounts([this.username], (err, accounts) => {
        if (accounts.length) { // check if we've found an account
          // and do a second call to get more information
          steem.api.getFollowCount(this.username, (err, followers) => {
            // bind all the information to the account property
            this.account = accounts[0];
            this.account.profile = JSON.parse(this.account.json_metadata).profile;
            this.account.followers = followers;
          });
        } else {
          this.account = null; // reset account if we can't find one
        }
      });
  }
}
You see there's a second data property now called account which will hold the data we get from steemit.com. We can now display this data in our html.
<div id="app">
  <input type="text" name="username" v-model="username" v-on:keyup="lookupUsername" placeholder="enter username" autocomplete="off">
  <div v-if="account">
    Reputation: {{ account.reputation }}
  </div>
</div>
Here we display the accounts reputation score only if the account property has some data, using v-if="account".
So now you can type in a username and a second later this users reputation score will appear below the text field. If you remove the username or change it to something that doesn't exist, the reputation div disappears again.
And that's it for now. I won't cover all of the code but you've already learned some of the basic concepts of Vue.js.
- You can define
dataandmethodswithin a Vue instance, to work with in your template. v-modelsynchronizes user input and data.v-onadds event listeners on elements, e.g. a method from a Vue instance.v-ifmakes your template parts conditional, based on your data.
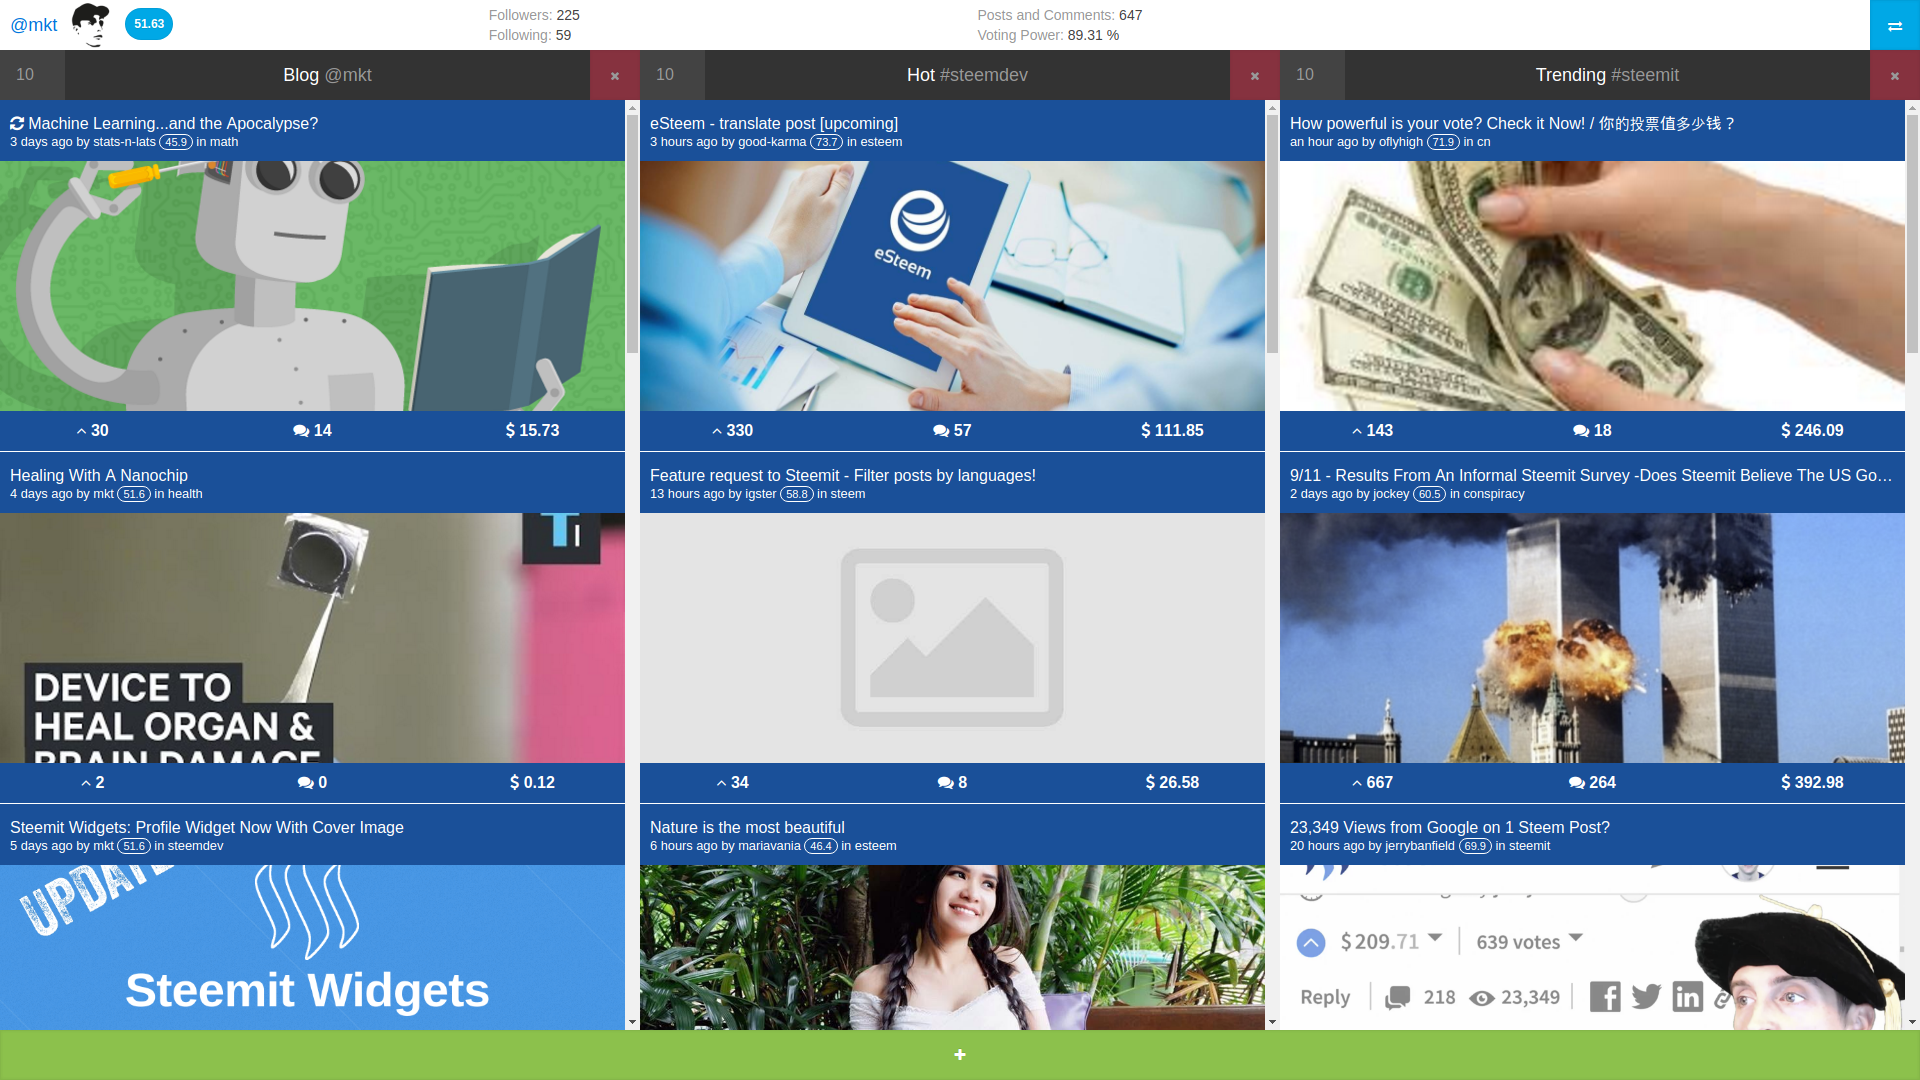
The Result
I call it:
Steemit Wall
Steemit Wall
This is the first time I used Vue.js and I feel way more confident than with Angular. I didn't compare them side by side but Vue.js just feels more intuitive to me. I know there are still bugs and things I don't understand but I will go deeper for sure and just see what this little experiment evolves into.
For now I'd love to get some feedback in the comments and read what you think of the idea. Is there something like this already or is it worth continuing this project? I have a lot of improvements in mind and at some point I want to finally implement the possibility to vote and publish in one of my projects. Maybe this is the one.
Check out the
GitHub Repository
GitHub Repository
And also check out this one:
Steemit On Your Website
Steemit On Your Website
Nature/Environment/Sustainability
Creativity/Programming
shared and original content
This is an excellent tool ! intuitive and sleek design ;-)
That would be great to be able to have a column with the mentions of a username ;-)
I am not sure this is available in the steemjs API but it is quite easy to do using steemsql.
If you ever want to localize your application in French I would be more than happy to translate the few labels you have there ;-)
I can't mention this enough... This was meant to be an experiment. But the feedback is so overwhelming that I will definitely continue developing it. BUT... please don't expect too much.
No pressure ;-)
Thanks for sharing! Links to your tool and post were included in the Steem.center wiki page list Steem Ecosystem: Steemit-Steen. Thanks and good luck again!
Thank you very much! Although I'm a little bit surprised. It's also already on steemtools.com. But it is really far from perfect. It has bugs and a lot of missing features. I am a little bit afraid that people try it and get disappointed. But of course I will improve it over time. Maybe you want to checkout my widgets plugin too. I think it's way more compelling and I am working on a generator tool in this very moment to make it even more easy to use.
Great! The links for Steemit Widgets are included in the same wiki page list now. Thanks and good luck again!
Very nice project, with simplistic and beautiful UI
Request: It could save my settings into a cookie so it won't disappear when I refresh the page.
Thanks for sharing!
Yes I will implement this. :)
It's now implemented!
Thank you! Really awesome tool! I totally had missed it! I found it through one of @roxane's post.
:D Awesome!
Thank you again @roxane! ;)
Haha! Rox's comment was pretty epic! Well it reached me and I gave @mkt a 100% vote, how ironic.
That is quite an upgrade! The design looks good, sure I will try out later. Thanks
It's just an experiment though... But if people like it I will continue developing it. Thanks for your feedback! :)
If it easy to implement, of course. Better than steemit design.
Testing right now
As I mentioned there are still many flaws. And it's not meant to be a substitute for the steemit.com ui... just a little helper to keep an eye on interesting blogs and tags on one screen.
UX is important :) I would prefer this one if I could post from it. Can I add multiple tags or accounts to display?
Yes that's the main purpose. The green fullscreen add button shrinks to the bottom of the page after adding the first feed. Posting and voting is definitely planned but unfortunately a little bit more complicated to implement.
I posted about it, if you don't mind!
Sure! Thank you! :)
Nice job! I should take a look at it and learn a bit about coding for Steemit web apps.
Learning about coding is a good idea in general. And building steemit apps is fun and not even that hard... to a certain extend. :)
Oh wow, this is exactly the kind of app I was planning to build, except yours looks much better. Great job, definitely going to use that!
It's far from finished. It really was just an experiment but I think I will continue developing it. If you would like you can help at https://github.com/mktcode/steemit-wall or make a completely own version and we will combine the best of both.
This is very good blog
Thanks!
good postt @mkt my friend.
Thank you my friend! :)
According to what people are using, opinions will come up and see what is missing to be perfect. After adjusting with the opinions of users it looks beautiful. Congratulations!
Thank you! :)