TUTORIAL: CREATE YOUR OWN CRYPTOACTIVE WITH WAVES
Waves is a platform that offers a decentralized cryptocurrency exchange house, which not only allows the exchange of cryptoactives, but also the implementation of intelligent contracts to create online tokens, which in turn can be exchanged on the platform.
As with the Ethereum network, the new cryptoactives are born through the creation of an intelligent contract, but with the difference that we will not have to download the entire chain of blocks in order to create a new cryptocurrency.
In this tutorial we will know the steps to follow to register in the Waves platform and create our cryptoactive in it.
REGISTER IN WAVES
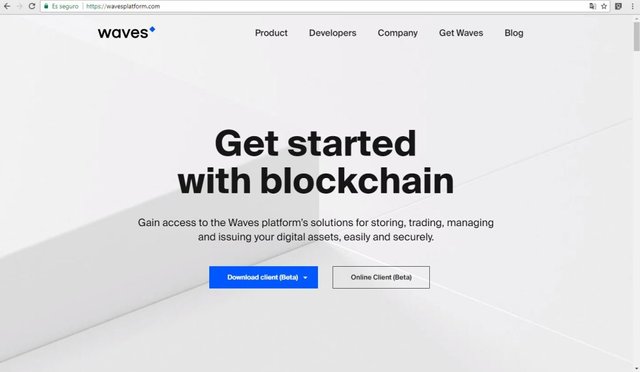
To begin, let's register on the platform. We will go to the main portal of Waves, once here we will select the client online (Online client). https://wavesplatform.com/ We can also download the client to our computer, but for the purposes of this tutorial, we will do it in the online client.
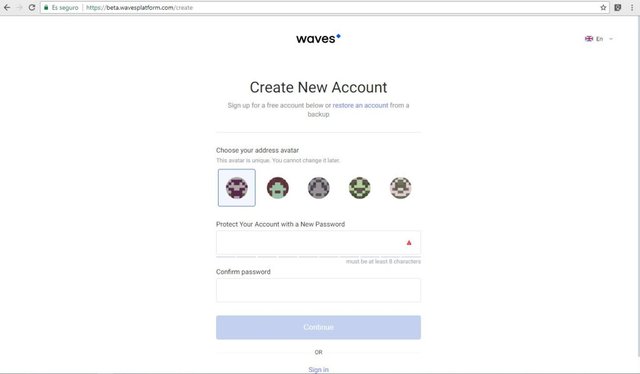
Here we will see the following:
The first thing we are going to do is select an avatar image, this image will be linked to the hash or address of our account; So, every time we log in and place our address, we will see this oval image that we chose when we created our account.
After this, we will select a strong password, that is, a password that contains a minimum of 8 characters between which there are both letters and numbers and a special character. This in order to give greater security to our funds. After confirming the password, we click on continue.
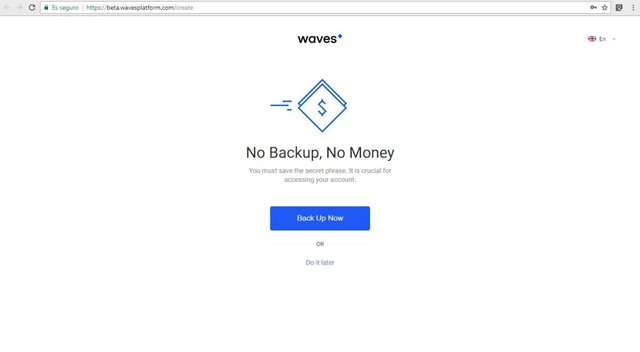
Next, Waves gives us the option to create a backup immediately or leave it for later. A recommendation before using any portfolio, exchange house or platform where we were to store funds: We must always support before making any deposit in our account, as this way, in case of equipment damage or other errors that compromise the start of session on that device, we can access our account on another computer without major inconvenience.
We must also bear in mind that through the backup words we can log in again to another team together with the password that we previously placed. If there is no backup, we run the risk of not being able to log in again.
In the same way it is important to mention that if we start session in the same team, it will remember which was the last entry address that was used and we will only have to place the password. Otherwise, it will be necessary to log in from the 15 supporting words.
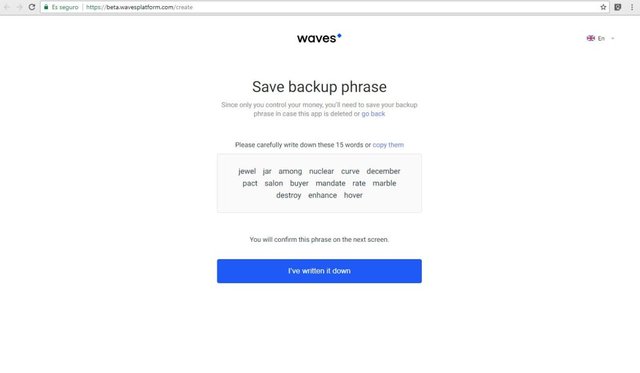
In relation to the previously discussed, the next step is to create a backup of our account. For this we are going to click on Back Up Now. Here we will see a warning about the care we must have about this recovery phrase and, as far as possible, keep it out of any digital storage medium. In practical terms, write our phrase on paper to avoid putting this information at risk against possible hacking. Having understood this, we will click on "I understand".
What we see then is our recovery phrase. This phrase must be saved in the same order it was generated. Before continuing, we must have written down our sentence in a safe place (on paper, there is no better safe place) since after this, we must confirm that we have correctly saved our words of support.
Once saved, we will select that we have already written them (I've written it down)
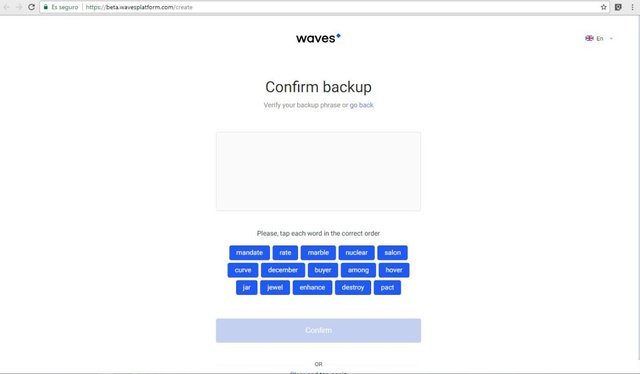
As you can see, here we must organize the words in the same order that we previously saved them. In case there is an error, we can go back to the previous screen where we will see our backup phrase by clicking on go back, which is under Confirm backup.
Once placed in order, we will click on Confirm to finish the creation of our account.
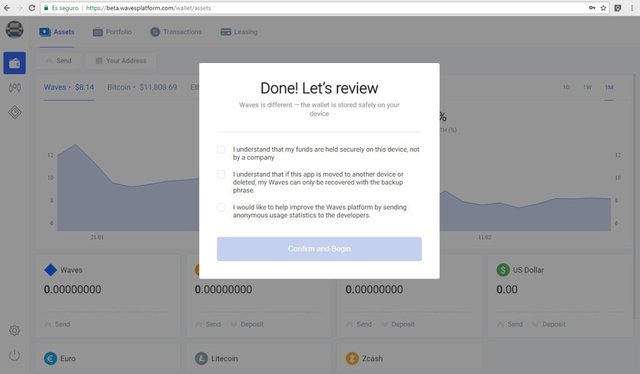
This box that appears just before starting to use our account touches on very important points that are worth considering. Firstly, it means that we understand that our funds are safeguarded in the device and not by the company that provides the service.
The second paragraph mentions that we understand that in the case that the application is moved to another device or is deleted (mostly for the case of people downloading the installer, but applies equally in the case that we use another device to open our account), the only way we have to restore our account is through the recovery phrases.
The last sentence asks us if we would like to help Waves sent statistics on the use of the platform and thus improve the user experience.
Having accepted at least the first two options, we can click on Confirm and Begin to start using our account.
EXPLORING WAVES
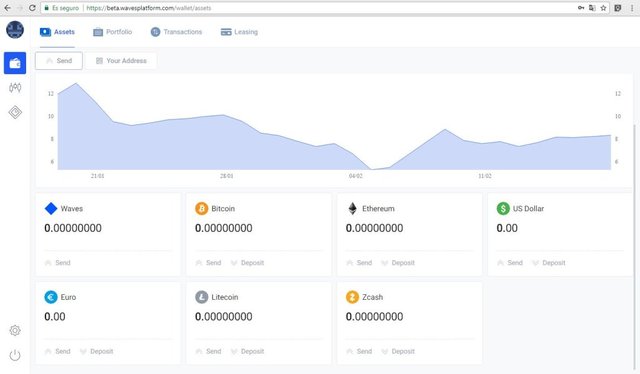
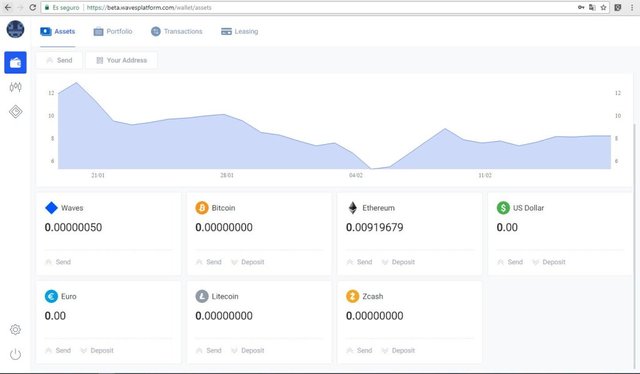
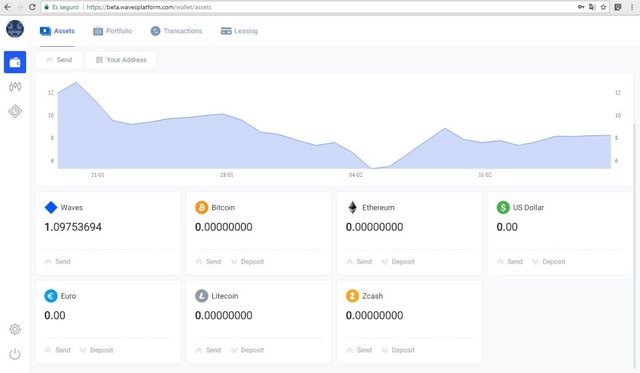
As you can see in the main screen, Waves offers us a portfolio of different cryptoactives that we can use to carry out exchanges in your internal exchange house. We can also use it as a portfolio, since no commissions will be charged for having cryptocurrencies stored. However, each exit will have a commission of 0.001 Waves to the change of the cryptoactive that we want to send.
On the left is the menu where we will find our portfolio, the exchange platform and the section for creating our token. We will use this last one later.
HOW TO PURCHASE WAVES INSIDE THE PLATFORM
To begin, we must first bear in mind that we need to have 1 WAVES in our portfolio, since this is the cost for creation. For this we can make a deposit in any of the cryptoactive listed in the platform and exchange it for WAVES. In this tutorial we are going to deposit ether (ETH).
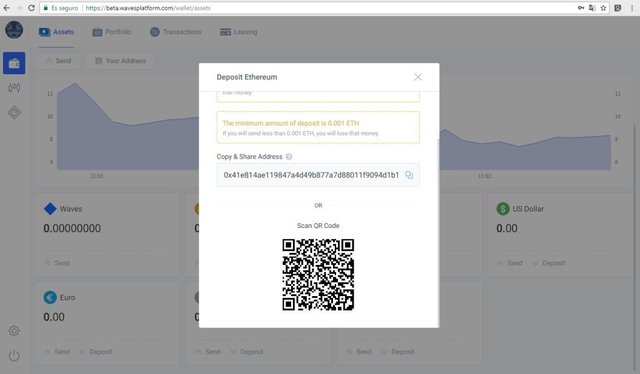
For this we need to know the address of our ether wallet on the platform. In this sense, we will go to the section where our assets are located and we will select Ethereum, where we will later click on Deposit.
Now what follows is to make a deposit to that address and wait for it to be confirmed in order to see the funds reflected in our portfolio. At the time of writing this tutorial, a WAVES costs $ 3.20. That is the price that we must recharge equivalent in ETH.
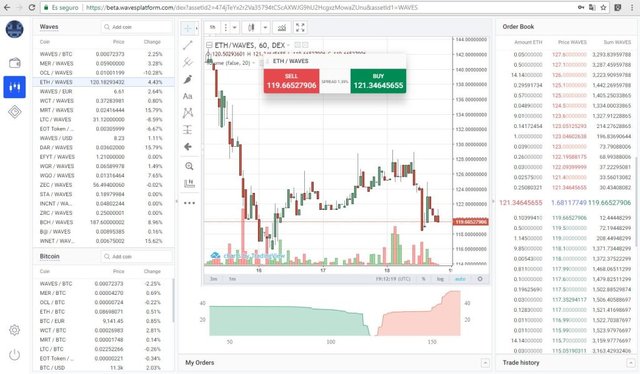
When our funds have been confirmed, it is time to exchange them. For this we must click on the icon of the exchange platform (the second from top to bottom) in the side menu.
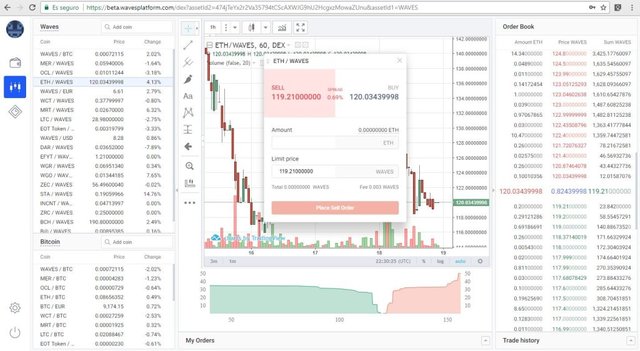
When entering the exchange platform, we will not complicate life by understanding its operation, but we will go directly to the list in the upper left corner. There we will look for the ETH / WAVES value. Once found, we will click on SELL or the red button.
In the pop-up window, we will place the amount in ETH equivalent to 1 WAVES inside the box identified as Amount. Below this is the last purchase price and in the lower part we will see the total of WAVES that we are buying. Once this is done, we will indicate that the order is placed by clicking on Place Sell Order and we wait for the sale to be made. After this we can see our WAVES reflected in our portfolio.
With a wave in our portfolio, we can start creating our own token.
CREATING A CRYPTOACTIVE IN WAVES
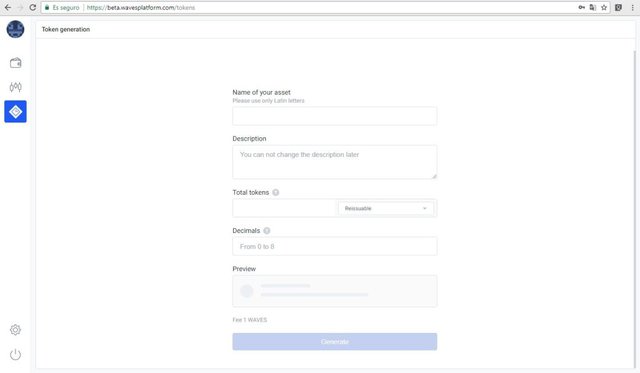
Already with funds to create our cryptoactive, we will go to the section provided for this. In the side menu we will select the corresponding icon (last icon).
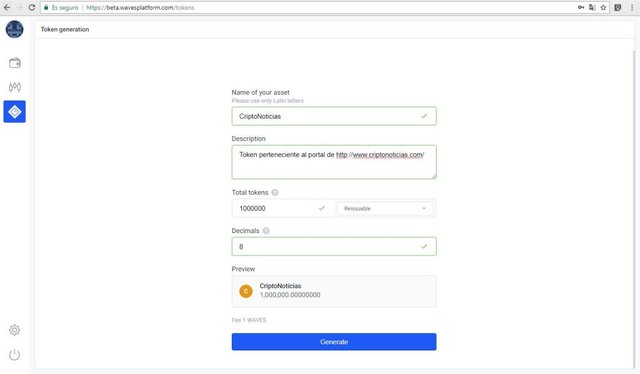
Let's understand a bit with what information we must fill out this form:
Name of your asset
Here we will indicate the name that we will place to our cryptocurrency.
Description
In this box we will put some description to our token. We can place some link of the project or any other reference. It is important to take into account that once the cryptoactive is created, the description can not be changed.
Total tokens
This refers to the total number of tokens that will be created with a condition. On the right side of the box we will find two options: Reissuable and Not reissuable. If we select the first, we indicate that regardless of the number of tokens we create, we can add more tokens later. On the other hand, if we place the second option, we are saying that this will be the only amount for life.
That is, in the case of selecting Reissuable, this field may be modified later; whereas when selecting Not reissuable, we will never be able to change it. It should be noted that because Waves is now in beta, it is not possible to generate new funds from an already created token, for now.
Decimals
Here we will indicate the number of decimals in which we want our cryptoactive to be divisible. For example, bitcoin has a total of 8 decimals. In this case, we can indicate placing from any decimal place, up to a maximum of 8. We only have to place the corresponding number.
Preview
In this section we will see a preview of the characteristics of our cryptoactive.
Once we have all the correct data, we will click on Generate to create our token. The next thing is to confirm that the data is correct and that's it! Now we have to wait for the smart contract to be confirmed in the network and we will have the funds in our portfolio.
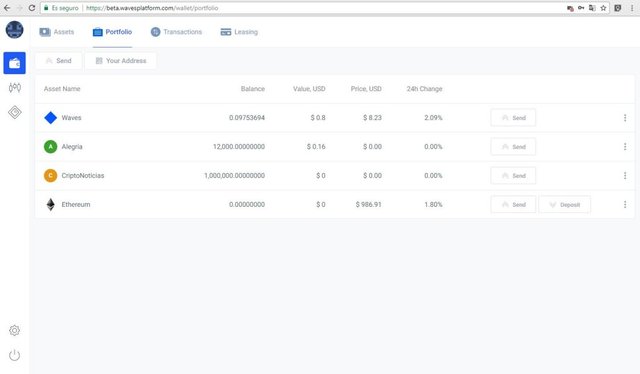
To observe our tokens we just have to click on the left menu on our portfolio, then click on Portfolio, where we will see our cryptoactive.
As you can see, we as creators have all the funds of this cryptoactive.
EXCHANGING THE CREATED CRYPTOACTIVE
Because the cryptoactive was created on the Waves platform, we can only exchange it on this platform (for now). To send our token, we only need to have the recipient's Waves address handy, since it is the same used to exchange the token we created. Therefore, to receive that or another token created in this platform, we only need to share the address of our WAVES portfolio.
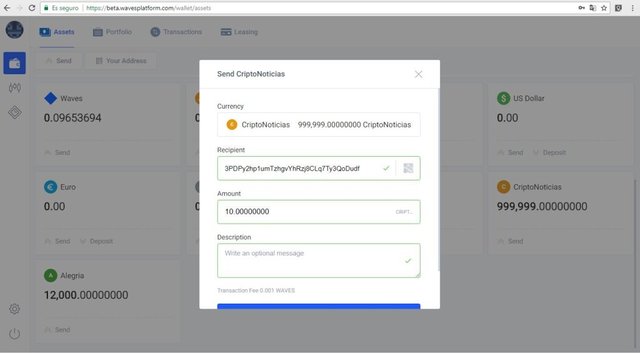
When we are going to send the created tokens, we must go to the main page of our portfolio, position ourselves on our token and click on Send.
In the pop-up window that we will see, we will place the address of a Waves portfolio, below we will place the amount to send and finally a description for the transaction (the latter is not mandatory). To conclude, click on Continue, but before it is important to understand that, to exchange the created token, we must have WAVES in our portfolio to pay the 0.001 WAVES commission per transaction. This is because when exchanging, this transaction must be confirmed in the blockchain, which entails a mining expense. Understood this, we confirm and send the funds.
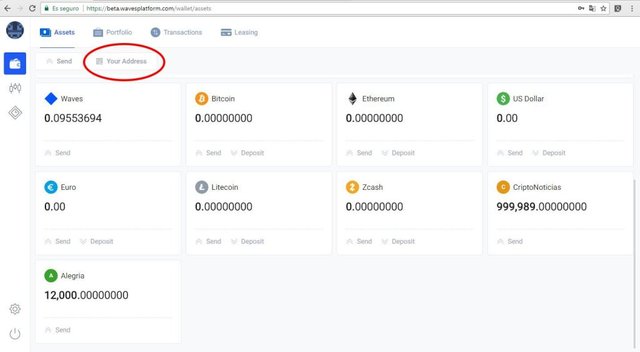
To receive tokens created in this platform we need to obtain our Waves address, which we can see by clicking on Your Address.
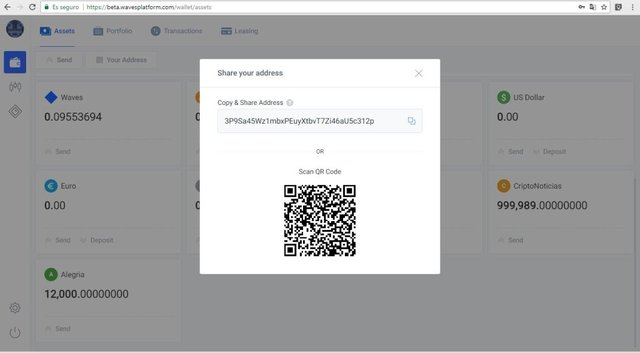
In case of using the Share your address option, it will only be necessary to send the address that is shown to the person who will send us the funds.
CONCLUSIONS ON WAVES
Waves is a platform that despite being in the development phase, has a lot of features that are very interesting, such as: The decentralized exchange platform, as well as the speed that has its blockchain to confirm transactions. The only disadvantage for Waves now is the fact that it is in beta and does not give us options to publish our tokens on the exchange platform and we can not issue new quantities of our tokens either. We would have to wait a while for these options to be enabled, but for now, Waves is heading very well
