How to Build a Diving Helmet
Diving helmets offer a really cool Jules Verne style diving experience, by contrast with scuba. Your head is dry, you're breathing naturally rather than through a regulator, peering out through big acrylic windows into the water as you hop along.
That's right, hop. You're weighted down when helmet diving and walk around rather than swim, as typically the helmet needs to be kept upright. It strikes me as similar to what it must be like to walk on the Moon. "Well shit, sign me up internet rando!" Not so fast. The helmet in that photo costs over $5,000.
"WHAT FIVE THOUSAND???" The scanner doesn't lie. Aqua Star makes it, and despite being little more than an ergonomically shaped upside down windowed bucket with weights to keep it from floating, it'll set you back a cool five grand. I was really crestfallen when I found out.
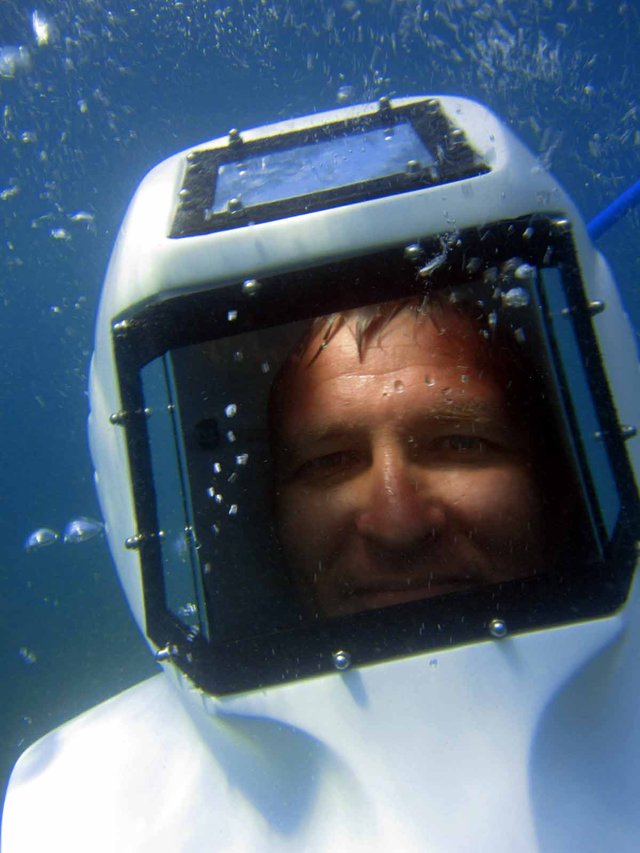
"Well...what can I build with $500 or less?" Glad you asked, hypothetical reader I've been schizophrenically conversing with. Feast your eyes on the home made diving helmet in the pic below. This is realistically the sort of thing an average person can hope to build on a budget, but it does the job.
You'll be underwater, have great visibility thanks to the huge windows and be living the aquatic steampunk dream. It just won't look pretty. If that still sounds fine by you, read on my dude.
I feel compelled at this point to talk about safety. Because while helmet diving in shallow water absolutely can be done safely and is in most ways safer than scuba, it's also possible to die doing it. If for example you were to panic, ditch the helmet and hold your breath while swimming straight to the surface, your lungs would burst.
This is because the air inside them is higher pressure compared to the air at the surface, since it got to you via an air compressor fighting the water pressure at the depth you were diving at. This can happen even at modest depths because your lungs are quite fragile, so do not neglect to breathe out on your way up, should you need to leave the helmet behind. This has never happened to me though, a large part of it is just keeping your calm.

"But what about the bends?" The bends, the principles of which are described in another article of mine, aren't a danger at the depths you'll be helmet diving at. Namely, so long as the helmet itself is never deeper than 21 feet (so you can be in water 25-27 feet deep depending on your height) the pressure will not be sufficient to cause nitrogen to be absorbed by your blood fast enough to be any danger to you. You could spend damn near all day at that depth and still be fine without needing to decompress.
"Neato burrito, now how do I build it?" Alright, fine. But while there's no law against helmet diving and no courses are necessary to do it, I still advise taking scuba lessons just to acquaint yourself with the basic physical principles involved, and for practice doing various safety excercises. I have to say that! If one of you went out and drowned yourself this way, it would weigh heavily on me, so don't do anything dumb.
Now, how to build your diving helmet. A diving helmet can be made out of almost anything. A water cooler jug for example. Or an upturned 5 gallon plastic bucket. Any number of containers will do the job.
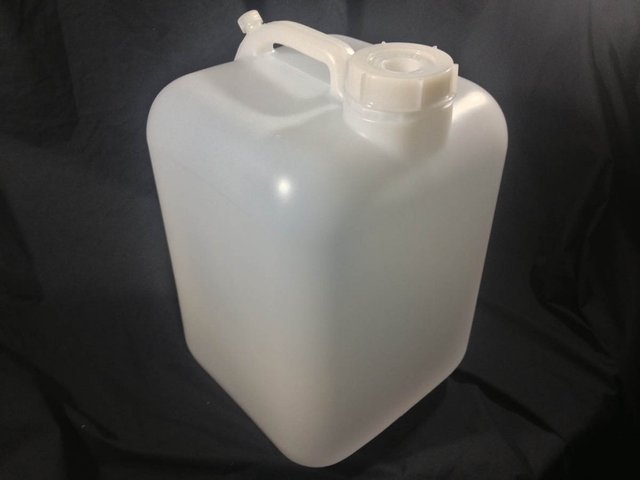
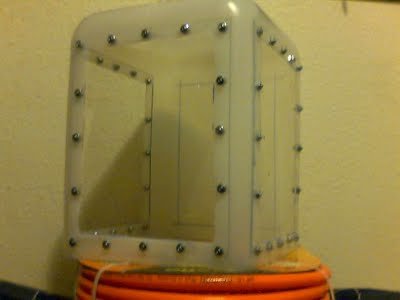
I chose a 5 gal square sided plastic jug as the basis for mine. While it looks a bit silly, this provides a flattened front facing surface to put a window in, as well as flat side surfaces so I can have an additional two windows to either side of me for glancing left/right. I found putting a window on top wasn't worth it as I could not crane my neck to look up that far with the helmet on.
The plastic is sturdy enough but only barely, if I had it to do over again I'd choose something sturdier. If you can work with metal, all the better. There is a good reason most DIY diving helmets are made out of metal. Next you will need lexan panels. Lexan is basically just a type of polycarbonate like acrylic, and what it is most commonly called in hardware stores like home depot:
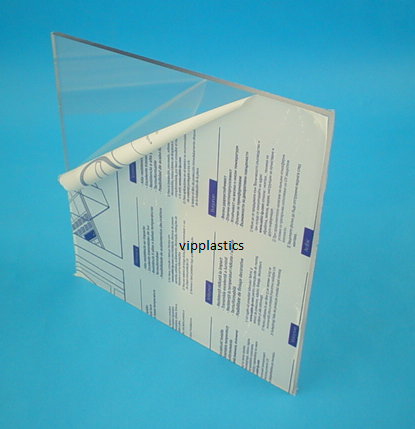
They should have a few different sizes. To avoid the hassle of cutting it to shape I suggest you pick out your window panels first, then design the helmet around them. After using a sharpie to draw the shape of the window openings I meant to cut out in the helmet (slightly smaller so there'd be a lip for screws to go through) I was then able to drill holes through the edge of that opening, matching holes in the rim of the lexan window. The result:
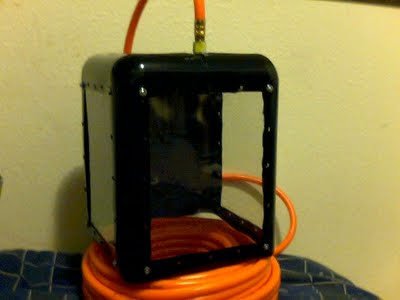
Looking good! But messy. Just before applying a layer of marine grade silicone sealant around the rim of the window to make it wateright, I spraypainted mine black so it would match my wetsuit. You can see it here after drying, with the air hose (a standard automotive air compressor hose, 100ft) attached:
Shaping up nicely, but now comes the hard part: Weighing it down. Air is buoyant! Very very very buoyant. To the extent that it takes 64lbs of weight just to cancel out the buoyancy of one cubic foot of air. More than that to actually weigh it down. This means you will need to attach diver's weights to some point on the helmet.
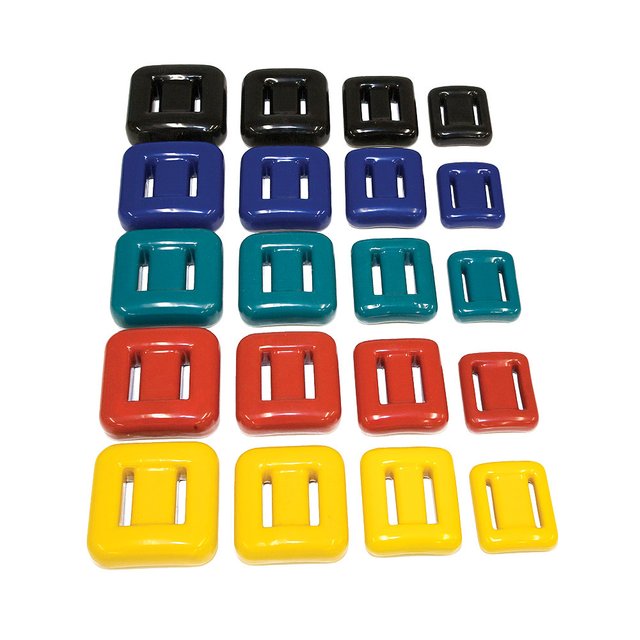
These can get pricey unfortunately and were a huge chunk of the cost at around $100. I chose the rubber coated ones because immersing two dissimilar metals in water together is an invitation to rust, and the black matched my helmet better. As you can see, I mounted them around the rim:
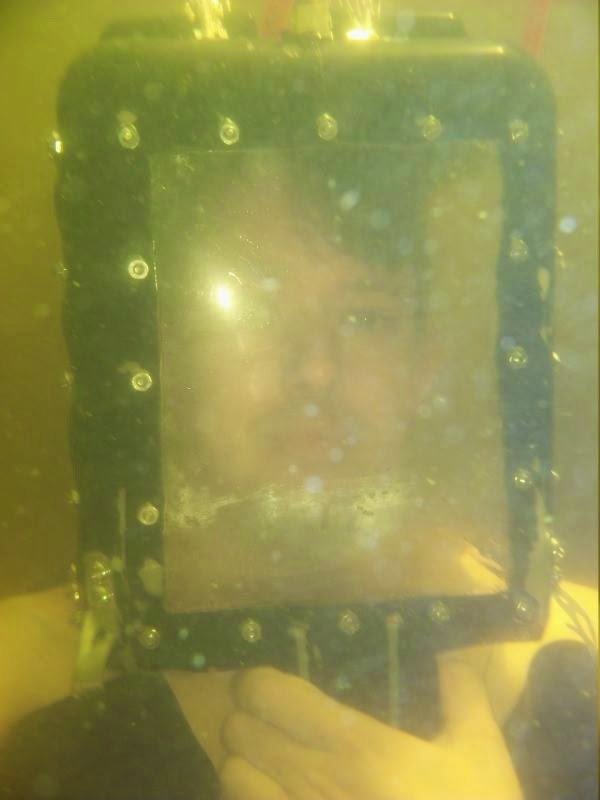
This wasn't ideal. I never really thought about how it would sit on my chest/shoulders while building it. Hence most nicer diving helmets have a rim that sits comfortably on your shoulders to support the weight of the helmet out of the water. Without that, it's this big ungainly heavy thing the sharp rim of which digs into my shoulders when I stand up out of water. Pic related: Smiling for the camera, enduring the pain:
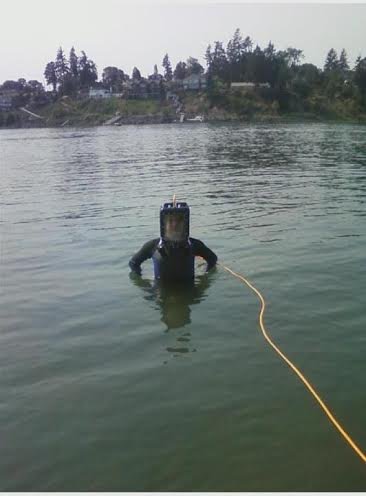
In-water, it's not such a problem. The helmet is only slightly negatively buoyant so it effectively is almost weightless and self-supports, hence why I have a firm hold on it in the first pic. If you build your own, think ahead. Design it around a support structure that sits comfortably on your shoulders and chest. This also makes for a neater, cleaner place to mount the weights:

The one above is well designed, resting on the chest and shoulders, so that it isn't the top of your head supporting the helmet while you're above water. I only didn't choose a plastic dome for my own helmet because underwater, they behave like a lens, warping everything you see. The decision to go with big, flat windows was a deliberate one meant to give me a wide, undistorted view while submerged.
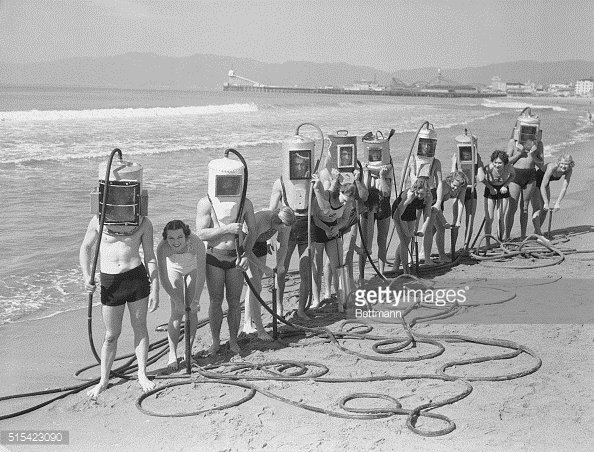
This is not a new concept; helmet diving was the earliest form and is still done today for dives too deep for conventional scuba. It was also the only form and widely practiced in the 1800s, and continued to be a popular hobby project over the subsequent century:
Your parents or grandparents probably read Popular Mechanix or Boys Life magazines with how-to guides for building a diving helmet, such as this one:
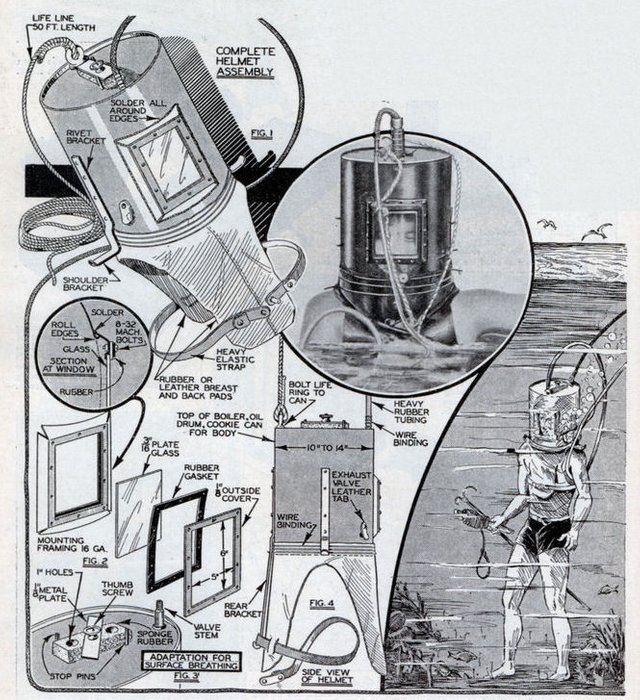
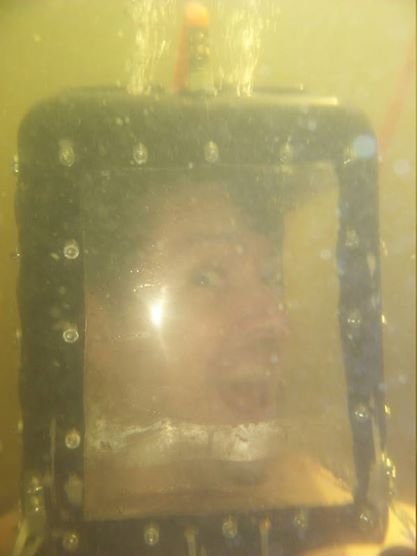
Note that the diver himself is weighted. The helmet is secured to his torso and floats up off his shoulders entirely. This is an especially comfortable configuration, if more difficult to build. Whatever design you choose, please take it seriously and build something robust and reasonably safe. Don't let me catch you out there looking like this:
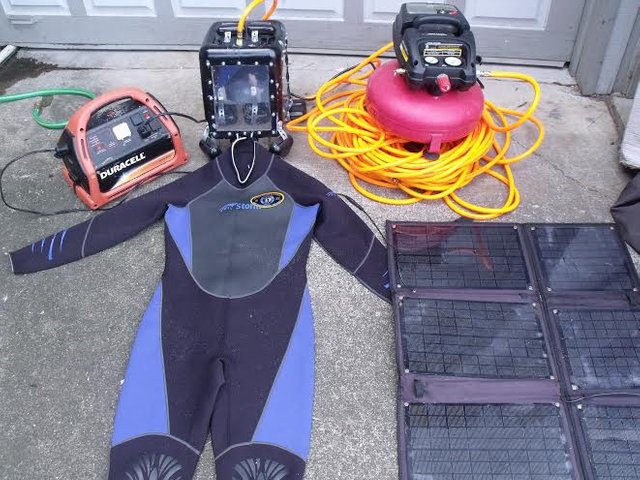
Anyway, that's the helmet covered. What about the air supply? Not just any old compressor will do! As automotive compressors are not designed for life support, many of them are not continuous duty cycle, which means they shut off intermittently to avoid overheating. That's a big no-no for diving applications, obviously.
Many also use oil, and get traces of oil in the air they emit. This is a huge no-no for diving. It's not like sitting next to a smoker or something, where most of the air around you is still clean. The only air you are receiving will come from the air compressor. Even a small trace of some contaminant will have unwanted side effects, compounded by the physiological effects of breathing air under higher than normal pressure.
To this end, you will want specifically a "continuous duty cycle, electric oil-free air compressor" with a buffer tank so the air comes into the helmet smoothly instead of sputtering. You'll want an in-line air filter, either water trap style or the silica gel kind (in which case you need to remember to replace the silica periodically). This will scrub out any contaminants in the ambient air that would otherwise be concentrated by the compressor and sent down into your helmet.
Moreover, it will need to supply fresh air faster than human respiration can foul it with CO2, not just at a resting rate of respiration but also during high exertion. I recommend a compressor capable of supplying 3 cubic feet of air per minute, three times what you need while resting.
The hose attaches to the helmet using a spigot style adapter, one of countless commonly sold in the same section as the compressor hose in any given hardware store. This allows the hose to be connected or separated from the helmet as needed by screwing or unscrewing it, so the hose can easily be replaced if needed. There's also a one way check valve in there so if I lose pressure, the helmet doesn't rapidly fill up with water. Highly recommended.
I also strongly recommend a UPS (battery backup) to keep the pump running in the event somebody trips over the cord or something, and a "power lost" passthrough power outlet alarm which emits a shrill siren if it's unplugged or there's a power outage. This lets people know the compressor is now running on battery only and that if you don't come out of the water on your own pretty soon, you'll need help doing so.
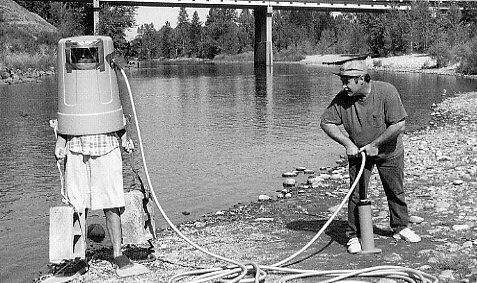
I hope I haven't scared you off! It's really a remarkable experience and about as mechanically simple as a diving apparatus can be. There's very little to screw up, and a competent, aware diver will be just fine using a setup like this. Do remember always to have a friend topside watching over the compressor, managing your air hose so it doesn't become tangled and making sure the power isn't interrupted!
With some basic safety precautions and an understanding of air and water pressure principles, a few hundred bucks in total and some DIY knowhow, you too can choose the impossible. See you on the blue frontier!
it's a good joke, this whole thing makes me think about how it was the beginnings of diving before the father the marine biology JacquesYves Cousteau
really awesome!
I couldn't stop laughing while reading the article, I swim in the ocean almost daily and I dive now and then with friends, but never had a chance diving with a helmet. Inspiring post and love your writing style!
Much appreciated. If you have such easy access to the ocean and can get your hands on everything needed to build a helmet, I urge you to make it your next project. It really is a neat experience.
Wow, just found your post! You guys are crazy doing this on your own lolz. I will follow you for more nice posts like that! Feel free to check my divingposts about tresher sharks! Looking forward to see more of you! Cheers