Charger light repair. || Problem: charging system and battery, on/off button. || With a video tutorial.
Assalamu alaikum Everyone. I am @imranhassan From #Bangladesh
A few days ago, a cousin of mine gave me a charger light to repair. And the problem with that charger light was the on-off switch which was not working properly and the battery backup did not last long and it had to be charged through 220 volts ac voltage which was risky for them.
.png)
Then I offered him to make it a 5 volt DC mobile charger system and change the switch and install a new lithium ion battery and according to that I worked on this light so let's see step by step how I modified it.
Step -01

Now the charger light that you see in my hand has been given to me for repair and I have to change its switch, install a new battery and make a charging system through DC voltage.
Step -02

I had previously removed the body of the light and removed the battery and circuit from inside. Now the battery that you can see in my hand is a four-volt water battery which is very cheap and provides less backup.
Step -03

Now I have taken some parts here to change the parts and battery of this charger light. You can see that I have taken two lithium batteries, a charging circuit and a type C charging pin.
Step -04

Now you can see the inside of the light. There is only the controlling circuit and I have removed the battery.
Step -05
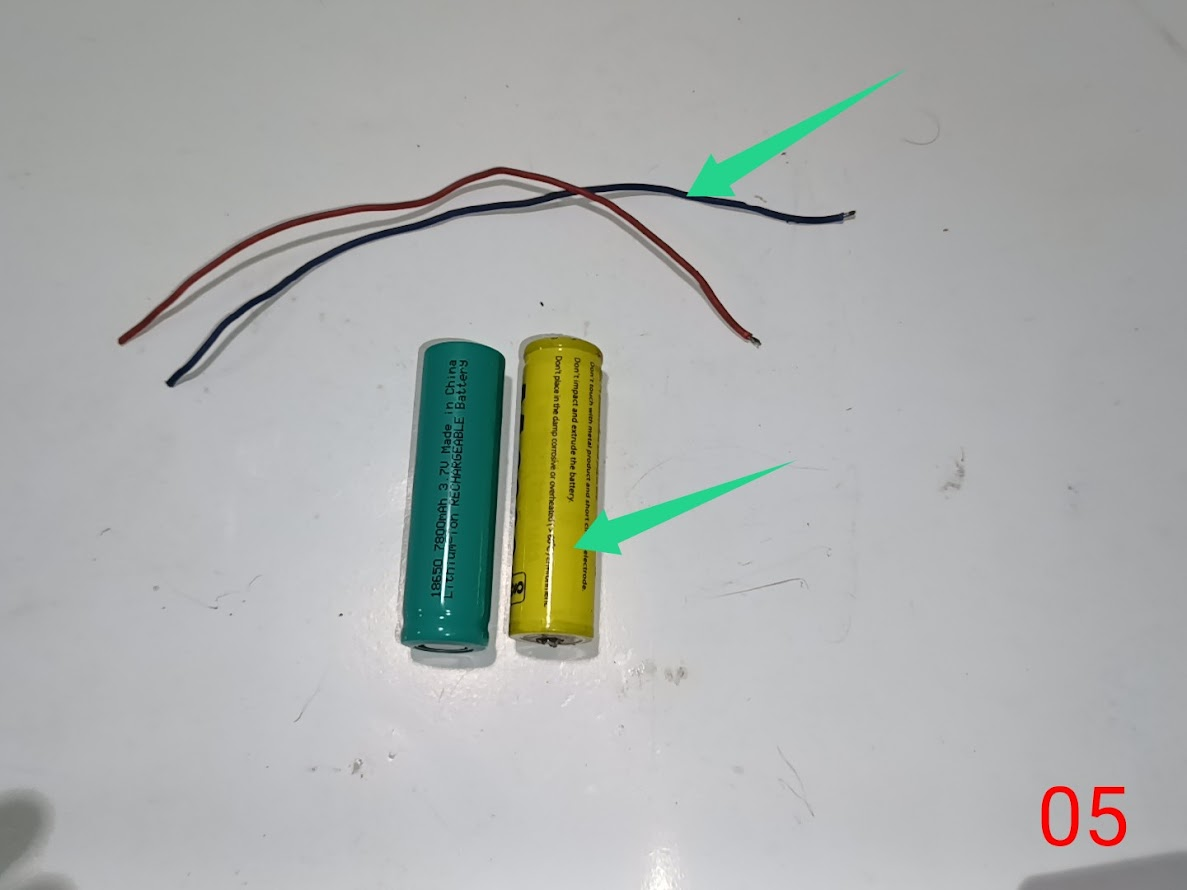
Now I will start modifying this charger light, so first I have taken two lithium ion batteries and two color wires for parallel connection.
Step -06

Before starting the work, I checked the output of the batteries with a digital multimeter to check if the batteries are OK and you can see that there is four volts plus here.
Step -07

Now I have combined the two batteries and made a parallel connection at the negative and positive ends using a soldering iron so that the battery backup of the charger light lasts longer.
Step -08

Now you can see that I have connected the Type C connection charging circuit to the charging input of the battery and to know the tutorial of this circuit, I have a previous post which I will give here.
Step -09

Now you can see that after connecting the battery to the circuit, I tested the input voltage with a 5 volt mobile charger circuit and here a red light is indicating that my battery is charging very well.
Step -10

I have done a very important job in this part, here I had previously connected the battery to the charging circuit, now I have soldered the two connections of the negative and positive connections of the battery from the charging light controlling circuit to the output connection of the charging circuit.
Step -11

Then the problem of the missing button of this charger light was that I installed a new button and while charging I turned the light on and off and tested both the charging section and the on-off section together.
Step -12
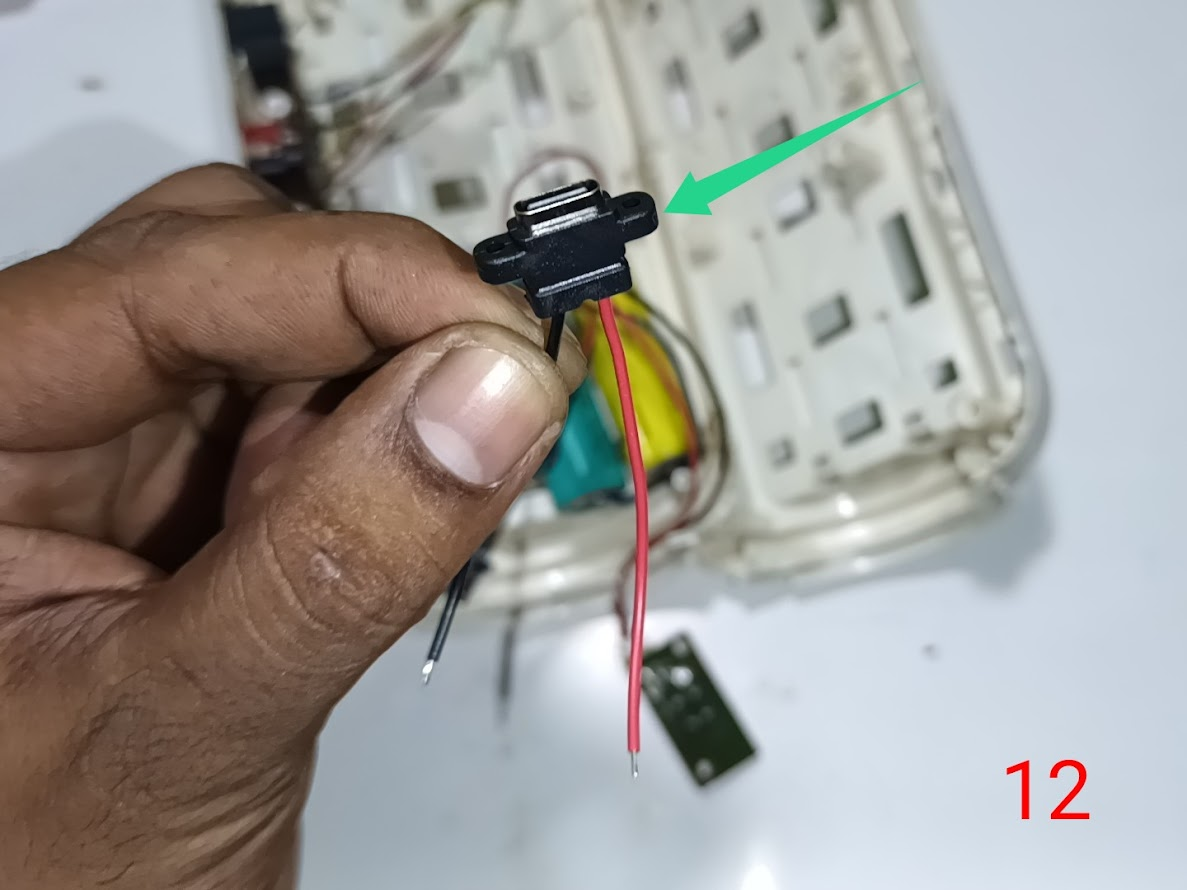
Now you can see a type C connection jack in my hand which I will replace in the body of the charger light to charge from the outside because the charging pin that is connected to the charging circuit will be inside.
Step -13

In this step, I have connected the circuit of the button that I changed to the on-off button to the other end of the light body.
Step -14

In this step, you can see that all my connections are complete. I have installed the battery in the body and connected the charging circuit to the controlling circuit from where the charger light will light up with the output of the battery and installed the button in the on-off circuit. Everything is replaced. Now the complete body fitting needs to be done.
Step -15

After fitting the entire body in this step, you can see that the DC 5 volt charging pin has been glued in place of the 220 volt input voltage charging.
Step -16

I have fitted the entire charger light bulbs nicely, and you can see the complete modification and condition in my hand now. Let's run it now.
Step -17

Alhamdulillah the charger light is running very well and giving beautiful light. The charger light modification work is 100% complete.
Step -18

I really like doing such work. Changing an old model system to digital mode and making it safe and secure has been given everything. And with my repair work, I have taken a picture which will be my memory.
| Video Tutorial: To better understand the practical part of this tutorial, you can watch the video below. |
|---|

✅ CC: My friend @rmm31
✅ We support @pennsif and @pennsif.witness for the growth of this platform. pennsif.witness his contribution to the Steemit community. Vote for him as a Witness here: Click to Vote
| Photography Details | 📱 Device: Walton Xanon90 | 📍 Location: Narayanganj, Bangladesh | 📷 Captured By: @imranhassan |
|---|
https://x.com/ImranHosen98536/status/1974164796225565090
!upvote 100
the post has been upvoted successfully! Remaining bandwidth: 100%
Congratulations!!

Your post has been upvoted through steemcurator06. We encourage you to publish creative and quality content.
Curated By:
Thank you very much sir for giving your valuable time and support to my post.