Pipe Smoking 101: Your First Bowl Of Tobacco
Are you eager to fire up a bowl of tobacco in your new pipe? If you've rounded up the basic supplies I outlined in yesterday's post, you should be ready for the most relaxing hour of your life.
There's lots of tutorials on YouTube that will take you through the process of smoking your first pipe, and you certainly won't hurt my feelings if you'd rather watch one of those. Even better, you might want to head to your local tobacconist and have him take you through it - if you've found one who is friendly and helpful. For the most part, we tobacconists love to talk and share our knowledge. (There are a few surly tobacconists out there, but most of them are just grouchy because their towns have passed bans against smoking in businesses. It's worth calling ahead to see if they're able to take you through the basics.)
Failing YouTube or your local smokeshop, or in addition to those, I'll still share my advice here. I've been smoking pipes for 20 years and have learned a lot about what makes for an enjoyable smoke.
Packing The Bowl
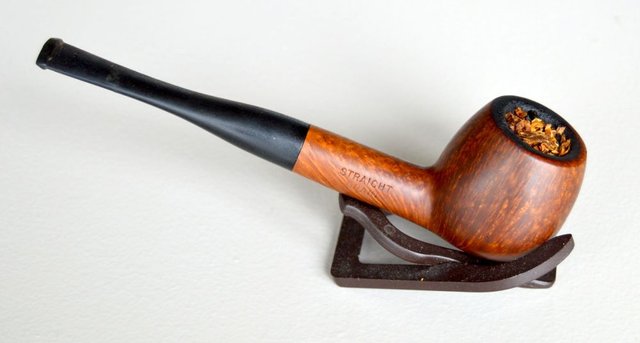
A properly packed bowl.
You want to pack the tobacco into the bowl of your pipe with the right level of firmness. If the tobacco is packed too tightly, you'll give yourself a headache pulling on it, and it'll go out a lot more often. Pack it too loose, and it'll burn quick and hot, potentially scorching your tongue. When you draw air through the stem of a properly packed pipe, you should feel about as much resistance as when drinking water through a straw.
So how do you hit this sweet spot of packing perfection?
You want to pack the bowl in three layers. First, sprinkle the tobacco in without packing it at all. Just let gravity fill it to the top. Then use your tamper or your finger to compress it down to half-full. It should still have some springiness to it, but more-or-less stay in place. Next, gravity feed to the top again, then compress until it's three-quarters full. Then load it one last time until you have a heap overflowing the bowl, and tamp it back down until it's level with the top, or just a hair below.
Take your time holding the tobacco flat until it stays at this level.
If your chosen blend is a long ribbon-cut, it may be difficult to sprinkle it into the bowl with gravity in the procedure outlined above. This is when I recommend actually cutting the tobacco into shorter lengths before you start. All you need to do is take a palm-ful of tobacco and roll it into a rope, as you might do with a handful of clay. Then, use a pair of scissors, or a sharp knife and cutting board, to chop this rope up in quarter-inch lengths. Don't worry about being too precise. It'll probably be unraveling as you do it anyway. What you want to end up with are bits of tobacco which can be easily sprinkled into the bowl via a gravity-feed method.
Tobacco cutting is an extra step, and it's not something you have to do once you've developed a feel for the properly packed bowl. But it does make the gravity-filling easier, and with the three-layer technique outlined above it generates a perfectly packed bowl every time.
Give your pipe a test puff. If it's too hard to draw the air through, scoop out the tobacco and try again. No harm done!
Lighting
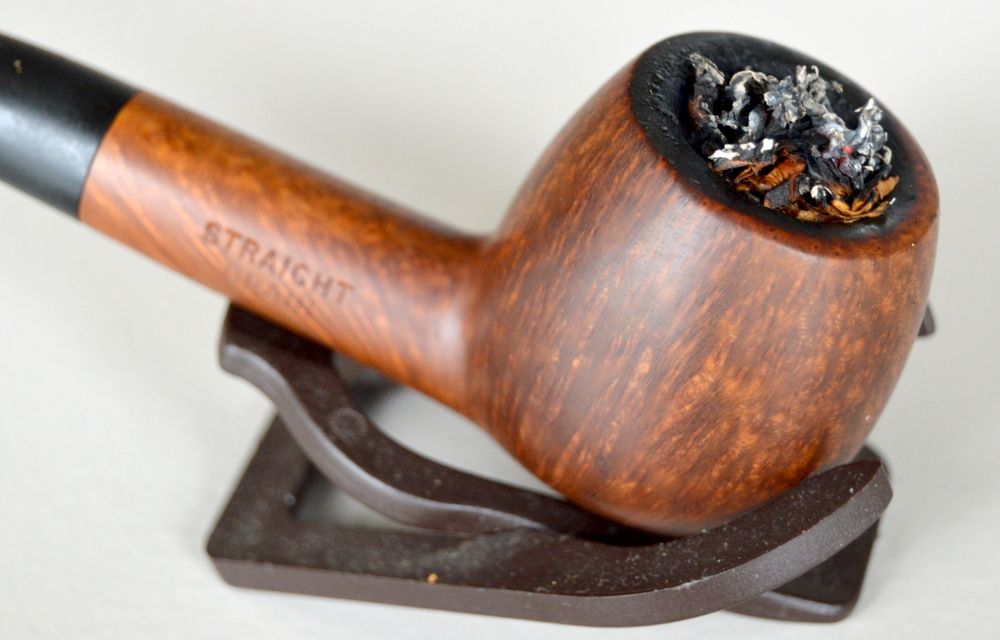
After the Charring Light. Note how the flakes have lifted up as they burned.
You're going to light the pipe two or three times to get it started. (There are lots of three-part procedures with pipe smoking. See how ritualistic this is getting?)
For the first light, hold your lit match or lighter flame above the bowl. While taking short puffs, move the flame in a circle around the top of the tobacco. I usually puff about 10-20 times. The tobacco will rise and expand as the edges of the leaves char. Remember how I said to take your time and make sure the top was firmly packed? Well, sometimes loose flakes will fall or scatter, burning holes in clothing or upholstery. (As my swiss-cheese car seat can attest!) Try to stay out of the wind, and avoid doing it near anything flammable!
Once you're done with this false light (also called a charring light) you'll want to tamp your tobacco flat again. Use your pipe tool, not your finger! The top of the tobacco should now be a thin layer of crushed cinder and ash. This serves as a sort of upside-down fire grate, holding the tobacco in place and letting just the right amount of air through. Now when you light it a second time, take longer puffs as you move the flame over the bowl. You should see an even glow start to develop.
Two lights is enough in most cases. (Pipe smoking contests - yes, they exist - provide contestants with two matches.) But we're not in a hurry, so to ensure an even burn I recommend a third light. Give the pipe a few seconds to die out, tamp the ash flat again, and re-light. This time, one or two leisurely puffs should be enough to set you on your way.
Smoking
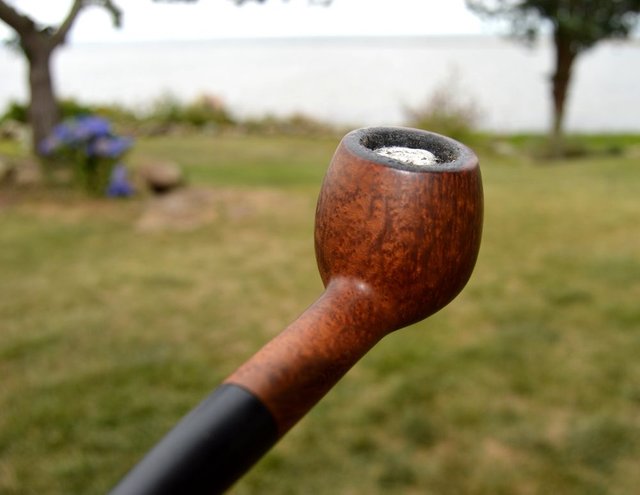
A "Pipe POV" Perspective - What you should see as you enjoy the pipe!
Just as with a cigar, you want to draw on a pipe with slow, measured puffs. Don't inhale. Just draw the smoke into your mouth, enjoy the flavor, and let it out.
In general you'll be taking shorter puffs than you'd draw from a cigar. Long, extended drags will tend to overheat the smoke. You'll get the best flavor and the coolest smoke from your pipe if it's just on the verge of going out. And if it does go out, don't worry! A pipe can be re-lit any number of times without a degrading the flavor. (This is another key advantage over cigars.) In fact it probably will go out a couple times as you smoke down the bowl.
Savor the flavors and note how they change with time. Enjoy the swirls of smoke as they float around the room or drift away on the breeze. Contemplate life, the universe, and everything. Isn't it nice to sit still for a while and truly relax?
Take your time. Smoking too quickly ruins the flavor and runs the risk of charring through the wall of the pipe - especially a new pipe that hasn't been broken in. How can you tell if you're smoking too fast? If the smoke gets uncomfortably hot and scorches the tongue, or the bowl gets too hot to hold comfortably in your hand, give it a minute or so to cool down before you resume.
As you're smoking, use your tamper to press down the ash of the burned tobacco once in a while. Don't compress the unburnt tobacco - You've done such a nice job packing it already! Just gently flatten the ash until you feel a slight resistance. Conversely, you can skip this step, smoke it until it goes out on its own, then tamp down the ash and re-light. Whatever works for you. Any time you re-light, though, you'll want to gently tamp the ash down first.
As with all activities that engender these kinds of ritual, people become religiously attached to their smoking habits. I've heard heated arguments about whether it's better to hold a pipe by the bowl, or grasp it at the stem. People are also divided on the hands-free teeth clamping method. I just say, find what you enjoy and do what's comfortable. Again: you do you.
I've also heard someone say that you should "savor the smoke of a cigar like a scotch, and sip at the smoke of a pipe like a gin and tonic." I'm not entirely sure what to make of this, but pass it on in the spirit of completeness.
If this is a brand new briar pipe, you may find that you pick up a bit of charred-wood flavor in the first couple bowls. This is part of the breaking-in process, and you'll find that subsequent smokes cooler and smoother as you start to build up that carbon cake on the walls of the bowl.
The pipe will usually go out on its own near the bottom of the bowl. Don't try to re-light the "dottle" at the bottom. This is where the moisture, tars, and syrups build up. It's normal to have a few soggy flakes at the bottom of your pipe, and trying to light these is just going to bring your pleasant experience to a bitter finish.
Finishing

Tapping out and clenaning. Note the soft cork knocker in the ashtray. Don't bang it on glass!
Once the pipe is out, use the scoop-end of your pipe tool to scrape out the dottle and gently empty it into an ashtray. You can tap the bowl against your palm if you like - just don't hold it by the stem when you do. And never bang a pipe against a hard ashtray!
(Sherlock Holmes was known for saving his pipe-dottle to dry out on the mantelpiece and smoke later. Don't do this. You are not Sherlock Holmes.)
Pass a pipe cleaner through the stem. A well made pipe with no filter will allow you to pass a cleaner all the way through to the bowl without taking it apart. This is why I recommend straight pipes for beginners, and filter-less pipes always. If the cleaner won't go all the way through, you may have to take the stem off the pipe to clean it. Let it cool completely before you do this! Because the pipe expands with heat, you run the risk of cracking the shank or tenon if you take it apart while it's still warm. Gently twist as you pull on the stem to remove it and clean out both the stem and the bowl. Twist it again as you put it back on.
Keep passing cleaners through until they come out clean. You can use both ends of the cleaners if you don't mind getting your fingers dirty. If the bottom of the bowl looks particularly moist or wet, you can fold over the pipe cleaner and use it to swab out the inside of the bowl as well. You'll want to let the pipe dry out and cool off before you pack another bowl.
Repeat
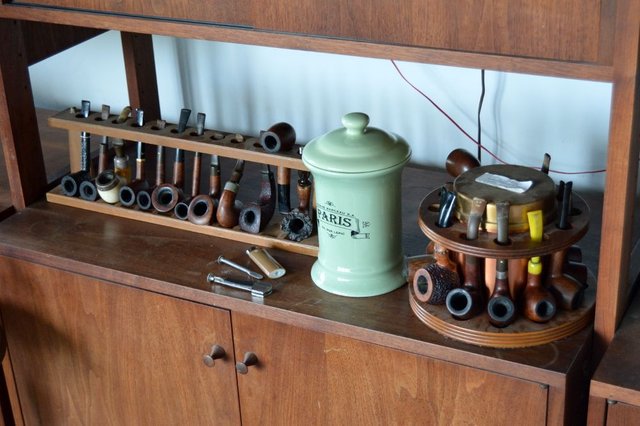
Lots to choose from. Pipes need a day or two of rest.
I'll usually smoke the same pipe all day. I smoke two to four bowls in that pipe. Then I'll give it a day or two to "rest" and dry out. With two dozen pipes, most of mine get a lot of rest. But a couple of days is really enough to prevent a pipe from absorbing too much moisture and going "sour."
At this point, though, you're already having so much fun you're thinking of adding a few more pipes to your collection, aren't you?
You'll find that a pipe retains a hint of flavor from previous smokes. Once you find a blend you like, you may want to smoke that blend exclusively in that pipe. Personally, I'm always trying too many different blends to follow this advice.
A pipe takes a little more effort than a cigar, but that effort will soon become part of a sacred ritual you'll look forward to performing as often as you can. You'll develop your own pipe-smoking techniques with time and practice. I've seen old-timers dip their pipes into a pouch of tobacco and somehow fill the bowl by working the tobacco in with their thumb single-handed, then bring it to their lips and light it with a match already ready in their other hand. It's a hell of a performance!
But the steps outlined above will serve you well until you develop your own routines.
Happy smoking!
-- Winston
I'm headed to the tobacco shop now.
Pipe Smoking 101 Your First Bowl Of Tobacco is an introductory journey into the world of pipe smoking. When starting, it's essential to choose a pipe that suits your style and preferences, avoiding girly pipes if you desire a more classic look. Selecting the right tobacco blend is crucial; experiment with various flavors to discover your favorite. Proper packing, lighting, and tamping techniques are key to an enjoyable experience. Savor the ritual and slow pace of pipe smoking, taking time to appreciate the aromas and flavors. With practice, you'll master the art of pipe smoking, forging a delightful and timeless pastime.