꽃파는처녀 (Flower Girl) | A Step-by-Step Illustration
꽃파는처녀 🌸 (Flower Girl)
Hello! So this blog will be extra special since this will be my first (well, second.) step-by-step illustration of my art. I made this when I was really stressed while studying with my exam so I guess stress contributed to the outcome? Hahaha! Well, without furthur ado, Let's start !! ✨ ✨
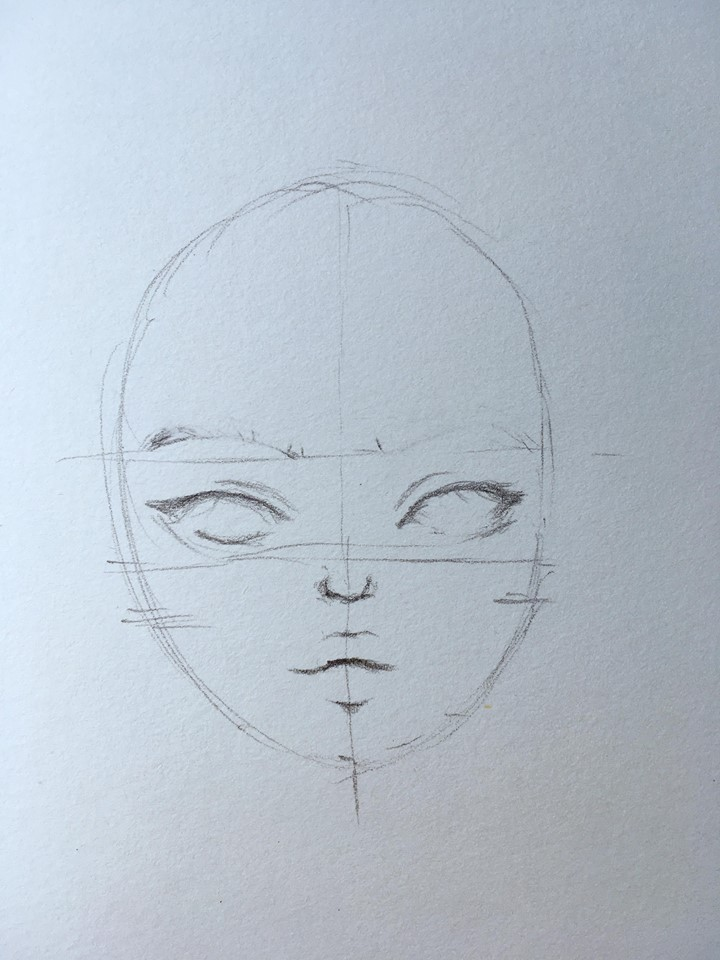
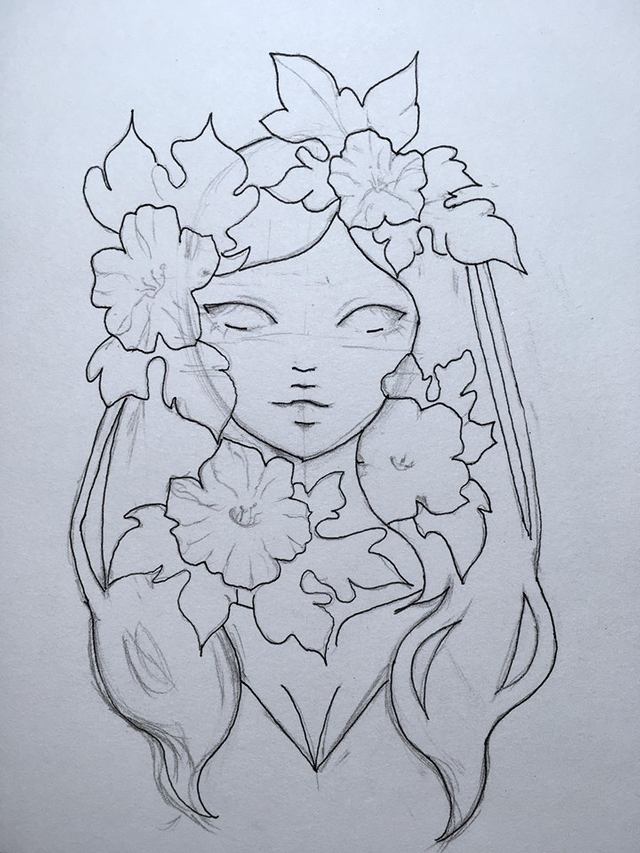
STEP 1
I started with the face: I drew a circle with one vertical line and three horizontal lines (which will serve as my guide to the face proportion)
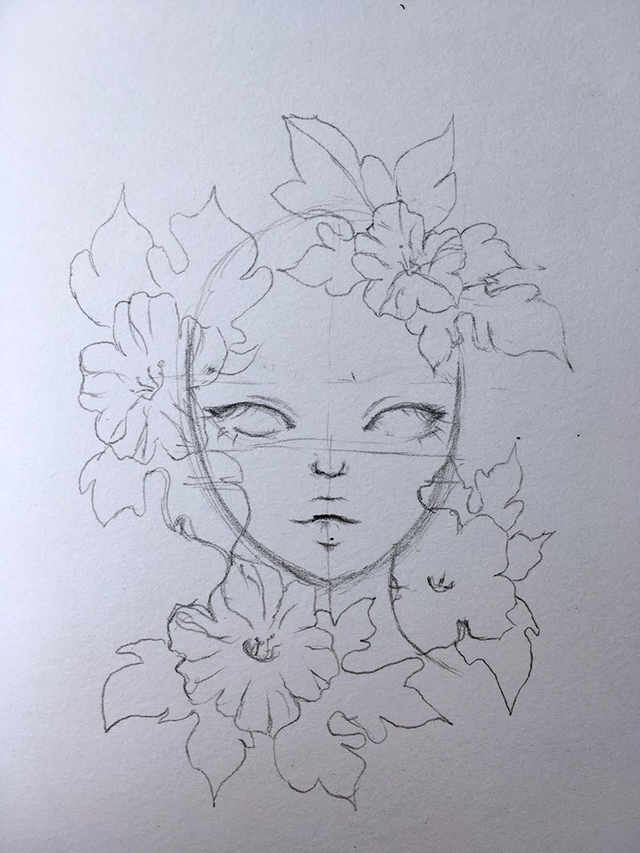
STEP 2
I drew the outlines for the flowers and leaves
STEP 3
The outline for the hair was drawn also
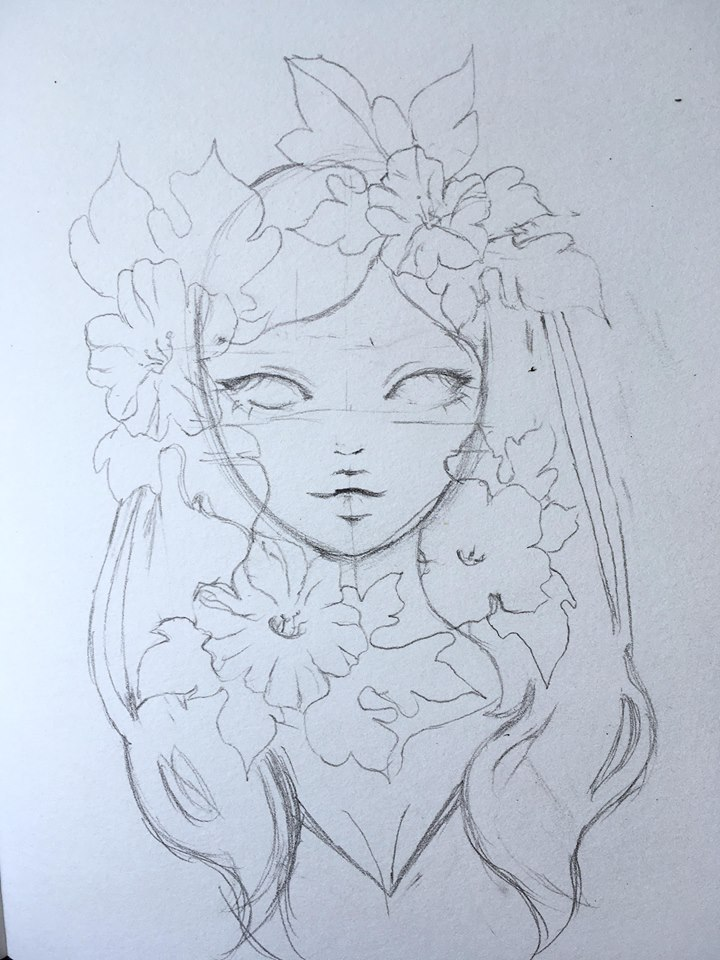
STEP 4
The lines were traced by a black ink. I used a 0.2 ballpoint pen
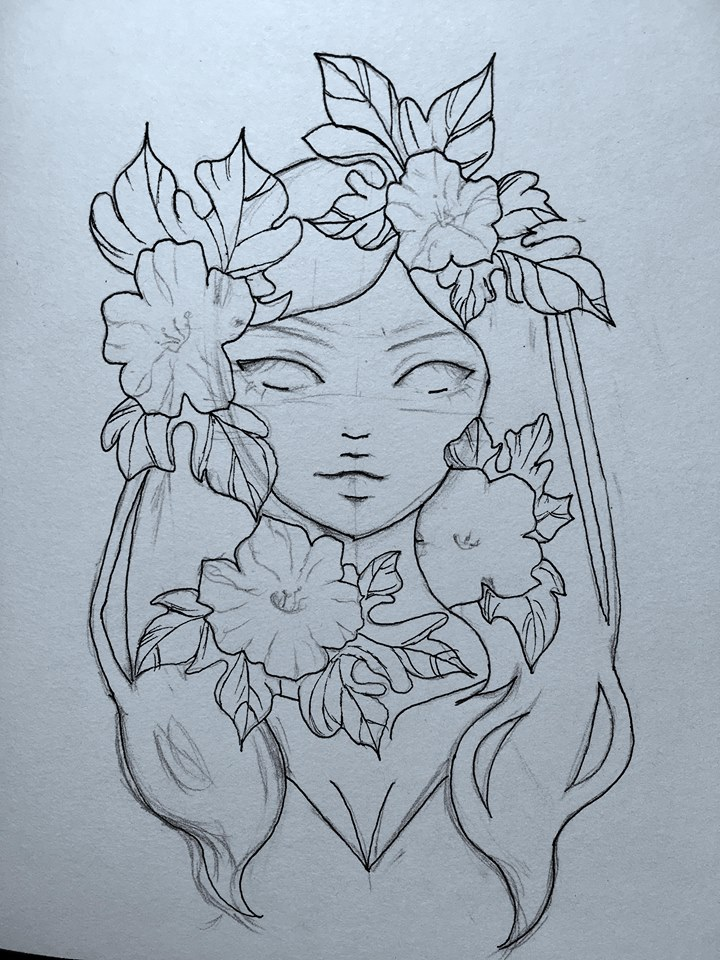
STEP 5
The details of the leaves were drawn
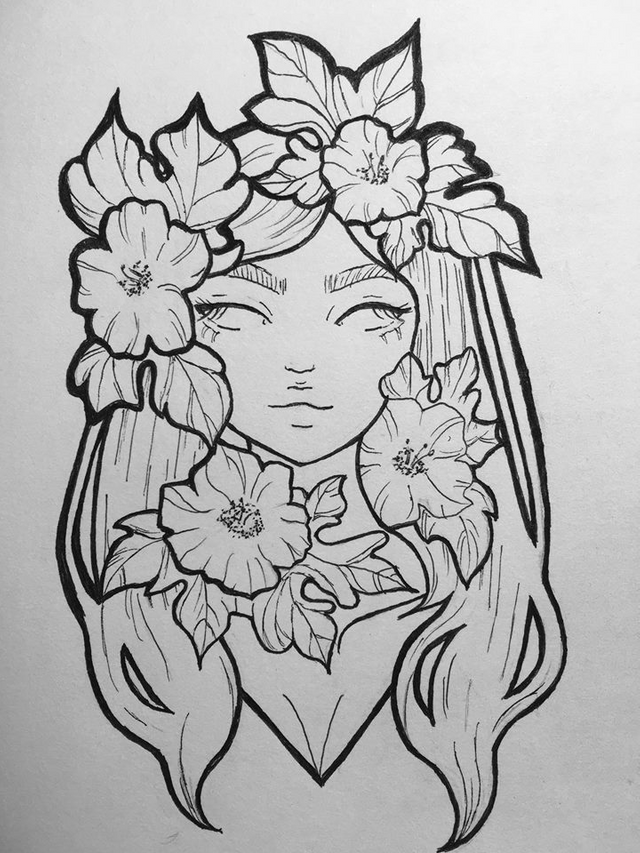
STEP 6
The outlines were drawn thicker and additional details for the flowers, hair, and face were drawn. All pencil outlines were also removed.
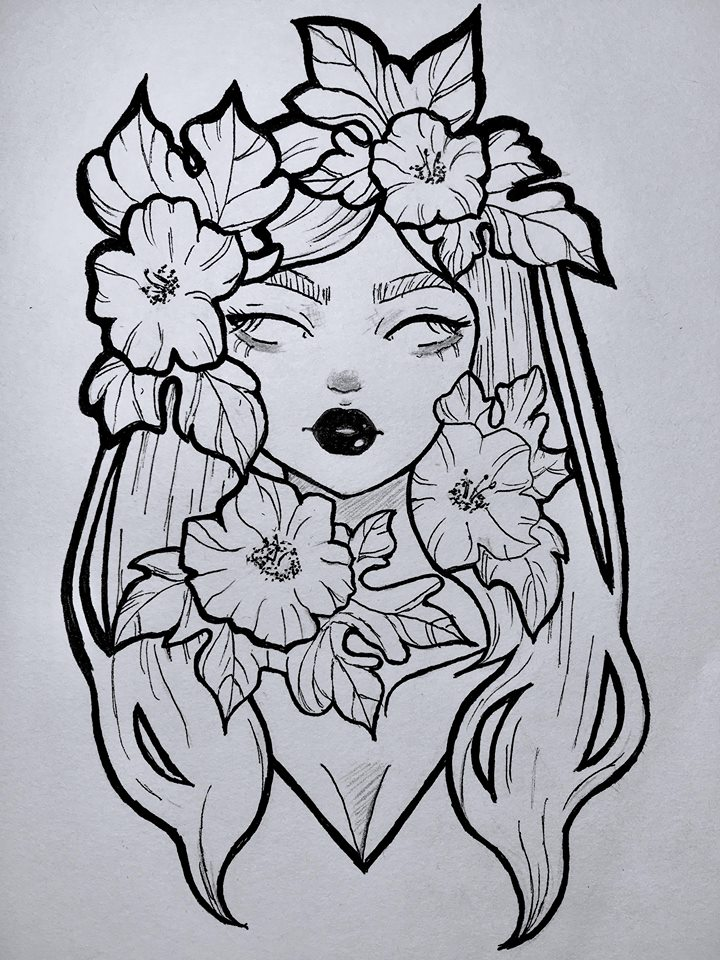
STEP 7
Final touches were made. And viola! It is partially done! Partially because, the next steps will be the adding of colors ✿ .
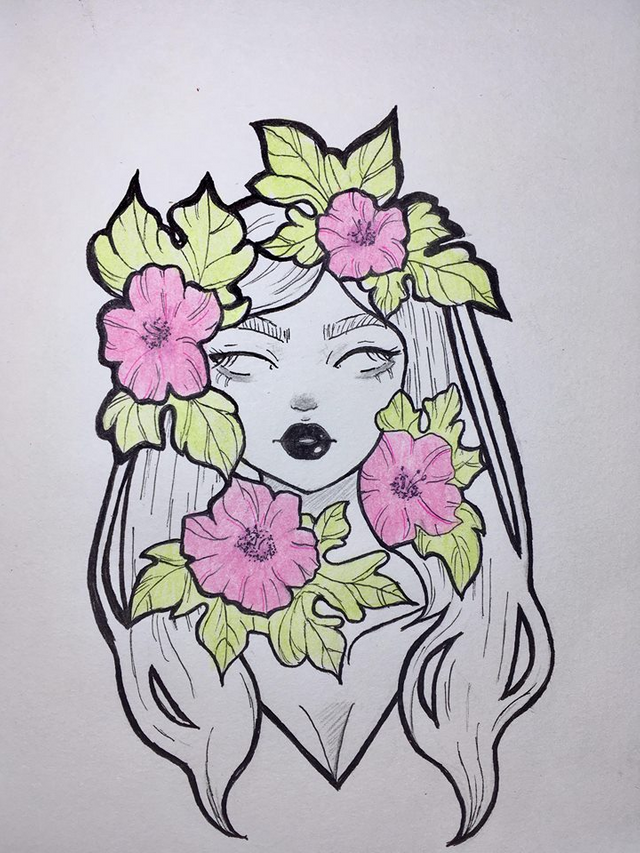
STEP 8
Green color was used for the leaves 🍃 and Pink was used for the flowers 🌸 (I used Faber Castel Classic 48 Color Pencils)
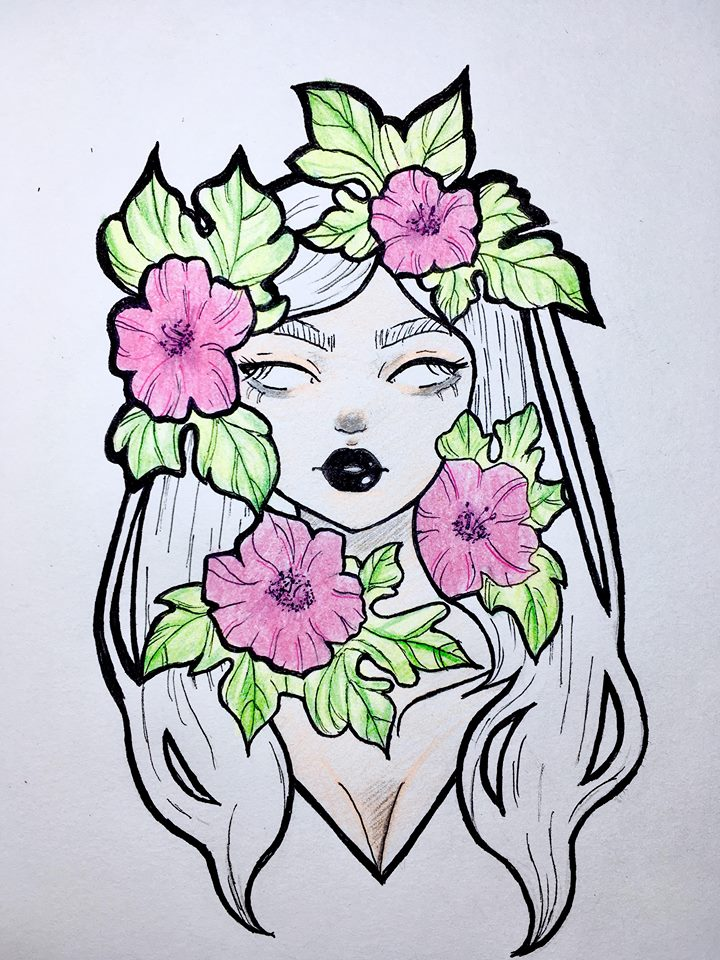
STEP 9
A darker shade of green was used for the details of the leaves and Purple for the flowers. Peach was used to color the skin.
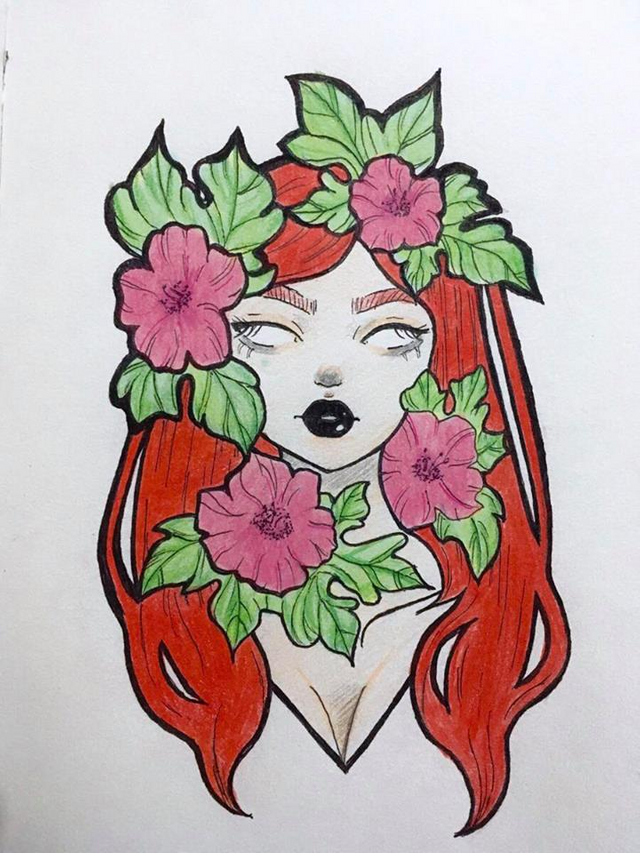
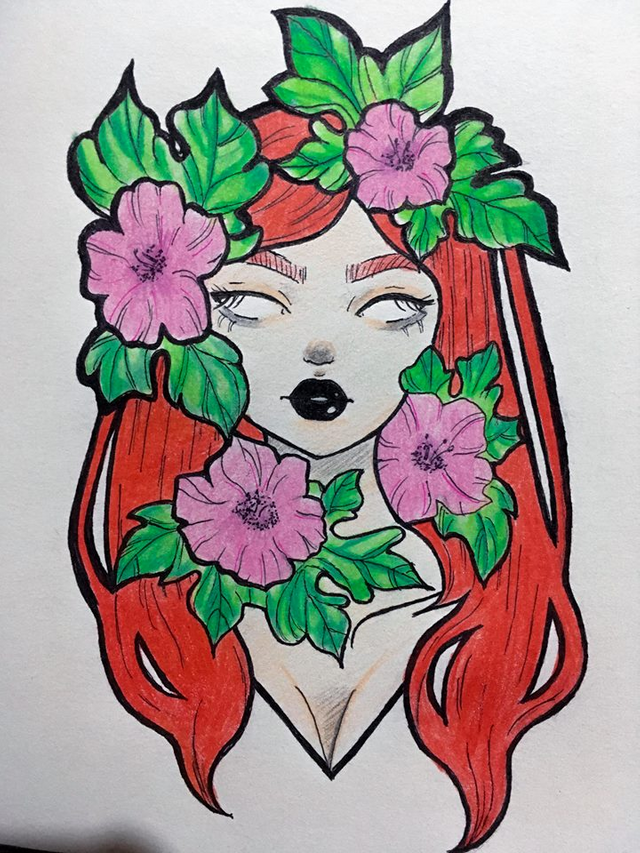
STEP 10 (Last Step! Yay!)
The hair was colored with a red color pencil. Even her eyebrows are red hihihi :>
D O N E ! ! ! ! !

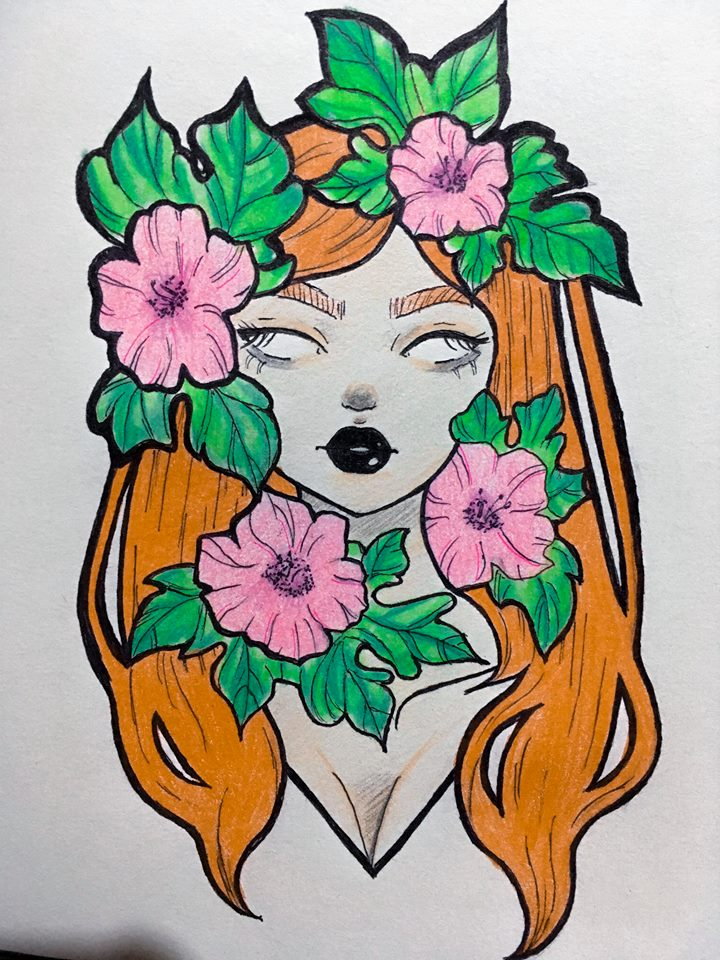
As a bonus, I used Adobe Lightroom to adjust the colors to try on different hair colors for our Flower Girl and this is the color that I picked:
So, that's it! Thank you everyone! I hope you liked this and you enjoyed scrolling through this blog. Give me reviews and feedbacks so I can improve my next step-by-step art illustrations. 💕💕
Beautiful!!!
This art reminds me of the fairy lands, their magical powers and the numerous beautiful yet unknown creatures.
This is indeed magical
Congrats @ayolouuu, You just won 50% upvote from @artzone.curators
Curated by @jacobite for @artzone
Naa pa kaha koy pag asa sa arts? :(
laban @kwenkwennnn
Lavaaaan
Naa pa kaha joy pag asa sa singing? :(
Saw you featured in the artzone post, this is so gorgeous!! Instant follow <3
Dear Artzonian, thanks for using the #ArtzOne hashtag. Your work is valuable to the @ArtzOne community. Quote of the week: Art, freedom and creativity will change society faster than politics. -Victor Pinchuk
im so amazed po huhu pa fansign