Tutorials on how to Wig on your own
First of all, take note of these :
1.Hair wefts- about three bundles should suffice (usually 100g per bundle) and you can either choose one length if you want to achieve a gradual layered look, or several different lengths to keep the overall length more consistent.
2.This guide uses 18", 16" and 14" lengths.
3.Lace Closure (optional)
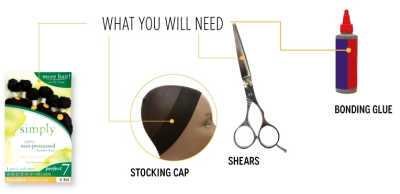
4.Stocking Cap (or elasticated wig cap)
5.Bonding Glue
6.Bonding Glue Remover (we all make mistakes, so just in case)
7.Scissors
8.Polystyrene (Styrofoam) or mannequin head
Pearl headed pins (optional but really helpful)
Step 1a
Place the stocking cap on the polystyrene head and starting from the nape area glue five rows wefts quite closely together - this will ensure that your home made wig will have more volume (higher density) of hair at the back of your head when you wear it
Step 1b
Leave slightly more space between the following rows and attach each row in an ear-to-ear pattern around the back of the head (do not attach the tracks over the top of the head) as eventually you should
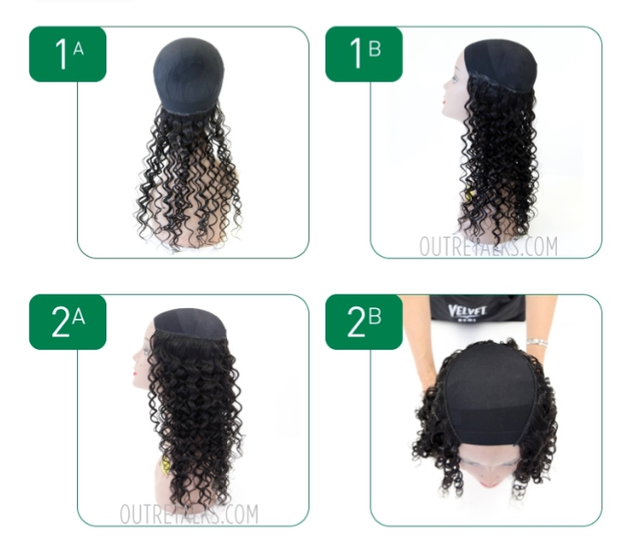
Step 2a & 2b
If aiming for a layered look, use the shorter length of hair weft once the longer length has run out (try to make sure you complete an entire row (track) with the same length of hair)
Keep gluing the hair wefts in rows in the U-shape until your rows reach about 2cm above the temple area (see images 2a and 2b).
Step 3a
For this step (3a), you will not work from one temple around the back of the head to the other temple. The pink lines show how the wefts should be attached.
Mark out the crown of the wig which is usually two - three inches from the front hairline (use a marker or pear headed pin).
Attach two or three more rows of wefts to the curve only of the U-shape of the wefts and not from temple to temple (image 3a with the three pink lines shows where these three rows of wefts should be attached). You should now have a shorter u-shape when looking down at the crown of the wig.
These three rows of wefts add volume (density) to the back of the wig.
Step 3b
If three different lengths of hair, use the shortest length of hair weave and attach it from temple to temple around the back of the head (image 3b with the u-shape pink line shows how this row should be attached)
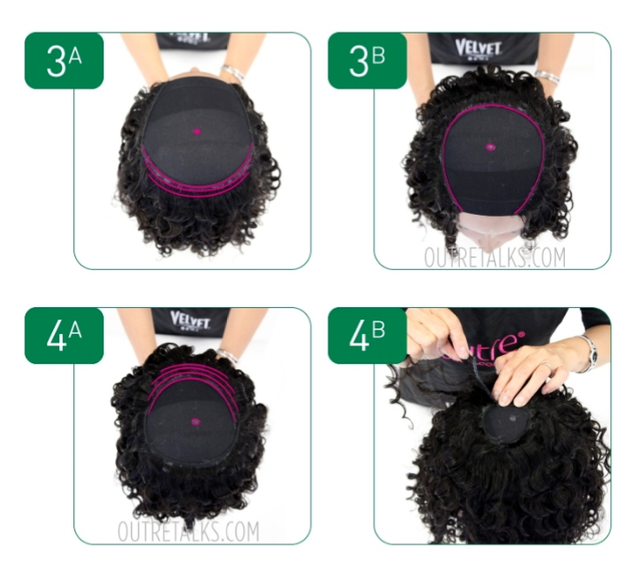
Step 4a
Turn the mannequin the front of the mannequin towards you. Starting at the front hairline of the wig (where a fringe (bangs) would be), attach three or four wefts closely together working towards the crown mark at the top of the wig (the four pink lines in image 4a show how the rows of hair weave should be attached.
When step 4a is completed you should have a circular shape left on the top of stocking cap
Step 4b
Using Lace Closure: Attach the hair weave in a circular pattern (rounds) and make sure the circular rows (rounds) of hair weave are close together so that there is fullness at the top of the wig. Keep attaching the hair weave in rounds until there is just enough room to attach the lace closure piece.
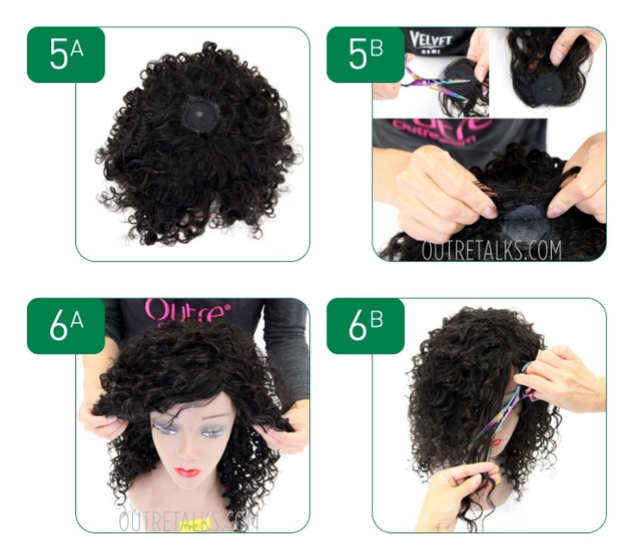
Step 6a
Finger comb curly hair (use a large tooth comb for straight hair) and create a parting of your choice (side or middle) - alternatively leave it without a parting.
Step 6b (optional)
If you want the hair to frame your face then trim the fringe at an angle.
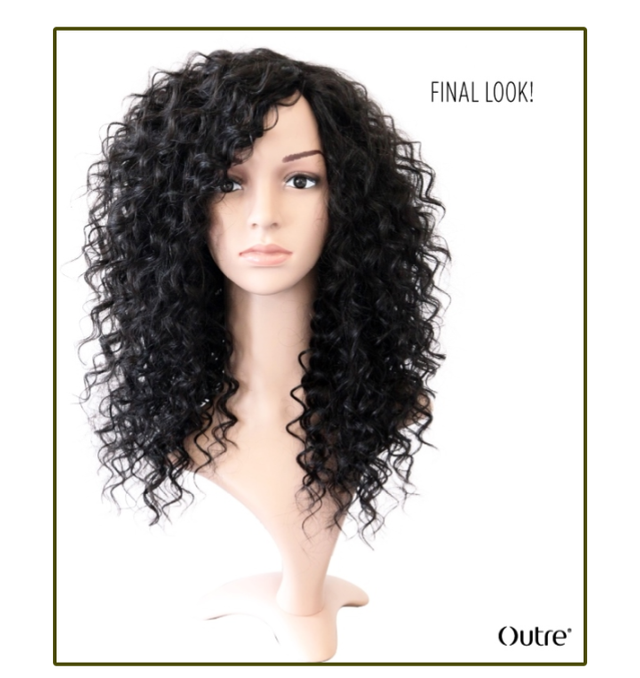
Voila! You've just learned how to make a wig!