Make your own artisanal beer at home! / ¡Elabora tu propia cerveza artesanal en casa!
As I have already told you, I study Chemical Engineering and as a classroom project in the subject of Bioprocesses this semester we brew beer. I learned a lot in the process and product of that are the previous post on What is artisanal beer and How taste properly. Today I will show you the process of elaboration and explain the science behind the production of artisan beer.
Elaboration process of Valquiria
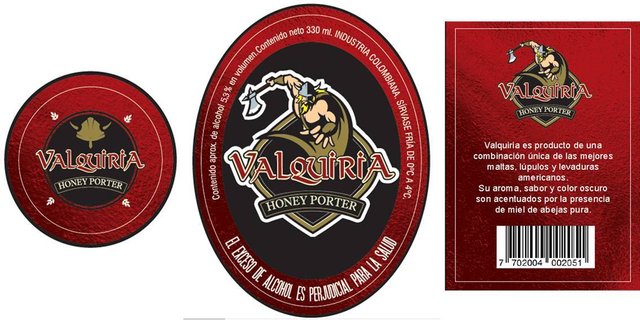
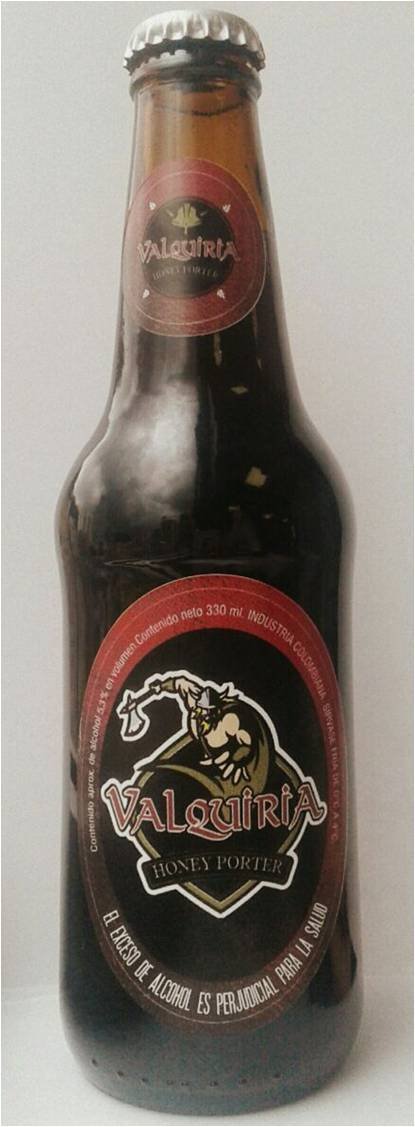
Valquiria was the beer we made during the semester. Its style corresponds to the 30.B of the BJCP (Beer Judge Certification Program) style guide of 2015, it is a standard Ale type beer (high fermentation) with pure honey as fermentable sugar. The classic style followed in the production of beer was 20.A, which corresponds to the American Porter.
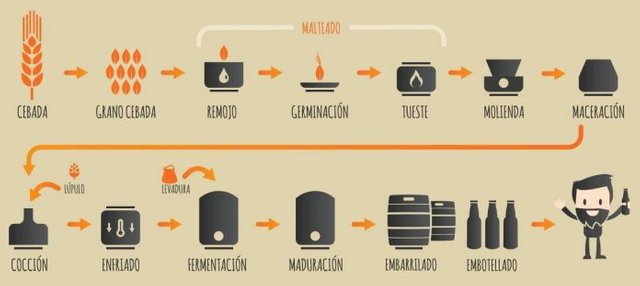
Brewing has eight main stages: malting, milling, mashing, lautering, boil, fermentation, conditioning and packing
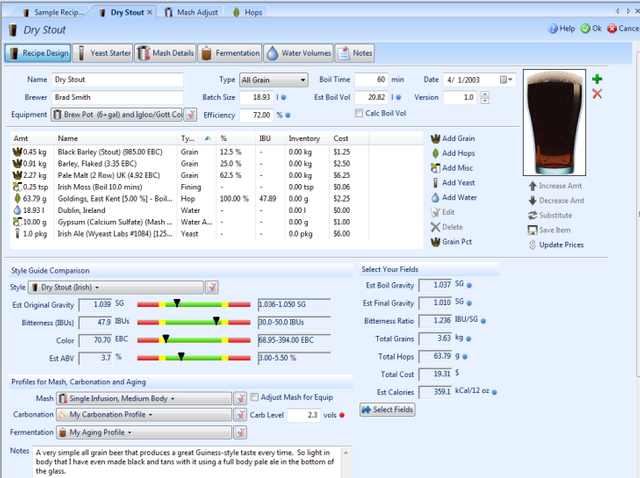
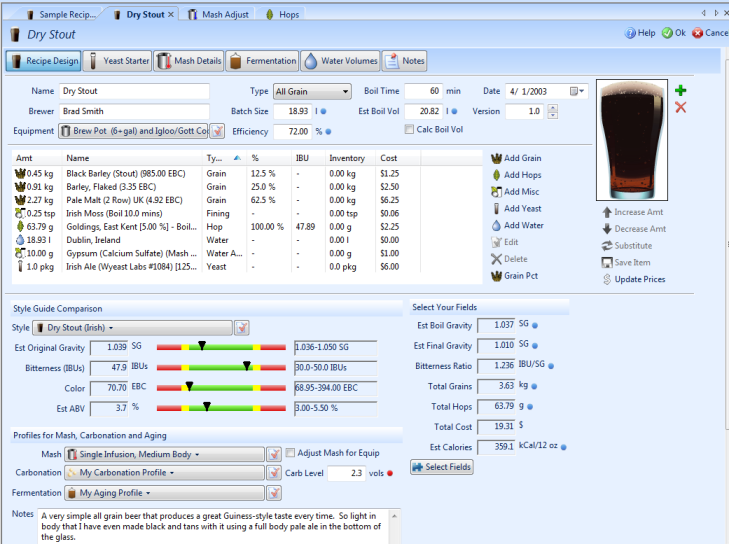
In order to produce Valquiria, we first chose the style of the aforementioned BJCP document. We made the formulation and proportion of the malts and hops and based on that, we did the simulation of beer in the BeerSmith software.
After proving that standards such as SRM, IBU (International Bitterness Unit), pH, percentage of alcohol and density are in the established ranges by the style of beer, raw materials are obtained:

Malting
It is the stage in which the barley grain is malted. The grain is soaked, it germinates and is roasted, depending on the type of malt that is required. Malts, which are the grains required to produce beer, are sold ready and there are many types according to the degree of roasting.
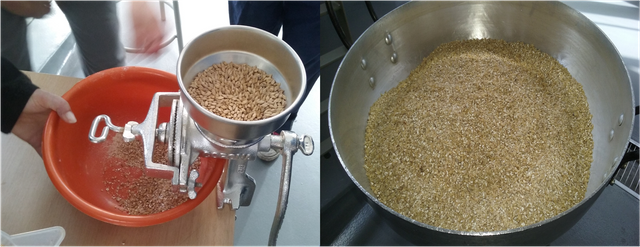
Milling
This is the beginning to produce beer. First, it must be taken into account that the place must be totally safe and clean and that you must wear a cap and masks. It is recommended to clean all surfaces with ethanol and leave the utensils in boiled water.
Now, in the milling stage is sought to break the grain in half, but not leave it powder. A medium-sized grain allows the hydrolysis process of the starch composing it to be optimal, so that the starch-glucose conversion is as large as possible.
Mashing
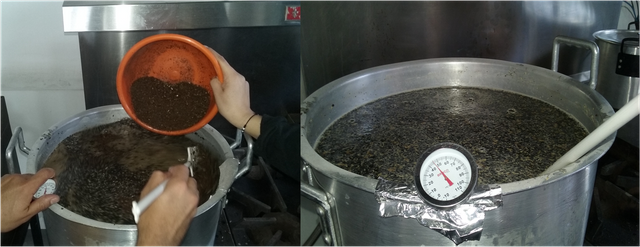
At this stage all the malts were mixed and cooked at a temperature between 40 and 50 ° C and increased 1 °C per 8 or 10 minutes until reaching 75 °C. According to the style of the beer it is advisable to look for or formulate a maceration ramp that fits the required product, since in this stage several enzymes are activated in each temperature range, as shown in the following image:
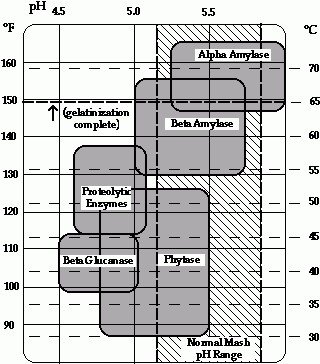
Mashing begins at a temperature of 40 °C with the activation of the β-glucanases breaking the β-glucans present in the walls of the grains, in order to control the gels responsible for the viscosity and turbidity of the must. In the step of 65 °C it is activated the α-almylase, responsible for the breaking of the ends in the starch chain for the production of maltose responsible for saccharification of the must. At 72 °C, α-amylases, which reduce the amylose and amylopectin chains for the production of dextrins (beer body formation) and glucose, are activated. Finally some of the enzymes were inactivated at 75 °C, ending the mashing.
Lautering
At this stage a food mesh is used to filter and recirculate the must 8 or 10 times, adding water in each one of them. This stage is indispensable to obtain a clear and slightly turbid must.
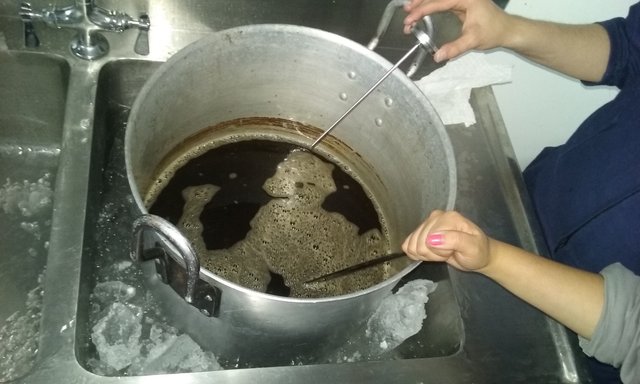
Boil
At this stage hops and the additive, if one is to be added, are added to the must over high heat, in order to completely inhibit all enzymatic activity. Determining the correct addition time and hops types is essential to get the bitterness you are looking for. After 1 hour of cooking the must is brought to a thermal shock so that its temperature reaches 22 °C, optimal temperature for yeasts to live.
Fermentation
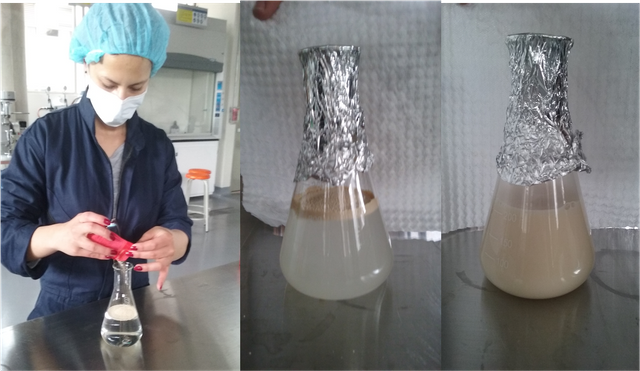
For fermentation it is necessary to have inoculated in a separate glass the yeast, as shown in the following image. After being cooled the must is transferred to the fermenter (which can be a very clean and disinfected bucket) carefully to avoid oxygenation of the must, and then it is added the yeast previously inoculated.
Conditioning
After 8 days of fermentation (or more, if the beer to be produced requires it), the beer is transferred and filtered in another bucket with a 5μm mesh to remove leftover leavings residing. It’s left during 15 days in this stage.
Packing
The bottles are washed and disinfected with boiling water, then a solution of 8 g of sugar per liter is made and 6 mL of the solution is added in each bottle, in order to make a final carbonation in the bottle itself giving fermentable sugars to the yeasts that remain alive. Bottles are filled, capped and labeled and are kept at room temperature for 8 days, then it is ready for cooling!
If you want to know more I’ll be pending in the comments. Thanks for reading me ☻
Como ya les he contado, estudio Ingeniería Química y como proyecto de aula en la asignatura de Bioprocesos éste semestre elaboramos cerveza. Aprendí muchísimo en el proceso y producto de ello son los post anteriores sobre qué es la cerveza artesanal y cómo catarla apropiadamente. Hoy les voy a mostrar el proceso de elaboración y a explicarles la ciencia que hay detrás de la producción de la cerveza artesanal.
Proceso de elaboración de Valquiria
Valquiria fue la cerveza que elaboramos durante el semestre. Su estilo corresponde al 30.B de la guía de estilos del BJCP (Beer Judge Certification Program) del 2015, es una cerveza estándar tipo Ale (de alta fermentación) con adición de miel de abejas pura como azúcar fermentable. El estilo clásico seguido en la producción de la cerveza fue el 20.A, que compete a la American Porter.
La elaboración de cerveza tiene ocho etapas principales: malteado, molienda, maceración, filtrado, cocción, fermentación, maduración y embotellado.
Para producir Valquiria escogimos primero el estilo del ya mencionado documento de la BJCP. Se realizó la formulación y proporción de las maltas y lúpulos a utilizar y con base en eso hicimos la simulación de la cerveza en el software BeerSmith.
Luego de probar que los estándares como SRM, IBU (International Bitterness Unit), pH, porcentaje de alcohol y densidad están en los rangos establecidos por el estilo de la cerveza, se obtienen las materias primas:
Malteado
Es la etapa en la que el grano de cebada se maltea. El malteado consiste en remojar, dejar germinar y tostar el grano, dependiendo del tipo de malta que se requiera. Las maltas, que son los granos que se requieren para producir la cerveza, se venden listas y hay de muchos tipos según el grado de tostado.
Molienda
Este es el comienzo para producir la cerveza escogida. Primero, se debe tener en cuenta que el lugar debe estar totalmente inocuo y limpio y que se debe usar cofia y tapabocas. Se recomienda limpiar todas las superficies con etanol y dejar los utensilios en agua hervida.
Ahora, en la molienda se busca partir el grano a la mitad, pero no dejarlo polvo. Un grano de tamaño medio permite que el proceso de hidrólisis del almidón que lo compone sea óptimo, de forma que la conversión almidón-glucosa sea la mayor posible.
Maceración
En esta etapa se mezclaron todas las maltas y se cocinaron a una temperatura entre 40 y 50 °C y aumentándola 1 °C cada 8 o 10 minutos hasta llegar a 75 °C. Según el estilo de la cerveza es recomendable buscar o formular una rampa de maceración que se ajuste al producto requerido, ya que en esta etapa se activan varias enzimas en cada rango de temperatura, como se muestra en la siguiente imagen:
La maceración comienza a una temperatura de 40°C con la activación de las β-glucanasas, rompiendo así los β-glucanos presentes en las paredes de los granos, con el fin de controlar los geles responsables de la viscosidad y turbidez del mosto. En el escalón de 65°C se da la activación de α-almilasa, encargada de la ruptura de los extremos en la cadena de almidón para la producción de maltosas; responsables de la sacarificación del mosto, a 72°C se activan las α-amilasas, que reducen las cadenas de amilosa y amilopectina para la producción de dextrinas (formación del cuerpo de la cerveza) y glucosa. Finalmente se inactivaron algunas de las enzimas a 75°C dando fin al proceso de maceración.
Filtrado
En esta etapa se utiliza una malla adecuada para alimentos y se filtra y recircula el mosto 8 o 10 veces, añadiendo agua en cada una de ellas. Esta etapa es indispensable para obtener un mosto claro y poco turbio.
Cocción
En esta etapa se añaden los lúpulos y el aditivo, en caso de que se vaya a adicionar uno, al mosto a fuego alto, esto con el fin de inhibir completamente toda actividad enzimática. Determinar el tiempo de adición y el tipo de lúpulo correctos es esencial para obtener el amargor que se busca. Luego de 1 hora de cocción el mosto se lleva a un choque térmico para que su temperatura llegue a 22 °C, óptima para que las levaduras puedan vivir.
Fermentación
Para la fermentación es necesario haber inoculado en un vaso aparte la levadura, como se muestra en la siguiente imagen. Luego de ser enfriado el mosto se trasvasa al fermentador (que puede ser una cubeta muy limpia y desinfectada) con cuidado de no oxigenarlo, y luego se le añade la levadura previamente inoculada.
Maduración
Después de 8 días de fermentación (o más, si la cerveza a producir lo requiere) se trasvasa y filtra la cerveza con una malla de 5µm para quitar los restos de lúpulo y levadura que residan a otra cubeta. Se deja 15 días en esta etapa.
Embotellado
Las botellas se lavan y desinfectan con agua hirviendo, luego se hace una solución de 8 g de azúcar por litro y se adicionan 6 mL de la solución en cada botella, esto con el fin de que se haga una carbonatación final en la botella misma dando azúcares fermentables a las levaduras que queden vivas. Las botellas se llenan, tapan y etiquetan. Las botellas se mantienen a temperatura ambiente durante 8 días, luego ¡está lista para refrigerar!