Home Made Plum Jam - Step by Step Guide.
Today I made home made plum jam.
I used to make home made jams all the time before, we had our own plum trees in our back yard, here in Australia we do not yet have our own back yard so I didn't think about making any home made jams. Then yesterday I saw plums on special at the market, $15 for 10 kilos of plums.
I instantly thought of my home made jams. So I bought 10 kilograms and today I made plum jam.
Here is my recipe for home made plum jam.
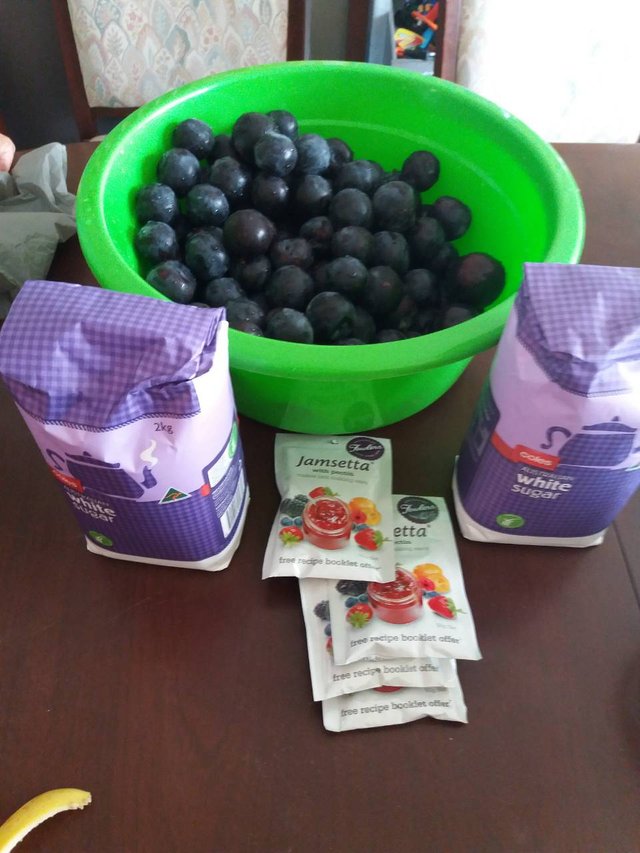
Ingredients
10 kg plums
4 kg of sugar
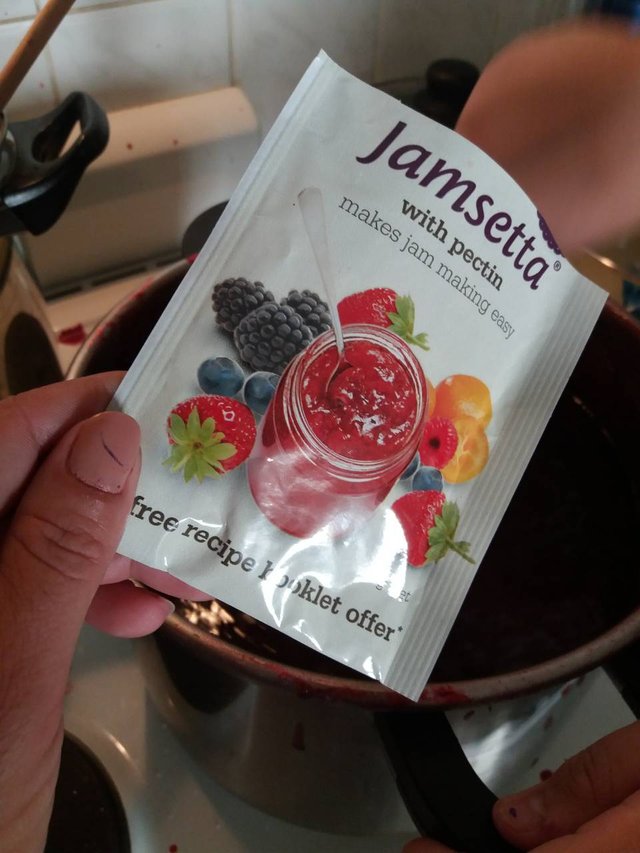
4 jam setter (the ones I used were 50 gram packets, but read the details on the packing, they all have different instructions for how many packets per kilogram)
Step 1
Wash and clean your plums, take out the pips, put into a big cooking pot.
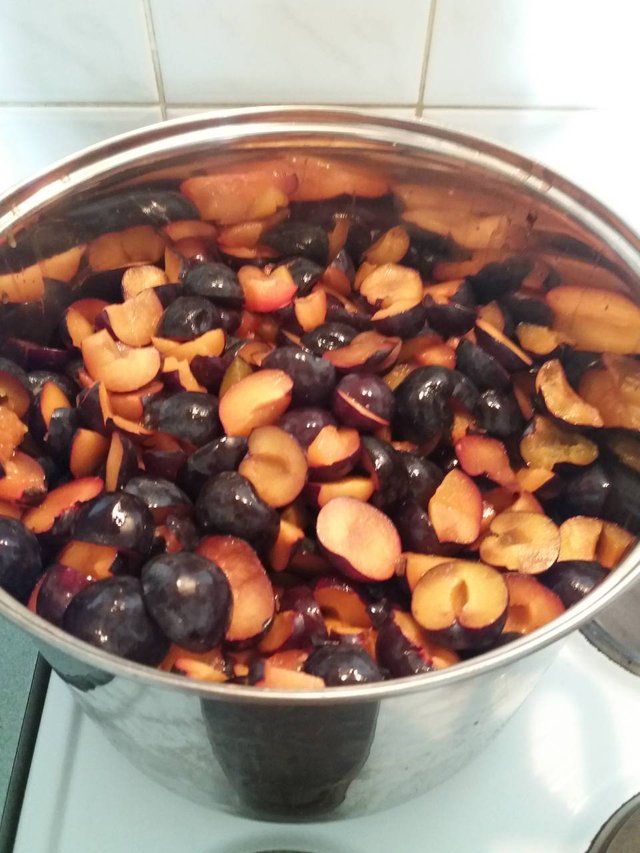
Step 2
Place the pot onto a medium flame and make sure to stir while cooking so you get a nice mix. Must be stirred non stop so that there is no burning on the bottom of the pot.
This takes about 1 hour. Depends on the plums. Some plums the skin on the plums falls apart, some will have the skins in tact. Again depends on the type of plums. But do not worry, this recipe is good for all types of plums.
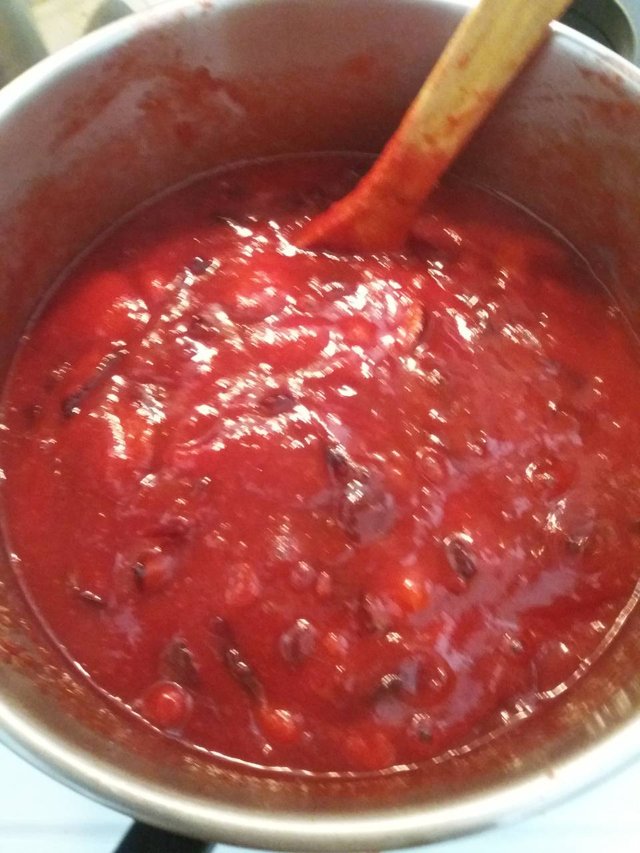

Step 3
Then add your sugar all 4 kg of it. Mix it well until the sugar melts. This is when you need to try your jam and if your taste spuds like sweeter tasting jam add more sugar and repeat the stir til melt process and taste test.
The taste of your jam again shall depend on the plums. Some plums are sweeter tasting, than others. So make sure to do your own taste test and add more sugar if you feel it is necessary.
Make sure to keep stirring the entire time, so that it does not burn on the bottom of the pot. No resting!
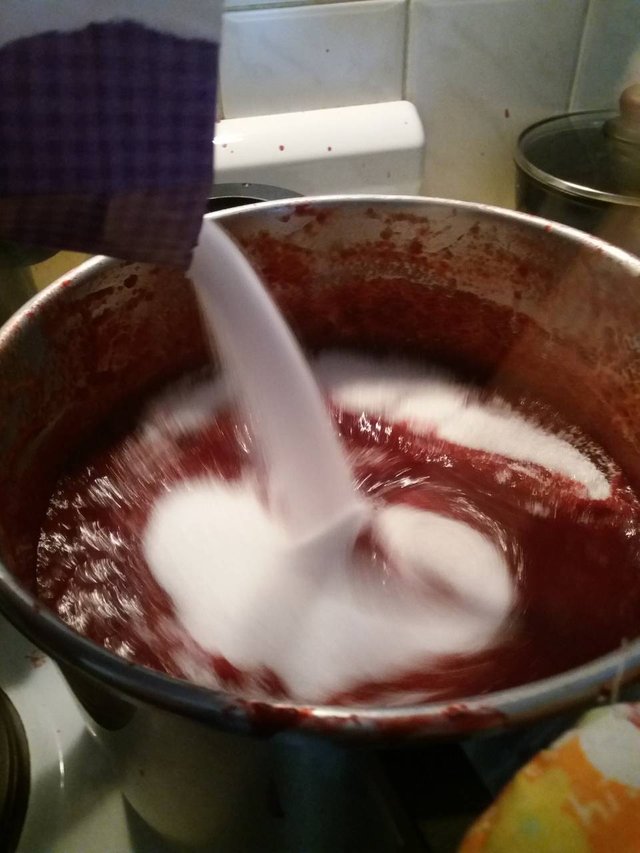
Step 4
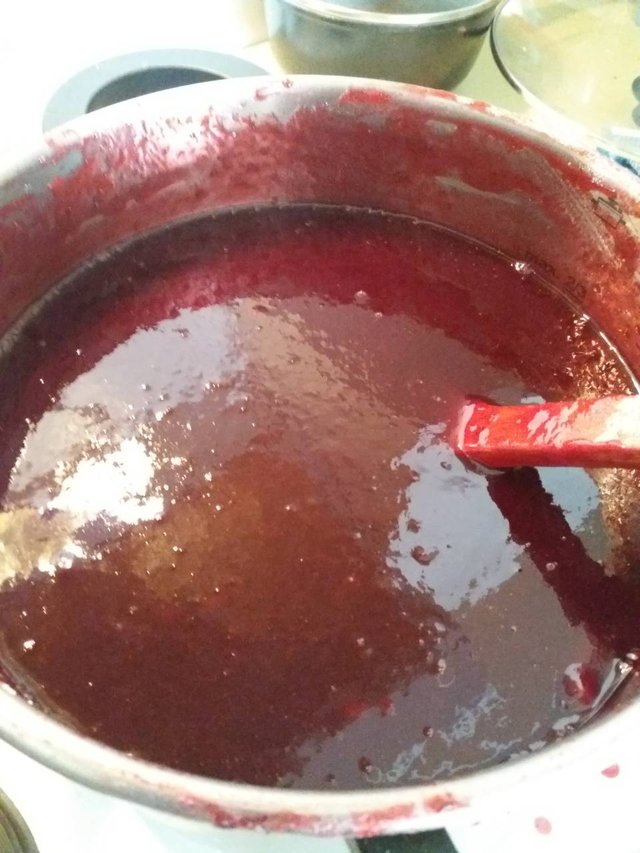
When the sugar and plum mix start to bubble (boil) then add your jam setter.
Keep mixing the entire time, when the jam setter is well mixed in, take a teaspoon and put a sample of the mixture on a small plate and place in the fridge for about 5 minutes to see if the mixture has thickened up in the fridge. If it is too liquidy then add a bit more jam setter and repeat the fridge test again.
This can happen because the jam setters are made for all jams and not for one type of fruit/jam. This is why the fridge test is the best to make sure the mixture is good.
Once you are happy with the sample from your fridge test, then keep cooking for another 10 to 15 minutes after your final taste test (final adding of jam setter).
So you have a total of 20 to 30 minutes of cooking time. 10 minutes while it is in the fridge + 10 minutes after you are satisfied with the mix.
It should look like this.
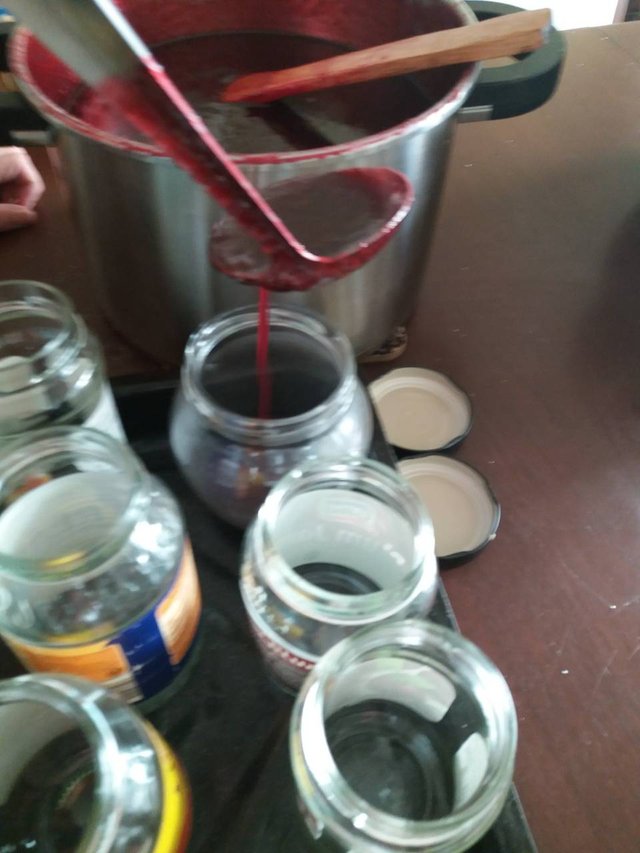
Step 5
First turn on your oven, and preheat it to 150 degrees celsius.
Take a baking tray and pour some water into it, approximately 2cm high.
Then put your jars into the baking tray.
Firstly place about 2 to 3 cm of jam into each jar, so that the jars warm up.
When finished with this, then fill them up to the top.


Step 6
Your oven should be at 150 degrees celsius.
You are ready to put the baking tray into the oven now.
FIRST TURN THE OVEN OFF.
Then place your baking tray with jars full of jam into the oven.
Leave them in there until the oven cools down.
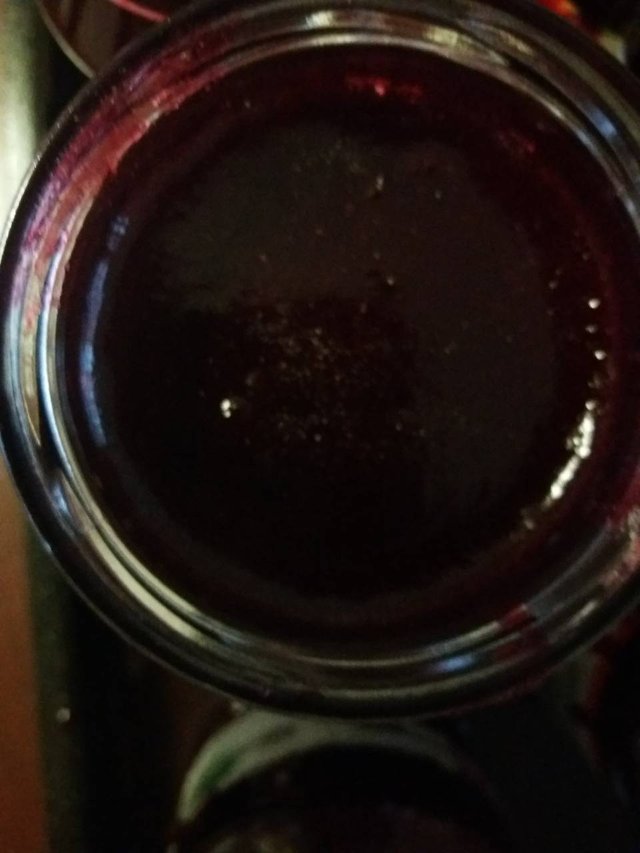
Once the oven is cooled down to room temperature, take your tray out and this is what the top of the jam should look like.
Finally, put your lids onto the jars.
That is it!
Home made jam.

The hardest part is the constant mixing so that the jam mix does not burn and stick to your pot. There is no time to take a break, it has to be mixed non stop.
Once you are finished and you taste your home made jam, you will see why it is worth making your own jam. The taste is very rich and maybe it might take a few slices of bread or toast with jam to get used to the strong natural flavor of home made jam.
I love it, my children love it.
The cheapest jar of jam in Sydney costs about $3. I made over 11kg of jam here.
I calculated that 11 kg of jam in the shops would cost me over $66 dollars.
This cost me a total of $32 to make.
I forgot to write the cost saving part of making your own jam too. So I added it now. (minutes after I posted)
I hope you enjoyed this step by step guide with photos.
Thank you for reading.
Thanks for sharing amazing stuff
You're welcome.
That looks awesome mate. Used to have damson trees in our family home and the jam was lovely. Great post will happily re-steem. I've recently written a post about homemade, tear 'n' share, pizza. If you like your pizza's you should come over and have a look. Look forward to seeing more of your posts and I will be back with my @team-solutions profile to re-steem again. Great work buddy!
Thank you.
I'll definitely try this, though first I need to get a stock pot large enough to handle 10 KG of fruit!
My last couple of windfalls have been apples, mostly winesaps, and I made apple butter both times.
Mine is heavily spiced, similar to mulled cider, and the apples were so sweet I never even added sugar, and both batches still came out perfect.
Far superior in taste than the store bought variety, and far healthier as well!