Recipe: Mosaic sushi roll
.jpg)

Ingredients:
1 small thin cucumber (as size will dictate the size of your sushi roll)
4 half sheets of nori
60g (2 oz) cooked white sushi rice
80g (2.75 oz) cooked pink sushi rice
Carrot sauce
4 strips of sashimi grade tuna (cut to the same width as a half nori sheet)
4 strips of sushi grade salmon (cut to the same width as a half nori sheet)
Step 1: Preparing the Quarter Sushi Roll Segments
Slice off both ends of the cucumber, then cut in half. Trim off any excess with your knife so that the total length of the cucumber matches the width of your nori sheet.
Then, cut the cucumber in half length ways, and the halves into quarters. If your cucumber is slightly too big like mine was then make two separate cuts a few millimeters apart down the length of the cucumber strip to reduce the size of the quarters. Discard the thin central piece. As a rule of thumb, the smaller the quarters, the neater and smaller your mosaic sushi roll will be.
Assemble the four cucumber pieces in your hand to form a whole circle, just to check they are all of equal size.
Assemble the four cucumber pieces in your hand to form a whole circle, just to check they are all of equal size.
rolling corner parts mosaic sushiMoisten your fingers with a little water, then transfer 60g of cooked white sushi rice onto the first half nori sheet. Spread out the rice in a thin layer, covering approximately 3/4 of the nori sheet.
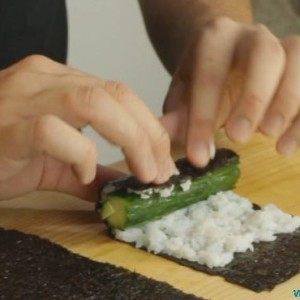
Next, position the four cucumber quarters as whole onto the bed of rice at the end closest to you. Begin rolling the nori sheet over the cucumber, using your forefingers to hold the cucumber in place as you curl the sheet over. Stop rolling just before you reach the point where the rice ends, then gently slice off the excess nori sheet using your knife. Set aside while you prepare the second half nori sheet.

Step 2: Creating the Pink Rice Layer
Transfer approximately 90% of the cooked pink sushi rice onto the second half nori sheet, using your fingers to spread it out. As before, spread out in a thin layer that covers roughly 3/4 of the surface of the nori sheet.
Place the first sushi roll onto the bed of pink rice, close to the end that is nearest to you. Roll the second nori sheet around the first, continuing until you reach the point where the rice ends.
Squish a little rice along the exposed end, then roll and lightly compress along the seam to help it adhere.
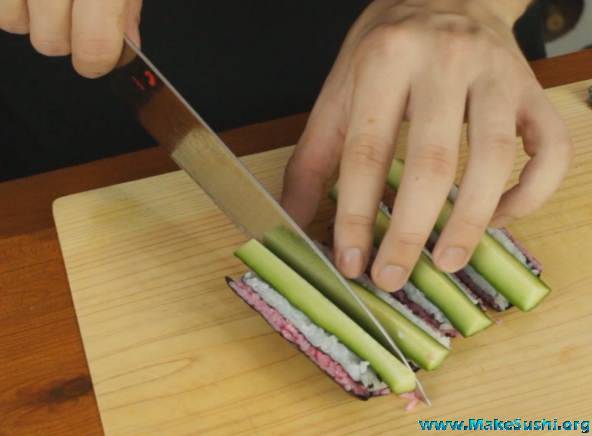
Prior to the next stage, you will need to cut your pre-prepared sushi roll into quarters. Using the position of the cucumber cuts as a rough guide, slice the sushi roll in half, then again into quarters. You may need to hold the cucumber segments in place as you cut, to prevent them from moving.

Step 3: Assembling the Sushi Roll
Take two half sheets of nori and lay them flat, end-to-end on your chopping board. Squish a little sushi rice along the top end of one sheet, creating a strip of rice ‘glue’ approximately 0.5 cm in width. Overlap the end of the second nori sheet and press down with your fingers to help the ends to adhere.

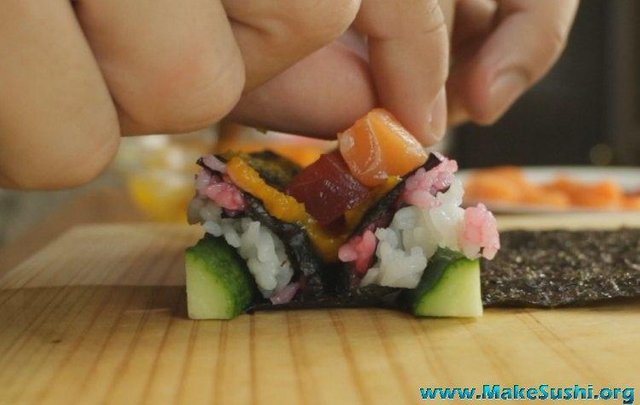
Place two of the quarter sushi roll segments side-by-side on the nori sheet, starting at the end closest to you. Ensure the cucumber segments face in opposite directions, and that when aligned, the segments create a v-shaped ravine between them. Fill the ‘ravine’ with carrot sauce, taking care to ensure that it doesn’t ooze out at each end.
Place a strip of sashimi grade tuna on top of the carrot sauce, then a strip of salmon either side. Top with another piece of tuna. They should all slot together to form a rough diamond shape in the middle of the v-shaped section.

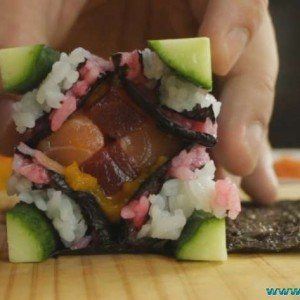
Next, add a little more carrot sauce to the top of the diamond formation. Position the remaining quarter sushi roll segments on either side of the diamond, making sure both cucumber strips face away from each other on the outside edge. Holding them in place with your fingers, flip the entire mosaic square over slowly. Continue rolling, compressing with your fingers as you go, until there is only a narrow strip of the base nori sheet left.
Squish a little rice along the width of the sheet end, then roll once more until it sticks to the sushi roll. You can also use a bamboo rolling mat at this stage to firm up the square and its contents.
Step 4: Cutting the Sushi Roll
To cut the sushi roll, first immerse your knife under a cold tap, allowing droplets of water to run along the length of the blade. Then, cut off either end of the sushi roll, remembering to start with the heel of your knife so the blade glides through. Cut into segments approximately 2cm thick. You will most likely get 4-5 out of each sushi roll.
Serving tip: Mosaic sushi rolls are food art in their own right, therefore the way you serve them really shouldn’t detract from the detail and colors used. The cucumber fan garnish is an ideal center-piece for a plate, and because it looks so organic and natural, it won’t detract from the detail of your sushi roll. For added color, you could also arrange the cucumber fans on a bed of carrot spirals!
This is my content!!!! taken from my website http://www.makesushi.com
That’s very creative!