Game Making with Python and Pygame Part 3
Refactoring Our Code into a MainWindow Class
See the previous parts linked at the bottom of this post if you haven't already.
In this part we're going to change our code from Part 2 so that we have a basic MainWindow class which will control the window and hold the game object when we get that far (unless I realise that this is a stupid way of doing things and decide to change it, of course).
The MainWindow class is going to setup the Pygame window. The parts that don't change are going to live in the dunder-init method __init__() of the class (the Constructor). Things that change, have to be checked or need to be updated regularly are going to live in the class methods. Ideally we'll have a separate class that holds the state of the game and the game logic, with other classes for the different parts of the game, that make up the game itself. Although as we go through this may be subject to change.
We need to start by importing the same modules as previously.
import sys
import pygame
The first section of our previous code initialises Pygame, creates the window and configures is so we'll add those parts to the __init__() method. For now we can add in the part that fills the background with a given colour too, although when we move on to changing this, we may move it to a different section. Finally we can add a line to instantiate a MainWindow object, although this will once more only make the window appear very briefly when we run the code.
import sys
import pygame

class MainWindow:
    def __init__(self):
        pygame.init()
        self.DISPLAYSURF = pygame.display.set_mode((400, 300))
        pygame.display.set_caption('Game Making Part 3')
        self.DISPLAYSURF.fill((100, 200, 255))

game = MainWindow()
The code from the previous tutorial contained an infinite loop which is essentially where our Main Game Loop will live. We'll put this into its own method and call everything else from it.
We'll also need to add a line of code after the line that instantiates the MainWindow object to call the method and start the loop running.
import sys
import pygame


class MainWindow:
    def __init__(self):
        pygame.init()
        self.DISPLAYSURF = pygame.display.set_mode((400, 300))
        pygame.display.set_caption('Game Making Part 3')
        self.DISPLAYSURF.fill((100, 200, 255))

    def main_game_loop(self):
        while True:
            for event in pygame.event.get():
                if event.type == pygame.QUIT:
                    pygame.quit()
                    sys.exit()
            pygame.display.update()

game = MainWindow()
game.main_game_loop()
Running this should achieve exactly the same results as we got previously in the second tutorial, but going forward we'll have better flexibility. We're going to make it so that the fill colour is set randomly every 100 milliseconds (tenth of a second). You might think that this should be done using the time.sleep() method that you may have encountered before. If we do it that way we'd probably end up with code that might look something like this:
import sys
import pygame
import time
import random


class MainWindow:
    def __init__(self):
        pygame.init()
        self.DISPLAYSURF = pygame.display.set_mode((400, 300))
        pygame.display.set_caption('Game Making Part 3')
        self.DISPLAYSURF.fill((100, 200, 255))

    def main_game_loop(self):
        while True:
            for event in pygame.event.get():
                if event.type == pygame.QUIT:
                    pygame.quit()
                    sys.exit()
            time.sleep(0.1)
            colour = (random.randint(0, 255), random.randint(0, 255), random.randint(0, 255))
            self.DISPLAYSURF.fill(colour)
            pygame.display.update()

game = MainWindow()
game.main_game_loop()
The problem with this however is that the time.sleep(0.1) part blocks all of the other code from running for the tenth of a second it sleeps for. Instead what we need to do is to use the built in Pygame Clock object to keep track of how much time has elapsed between each time the loop runs. To do this we would need to change our code to do this instead:
import sys
import pygame
import random

class MainWindow:
    def __init__(self):
        pygame.init()
        self.DISPLAYSURF = pygame.display.set_mode((400, 300))
        pygame.display.set_caption('Game Making Part 3')
        self.DISPLAYSURF.fill((100, 200, 255))
        self.clock = pygame.time.Clock()
        self.time_counter = 0

    def main_game_loop(self):
        while True:
            self.time_counter += self.clock.tick()
            for event in pygame.event.get():
                if event.type == pygame.QUIT:
                    pygame.quit()
                    sys.exit()
            if self.time_counter > 100:
                colour = (random.randint(0, 255), random.randint(0, 255), random.randint(0, 255))
                self.DISPLAYSURF.fill(colour)
                self.time_counter = 0
            pygame.display.update()

game = MainWindow()
game.main_game_loop()
Doing things this way, not only allows us to only update things at a given instance, but also allows us to make sure our game updates at a reasonable speed on slow platforms and doesn't run too fast on quick platforms. Without the clock ticks, we could just leave the code to update the colour of the background whenever the loop runs, but this could be far too fast or far too slow for what we want, and depends completely upon the speed of the machine our code is running on.
We're going to remove the colour part now and have an image as our background. We'll load in the image, and create a rect for it, which handles the size and position aspects of the image and allows us to place it wherever we want in the window (although this time we're going to make the window size dependent on the image).
import sys
import pygame

class MainWindow:
    def __init__(self):
        pygame.init()
        self.background = pygame.image.load("myrock.jpg")
        self.background_rect = self.background.get_rect()

        self.DISPLAYSURF = pygame.display.set_mode(self.background.get_size())
        pygame.display.set_caption('Look At My Rock - Game Making Part 3')

        self.clock = pygame.time.Clock()
        self.time_counter = 0

    def main_game_loop(self):
        while True:
            self.time_counter += self.clock.tick()
            for event in pygame.event.get():
                if event.type == pygame.QUIT:
                    pygame.quit()
                    sys.exit()
            if self.time_counter > 100:
                self.DISPLAYSURF.blit(self.background, self.background_rect)
                self.time_counter = 0
            pygame.display.update()

game = MainWindow()
game.main_game_loop()
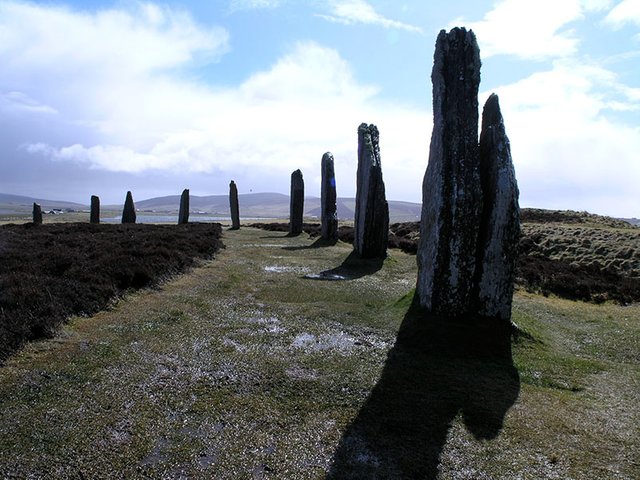
This time I have an image called myrock.jpg which is in the same folder as the Python file, if it's in a sub-folder then you will need to supply the path to it, but this isn't necessarily platform independent so you may find it easier to start with the image in the current folder and work from there. The image is a picture of the Ring of Brodgar I took on holiday a few years ago:

Image by the Author - Amos1969 - Dave A
The caption Look At My Rock is a joke about the most boring game going (called Look at my Rock) that I think came from a comment I read in one of Al Sweigart's Python books Invent with Python
We load the image into its own variable, but then use this to create another rect object which is what is used to manipulate the surface we are going to display the image on. There is a Sprite class in Pygame which groups these two things together which we may investigate later, my usual method is to load the image into one variable and then create a rectangle for the image with the same name and _rect tacked onto the end. Naming them differently has always struck me as the road to madness (I've created Pygame programs with a couple of dozen images, so a naming convention helped immensely).
Notice that we set the size of the window from the size of the image.
As nothing is changing we could do away with the time stuff, but then we'd only have to bring it back in later, so we might as well leave it there for now. Instead of filling the background this time we're going to use an image so we have to blit the image to the rectangle location that's the second argument to the method.
We then call update() to redraw the screen. There are various things we can do so that we only have to redraw parts of the screen etc, but that all comes later on. We could also potentially move the call to update() inside the if statement so that it only redraws when things have actually changed, but for now we'll leave it where it is.
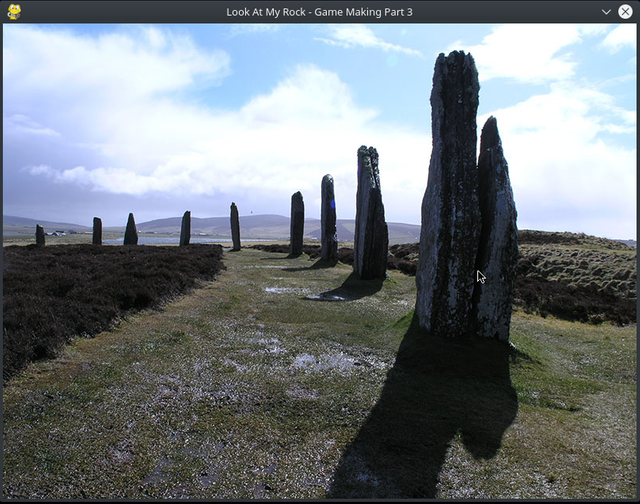
Running the code should give you the following window:

Image by the Author - Amos1969 - Dave A
We'll leave Part 3 there. Next time we'll come back and add in some sprites that we'll make move in the window (probably some bouncing balls). Like and follow if you're enjoying these. If you have any comments or suggestions for improvements or things you'd like it do, let me know in the comments.
Previous parts:
Part 1 - How to get set up with an up-to-date version of Pygame: Part 1
Part 2 - How to make a window appear using basic code: Part 2

Part 4 is now here: https://steemit.com/python/@amos1969/game-making-with-python-and-pygame-part-4
Hello. World. Awesome project! :)