How To Link a JavaScript File to an HTML Document
Hey everyone, here's a quick tutorial that will show you how to link a JavaScript file to an HTML document.
Enjoy!
Video Transcript:
It's very common to keep all of your JavaScript files separate from your HTML files.
This helps you organize everything, especially once your files start to get really big. Make sure that when you build your JavaScript file, you don't put your HTML, CSS, or anything else in there.
Just use JavaScript for now.
We can see here in this document I inserted some JavaScript at the top here. We have a document.write command.
If we save this page and open it, we can see that our JavaScript will be opened up at the very top of our page here on our web page content.
Now, what we're going to do in this lesson, is we're going to take this JavaScript code and transfer it into a separate file and then import that file into an HTML document.
The first thing I'm going to do here is I'm going to create the JavaScript code we had before.
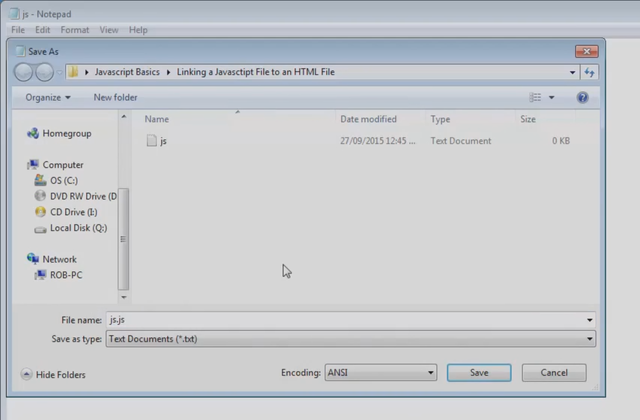
I'm going to create a new file and call it JS. We're then going to open up that Notepad file and we're going to file save as JS.JS.
It is important that you have that JavaScript file extension for this file in order for our computer to know it is indeed a JavaScript file.
We see here that now that file is different and we can delete our earlier Notepad file we had before.
We are now going to open up and edit our new JavaScript file in our Notepad++ or whatever code editor you have. We're then going to take our command here, we're going to copy/paste it, and we're going paste it into our new JavaScript file. We're going to delete what we have here in our script tags as well.
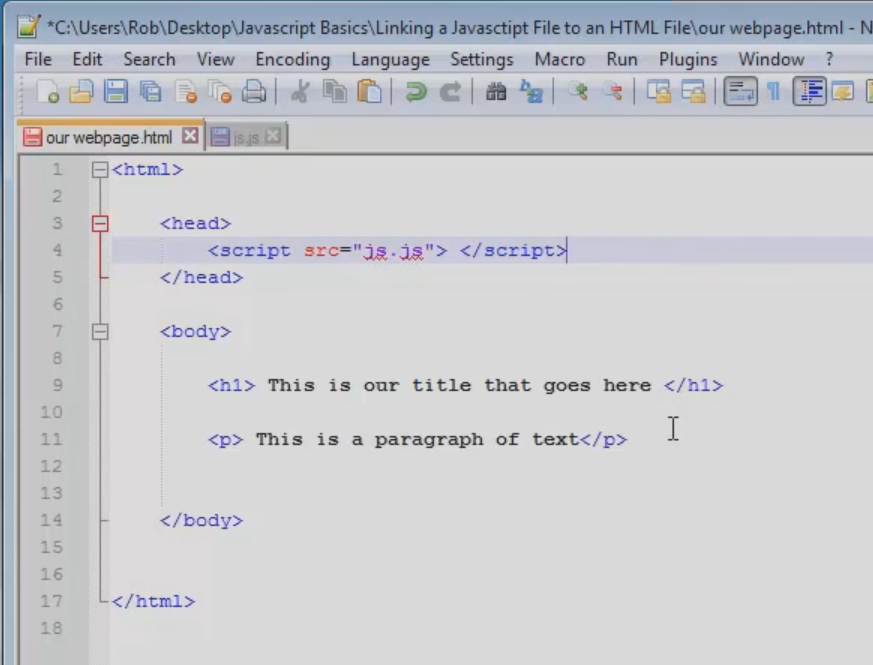
The next step, we're going to add some new tags. We're going to add a head tag here. And basically, the head tags, you don't need to worry about now, we'll explain it later. But just for now, in the head tags, we're actually going to import our JavaScript.
So let's look at this command a little bit deeper. Now with this command, in the quotations, what we do is write the file path to our external JavaScript file. You remember I named our file js.js. So, as long as our file here is in the same folder as our html document, all we have to do is put the name of a file plus the extension, which in our case is .js. Before you preview this, make sure that you save your html document as well as your external JavaScript file.
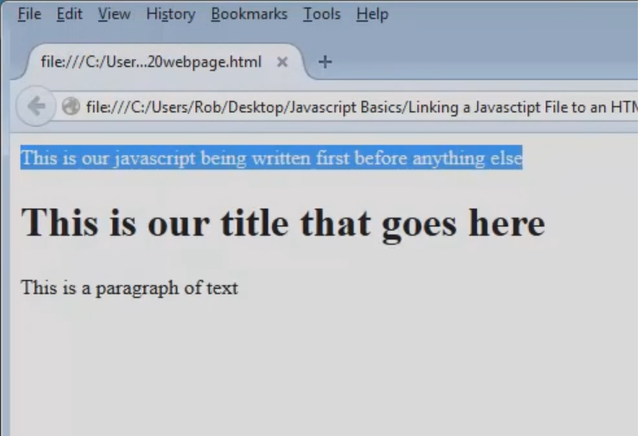
We can see here that our JavaScript code is now displaying correctly in our external sheet.
One thing that I'm going to point out really quickly is that the placement that we have our JavaScript on our webpage can dramatically affect performance and the load ability of our webpage.
Generally speaking, you want to put your JavaScript at the bottom of your webpage if possible, so I'm going to add some footer tags here.
And I'm going to place my JavaScript source file in there as well.
So, now what happens here is that the webpage content will load first, and then our JavaScript file will load right after. You can see here that now our JavaScript code is placed at the end of the document instead of appearing at the top. If at all possible, you always want to place it at the end.
So to sum things up for this lecture, try to keep your JavaScript in an external file that is separate from your HTML and CSS.
This will help you a lot as your web sites get larger and more complex.
Try linking your own external JavaScript file for practice and see if you can get it working correctly.
Cheers!
Robin.


