Java programming for beginners - Lesson 0 - IDE/Hello World
Hello everyone, I have been thinking lately about what kind of content I would like to bring to the Steemit community. This thought process led me to the idea of creating a tutorial series for programming in Java for beginners. I want to do this so that I can cement my own knowledge of Java and programming and develop my technical writing ability.
Although these series use the Java programming language to convey concepts. These concepts will be transferable to most other programming languages.
So to get started with programming in Java there are a few things you are going to need.
JDK
To start programming in Java you are going to need to download and install the Java Development Kit, this can be found at http://www.oracle.com/technetwork/java/javase/downloads/jdk9-downloads-3848520.html
The JDK is a development environment that allows you to build programs using the Java language.
IDE
What is an IDE?
The acronym IDE stands for integrated development Environment. This is a piece of software that is designed to make writing code easier. The IDE can improve development times for programmer by highlighting errors, providing file management, debugging and a lot of other features that we will look at throughout the series.
Choosing in IDE
Now you will want to choose an IDE for yourself. Although this is not 100% necessary and you are able to create and execute Java code using notepad and the command line, using an IDE allows beginners to find their mistakes easily and takes away some of the pains of using the command line. This means that students can focus more on the language and programming concepts.
Three of the most popular IDEs are
NetBeans - https://netbeans.org/
Eclipse - http://www.eclipse.org/downloads/
IntelliJ - https://www.jetbrains.com/idea/
My personal favourite and the one I will be using throughout this series is IntelliJ. If you are planning to follow my tutorials then I recommend that this is the IDE you choose.
Setting up your IDE
So now that you have downloaded the JDK and installed an IDE it is time to set up your development environment.
Setting up IntelliJ
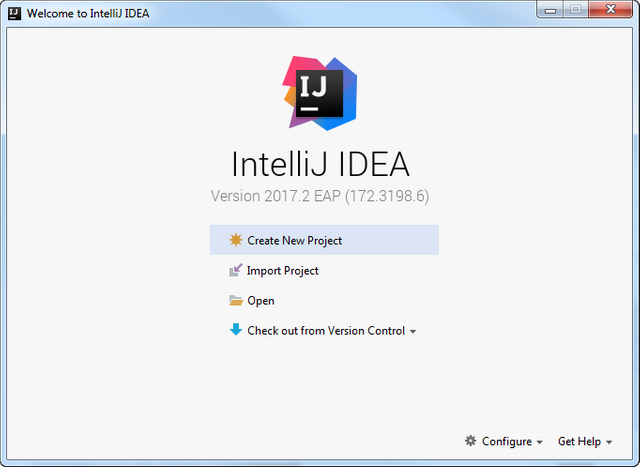
When you first start up IntelliJ you will be greeted by this screen.
You want to click on Create new project.
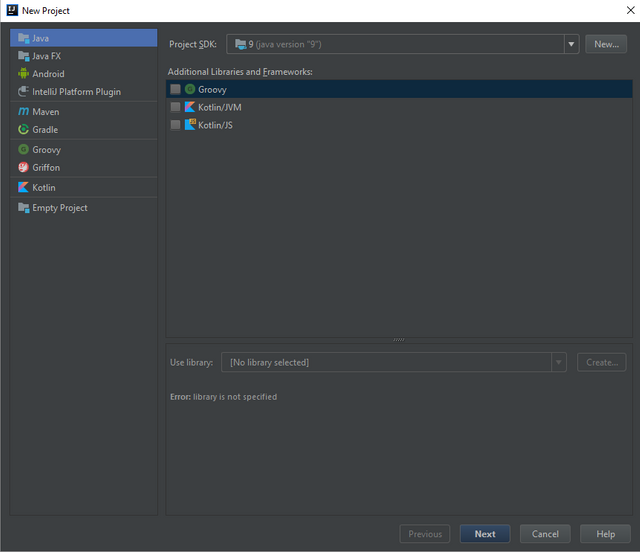
After you have clicked this you will move on to this screen.
On this screen, you want to be looking at the top where it says Project SDK, this is where you want to choose the JDK that you downloaded.
To do this you want to click on new and search your Program files for the Java folder where you will find the JDK you downloaded.
The path file should look something like this C:\Program Files (x86)\Java
After you have selected the JDK you want to press the next button. This will take you to the screen you can see below.
From that screen just press next again. Which will give you this screen below, on this screen you are able to change the name of your project. As you can see I have named mine HelloWorld.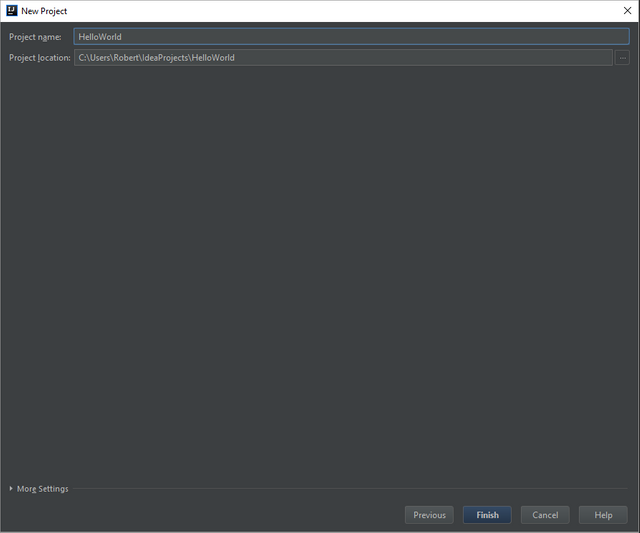
After you have created the project your project will load. To get more familiar with the IDE I suggest using the help function on the toolbar.
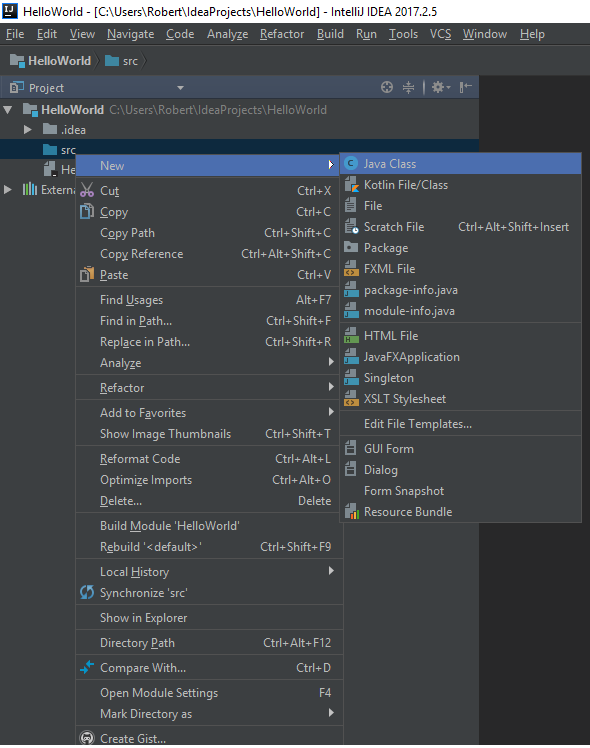
The next thing you want to do is create a class, to do this right click on the folder named src and navigate to new Java class as shown below.
Once you click on Java class a dialogue box will pop up and ask you to enter a name for your class, for the moment use the name HelloWorld.
Notice that the class name starts with a capital letter, this is common for classes in Java but this will be covered at a later date.
Setting up other environments
If you wish to use a different IDE that is fine, you can use Google or Youtube to help you to find out how to set up that particular environment. Most of the priciples will be the same but some of the menus may differ.
Note on IDEs
Whichever IDE or JDK version you choose to use for this beginners series doesn't really matter, most of the stuff I am covering is basic and will be the same for almost all versions of Java.
Hello World
Now that we have a working IDE we can start doing some actual programming.
The first program that we will be looking at is a Hello World program. This program is a rite of passage for most programmers and is the starting point for most programming tutorials.
So here is the code for the program below.
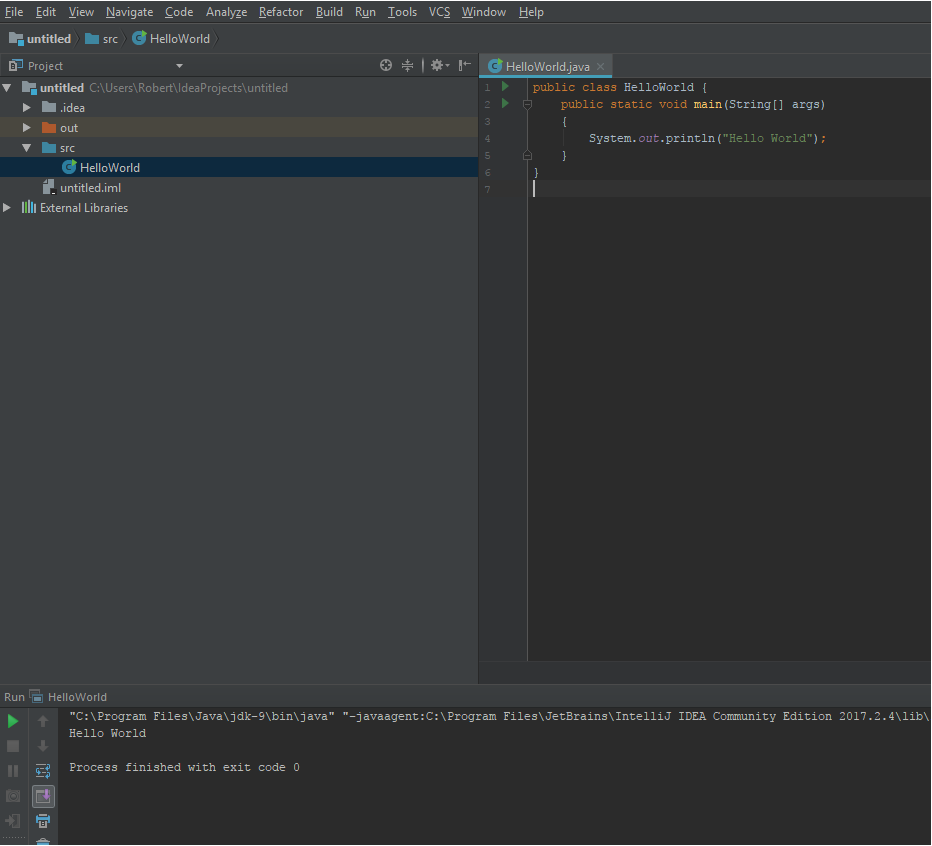
So looking at the code in the program above and dissecting it line by line as follows.
Line 1 - public class HelloWorld {
This is what is known as a class header, I will come back to classes nearer the end of the tutorial series.
Line 2 - public static void main(String[] args)
This is what is known as the main method, it is the starting point for the program. I will come back to what each of the individual words means later on but one thing to note is that a program MUST have a main method.
Line 3 - {
This is an opening curly brace, it is used for grouping blocks of code together. This will become more familiar as we progress through the tutorials.
Line 4 - System.out.println("Hello World");
This is what is known as a statement. This code outputs the text between the brackets to the screen, as can be seen at the bottom of the image above. If you look below the path file you will see that "Hello World has been output to the console.
Line 5 - }
This is the closing brace that accompanies the brace on line 3.
Line 6 - }
This brace accompanies the brace that can be found at the end of the class header, as you can see all opening braces have a corresponding closing brace. This is something you will come to be more familiar with.
How to run the program
After you have coded your HelloWorld program you will want to run it to make sure that your code works. There are two ways of doing this. You can either use the keyboard shortcut Shift+F10 or you can go to the run menu on the toolbar and select run from there.
If you are experiencing any errors make sure that you check your code for mistakes, common mistakes are spelling errors and missing semi-colons.
Challange
Replace the text Hello World on line 4 so that it reads Hello, followed by your own name e.g Hello, Robert.
Remember to include the punctuation marks.
Answer
System.out.println("Hello, Robert");
Conclusion
This program that I have shown here is very simple and it highlights some of the syntax used within the Java language. You are not expected to know what any of this means, it is purely a taster for the language and it will be unveiled throughout the course of the series.
The next tutorial I have planned will cover the topic Variables and will allow you to create a program that can perform calculations.
These tutorials will be constantly updated as I progress through the series
This is the first time I have created a tutorial so any feedback is welcomed. If you think there is anything that I can add, then please feel free to comment below and I will consider adding it.
Thank you for reading and I hope that someone will get some use out of these tutorials.

Do C++ or Python next
I want to focus on Java at the moment but maybe in the future :)
Hi @robertlyon, you have made such a good content here but i have a question:
Is Java eclipse easier for beginners ?
Thats is a good question
Perhaps. I think it is more personal preference, I have only used eclipse very briefly to try it out. My advice would be to try it and see if it is easier for you
This is very clear and concise Java tutorial. I would recommend it to anyone starting to learn the language. Actually, Java happens to be first programming language that I learned. I am new to steemit platform but from this post, you have really motivated by seeing am not alone. Am definetely resteeming this post
Thanks for your input, good to see someone getting some use from it :)
muy bueno .. pasate por mi blog
podras ver mis post y darle voto !! ☺
Nice post.
Thanks for the feedback, I was sceptical about using someone else's video when I was creating the article, I think I will edit it to remove the video as it does make me a little uneasy posting someone else's content
Really nice. Do you have a video?
I have not included a video but have updated the post to show the same information as the video through images.
Great!
Thanks, updated
Great post. I will resteem it. thanks.
Thanks, appreciate the feedback as well, i'll be more diligent before I post next time.
Congratulations @robertlyon! You have completed some achievement on Steemit and have been rewarded with new badge(s) :
Click on any badge to view your own Board of Honor on SteemitBoard.
For more information about SteemitBoard, click here
If you no longer want to receive notifications, reply to this comment with the word
STOPCongratulations @robertlyon! You have completed some achievement on Steemit and have been rewarded with new badge(s) :
Click on any badge to view your own Board of Honor on SteemitBoard.
For more information about SteemitBoard, click here
If you no longer want to receive notifications, reply to this comment with the word
STOP