How to: Embedded Tomcat | Dockerize a Java-Application – Part 2
Hay Steemers,
we created our own REST-Service in Java in the last part of this series, but were not able to launch it. As it is pretty sad to do some work and can‘t try it out, I decided to spend my Sunday and directly create the second part, in which we will add an embedded Tomcat into our application and run it!
What does „embedded Tomcat“ means?
Just to make sure all of you understand the plan, I will start by describing the meaning of „embedded Tomcat“. By “embedded Tomcat” I mean, that we will add the most common Web-Server, Tomcat, directly into our Java-Application. Yes, we could also use a normal, stand-alone Tomcat, but that would mean that you have to take care about the Tomcat-Configuration before installing our REST-Service Java application. With an embedded Tomcat, the configuration is done in the source code of our application and therefore will be added to the version control. Each revision of the application has its dedicated Tomcat configuration.
Another benefit of this is that the dockerization of the application will become a way easier!
Adding an embedded Tomcat to our example Application
To add the embedded Tomcat into our example application, we will start again by adding the needed dependencies to our pom.xml (surprise, surprise).
        (html comment removed:  Embedded Tomcat )
        <dependency>
            <groupId>org.apache.tomcat.embed</groupId>
            <artifactId>tomcat-embed-core</artifactId>
            <version>${tomcat.version}</version>
        </dependency>
        <dependency>
            <groupId>org.apache.tomcat.embed</groupId>
            <artifactId>tomcat-embed-logging-juli</artifactId>
            <version>${tomcat.version}</version>
        </dependency>
        <dependency>
            <groupId>org.apache.tomcat</groupId>
            <artifactId>tomcat-jasper</artifactId>
            <version>${tomcat.version}</version>
        </dependency>
        […]
        <properties>
            <jersey.version>2.24</jersey.version>
            <tomcat.version>9.0.0.M6</tomcat.version>
            <sonar.host.url>http://sonarqube:9000</sonar.host.url>
        </properties>
And again, thanks to Maven, this was pretty easy.
At this point we will also talk about a problem that we will face later: Tomcat will need all those dependencies and configuration files to be able to serve our REST-Service. This task is pretty complex, but thank god, there is maven plugin that can take care of that.
So we will also add this plugin:
            <plugin>
                <groupId>org.apache.maven.plugins</groupId>
                <artifactId>maven-war-plugin</artifactId>
                <version>2.6</version>
                <configuration>
                    <failOnMissingWebXml>false</failOnMissingWebXml>
                </configuration>
                <executions>
                    <execution>
                        <id>war-exploded</id>
                        <phase>package</phase>
                        <goals>
                            <goal>exploded</goal>
                        </goals>
                        <configuration>
                            <webappDirectory>${project.build.directory}/dez1337Example/webapp</webappDirectory>
                            <archiveClasses>true</archiveClasses>
                        </configuration>
                    </execution>
                </executions>
            </plugin>
            <plugin>
                <groupId>org.codehaus.mojo</groupId>
                <artifactId>appassembler-maven-plugin</artifactId>
                <version>1.10</version>
                <configuration>
                    <repositoryLayout>flat</repositoryLayout>
                    <repositoryName>webapp/WEB-INF/lib</repositoryName>
                    <generateRepository>false</generateRepository>
                    <assembleDirectory>${project.build.directory}/dez1337Example</assembleDirectory>
                    <programs>
                        <program>
                            <mainClass>example.steemit.com.TomcatLauncher</mainClass>
                            <id>dez1337Example</id>
                        </program>
                    </programs>
                </configuration>
                <executions>
                    <execution>
                        <phase>package</phase>
                        <goals>
                            <goal>assemble</goal>
                        </goals>
                    </execution>
                </executions>
            </plugin>
I won’t explain this in detail as the configuration is pretty complex and would need a lot of words to be explained clearly. The configuration/plugins above will basically create a folder “dez1337Example” in the target folder. It will contain a “bin” folder containing a startup script for Linux and Windows and all needed libs to run our project. At this point you have two options: You spend some time in getting a maven expert or you just use the snippet above.
Configure Tomcat
Okay, now that we can access all the tomcat classes in our project, let’s start to write some code.
We create a new class, that will launch our Tomcat, so name it something like “TomcatLauncher” and add a new main method to it, because we want to launch the Tomcat when our application is started.
Your code should now look like this:
package example.steemit.com;

public class TomcatLauncher {
    public static void main(String args[]) {

    }
}
Now we add our Tomcat configuration into this class. We basically have to define,
- where Tomcat can find the needed files, which is the webapp directory by default
- the port of the Tomcat-Server which we will set to 8080
- and, due to an bug/failure in the embedded Tomcat libs, the servlet that we want to start.
The final class will look like this:
public class TomcatLauncher {
    public static void main(String args[]) {
        try {
            Tomcat tomcat = new Tomcat();

            // basedir property will be set by the appassembler script.
            String basedir = System.getProperty("basedir");
            String webappDirectory = new File(basedir + "/webapp").getAbsolutePath();

            tomcat.setPort(8080);

            Context context = tomcat.addWebapp("", webappDirectory);

            Tomcat.addServlet(context, "dez1337Example", new ServletContainer(new ResourceLoader()));
            context.addServletMapping("/rest/*", "dez1337Example");


            tomcat.start();
            tomcat.getServer().await();
        } catch (Exception e) {
            e.printStackTrace();
        }
    }
}
The needed “ResourceLoad” class looks like this:
package example.steemit.com;

import org.glassfish.jersey.server.ResourceConfig;

public class ResourceLoader extends ResourceConfig {

    public ResourceLoader() {
        packages(true, "example.steemit.com.endpoints");
    }
}
I think it should be pretty understandable what is happening here. At that`s it! We can now compile and run the project.
Just compile it with “mvn clean install”, jump to the “target/dez1337Example/bin/” and run the dez1337Example.bat file on Windows.
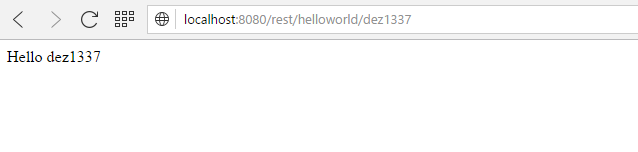
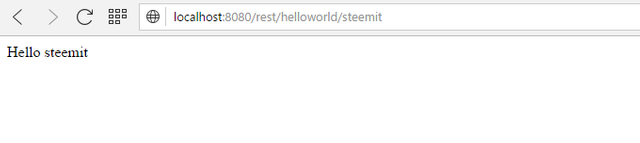
If you now open your browser, you should be able to access our REST-Service under the URL “http://localhost:8080/rest/helloworld/$NAME”. Let’s test if our service works as expected:
And yes – We did it! Great job!
Summary
Today we added an embedded Tomcat into our application and found a way to generate a startup script. Some tests have shown, that our service is working as expected.
In the next part we will finally dockerize this application and than launch multiple applications to prove the scalability of this solution. So stay tunes and make sure to