Let's Build a Modern Website from Scratch #01 - Video Series Introduction
Hello, everyone! Welcome to this series of lessons in which we're going to build a modern website using latest front-end tools, packages and workflows.
What are we going to build?
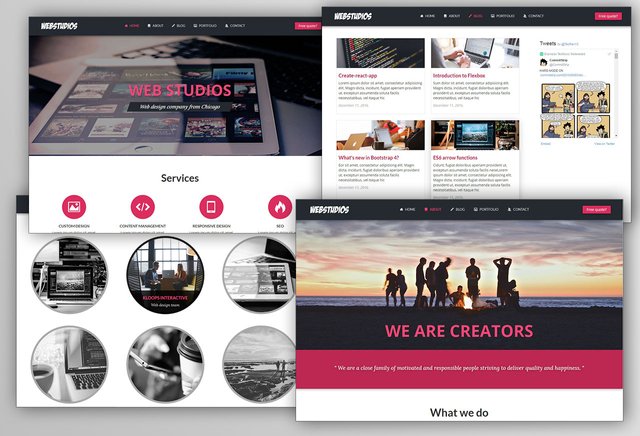
We're gonna create a website for a fictional web design company from Chicago. It will include about, portfolio, blog and contact pages, social media share buttons, twitter and facebook page timeline, really nice animations and many more useful features. Here are some previews:
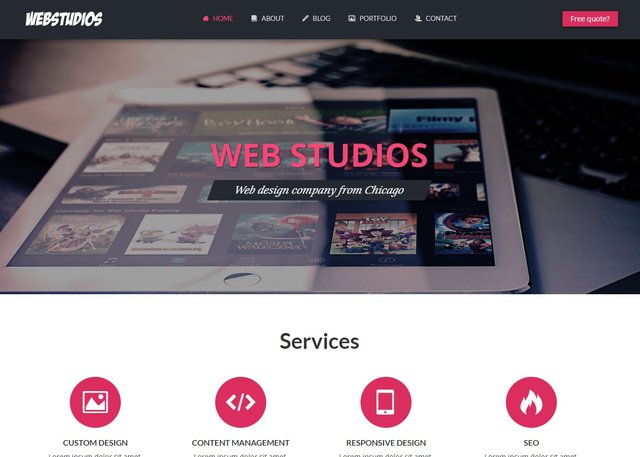
Homepage
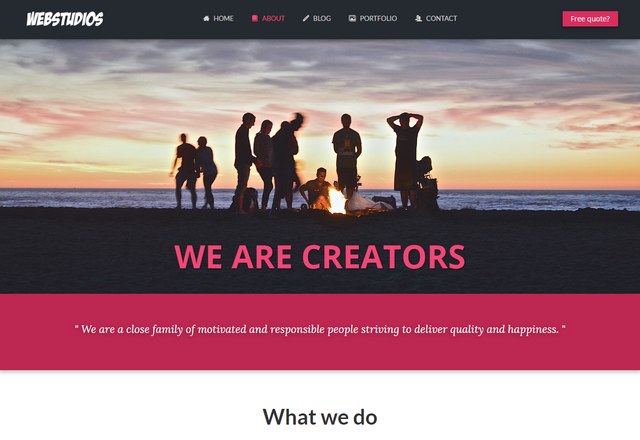
About page
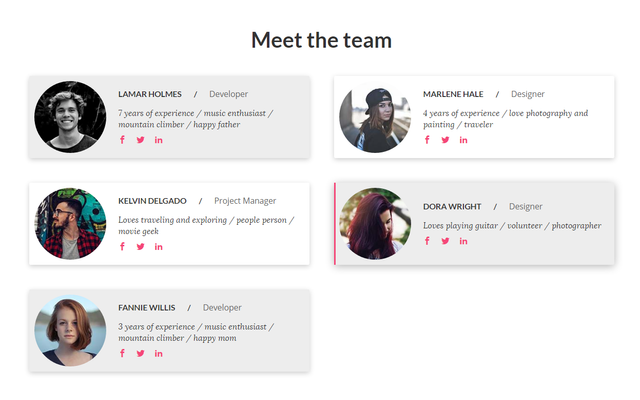
Section with team members
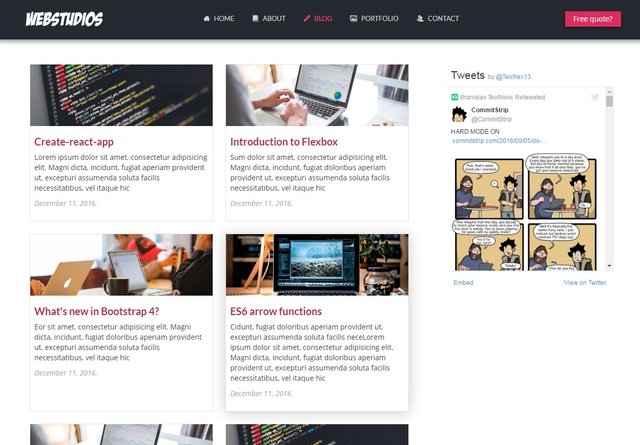
Blog page
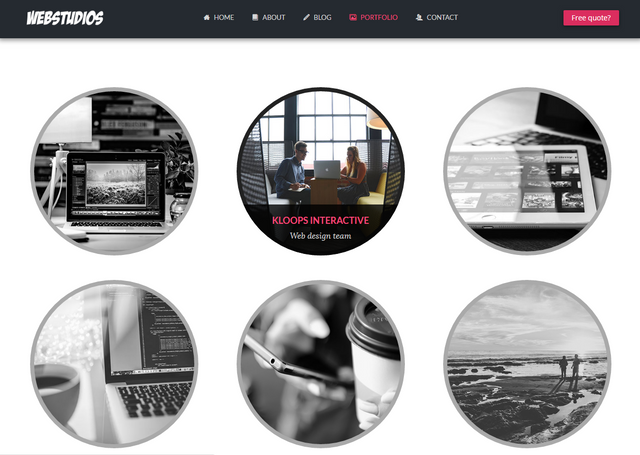
Portfolio page
Here is what we're gonna talk about during this series of lessons:
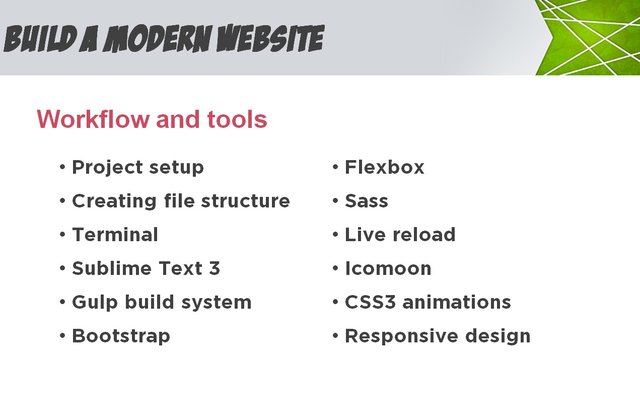
Workflow and tools
We are going to learn how to organize the project, how to create effective file structure, how to use command line interface (it's not that scary as every newcomer feels) to install required packages, run local development server and run build.
We will use SASS, Bootstrap and Flexbox to automate our styling process and make it much more enjoyable.
Gulp will help us compile our SASS files into single CSS file, minify and concatenate Javascript files, optimize images, enable live reloading of the browser as we're typing in the editor and more useful stuff.
I'm going to use Sublime Text 3 as my editor, so If you follow along, you'll learn how to drastically speed up your workflow using various plugins, snippets and shortcuts.
We will see how to create beautiful CSS and jQuery animations while taking in consideration speed and performance.
On top of that, we'll make it responsive so it looks amazing on mobile and other devices as well. The fact is that more and more website traffic is coming from mobile devices, so this step is absolute must nowadays.
What you need to know
Although I am going to explain in detail what I'm doing as we're building the website, it would be best if you have at least some knowledge of:
- HTML5
- CSS3
- Javascript / jQuery
If you are a total beginner and you would like to follow this course more easily, let me know and I'll make an introductory for people without any web development experience.
Of course, any suggestions or questions are welcome!
Let's start
In this first lesson we're going to setup a project, organize file structure and start working on our index.html file.
In our project folder let's create this initial file and folder structure:
webstudios\
  app\
    css\
    fonts\
    images\
    js\
    scss\
    index.html
And in our index.html file we add some starting html structure like this:
<!DOCTYPE html>
<html lang="en">
<head>
    <meta charset="UTF-8">
    <title>Document</title>
</head>
<body>

</body>
</html>
If you have emmet installed in your sublime text, you can use snippet html:5 and hit tab to generate this initial content. Emmet is a plugin for sublime text and some other code editors that allows you use shortcuts and snippets write code more quickly. You can install it in your package control.
Let's add jQuery and Bootstrap in our project. We have three ways to do that. We can install it through npm as a package, we can simply include cdn links from one of the websites that host them like cdnjs.com. And third option which we will use for our website is to simply download them from their websites. You can find Bootstrap on http://getbootstrap.com/ and jQuery on http://jquery.com/download/.
Extract js and css files into their corresponding folders. To include scripts in our index.html file, just before our closing </body> tag, let's add:
<script src="js/jquery-2.2.4.min.js"></script>
<script src="js/bootstrap.min.js"></script>
Note: if you downloaded different version of jQuery, your script name might be different. And let's add path to our css files in the <head> tag:
<link rel="stylesheet" href="css/bootstrap.min.css">
<link rel="stylesheet" href="css/styles.css">
Not is a good time to initialize our package.json file. If you don't know what it is, it is basically file containing all necessary information about our project like name, description, version and dependencies.
To initialize it, let's open our command line window. You can use the default terminal that comes with your system or download one like iTerm2 if you are on mac or cmder if you are on windows.
To navigate to any folder on your hard drive, you need to know just two commands. To change the partition:
[name_of_the_partitions]:
Example: If you are on C drive, to switch to D type: D:
To move to another folder:
cd folder_name\another_folder_name
cd stands for 'change directory'. Or if you want to move back one level type:
cd ../
For example I'll navigate to my project folder from C drive like this:
D:
cd code\frontendland\lessons\webstudios\
Now that we are in our project folder, to create package.json file we need to type:
npm init
The prompt will appear asking you to add information about project name, description, license etc. Once you do that, you'll see that new file called package.json was created. We will change this file later by adding dependencies.
Let's finish this first part of the tutorial here. In the next one, we will create our gulpfile, install required packages and start building our homepage. See you then!