Printing Ball Joints
I guess this is kinda like a small research paper on my findings for printing ball joints. Hopefully it can help y’all or serve as a guide. There’s a tl;dr and a note on the bottom too, thanks.
Ball & Socket Tolerance
Tests were done with a 20mm diameter ball with various tolerances [Tolerances (mm): 0, 0.1, 0.25, 0.5, 0.75, 1, 1.5, 2].
For a ball joint with little to no noticeable play within the socket, tests with a 20mm diameter ball suggest a tolerance/ “difference” of 0.1mm or less between the ball and the socket is optimal. (Ex. 20mm diameter ball & 20.1mm diameter socket.) Values greater than 0.1mm result in play within the socket of the joint.
This tolerance affects friction between ball and socket, “ease of movement” increasing as tolerance increases. The same is is true for the inverse.
The ability to insert and remove the ball from socket is also affected by this tolerance, though this ability is equally, if not mostly affected by the offset in height (Y axis displacement) between the ball and socket.
Y Axis Offset (Height Difference):
Balls can be kept in sockets due to the offset of the ball in relation to the socket. (This way in order for a ball to pop out of the socket it would have to displace the surrounding material of the socket.) Because of this, the offset of ball in relation to socket directly influences the difficulty of inserting and removing the ball from the socket.
Tests were done with a 20mm diameter ball with various tolerances and socket offsets. [Tolerances (mm): 0, 0.1, 0.25, 0.5, 0.75, 1, 1.5, 2. Offsets (mm): 1mm, 2mm, 3mm, 5mm ].
I found that my tolerance rule held true through all the tests, tolerances greater than 0.1mm resulted in noticeable play within the socket.
The greatest offset (5mm) I was only able to get the 2mm tolerance ball in/out of socket without “breaking” the socket. Though as said earlier, this joint had extreme amounts of play.
At a 3mm offset I was able to get 0.5mm-2mm tolerances in. All had great amounts of play (note the 0.5mm was especially hard to remove from socket.)
At a 2mm offset I was able to get all the various tolerances in the sockets (note with the 0mm tolerance I had a difficult time, breaking two of my ball extension handles which I was pulling on to remove the ball.)
At 1mm offset all balls got in and out with little to no effort on my part.
So because I don’t have dissolvable support material I didn’t print the joints whole, here some examples of how I tested.
I thought the 2mm offset with 0.1mm tolerance is the most fitting. Though take note that offset should be regarded as a proportion, in this case offset should be 10% the diameter of the ball.
How?:
I made the base first, then made various tops which let me test different offsets, along with different tolerances. I then made the testing ball and tried to insert and remove the balls from the various sockets at various offsets. Here’s some pics from Onshape a CAD program:
Also here’s a link to the public files on Onshape. I made the top modifiable, all you have to do is Extrude- remove down to whatever offset you want to test. (The starting offset/ height is 13mm btw.)
Basically I made the model by getting the two pieces (Main piece, and the top, and removing the different tolerance spheres (balls) from it to make the different sockets, and extruding- removing down to get the different offsets. Because of this you should note that if you want make you own offset top, you can’t just extrude up from the original plate/ top. You have to extrude- remove down so it makes a socket/ spherical cut, not just a cylinder.
I also don’t recommend printing as a put together piece (The top and main plate).
I recommend printing each part separately. Print the “Main Plate” once and just exchange tops, there is also a model for just single tolerance tests. For those of you who can print with dissolvable support, I’m curious to see at which tolerances the joints are still functional if you print as a single piece :).
Also I recommend shaving off some of the non-essential material if you decide to print to decrease material usage and print time.
Disclaimer/ Note:
There may be errors in my research. This investigation was just me with no prior knowledge on the subject trying to see how I could make functional ball joints to 3d print. This is in no way a test done by some worldly renowned scientist or anything. I just thought my research might be helpful to some, and at the very least provide a frame of reference. Sorry if I misused any terms or anything, I’m sure there are more accurate investigations done by more qualified people, but this is just what I found. So hopefully it can help y’all :). Thanks for taking the time to check it out.
TL;DR
Ball & Socket Joints usually utilize a combination of various offset and tolerances. I tested out a bunch to find what works best for me. (This should hopefully provide a frame of reference should you look to do tests of your own, or design joints.)
I found an offset of 2mm for a 20mm ball (offset of 10% the ball’s diameter), and a tolerance of 0.1mm works best, if the goal is to provide functionality with little play in the socket.
There are links above if you’d like to test out some values for yourself in Onshape a free CAD program.
I also played with ball joints a bit and the nice part of 3D printers are that in some cases you can printing the complete joint. That’s an example I made and it prints as one piece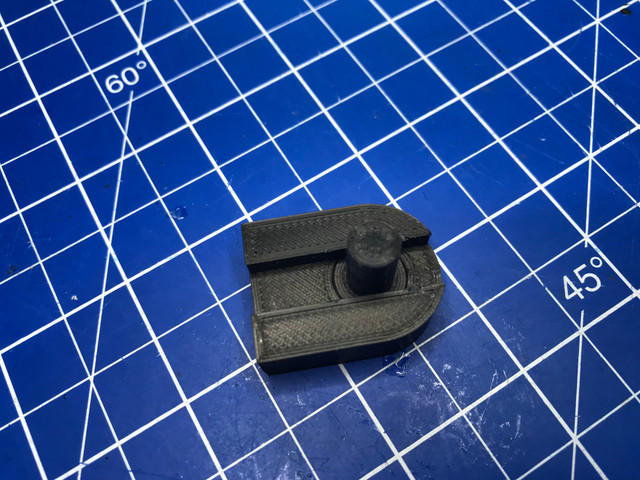
Congratulations! This post has been upvoted by SteemMakers. We are a community based project that aims to support makers and DIYers on the blockchain in every way possible. Find out more about us on our website: www.steemmakers.com.
If you like our work, please consider upvoting this comment to support the growth of our community. Thank you.
Sorry, I was still getting used to steemit when I originally posted and didn't include the appropriate tags.
You can still edit your text :)
Unfortunately it was beyond the time limit to edit.
Thanks for the information, maybe I will try the same trick as you use.
cool post! thank you
if you like, check my newest post about 3d-printing
https://steemit.com/printing3d/@fustfra1/crazy-3d-printed-iris-goggles
@tara-bich