OS for mining on Raspberry Pi3 and best overclock settings
Hello and thank you for visiting my guides, i'm going to be showing you which OS i use on the Pi3 for mining. The main one i use and get the best results on is bamarni pi64, which is a 64 bit operating system that works well on the pi3 and is required to get higher hashrates when mining as a headless system. This is an easy to follow guide and little knowledge of linux or using command lines is required, i will also give you my overclock setting which have been running stable for months and give you that little bit extra. To be clear this is rarely profitable and most the time you will probably just pay for the electricity you use but is something fun to try out with a pi3 and gets you used to command lines if you havent used them before.
What will you need to start?
1x Pi3
1x Small Metal Heatsink
1x Power supply capable of supplying 2.5A @ 5V 24 hours a day
1x Cooling fan (not required for installing OS only when mining)
1x Network cable (can use wifi but lost a lot of speed)
1x 8+Gb Class 10 SD Card
Etcher or other image writing software
Putty or other SSH software
First we need to clear your sd card and make sure no data or previous OS is left on there, then go to https://github.com/bamarni/pi64/releases and download the latest Lite version. Download the zip file and unzip, which should give you the pi64-lite.img which you need to write to card using etcher or another program used for writing images. Setup your pi3, insert the SD card and network cable, then insert the power cable, the first time you do this the OS will be unpacked on the sd card you can view this if you plug a screen into your pi to check it progress, but generally takes no more than 10 minutes for it to be setup and able to receive a connection from putty.
After you have waited 10 minutes for the OS to setup you will see the pi appear on your home network and should have an ip address assigned by your router. You need to copy this ip address and enter it into putty and it will connect to a login screen like below.
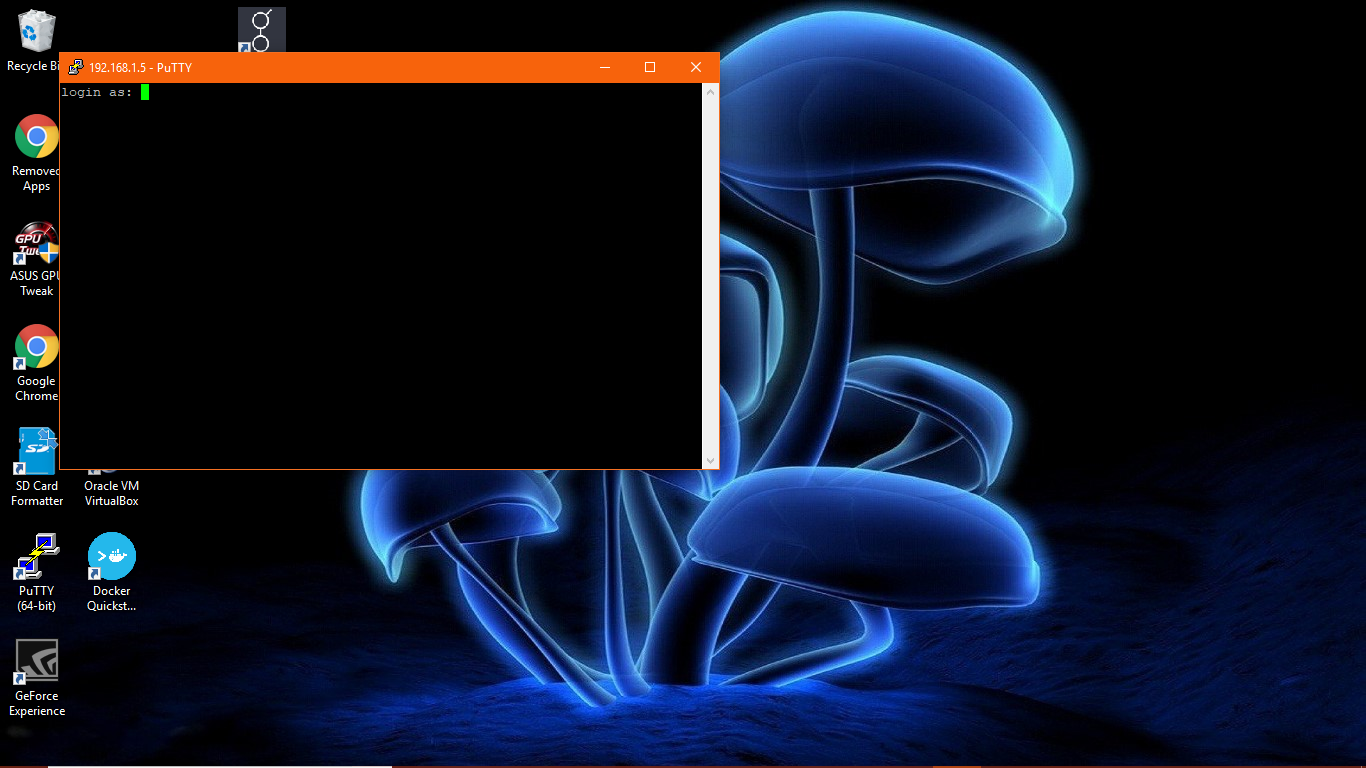
The default username is pi and default password is raspberry, you can change this soon to something a bit more secure. Once logged in you should have the below screen.
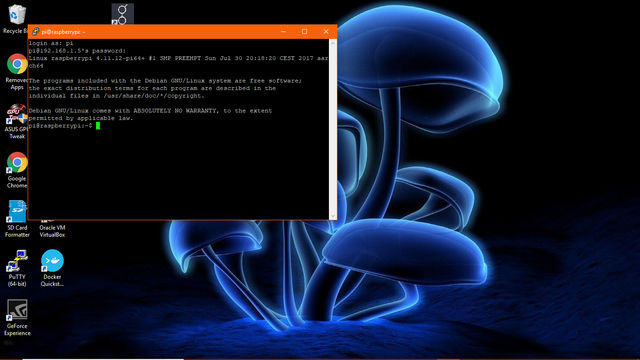
We now need to download the system and kernel updates. We do this by typing in sudo pi64-update then press enter, this will download the latest kernel and update it, it will give you a message to say you will need to reboot for this to take effect which we will do soon, next type sudo apt-get update and press enter this will take 2 minutes to download the necessary updates, one this is finished type is sudo apt-get upgrade, this will bring up a list of dependencies it will install and when prompted type in y and press enter, this will now install most the libraries required to install and run the miner. Once this is finished we now need to reboot, so type in sudo reboot and press enter, putty will flash up with an error that network connection has closed, close this window and re-open putty, connect back to the pi and log back in with the default details.
Now depending whether to push your pi or not to get that little extra hash rate, doing this will void your warranty but makes quite a bit of difference depending on the algorithm and has some days made me a small profit. We do this by overclocking the pi by through the config file, the following settings are over clocking the processor giving it more memory over the gpu. By default the pi64 OS doesnt come with nano so we need to install this by typing sudo apt-get install nano and press enter. Once this is installed type sudo nano /boot/config.txt and press enter and you should get the following screen
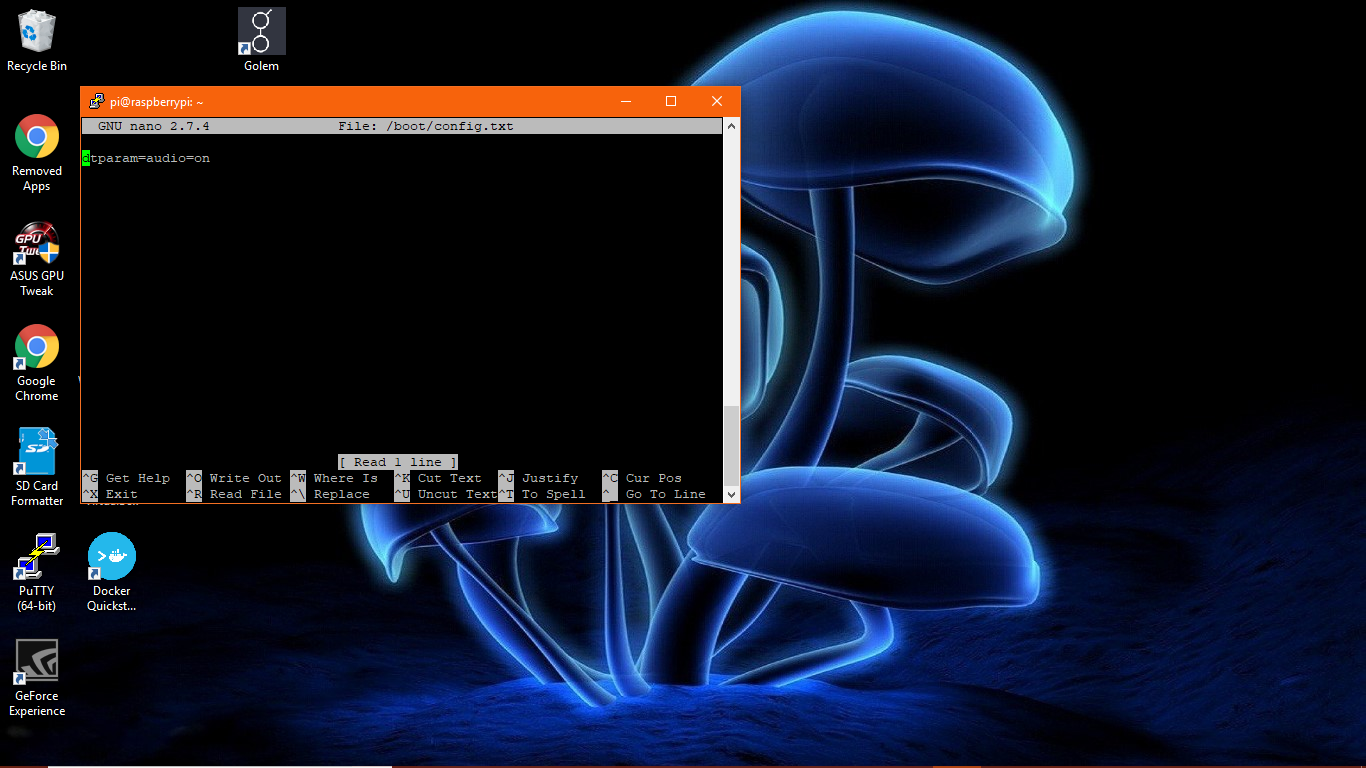
Delete anything currently within the text document and replace it with:
dtparam=sd_overclock=100
arm_freq=1310
core_freq=500
over_voltage=4
sdram_freq=575
sdram_schmoo=0x02000020
over_voltage_sdram_p=6
over_voltage_sdram_i=4
over_voltage_sdram_c=4
v3d_freq=500
gpu_mem=16
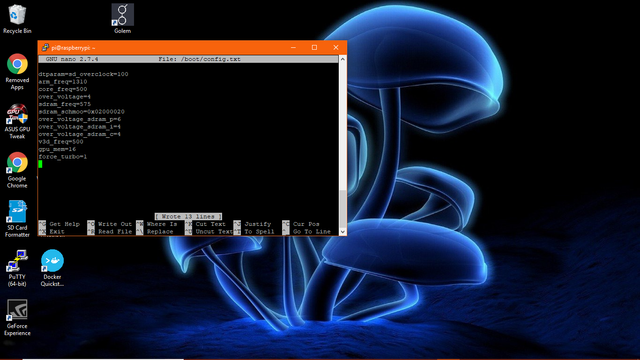
force_turbo=1
Now press Ctrl+O to write the file which should look like below
Now just press Ctrl+X to exit the file to the command line, now you are ready to start installing your miner which will be in following guides i will publish. If you have any troubles installing comment below and i will try my best to assist you.
Thanks Shroom