How to Make an Animated 4-Step GIF in Adobe Photoshop.
HOW TO MAKE AN ANIMATED 4-STEP GIF IN ADOBE PHOTOSHOP
Welcome to another Photoshop Tutorial by @toffer! In this tutorial I wanna teach you how to make an Animated Gif using Photoshop. Like this one with a little smiley cartoon guy. It is a simple animation with just 4 frames.
Procedure:
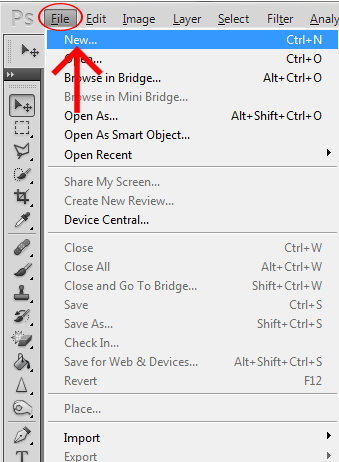
STEP 1. First thing to do is create a New image. On the top left panel click "FILE" and find "NEW" or simply click "CTRL + N".
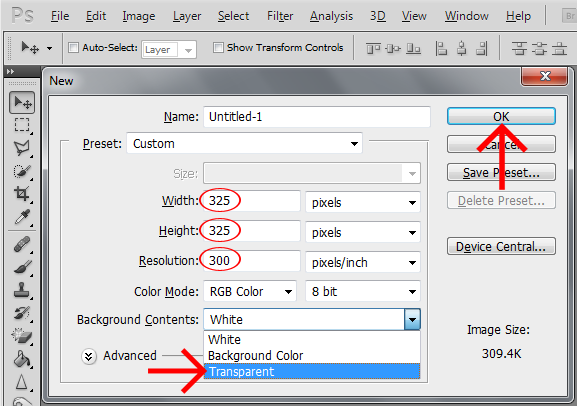
If the pop up menu is open you can change the size of the Width. I set mine to "325" pixels, the Height is "325" pixels too, the Resolution is "300" and for the Background Content I used "Transparent".
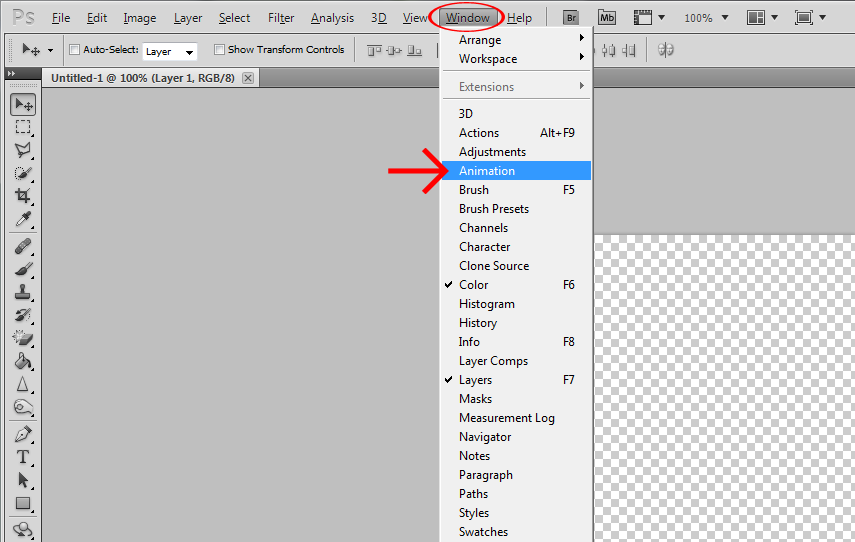
STEP 2. The Animation window is not shown by default. For Photoshop CS5: Open the Animation palette (Window > Animation).
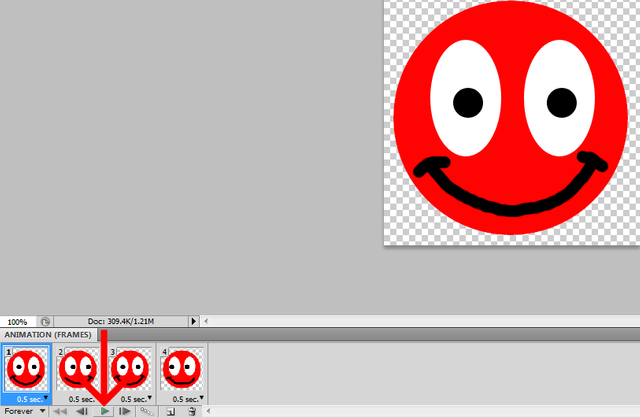
If you can look at the Animation window it looks like this, which is a Timeline view for simple Animation with a few frames. It may be best just to go in (Convert In Frame Animation) for each frame to be one step.
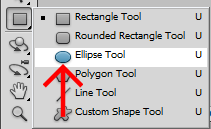
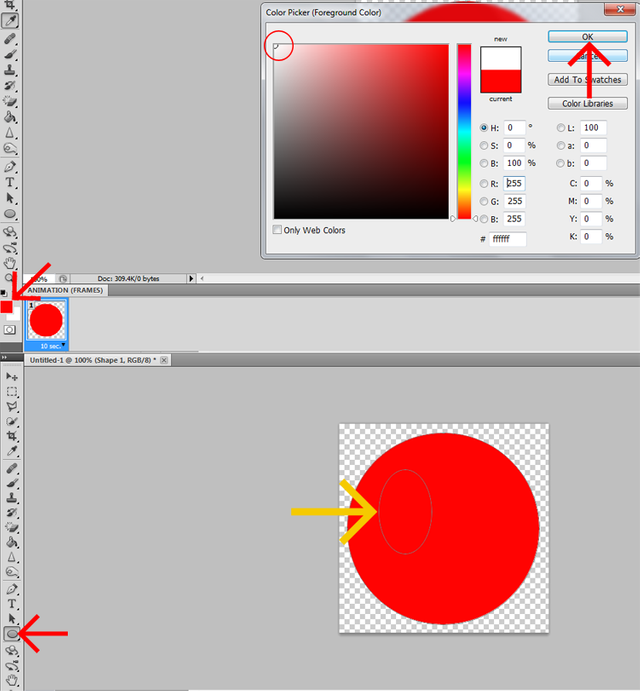
STEP 3. To create this little man I used (Ellipse Tool). Go to (Shape Tools) and click (Ellipse Tool).
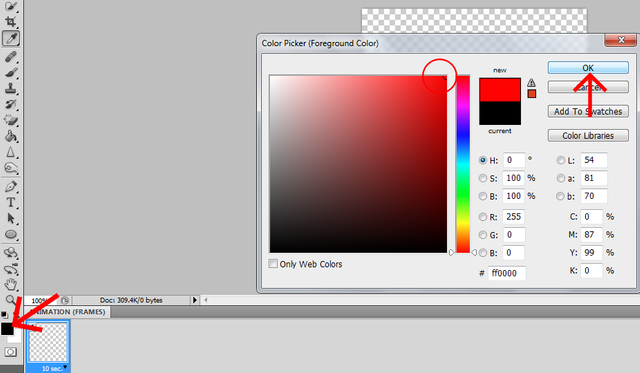
Choose the color of your little man by going to (Set Color ForeGround) and if the Color Picker pops up you can pick your color from the options. I chose the color red and clicked on OK.
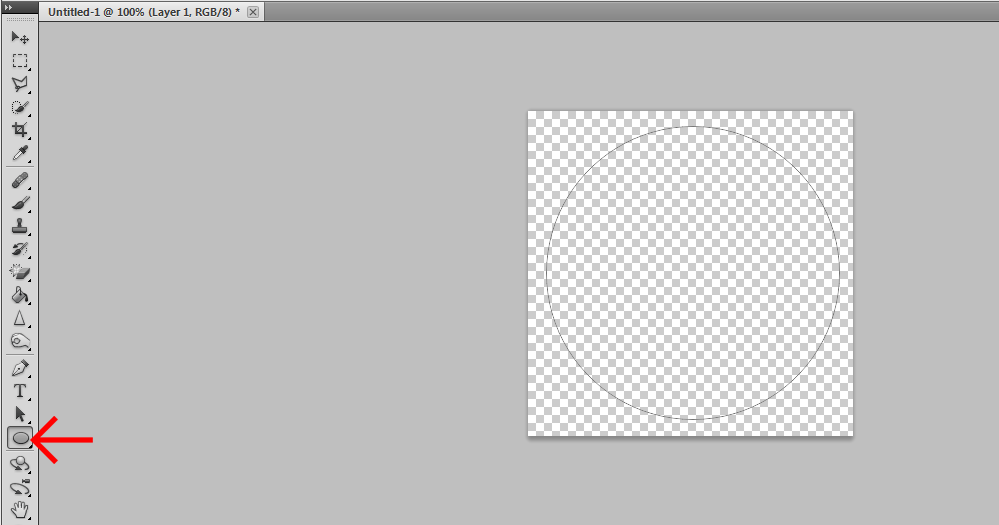
STEP 4. Create a shape using Ellipse Tool by just dragging the Ellipse Tool to Transparent background. To create a perfect cirlce hold (SHIFT + LEFT KEY). Once you've created the desired shape just release your click on the mouse. If you want the circle to move to the center just use the (Move Tool).
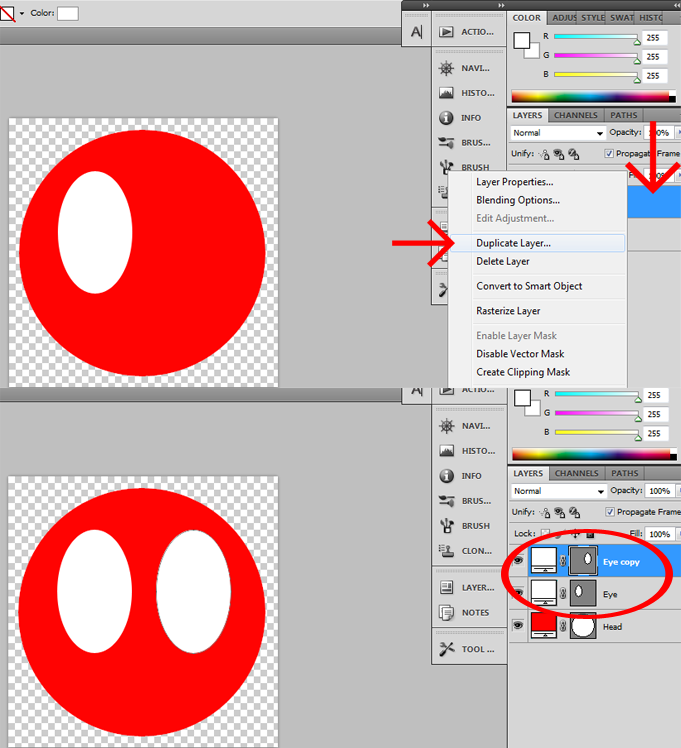
To create eyes, again use the Ellipse Tool and choose the color you want on the Color Picker. I choose the color "WHITE" and clicked on OK.
Drag the Ellipse Tool to the first Shape Layer. If you have created one eye just duplicate the shape eye layer to get another eye. Go to the eye layer and right click on the Mouse and choose the (Duplicate Layer) or simply click (CTRL + J) on your keyboard.
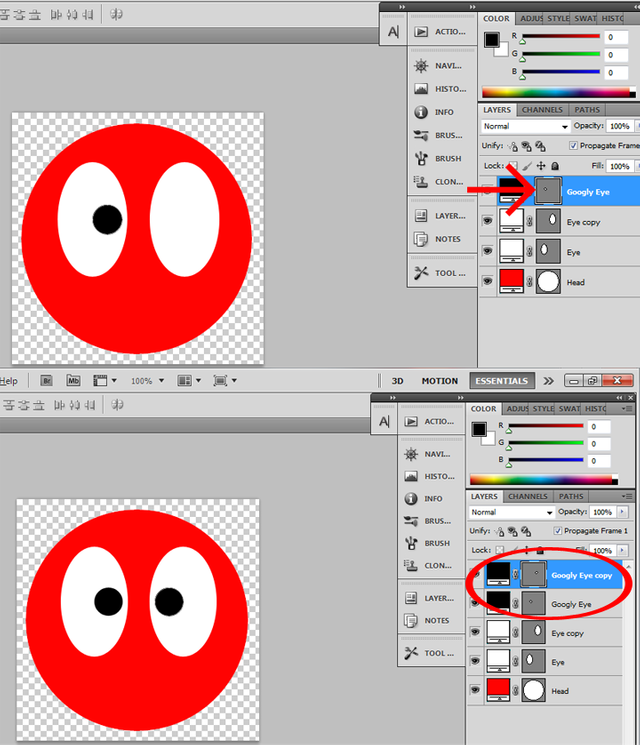
To create googly eyes just follow the same steps on how you've created the Eyes earlier.
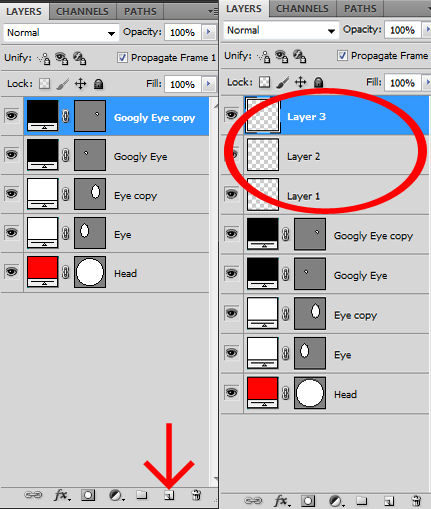
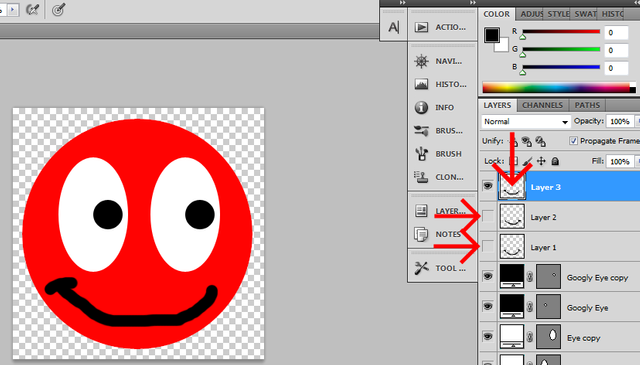
STEP 5. Create a 3 new layer go to (Create a New Layer) and click 3 times you need these 3 new layers to create a mouth.
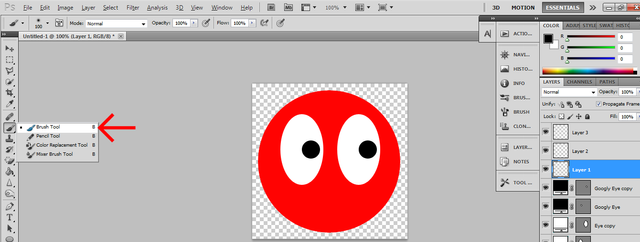
First mouth: Click Layer 1 and go to the (BRUSH TOOL). Select the Brush Tool or simply click the letter "B" on your keyboard.
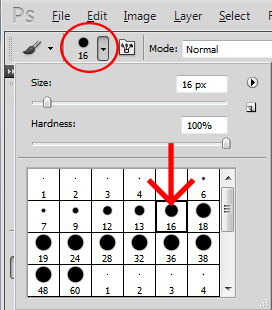
You'll need a hard brush for this. Just go to the (BRUSH PRESET PICKER) and select it from there. The number of brush I picked was (Hard Mechanical 16 Pixels). If you want to change the size of brush just click [ to make it smaller or ] to make it bigger and choose the color you want in the Color Picker, I picked the color Black.
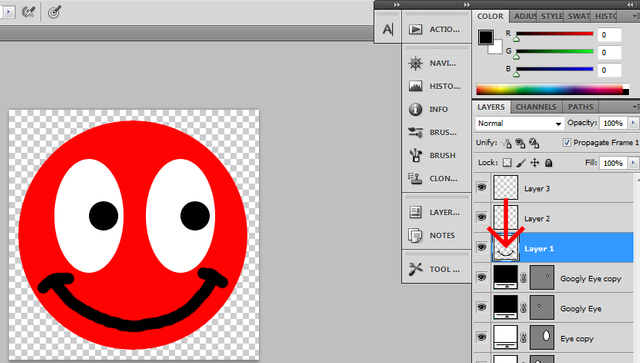
To create a regular smile just drag the Brush Tool to the Layer and draw a smile. I drew mine with cheeks.
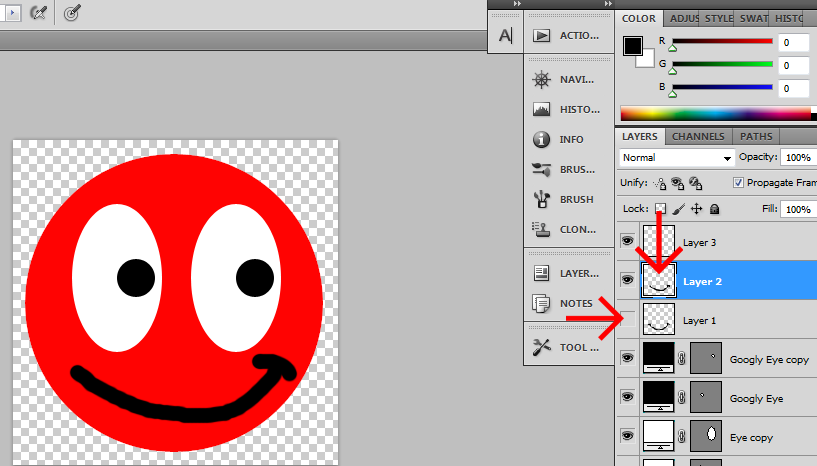
Second Mouth: Click Layer 2 and draw a mouth just draw in on top of the First mouth. If you have the second mouth showing just click the (LAYER VISIBILITY) or the eye logo of the Layer 1 to hide it then create another cheek on the right side.
Third Mouth: Click Layer 3 and draw a mouth. Just draw it on top of the Second mouth. If you have the third mouth showing just click the (LAYER VISIBILITY) or the eye logo of the Layer 1 to hide it. Then create another cheek on the right side. I think now is the right time to animate this little man.
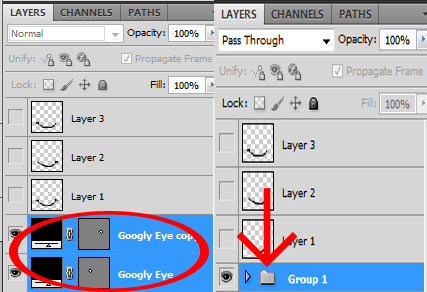
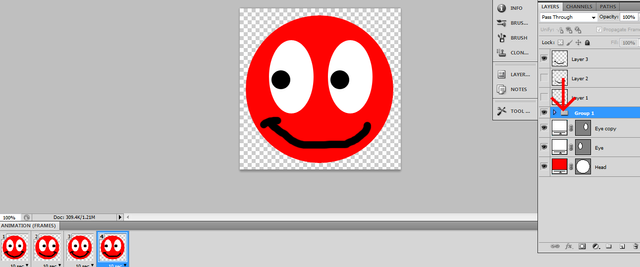
STEP 6. One more thing you need to compress the Googly Eye and Googly Eye copy layer just hold (CTRL) click two layer if the layer make a highlight just click the letter "G" on you keyboard to create a group layer.
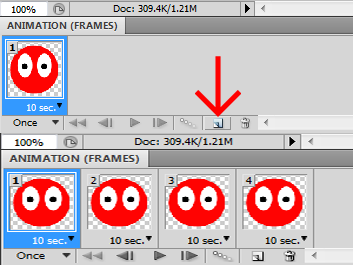
STEP 7. Go to (ANIMATION FRAMES) or Timeline and create frames. I created a window for this frames just click the (Duplicates Selected Frames) and select the first frame. This how to make the animation look to the side.
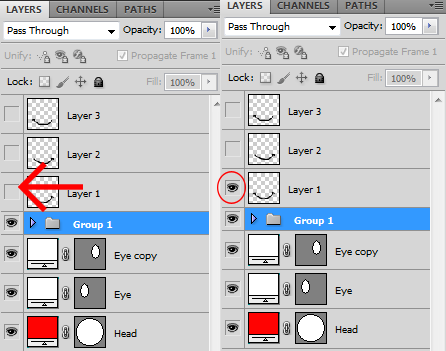
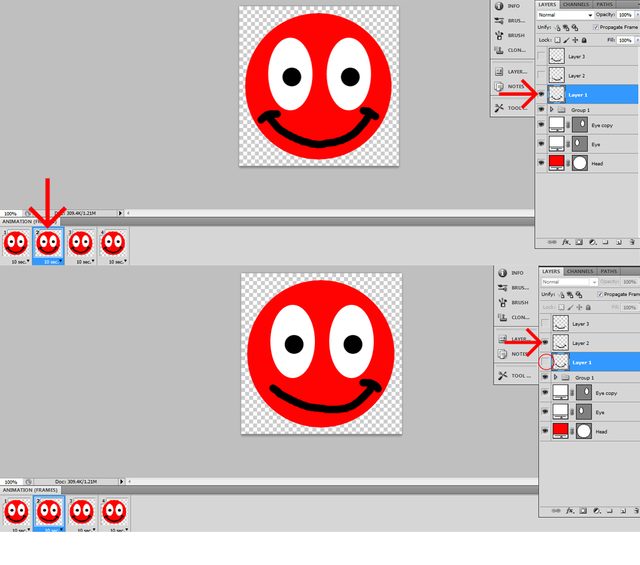
STEP 8. Turn on the Smiley Layer 1 just click the blank square box of the left side of the Layer 1
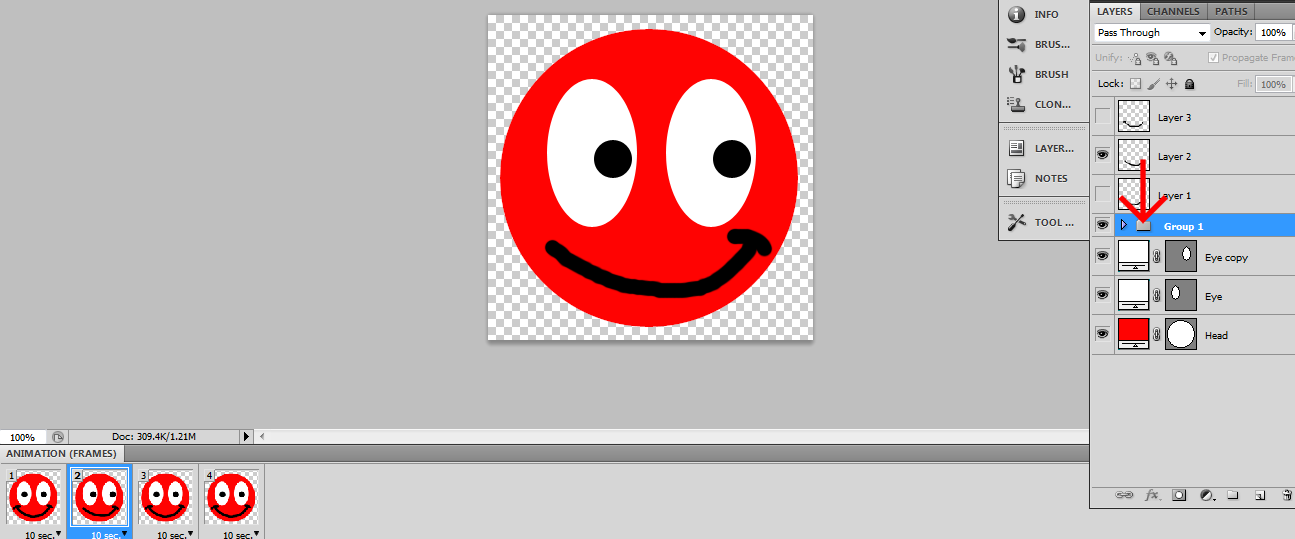
Click on the Frame 2 and hide Layer 1 by clicking the eye logo and turn on Layer 2 just click the blank square box of the left side of the Layer 2.
Click the Group Layer and move the Googly Eye use the move tool. I moved the eye into the right side.
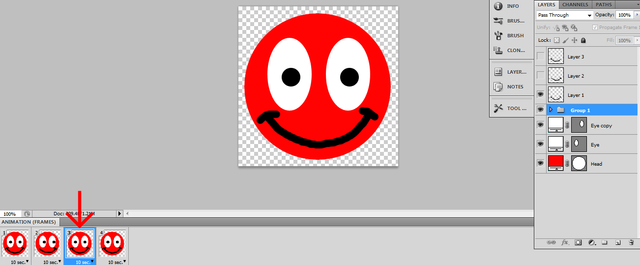
Click the 3rd Frame just leave him in the center.
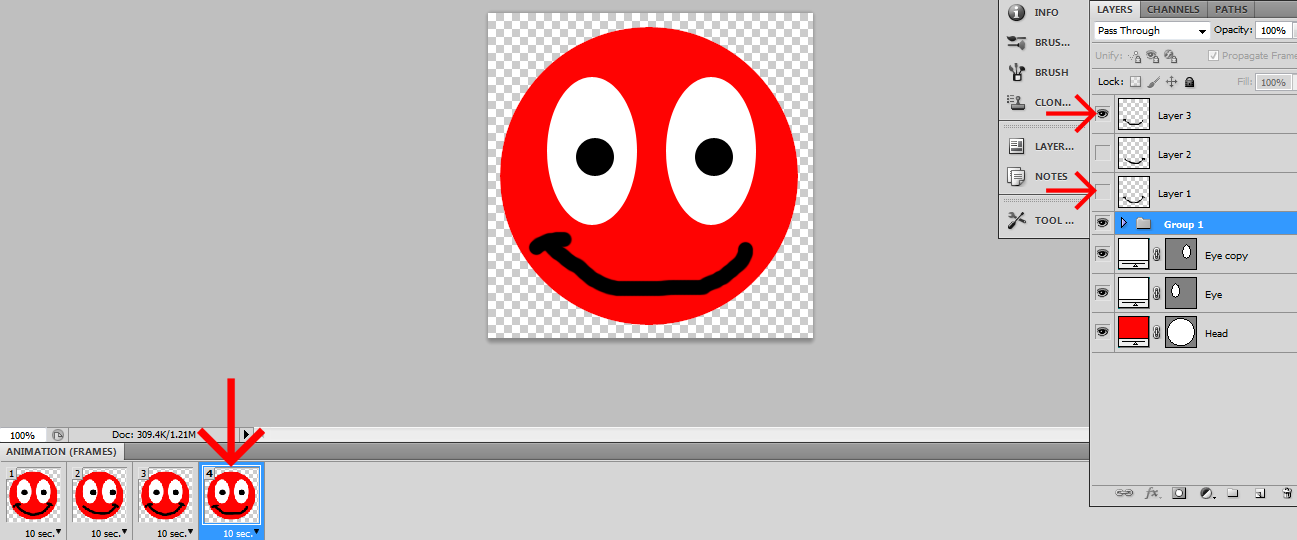
Click the 4th Frame hide Layer 1 by clicking the eye logo and turn on Layer 3 just click the blank square box of the left side of Layer 3.
Click Group 1 Layer again and move the Googly Eye. Use the move tool I moved the eye onto the left side.
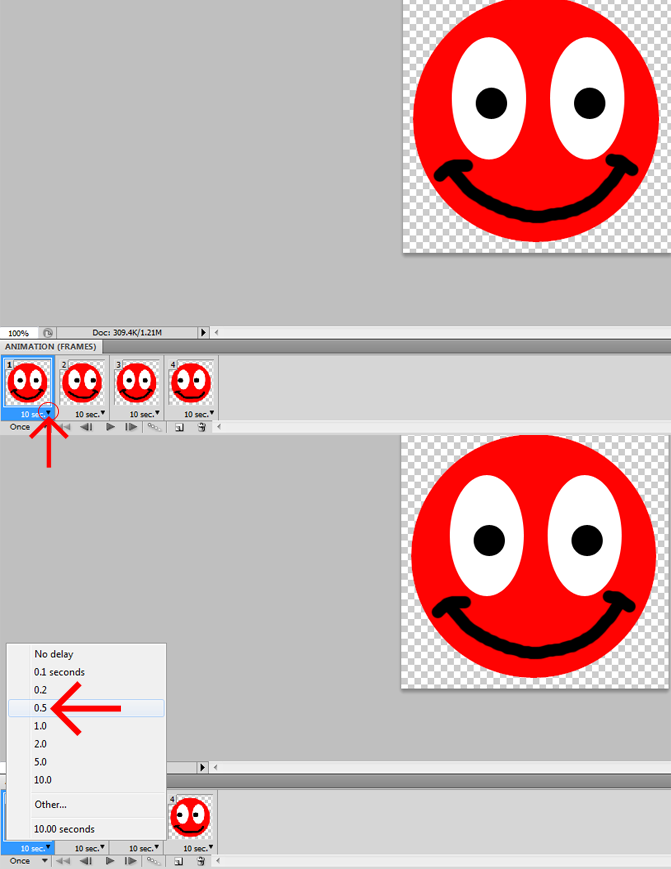
STEP 9. At the buttom is where you can see the seconds of each frame I wanted to change that to be only half a second. Just click the the arrow down and if the pop up menu is open choose the time of the frame you want. I chose 0.5 second
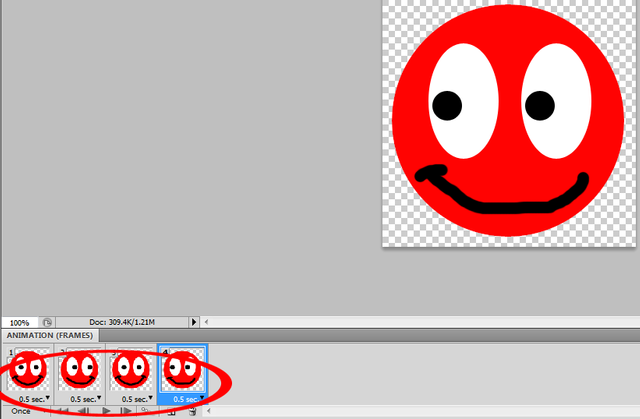
Click all the 4 frames to change the number of a second of your frames you can pick the second and change it to whichever you want.
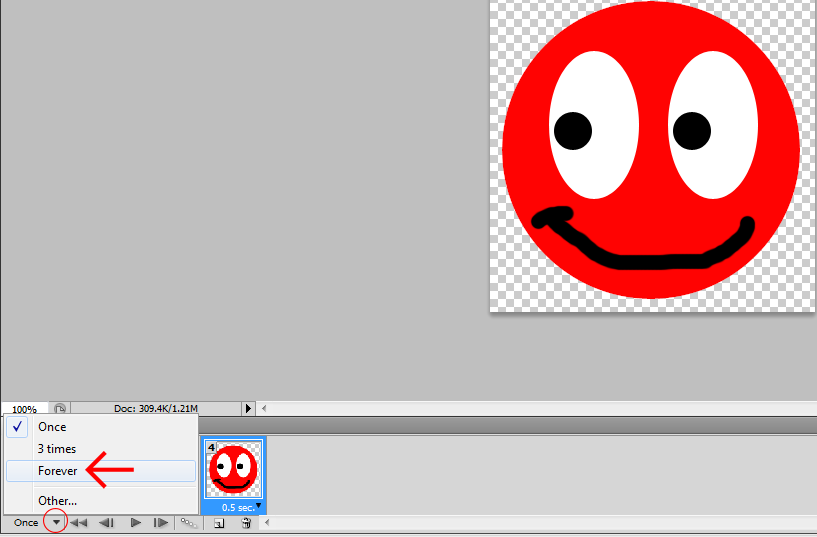
STEP 10. To choose how many times the animated piece repeats click the (Selects Looping Option) or the arrow down. I wanted to choose "FOREVER".
If you want to play the animation just click the (PLAY BUTTON) so we can have a look at the animation when everything's done.
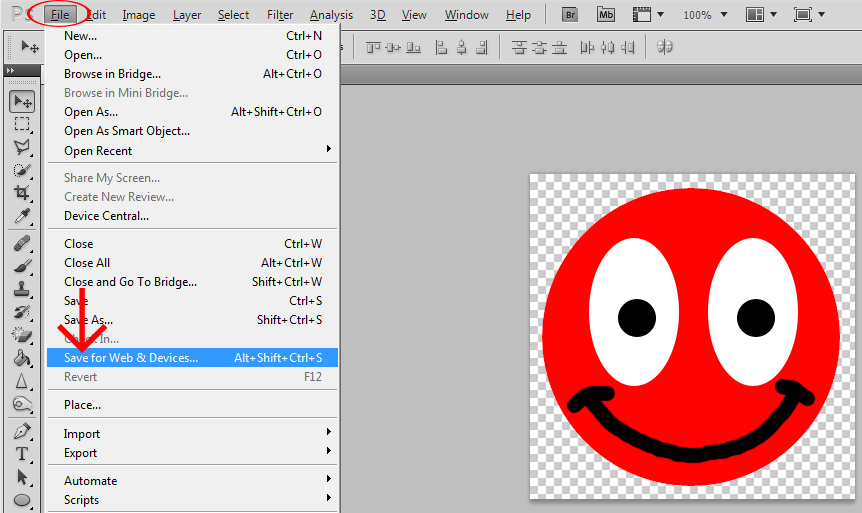
STEP 11. To save your Animation project, go to "FILE" and click "SAVE FOR WEB AND DEVICES".
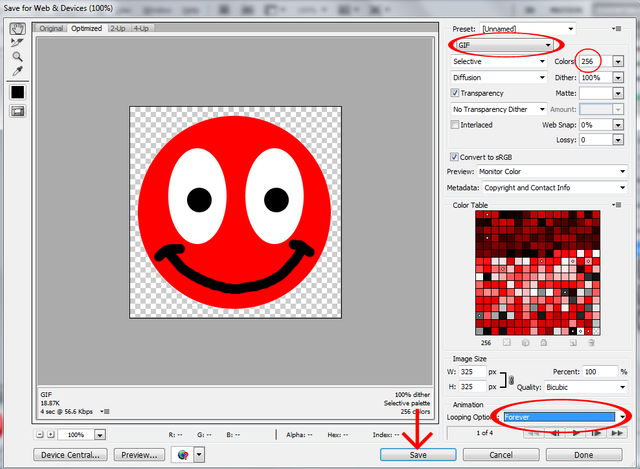
If the pop up menu is open make sure the format of you project is "GIF" just click the down arrow and click GIF. Make sure you have enough color just click the down arrow of the COLORS and choose what ever you want I set the COLOR to "256" and make sure the animation setting is FOREVER just click the down arrow of the LOOPING OPTION settings and click FOREVER and if have done just click SAVE.
You will now have an animated GIF

Here are other 4-Step Gifs:
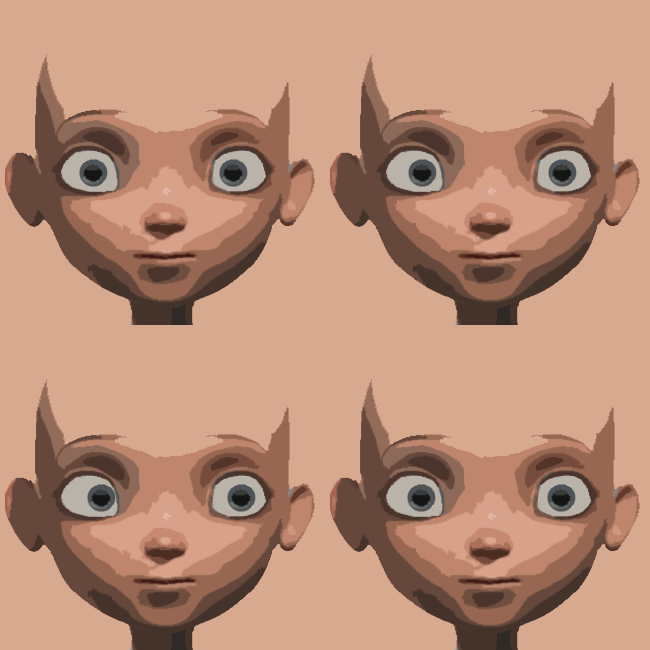
Here's a 4-Step GIF with moving eyes, Image Source Here. This was made using moving layers.

Here's a 4-Step GIF of Mickey Mouse with moving ears, Image Source Here, this was made using moving and free-transformed layers.





This is really a helpful tutorial for beginners. Making GIF is fun. The way you've explained is very effective @toffer
Thank you for your wonderful feedback @steemafia.. I hope this tutorial really helps you!
hi friend have a nice day man
Have a nice day frend @waqarhasan..
Thank you very much for kind information.
I am very glad to see it!
Your welcome @Steemjeet.. I so glad to hear that!
@originalworks
The @OriginalWorks bot has determined this post by @toffer to be original material and upvoted(2%) it!
To call @OriginalWorks, simply reply to any post with @originalworks or !originalworks in your message!
Thank you @originalworks
hi friend have a nice day man