Digital Photography - High Dynamic Range (HDR)
Understanding High Dynamic Range
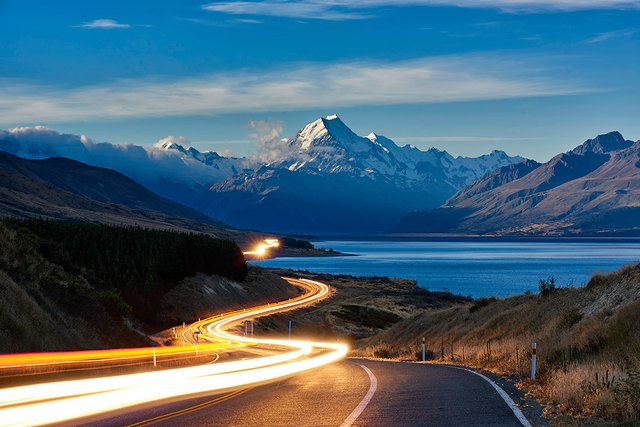
Image Credit
First of all, I need you to understand that this is an advanced technique in photography, but as I always say, the more you know, the more you can apply, and the more you apply/practice the more professional you can become. But you will need good editing software to get the final result, not necessarily the best camera.
Now that all the mambo jumbo is out the way........what is high dynamic range? The simple explanation is those very detailed photos that capture your attention based on clarity in the entire photograph.
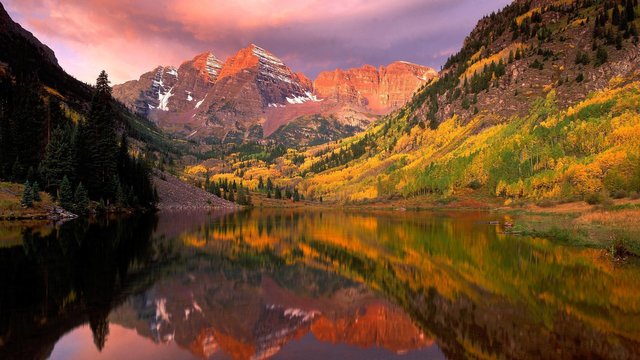
Image Credit
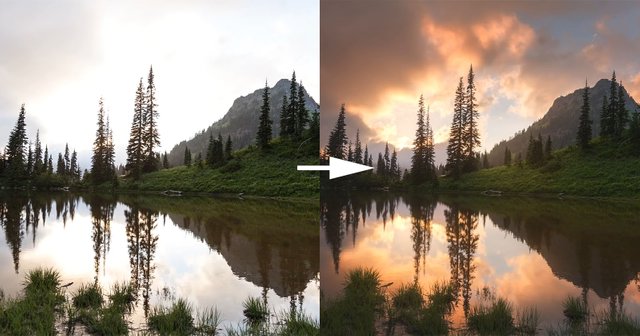
The complicated explanation is based on exposure, as in the end the target is to expose the shot correctly to resemble the closest image that the human eye displays when looking at the scene. This however is difficult to achieve as the human eye has a dynamic range of approximately 10,000:1 and a very good camera has a dynamic range capacity of 1,000:1.
So basically we can see dark shades and very bright lights at the same time, where the camera is limited to expose for either shadows or for bright light, it can't expose for both at the same time, as you will have aspects of the photo that will be overexposed or blown out where bright lights are present if the exposure is set to capture details in the shadows.
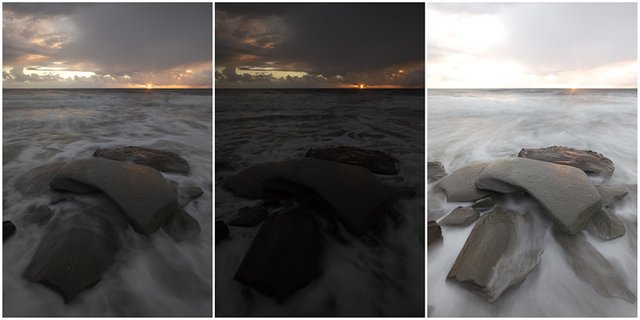
Image Credit
And the opposite is true when we expose for bright lights, we would loose all the details in the shadows as we would change the settings to let in less light to avoid over exposure, but then the shadows will be black with little to no details and noise will be introduced in those shadows.
How to Take a High Dynamic Range Photo?
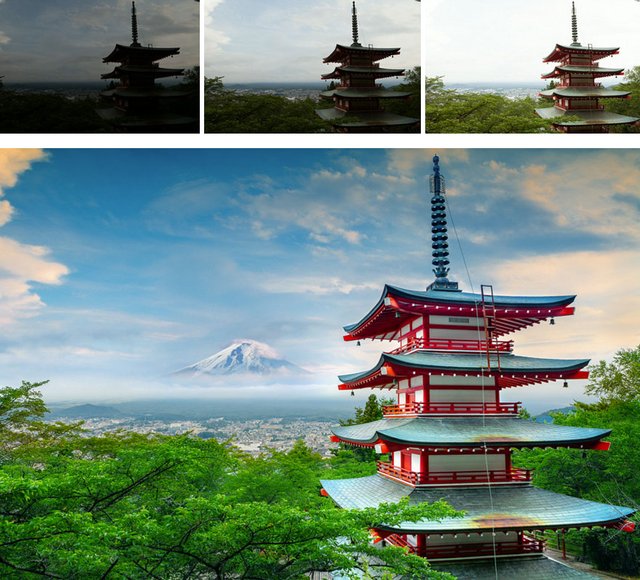
Image Credit
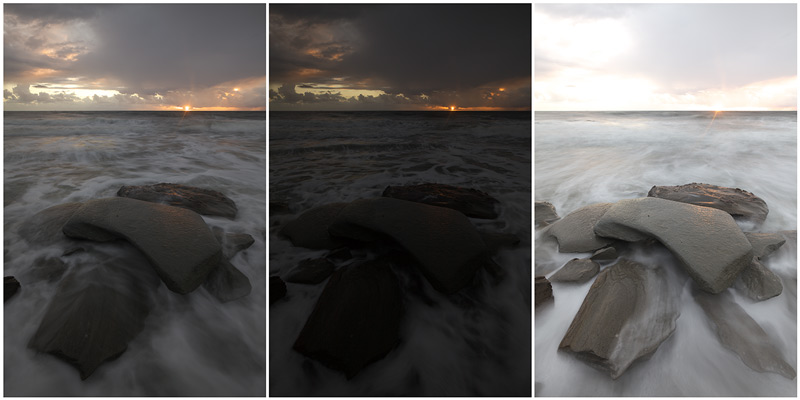
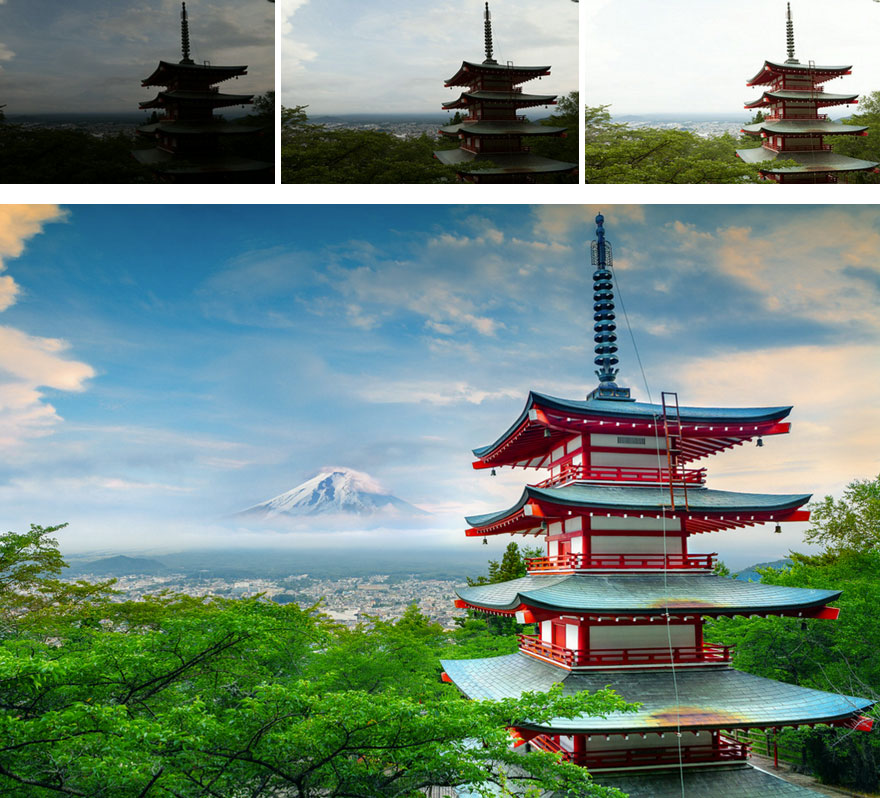
There are a number of ways to take an HDR photo, but I will only discuss bracketing today. One of the tools that are vital to an HDR photo is a solid tripod, as you want as little movement in the image as possible and the same composition through the range of photos or else your software might not be able to synchronize the captured images.
Most of the modern digital cameras have a built in feature called bracketing, and its basic function is to take a range of pictures, either 3 or 7 shots, ranging from underexposed to normal exposure and finally overexposed images. This provides detail for the bright sky or background (Underexposed). The normal exposure provides details in the mid section of the photograph or your main subject, and the foreground or shadows details are provided by the (overexposure).
As is illustrated in the images, the final product is far more superior once all the images are combined to give the best exposure for the entire dynamic range, than any single one photo captured.
The best settings for taking such images is a high f stop aperture f/16 for example to get a clear depth of field, then you want as little noise as possible, so the lowest ISO setting available, and so the only change you should make to the camera would be shutter speed, to get the varying desired exposures.
Understanding your software is a very important aspect of getting the desired outcome from all images captured, whether you use Lightroom, Photoshop or any other software, make sure you understand the merging or layering process. Play around with your editing until you are comfortable using your software, the more you practice the more professional your work will look at the end of the day.
I like the technique you described. It is elegant for landscape photography especially. I have a question can we use Photoshop cc for editing
Thank you, I am glad the info as helpful, I do believe that you can use photoshop cc, you can merge the images with layers, and then removing aspects of each layer you don't want, to give you the best end result.
Interesting post
In videomaking dynamic range is important especially in low light, I usually use a semi-auto setup with fixed aperture and auto iso, as a vlogger it’s the best choice
Now I need to gain more experience in video making, as that is an aspect that can really widen my scope, thank you for sharing, I will give video making a chance, just scared I might not like the outcome.
Glorious photos! Thanks for sharing! Keep up the good work!
Fantastic photography 💙
Thank you for the kind words.
Thank you for sharing dear it is amazing and information for every one.really helpful post for us.
Amazing post dear........
keep it up.
and please friends follow me.
@mahmoodhassan
And please upvote my post i also upwote your all post friends.
I am happy the information was helpful.
Awesome highly professional further progress!
Thank you.
Nice one, thanks for sharing;)
Thanks
Thanks for sharing :-) @cherryblossom-sa I am following. Best of Luck !
Thank you for the support.
I like that you explained the technique very well. We can play with the colors and shadows and get some stunning photos
Hope you can experiment with the technique, remember practice makes perfect.
Interesting ;)
Thank you