Photography 101: Common Mistakes To Avoid

The word “snapshot” is often used for a photograph taken without much care and attention to composition. We’ve all made them, but some bad “snapshot” habits appear over and over in beginner photography.
Below are some of the most common mistakes made by those who just started their photography journey. By avoiding these, you will be able to improve and elevate your photography above mere snapshots and start creating some great photographs.
No clear subject
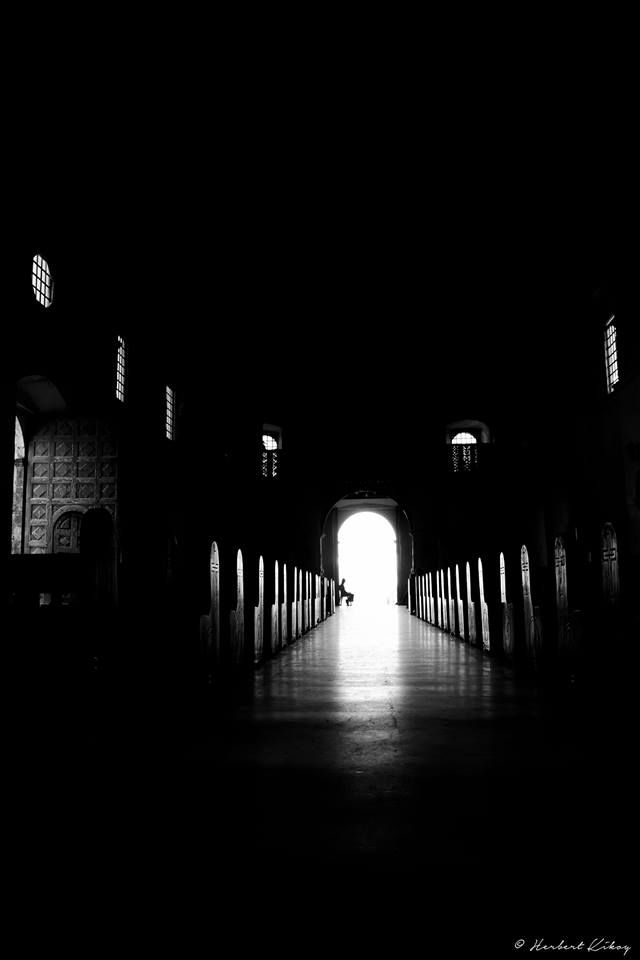
Snapshot photos often show a random scene, and the viewer is unsure where to look. Even when an image contains no humans or animals, a stronger photo will signal a clear subject and lead the viewer’s eye to it by using leading lines, size of objects, or light and dark.
Not every photo must have a subject – sometimes images of patterns and textures can be interesting. Even here though, an element that breaks the pattern and stands out makes for a much stronger image.
 |
 |
|---|
Not getting close enough
One of the 20th century’s greatest war photographers, Robert Capa, famously claimed: “If your pictures aren’t good enough, you’re not close enough.” Most of us aren’t shooting subjects where we risk getting killed, as Capa was, if we get too close to the action.
So there’s no excuse for the beginner tendency to shoot from too far away. This is especially true with wide angle lenses, which exaggerate the distance.

Shooting from a standing position
Pictures shot from eye level in a standing position are the mark of tourist photography. It’s the point of view we’re used to seeing, and it’s boring. To add interest, shoot from lower down or higher up, or find an unusual perspective.
Unless you’re trying to emphasize small size, when you shoot children, animals or flowers, get down to their level or lower.

Subject or horizon in the center
You’re not shooting at a bull’s eye target. So placing your subject in the dead center of the frame makes for a boring, static composition. Likewise, a horizon running across the middle of the frame is usually the mark of a beginner.
There are exceptions with some very strong subjects where symmetry makes the composition, but most effective compositions follow the “rule of thirds.” Imagine a tic-tac-toe grid over the frame, dividing it into thirds both vertically and horizontally. Then position major elements of your composition along the grid lines and at points where the lines intersect. Some cameras allow you to show rule-of-thirds grid lines in your viewfinder.

Distracting elements in the background
Beginner photographers often pay so much attention to their subject that they neglect what’s in the background. Is there a tree sprouting from the bride’s head? Is the background cluttered? Are there areas of bright glare? Often you can eliminate background problems by looking for them when you compose.
If necessary, move to the side or shoot from lower down to eliminate the distraction. Throwing the background into soft focus is another way to keep the attention on your subject.

Shooting in bright sun
Beginner photographers often wrongly assume that bright sun is the best time to shoot. But midday sun causes harsh, glaring light, strong contrast between areas of light and shadow, and it can make human subjects squint. The best times for photography are often very early or very late in the day when the light is warm and soft.
If you must shoot at midday, try to place your subjects in open shade for softer, more even light. Or, shoot in the direction of the sun to give your subject attractive rim light, and use a fill flash to throw light onto the shadows on the side of your subject facing away from the sun.

Using flash on the camera
The built-in flash on your camera does have some uses, but making attractive pictures where it’s the primary light source isn’t one of them. It can work as a secondary fill flash, or on some cameras, it can be used to trigger remote flashes, but as a primary light source it’s harsh and ugly. “Red eye” is a common problem when shooting people or animals with a flash attached to the camera.
By moving a flash away from the camera, and bouncing or diffusing the light, your photos will improve dramatically.

Bad exposure
In recent years, cameras have become much more sophisticated in how they calculate exposure by evaluating a scene. But they still rely on averaging the light readings, and only the photographer knows which parts of an image should be properly exposed.
For example, cameras tend to want to make white snow look grey. A good photographer will learn how a camera measures exposure, and when to override its decisions by using manual mode or exposure compensation.

Unintentional blur
There are two major kinds of blur – motion blur and soft focus.
Motion blur occurs when the camera or subject moves during the exposure and the shutter speed isn’t fast enough to freeze them. Soft focus occurs when a subject falls outside a lens’s depth of field, the area that a lens makes sharp when set to a given distance at a particular aperture.

Blur can be intentional, for example to show movement in a runner, or make a distracting background appear soft. But when it’s unintentional, it’s a problem. Understanding how shutter speed, aperture and ISO work together is the key to fixing this problem and bad exposure.

Not getting close enough
I know. I mentioned this in number 2, but “getting close” doesn’t just mean physical distance. It also means getting to know your subject. The time you spend making a human subject comfortable about being photographed, or taking time to learn about your subject matter, will be paid back many times over in much stronger photos.

By honestly self critiquing your photos with these ten problem areas in mind, I guarantee you’ll become a much better photographer, moving beyond mere “snapshots” to work you can be proud of.
This is very helpful. Thank you for sharing this one @wdoutjah.... are those pictures taken in the Philippines?
Yes @morken, Cebu to be exact :)
You have a very nice shots! It seems it is outside of the country. Keep up your superb work. Im so proud!
I can relate, especially using 1.2f apertures, I need to shoot photos with an aperture of 1.2, but there arent no clouds, so I will be adjust the shutter speed and the ISO of the camera. It isn't still enough, I have no lens filter too.
The shot will still be overexposed, and wait until it is cloudy.
Hi sir Herbert! I love your blogs on basic photographer since im a beginner myself. Would loved to meet you during the steemsummit if you are going. :-)
See you ^_^