Five Exercises To Improve Your Photography!
Five Exercises To Improve Your Photography
Every photographer in the world has been there, you have a new camera and you’re not sure what to go out and shoot. It might not even be a new camera, from time to time we all get stuck in a bit of a rut where we’re struggling for inspiration, or we feel that we’ve over-used our usual subjects/locations. In situations like this it’s easy to put things on the backburner and await that moment of divine inspiration. Unfortunately that kind of inspiration doesn’t happen often and many never really experience these kinds of moments. Most of us have to work away at it, sifting through a sea of mediocrity until we find the occasional nugget of genius.
The thing to remember in these situations, as I’ve said so often, is that photography is a SKILL. As such, the easiest way to improve is practise. Every time I’m stuck for something to shoot I’ll do my best to head out regardless and take photos. For me, the easiest way is to set myself assignments, or exercises, that I can use to hone my skills. Some of these I’ve learned from other photographers, others I’ve made up myself – although I’m sure I’m not the first person to think of any of them!
Hopefully they will help you work your way out of a rut, improve your photography and just increase your overall photographic satisfaction!
Exercise 1 – Depth and Layering
We all love some creamy bokeh, a few years back I spent months buying up used vintage lenses to satisfy my need for a unique look. One of the coolest things about old lenses is the bokeh they produce, not just the quality of it, but the shape. There are lenses out there that create an almost dizzying effect and others that just look plain dreamy. Even my favourite recommendation the 50mm 1.8 produces a lovely look wide open (That is to say at the widest aperture – f/1.8)
Sometimes however it’s easy to become a little over reliant on what bokeh does to an image. Especially to those starting out in DSLR photography it’s easy to become obsessed with bokeh, it often seems like the most obvious way to make your images look ‘professional’ since it’s a look that compact cameras and phones can’t really offer. I know the iPhone has it’s portrait mode thingy, but it’s still not exactly the real deal!
Your first exercise in improving your photography is to head out on a shoot and not go wider than f/5.6. No more creamy bokeh for you!
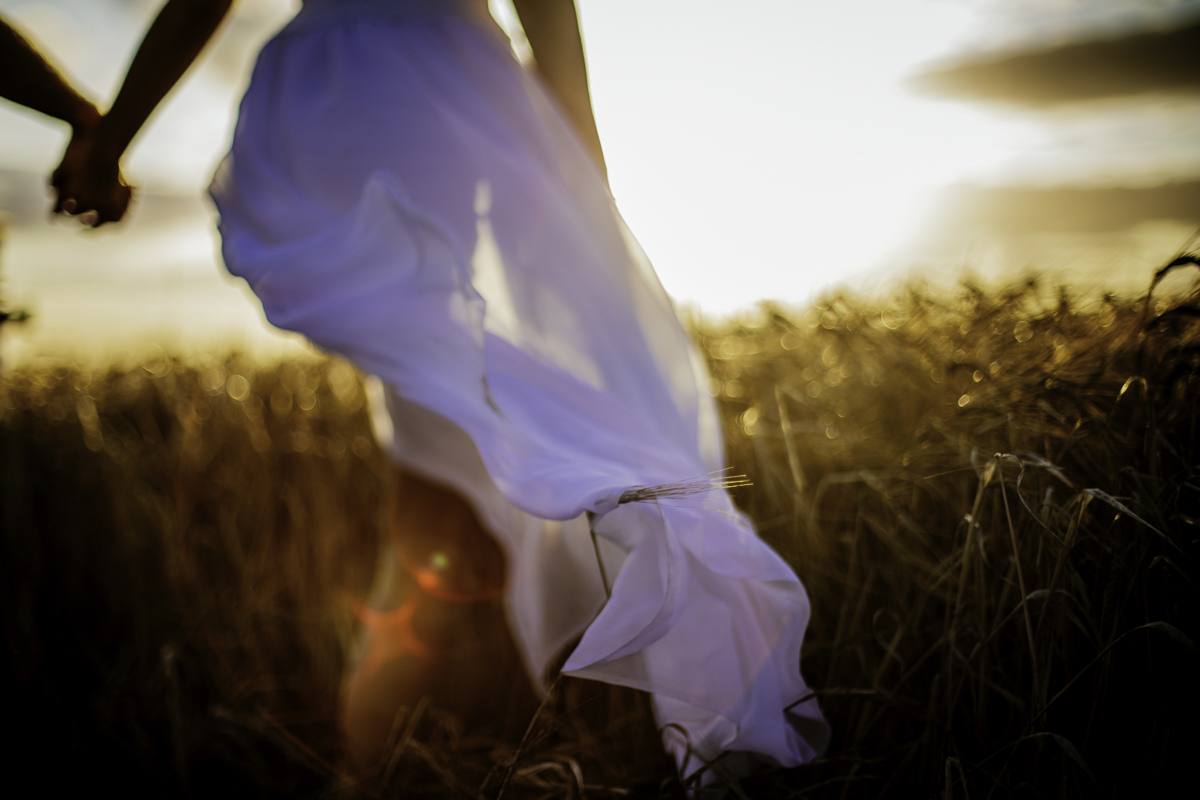
Photographers often get so caught up in the ‘look’ of an image that they forget that photography really is all about storytelling. When I look back at the early weddings I shot I see so many images shot at f/2.8 and below. Some look lovely, but some just lack….depth! Classic photojournalism is all about layering, working at f/5.6 and above is a great way to force yourself to survey the scene before you take the shot. Creating layers of interest that draw in the viewer and keep their attention. Depth and layering make your photo more than just a pretty picture, they are the mark of a considered photographer.
The trick here is often to find a scene and try to anticipate what MIGHT happen. Setting everything up so that someone can walk into frame and really set the whole thing off. You might choose to head out and take landscapes, narrow aperture is really a no brainer here if we want to capture the vastness of a beautiful landscape.
It doesn’t matter what you normally shoot, a whole shoot at f/5.6 and above is bound to be an interesting and insightful experience. It’s something we can all work on and it leads to the kind of intuitive use of aperture that makes a true professional really stand out. Knowing WHEN to use a narrow aperture and when to open it all the way up is one of the most important skills anyone could learn.

Exercise 2 – Restrictions
Restrictions force us to think creatively, in the same way that the Depth and Layering exercise forces you to think differently placing restrictions on how you work encourages you to step out of your usual routine.
We all have our favourite lens right? You can probably guess that mine is a wide aperture 50mm, some people love their 24-70’s while others insist that 35mm is the true photographers lens. That’s one of the many wonderful things about photography, it’s what gives us each our own ‘look’. You’ve maybe heard that term before and thought it was reserved only for professionals? Not at all! Every single photographer has their own look, whether it’s the angles you use or the way you expose shots. A big part of that is lens choice, our ‘go to’ lenses often define our look as much as editing or angle and that’s awesome! But what happens to the photographer who loves shooting at 50mm when it just doesn’t work in a given situation?
Your second exercise is to head out with just one lens. Ideally a prime but just any lens other than your favourite
.jpg)
You can be as adventurous as you want here. If you’re heading out with a wide angle then it forces you to get in closer, the opposite obviously applies to a Tele. This is a great exercise that not only pushes you out of that dreaded comfort zone but also allows you to really get to know the lenses you own. When I’m working professionally I’ll usually have two camera’s on my belt each with a lens as well as a lens tucked in my belt pouch and another two in my camera bag close by. Everything happens very fast when you’re being paid for a job, so being able to decide in a split second what lens to use is crucial!
I’ve done this exercise in almost every way I can think of, including doing a whole engagement session with JUST a 135mm. That was a strange experience – wandering off into the distance to get a full length portrait! It was a great shoot all the same and the very next wedding I found myself reaching for the 135mm that bit more. It’s still not a lens I use often, but when I do it looks GOOD!
Exercise 3 – Get Out Of Your Comfort Zone
I suppose getting out of your comfort zone is what this whole blog post is about, but this exercise is aimed at making you feel it! Have you ever missed a shot because you weren’t sure if you could or SHOULD get it? If not then I imagine at some point you will! When it happens in a professional environment it’s all the more frustrating.
Sometimes it’s that awkward feeling, sometimes we just feel too conspicuous. Either way that hesitation is only holding you back. Of course, there’s a time for restraint, but most of the time – if we want those killer images – we just have to go for it! A little side tip – don’t ask for permission! Get the shot first, if someone tells you to stop then politely apologise and put your camera away – you’ve already got the killer shot!
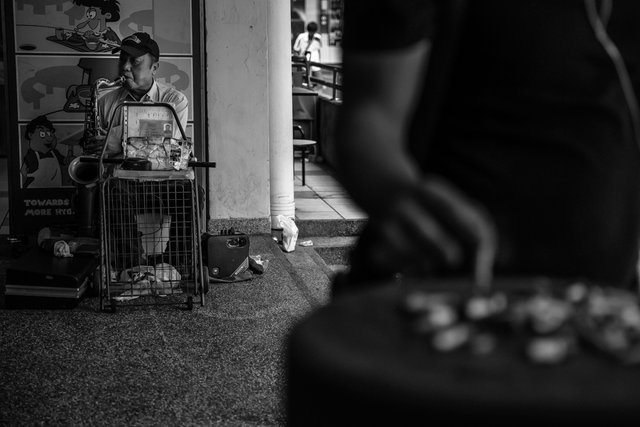
Exercise 3 – go and shoot street photography

Taking photos of people who haven’t actually asked you to is weird. I should know, I do it every weekend as a professional, with the added stress of knowing that someone has paid me to take photos of them! Most of the time though people aren’t too bothered, it’s all about how you approach it. As I said before, once you’ve taken the shot, there’s not a whole lot anyone can do about it is there? – Although with Street Photography it’s always worth being prepared to delete images of someone if they ask you to!
It’s a slow game, almost like wildlife photography, that teaches you not only about setting up a shot and waiting, but also about people watching. If you’re a photographer you’re almost certainly taking photos of people. Not professionally perhaps, maybe not even as a passion but I guarantee you’ll be asked to shoot family gatherings, or just want to! Watching the way people interact is a great way to improve your photography. Why? Because great photography is all about anticipation. Every time I’m shooting I’ll be looking through the viewfinder but listening intently to everything around me. I often shoot with both eyes open just so I can see what’s going on outside of my viewfinder. It might be anticipating the punchline to a joke, or an emotional response, or even a burst of anger. Emotions usually show themselves for fairly brief moments, if you can learn to anticipate them it gives you that little bit of extra time!
Street photography also forces you to confront your own awkwardness. 90% of the time that’s all that stops you taking a shot. Spend a good amount of time on location, blend into your environment and wait for the moments. It’s a really satisfying experience finding a great shot and having someone walk into frame and do something that really makes that moment shine.

Exercise 4 – Shoot [like] Film
When we first started out we’d talk to people all the time about the days of film, it just didn’t feel like that long ago. Now it seems like forever ago and really there’s not many logical reasons to use film. I’d just like to point out that I’m not knocking film at all, I love the stuff! I’m just saying that most of the reasons for using film can’t be properly explained. It’s a visceral thing, one that’s connected with memories and nostalgia and, most of all, sentiment. Is the resolution higher? The image clearer? The framerate faster? Lets face it, digital just makes sense!
Film and Digital photography are two very different beasts and to me, one of the biggest advantages film offers is that it really does FORCE you to take your time. With 36 exposures on a roll it’s not quite as easy to go spraying off images like there’s no tomorrow. There’s a whole range of cameras doing more than 10 frames a second nowadays, so that’s 3.6 seconds of shooting per roll! It’s pretty obvious that nobody used film like that!
Exercise 4 is to head out with a strict limit of 72 photos or two rolls of film
.jpg)
You don’t have to use film for this, but if you can then you get some bonus points for effort! The idea is knowing you have a limit on your shots. You’re not aiming to take a quick snap to check exposure, you’ll need to be careful with your metering, go for something like spot metering and really think about which element you’re exposing for.
The main thing that this exercise will do is encourage you to slow down with your framing. Really think about what the best shot is and where the best angle is. So often when I’m shooting people I’ll wait for the right moment and then hold that shutter down! Usually coming out with 10-15 images it’s pretty easy to get the right expression. That said exercises like this have allowed me to just take my time a bit more, watching people to see when they look best and picking up on those moments for each frame.
It’s important with this one to be totally honest with yourself. You only have 72 shots, no changing cards and no deleting images. You’ll probably come back from the shoot with less than 72 shots, after all if you were heading out with a couple of rolls of film would you really use them all and not leave anything just in case something special happened? It doesn’t matter what camera or lens your using, this is all about honing your eye and teaching you about patience.
Give it a try, then look back at your last day out with a camera and compare your hit rates – by hit rates I mean the number of shots you took divided by the number of keepers. On a wedding day my hit rate is 10% (As I’ve said before, I take lots to get the moment, but that doesn’t mean I’m doing it blindly) whereas on a day out my hit rate is roughly 33%. I’m not saying you should always shoot less, but what you’ll find with an exercise like this is that when you do go out and shoot lots, you’ll be choosing the best of several shots instead of picking out the one that is ‘ok’.
.jpg)
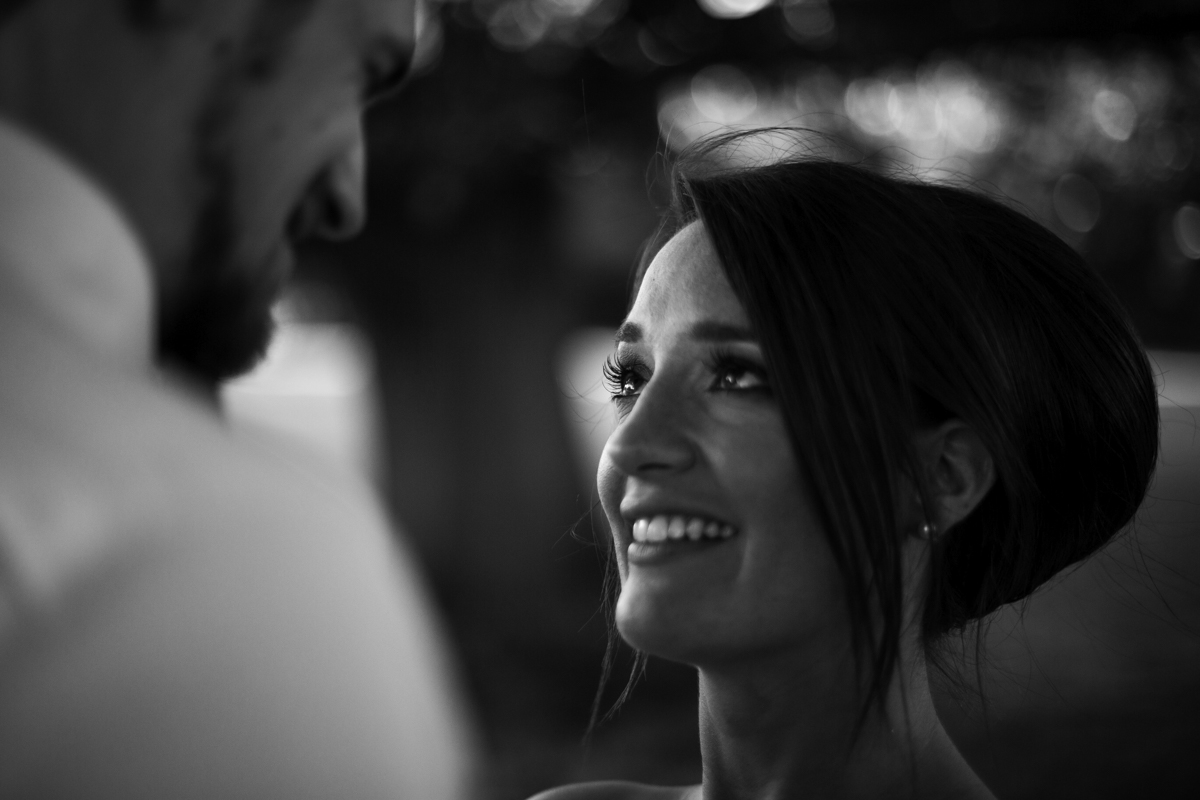
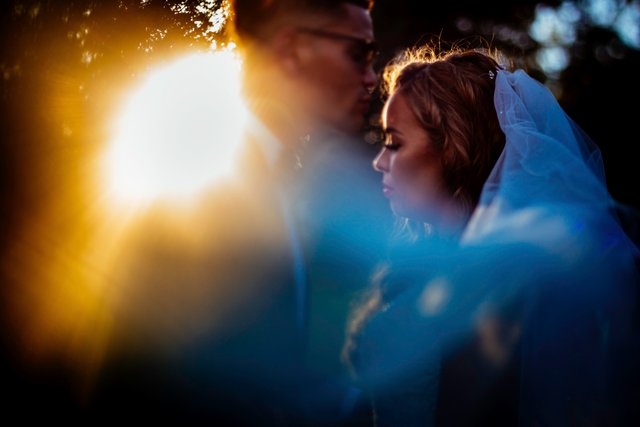
Exercise 5 – Work The Light
I was at a conference in America a couple of years back and my wife and I had gone out to dinner with some friends. To our right we had the owner of one of our industries biggest software companies and his wife, to our left was another husband and wife who happened to be probably the most respected wedding photographers ever and across the table yet another husband and wife of incredible photographers who regularly shoot for major celebrities.
We all had our cameras and I was playing with my new (at the time) Fuji X-Pro1 and looking at the different colour filters. Pretty quickly all of the others picked up on this and questioned why I was spending so much time choosing. One of them explained;
”There’s only one colour profile that’s ever worth using. Black and White”
I’ll be honest, I felt so star-struck that evening that if they had told me that the best photographers all ate worms I’d have gone and dug some up there and then. Fortunately they were telling the truth!
Exercise 5 – Go on a shoot and only take black and white photos
.jpg)
I’m assuming your camera has the ability to do that, most of them do nowadays. It doesn’t have to be an amazing BW profile, you can always tweak it in post, but it just has to be Mono!
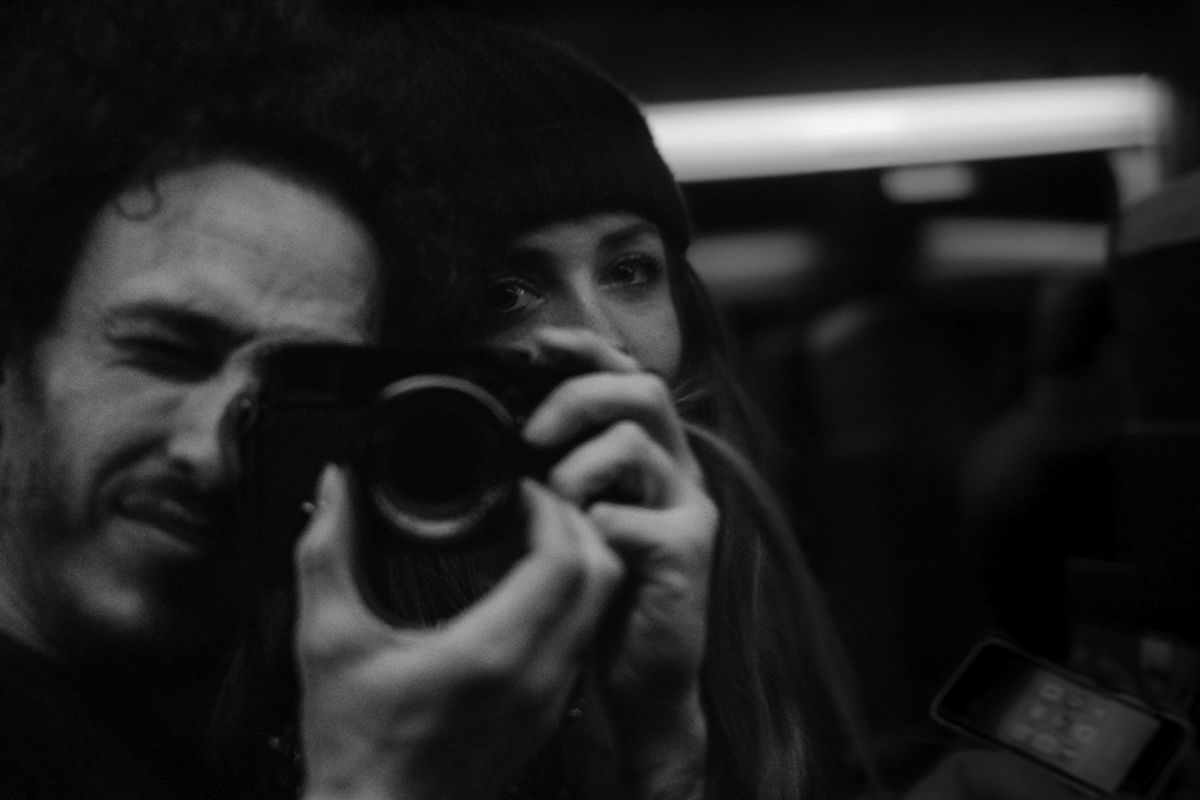
So why Mono? Simple, colour is a distraction. Photography is all about light. This is of course just an exercise and I will be the first to say that I love colour as much as the next photo geek! But when you work exclusively in black and white, albeit only for one shoot, you are forced to look only at light and dark. The very backbone of the essence of photography. It can make the mundane look like an abstract work of art just simple light and shadow blended together in the style of your choosing.
You’ll start to think more about light sources and how to work them as well as work with them. The difference between shooting with the light and against it is huge, obviously. Just as high and low angles play a huge part in the psychology of an image. Just look at film and TV, ever notice how the hero is often shot from a low angle (Looking UP at them) to put them in a position of power, while the weaker characters are often shot from above, as if we’re looking down at them.
To use a portrait example we could shoot with the light and expose for the subjects face or work against the light and have a simple rim around the subjects silhouette. I can’t tell you which the better image is, but I can tell you that they each convey very different messages about the subject. The only difference? The way you work the light. So turn get that black and white profile on and get out there, really think about what the light is doing to your shots.
.jpg)
As Always – Get out there and Shoot!
In one of my other blog posts I finished with this and said that I would do my best to finish future blog posts a little more originally. I’ve since changed my mind. This is the advice I give to people who ask me about photography every single week that I’m out shooting. It’s the best advice anyone could give and by far and away the best way to improve as a photographer.
Whether you use these exercises or not, just get out there and take photos! I promise that if you take photos every day, or even just every week, the images you take next year WILL be better than those you take this year!
This is one hell of a great post! I’m always trying to improve my photography skills, and these seem like great exercises for that. I’ve already been challenging myself by taking with me only the lens I hardly ever used.
This is definite worth resteeming, keep up the amazing work and educate us newbies more! :)
Thank you, and thanks for the resteem! It's always great to reach a new audience!
Working with one lens is always a good one! And don't worry, you're not the only one who's had to use one lens out of necessity!!
Wow, really good article! I suggest to do 365 project too. Its a good way learn to see. When all the year you always and everywhere search for good light, interesting composition, you learn very quickly.
This is a great list! So much detail and explanation, perfect for inspiring any photographer to challenge themselves, I especially agree with the last one, just get out and shoot! I feel that I learned so so much more when I just picked up my camera and winged it! Thanks for sharing!
Thanks man, that's great to know! Yeah, just get out and shoot is always the most important one I think!
Four Corners
Choose one subject and place it, where it exists, in each corner of the frame for 4 images.Can you go to the other side of the subject? Do the same. Shoot all four sides in all four corners if possible. See what you come up with! @skiesandsports
Thanks @rajat1802, I'm afraid I don't quite understand though!
Wow, this a really comprehensive post! Lots of knowledge in it.
Thanks, glad you enjoyed it!
Wonderful practices to do as a beginning photographer such as myself, thank you for sharing!
You're welcome! Good luck trying them out!
So much great content in this post. Always an enjoyable read. I need to get out there and shoot for the sake of shooting again so I'll try some of your techniques... Thanks for the tips!
Thanks dude, I hope you enjoy giving them a go! Sometimes it's good to write little articles like this just to remind myself!!
this is so informative, i just wanna take my camera and go out now
thnx for the good work
Ah that's great to hear! I hope you did take the camera out!!
i really needs this becouse my photography is going bad these days thanks for posting i think it will help
We all have times when we don't like what we're shooting, it's not because you're getting worse, you're probably getting better and so you're judging your work more harshly!
yeah my be you are right
Hey @skiesandsports! Thank you for your comprehensive guide. I personally just got into photography lately, merely for the purpose of capturing the places I have been to and keep a reminder of the feelings and impressions I got at that place. I only have a crappy digi cam because I am just a poor student, haha. However, I plan on getting a better cam once I made some money, and I will definitely do your exercises. Cheers @lesshorrible!
Great to know you enjoyed it! I'll be posting plenty more!