Portrait Lighting Pattern Tutorial
By using certain lighting patterns, we are able to create lighting definition on our models that can make them look more flattering than they would with flat light.
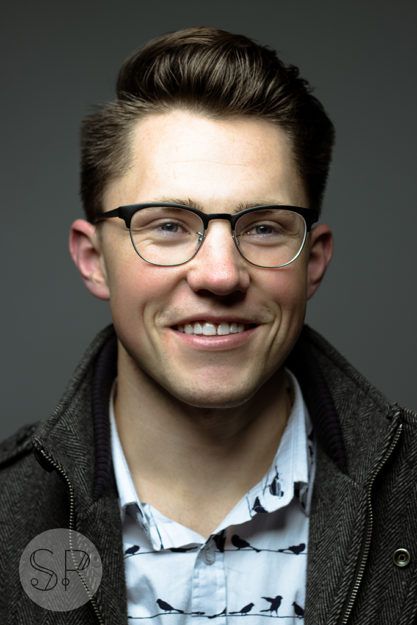
This first lighting pattern you see here is called “butterfly lighting.” You will need an auxiliary lighting source (speed light, beauty dish, etc) placed directly in front of your model, and extended a couple feet higher than their head, pointing down at them. This is great for portraits and glamour shots because it creates beautiful lighting definition in the face, gives that little butterfly shaped shadow under the nose, and has a shadow under the chin.
Another variety of this lighting pattern is “clamshell lighting.” This can be achieved by having the same positioning of the auxiliary lighting, but adding more light to fill in those shadows as well. This can be done by having you model hold a reflector around the height of their waist, and pointing the light up towards their face.
Here is my example of “butterfly lighting”:

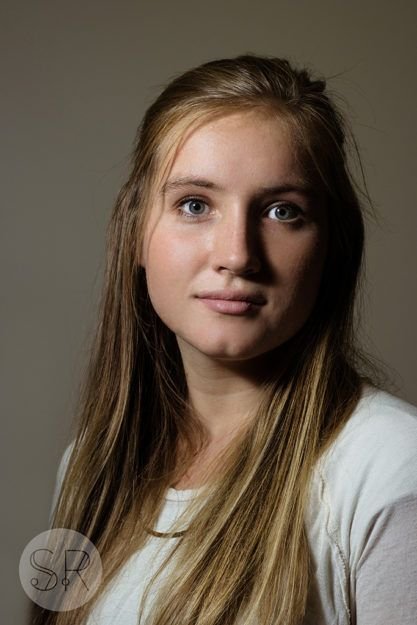
The next lighting pattern I will demonstrate is “Loop Lighting.” This adds a lot of lighting definition to the face as well and can be used in many different portrait settings. In order to achieve this lighting pattern, your auxiliary light needs to be placed at a 25 degree angle from the front of your subject. You can choose to move your light 25 degrees left, or 25 degrees right, but be sure your light is also higher than your subject’s head, to give this a more flattering look. If you can see, there is a nice loop of light that goes from her right eye all the way down to her chin. This is what you are aiming for.

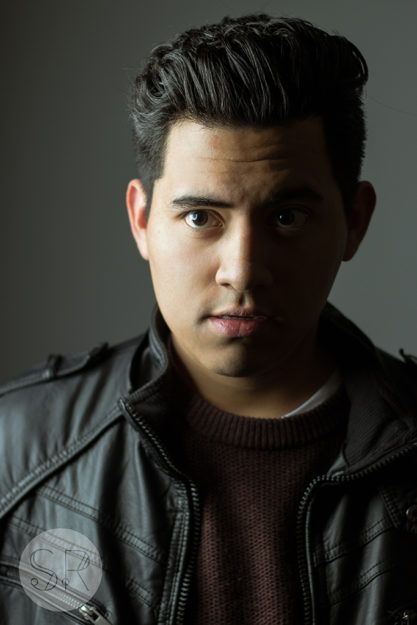
Lastly, I would like to talk about Split Lighting. This adds a lot of lighting definition to only one side of your subject’s face. This can be achieved by placing your auxiliary light 90 degrees form the front of your subject (directly to the left or right of your subject). This is what you will be able to achieve with this Split Lighting pattern:

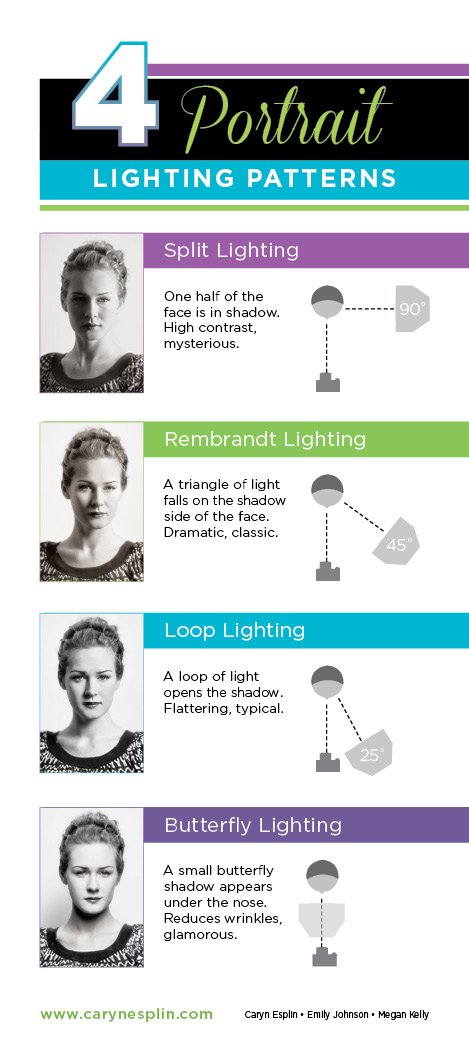
Here is a handout I received from my professor, Caryn Esplin...
Be sure to check out her post on this subject here: http://www.carynesplin.com/portrait-lighting-patterns/

I published this information earlier on my website, http://www.sarahjanele.com, but wanted to share here on Steemit as well!
Let's keep sharing tips & tricks so we can learn and grow together! Please upvote & comment with any insights or questions!
Very useful tutorial on portrait lightning. I hope you will continue in this manner. Upvoted, followed, daily selection… 😊
Thank you so much! I'm so glad you like my content. I will continue posting in this manner for sure!
Hi. In recent years, the demand for high-quality lighting solutions has increased significantly, especially in the field of photography and videography. One company that offers a wide selection of lighting products is Lume Cube, which can meet the needs of any buyer. Among their assortment, it is sometimes difficult to choose everything you need, but if you contact lume cube customer service you can get excellent advice, which will be invaluable when choosing a product.